
TRANSITION PATIENTS
This document outlines all the necessary steps for transitioning patient records from your legacy system to Careficient. Transition typically occurs at the end of a benefit period for all active patients.
For Home Health agencies, a Medicare benefit period is a 60 day’s. From an administrative standpoint, the patient episode (Start of Care) may cover several consecutive benefit periods. You will transition the active patient record at the end of the last benefit period using the Transition Patients in Careficient.
The Transition Patient does not require referral information. With a Transition Patient, the referral will be recorded in your legacy system. You will use the same Start of Care date in Careficient for the transition patient that you have recorded in the legacy system.
What we consider a transition patient is a patient that you already have in the system you are coming from. New patients will not be in your old system. The difference between a transition patient and a new admission is the way that they are added into Careficient. How will I know if this is a transition patient or new admission? Transition patients have no referral tab in the patient encounter.
Careficient usually imports your patients for you into the system if you choose that option and you should find them by going to Patients > Patient Encounters. If you did not have Careficient import the patients for you, you will need to follow "If Patient Is Not In Careficient System" before moving to the next step of the transition process. You will need to designate a "Transition Team" to perform these tasks.
IF PATIENT IS NOT IN CAREFICIENT SYSTEM
TRANSITION TEAM
Go to Patients > Transition Patients
NOTE: For Careficient Agency Administrators, click on the following to learn more about the privileges for Transition Patients.
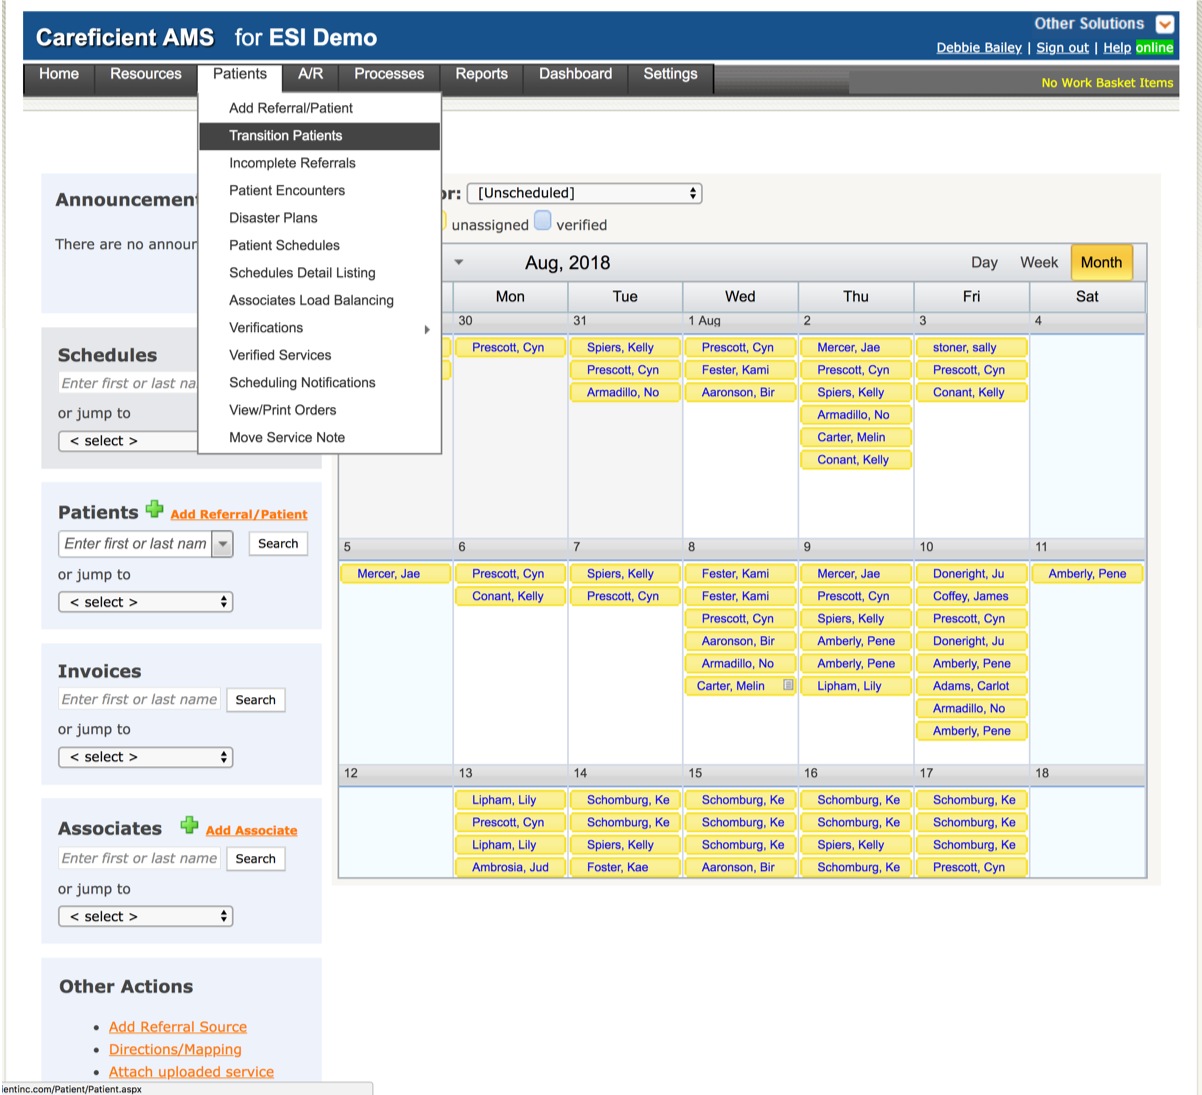
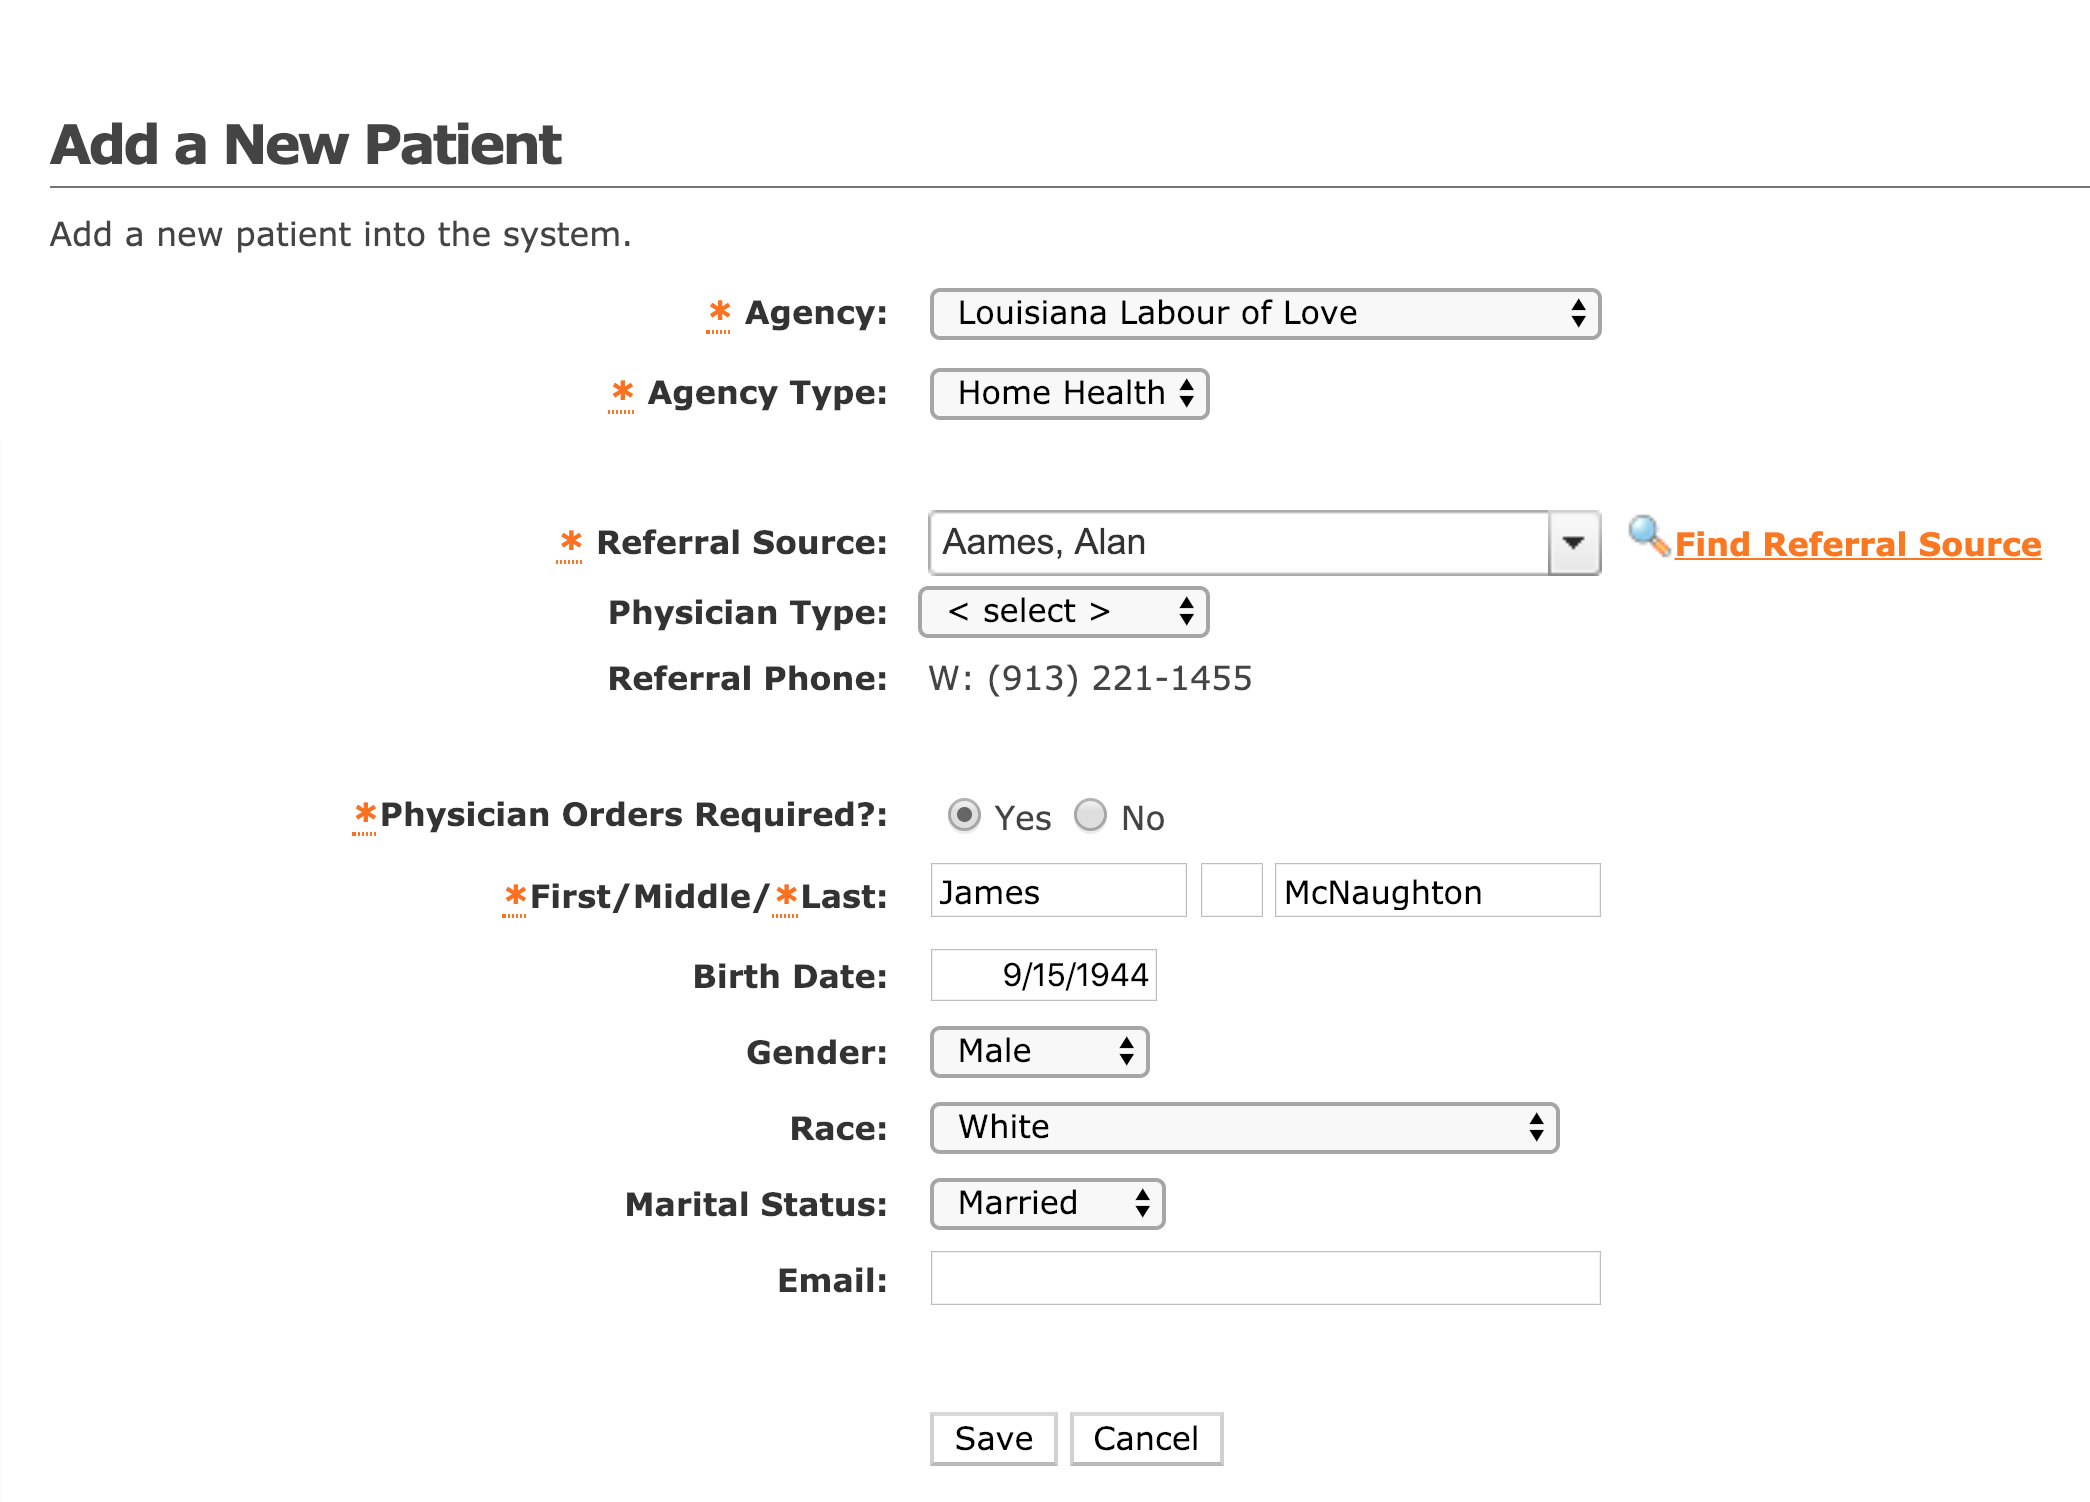
This page is pretty much self explanatory. It requires less information than the page for a new admission. When you have entered information, click on "Save". This will take you to the patient encounter (chart).
Choose your "Agency" if you have more than one.

Then choose your "Agency Type".

You can either click on the drop down and choose a recent referral source OR

Click on the "Find Referral Source" Link to search for one.

When searching for a referral source, you can search by first or last name, or facility name. To avoid issues of not finding the referral source because of spelling, I recommend not entering anything and just clicking on "Search".
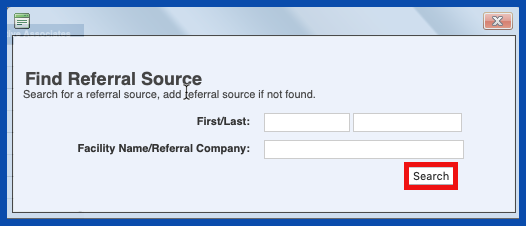
The search dialog appears. You can also still search for the referral source on this screen as well.
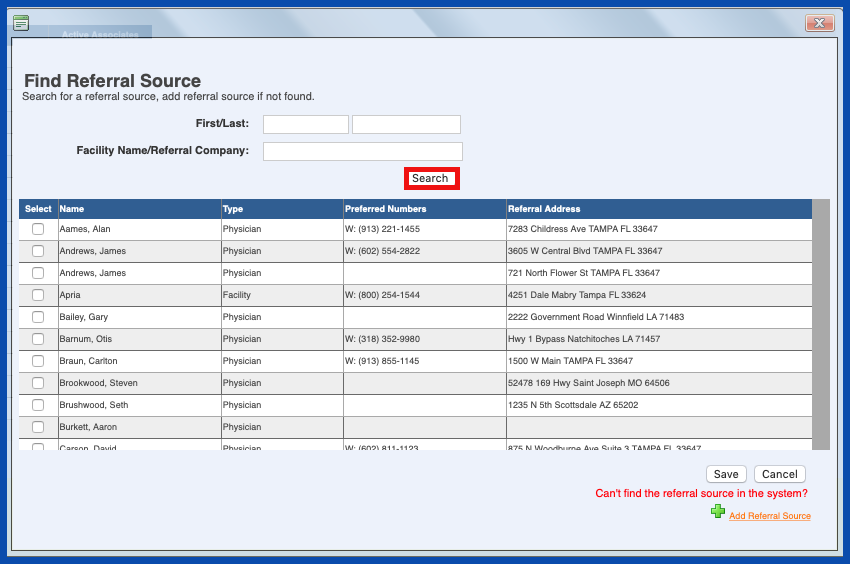
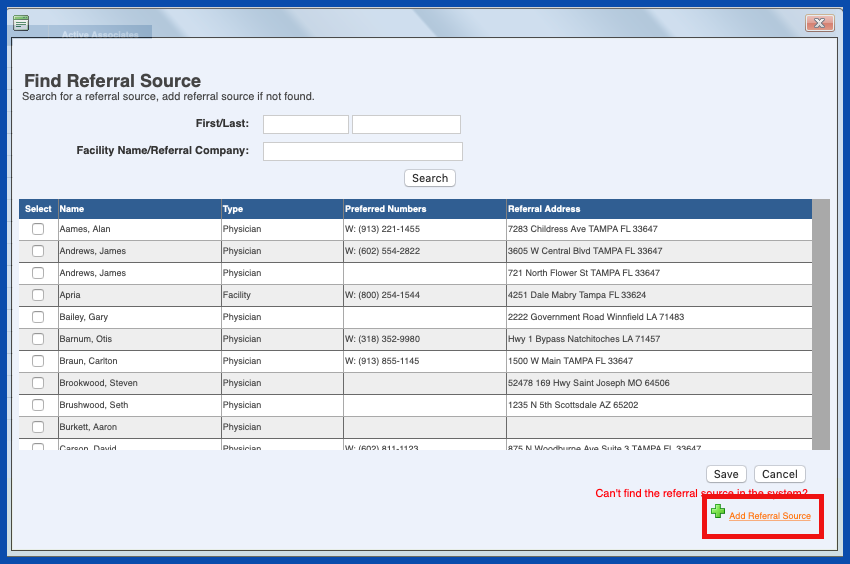
You can click on the checkbox to the left of the referral source to choose them. In the event, you do not see your referral source, you can add them by clicking on the "Add Referral Source" link.
NOTE: For Careficient Agency Administrators, click on the following to learn more about the privileges for Add Referral Source.
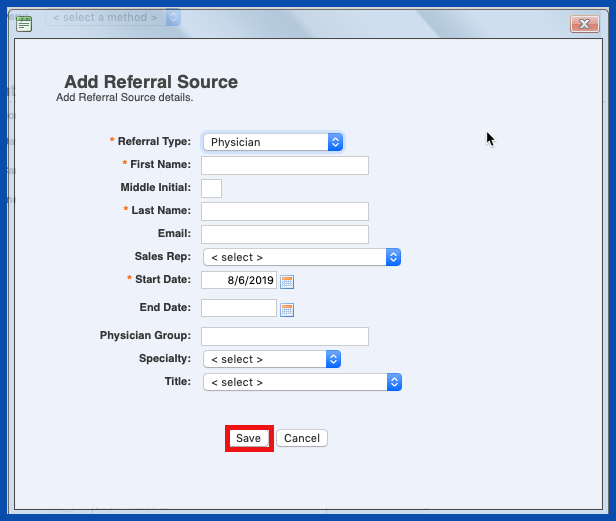
The "Referral Type" you choose will determine what options are available. If you choose Physician the following options are available. If you do not find your Sales Rep in this list, they can be added when entering the "Referral Source Contact" on the referral.
NOTE: For Careficient Agency Administrators, "Referral Type" options can be set in Settings > Lookup Tables > Referral Source Tables > Referral Source Type and "Specialty" options can be set in Settings > Lookup Tables > Referral Source Tables > Physician Specialty. "Title" options can be set in Settings > Lookup Tables > Referral Source Tables > Physician Title.
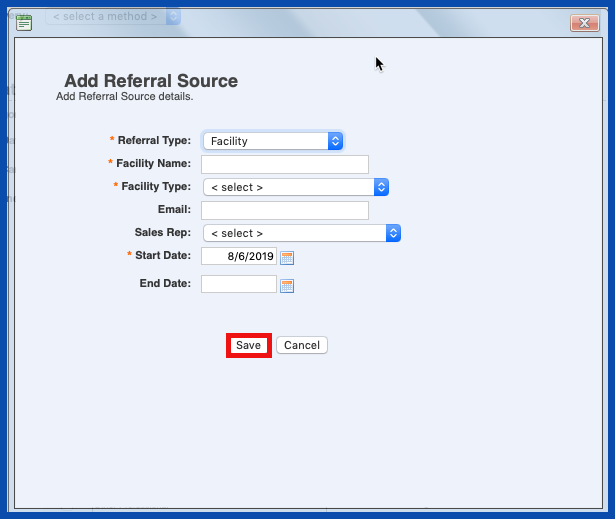
For Facility the following options are available. If you do not find your Sales Rep in this list, they can be added when entering the "Referral Source Contact" on the referral.
NOTE: For Careficient Agency Administrators, the "Facility Type" options can be set in Settings > Lookup Tables > Referral Source Tables > Facility Type.
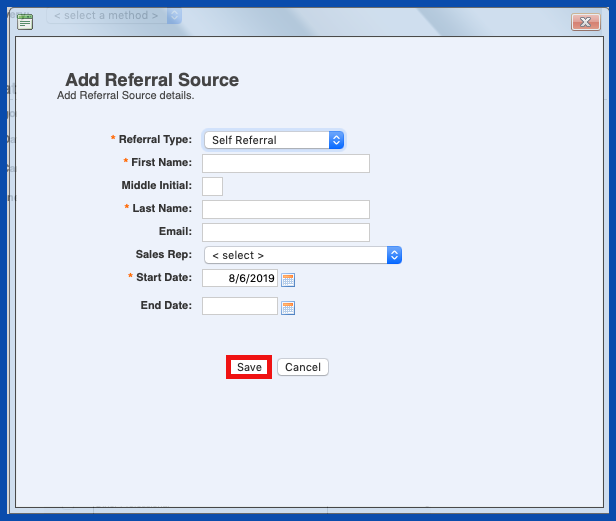
For Self Referral the following options are available. If you do not find your Sales Rep in this list, they can be added when entering the "Referral Source Contact" on the referral.
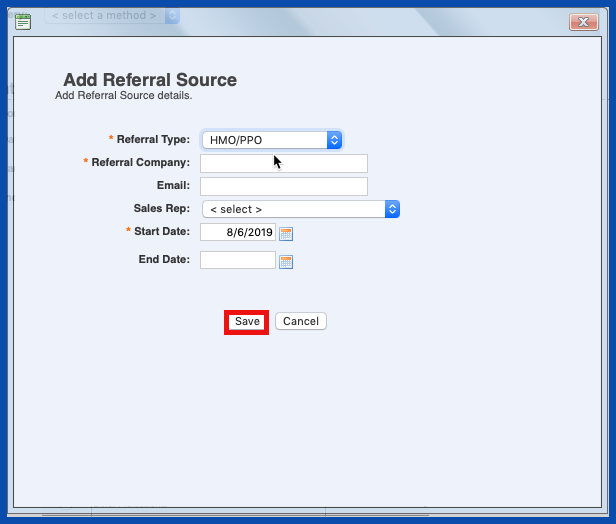
For HMO/PPO the following options are available. If you do not find your Sales Rep in this list, they can be added when entering the "Referral Source Contact" on the referral.
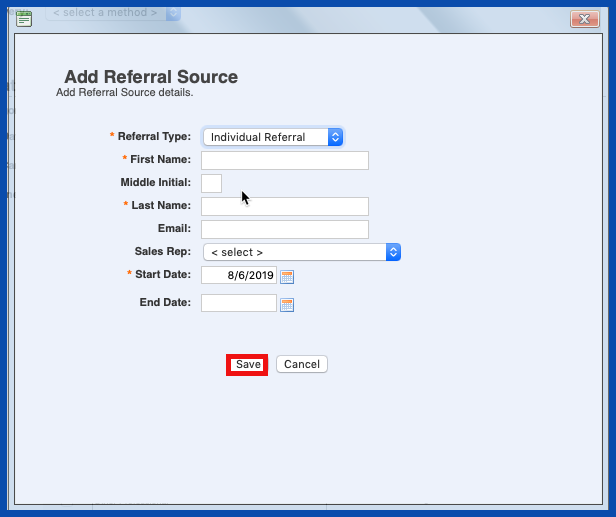
For Individual Referral the following options are available. If you do not find your Sales Rep in this list, they can be added when entering the "Referral Source Contact" on the referral.
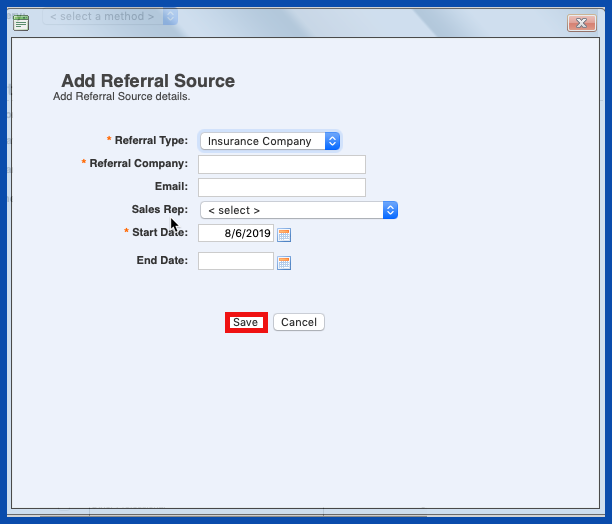
For Insurance Company the following options are available. If you do not find your Sales Rep in this list, they can be added when entering the "Referral Source Contact" on the referral.
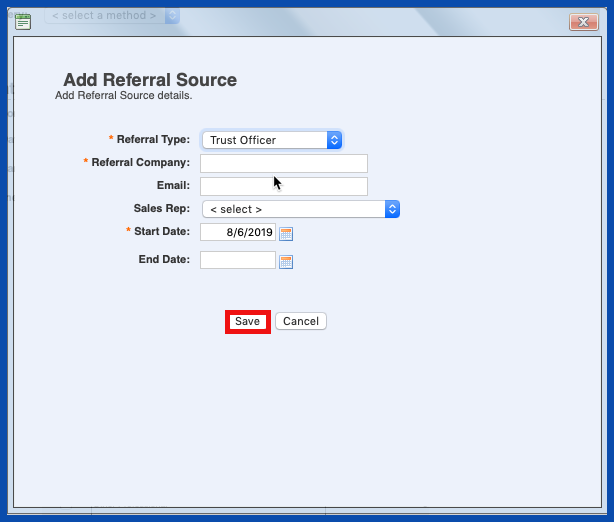
For Trust Officer the following options are available. If you do not find your Sales Rep in this list, they can be added when entering the "Referral Source Contact" on the referral.
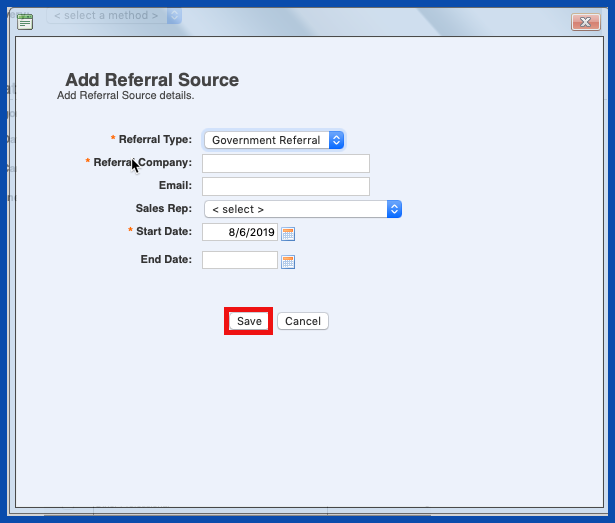
For Government Referral the following options are available. If you do not find your Sales Rep in this list, they can be added when entering the "Referral Source Contact" on the referral.
If you type of admission requires orders you will choose "Yes" and if not, choose "No". These option can be changed later if needed. Enter the rest of the required information and click "Save" when finished. You will follow the next steps for patients that are already imported into your system or for those you just added as above.
IF PATIENT IS ALREADY IN THE CAREFICIENT SYSTEM
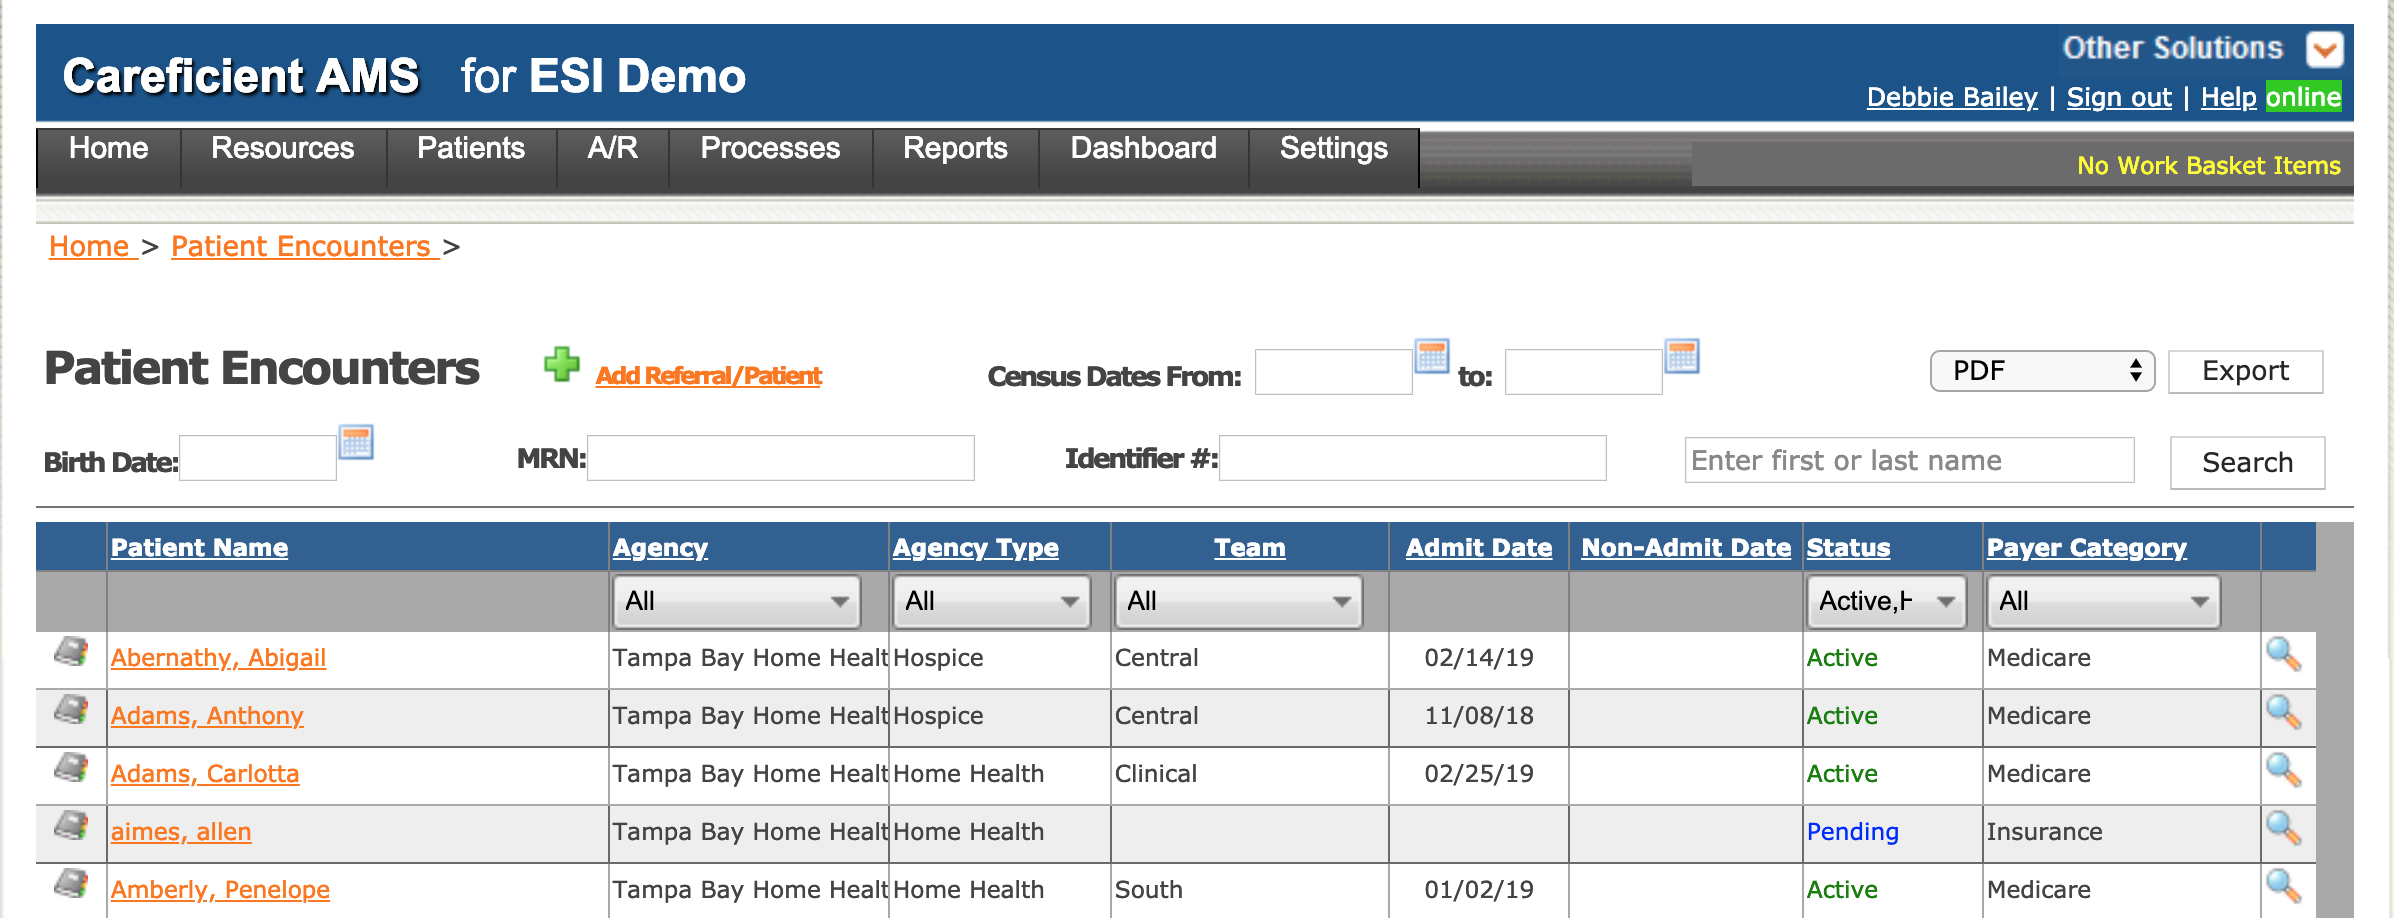
If the patient has already been imported into Careficient for you, Go to Patients > Patient Encounters > and click on the name of your patient. This will also take you to the patient encounter (chart).
TO PREPARE YOUR PATIENTS FOR TRANSITION INTO CAREFICIENT YOU SHOULD HAVE A TRANSITION TEAM APPOINTED FOR THIS PROCESS.
TRANSITION TEAM PROCESS
- Go to Patients > Patient Encounter > Choose the patient that is coming up for one of the following:
- Home Health - Recertification
- Private Duty - Beginning of the billing cycle
NOTE: For Careficient Agency Administrators, click on the following to learn more about the privileges for View Patients.
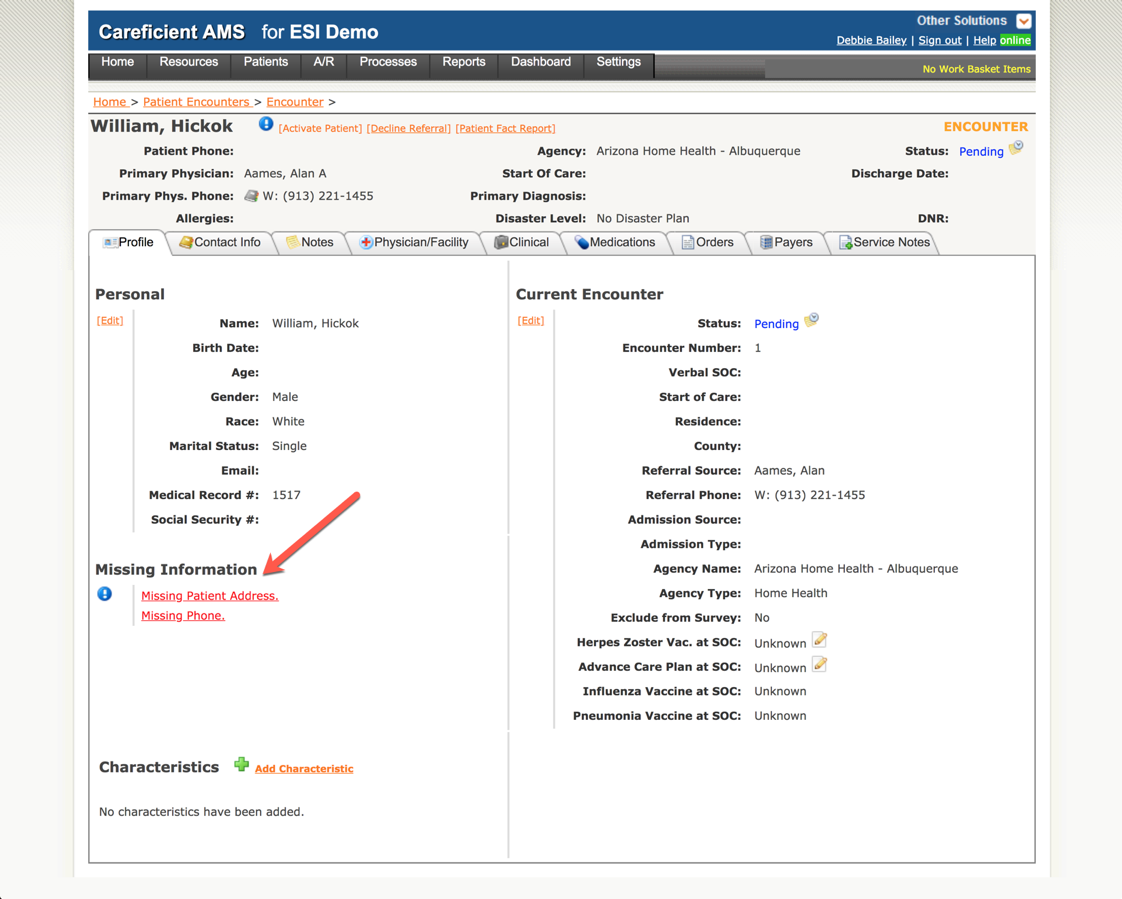
You will need to address any “Missing Information” on the Profile Tab. To do this, click on the Red Link for the missing information and it will take you to the area where you can add the missing information.
Click on “Payer Tab” > “Add Payer”.
NOTE: For Careficient Agency Administrators, click on the following to learn more about the privileges for Add Payer.
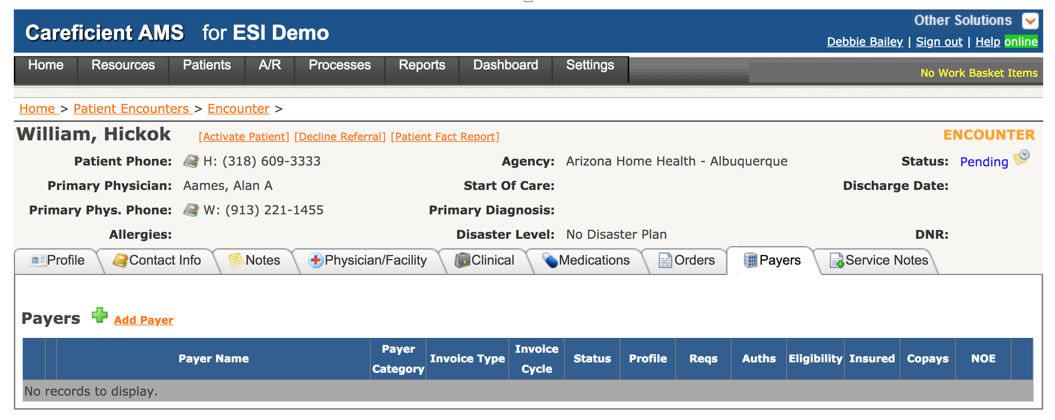
Enter patient’s payer information by clicking on green plus sign. If the payer does not display on the list, contact the individual in your organization who is responsible for maintaining organization payers.
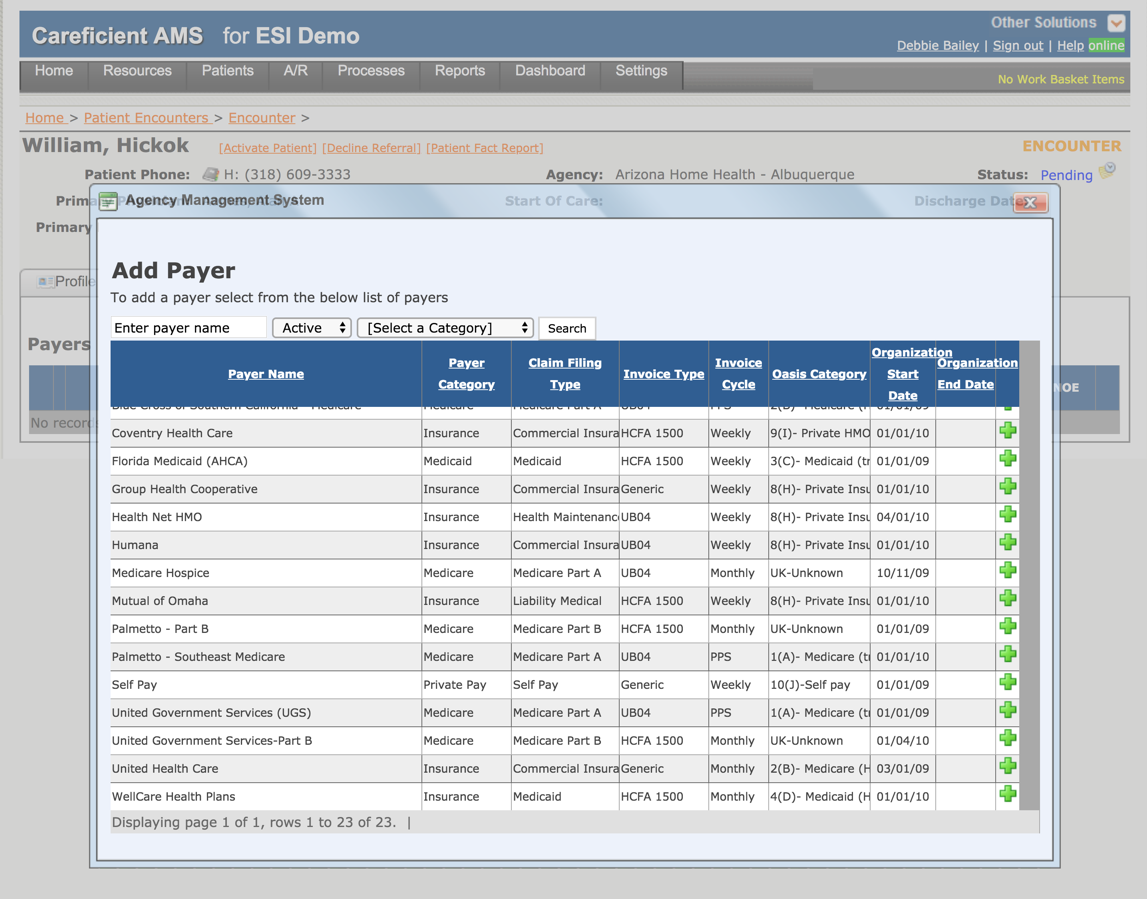
Add the start date for the payer. This would be the date that the payer became active for the patient.
Choose the drop down for “bill to address” and add the address.
Add the Payer Identification number and click “save”.
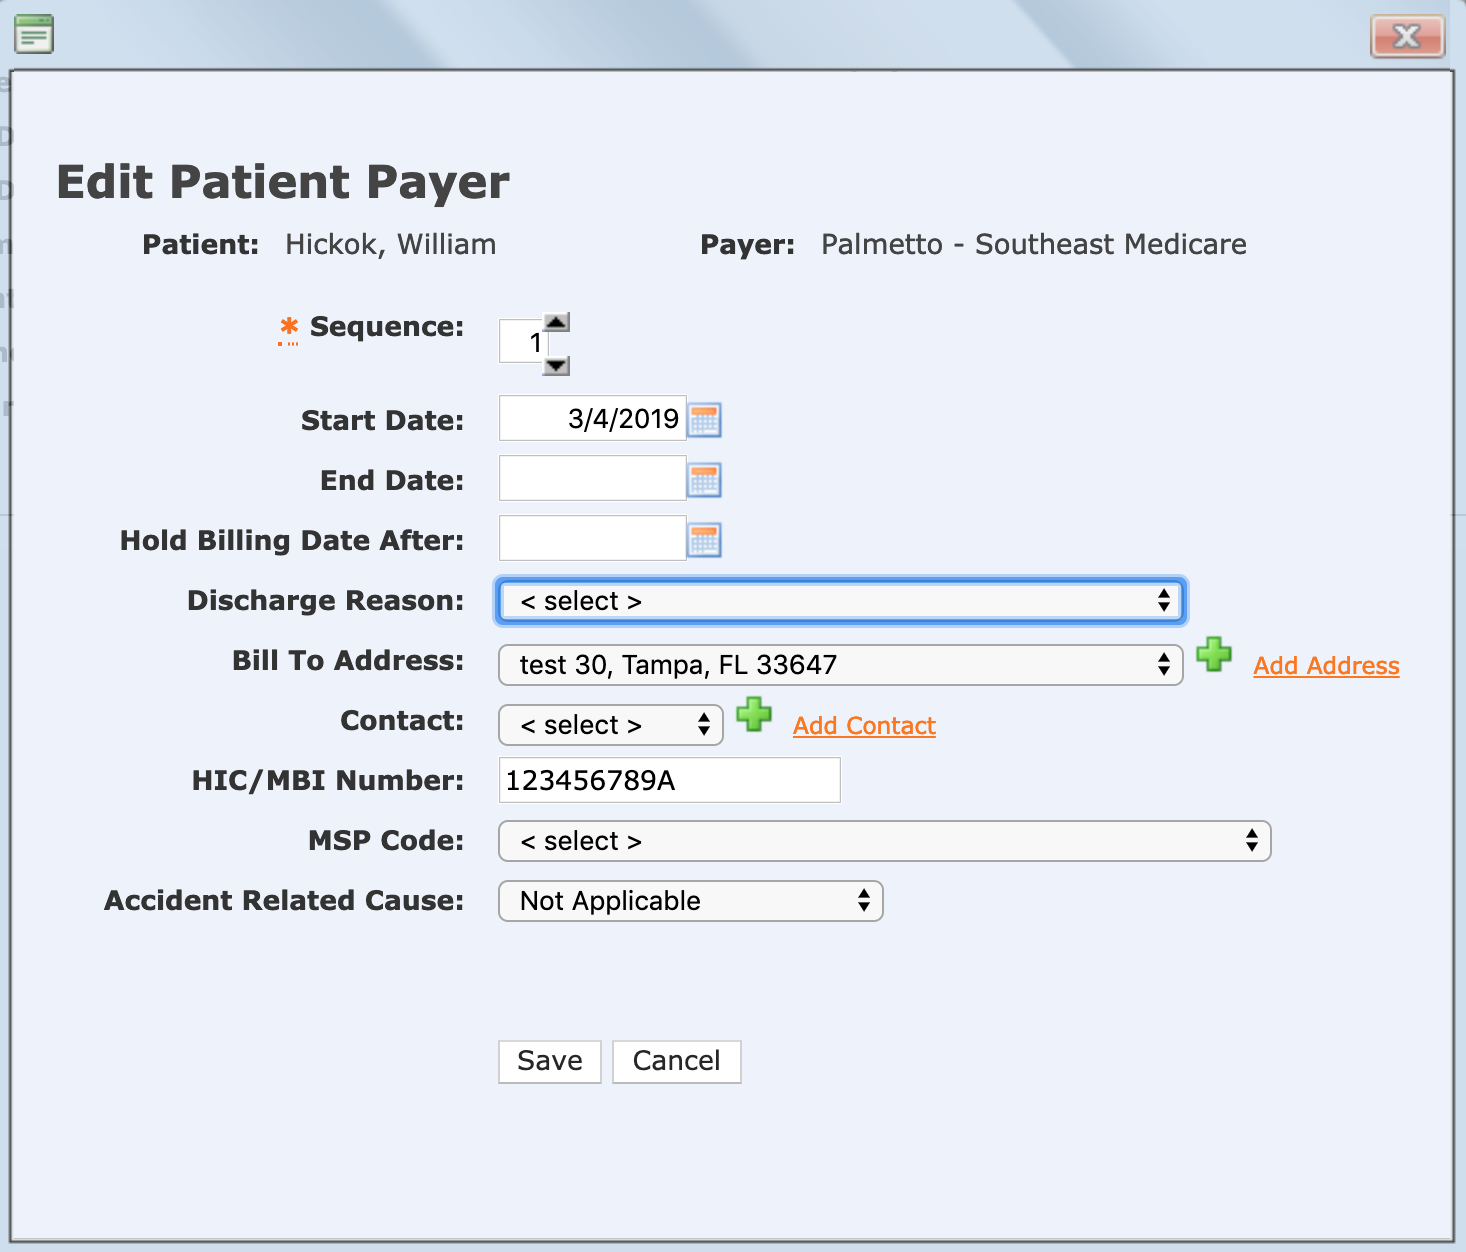
You may see several red bubbles. To correct the issue, click on the bubble and it will take you to where the information needs to be addressed.
Here we will click on “eligibility”.
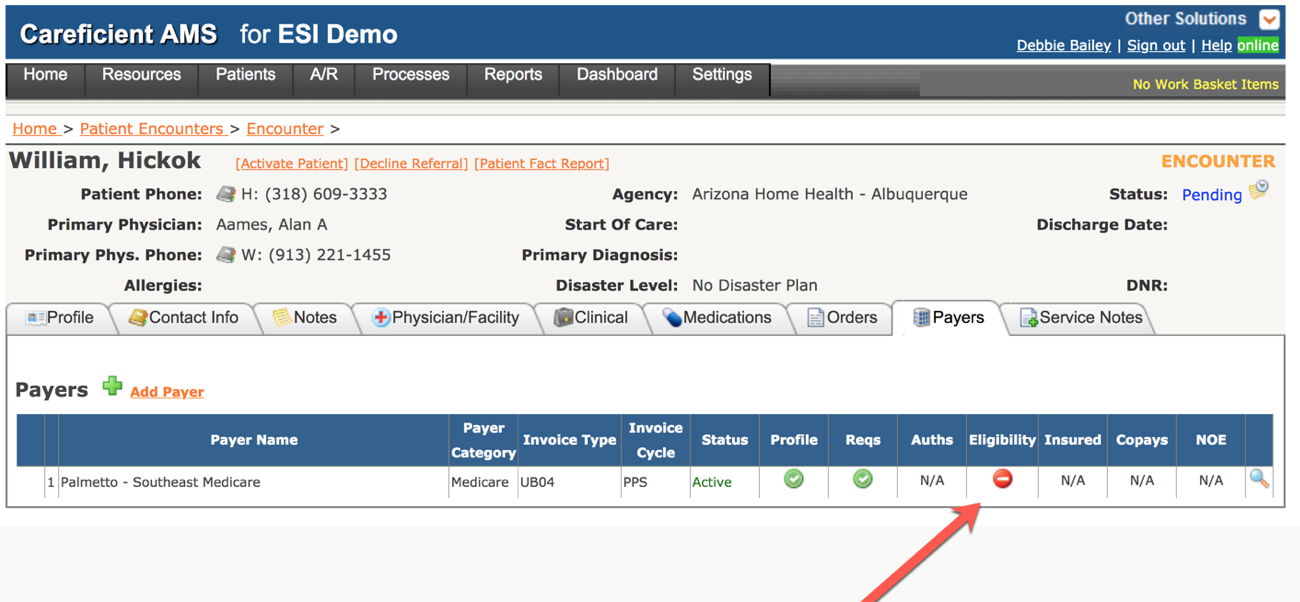
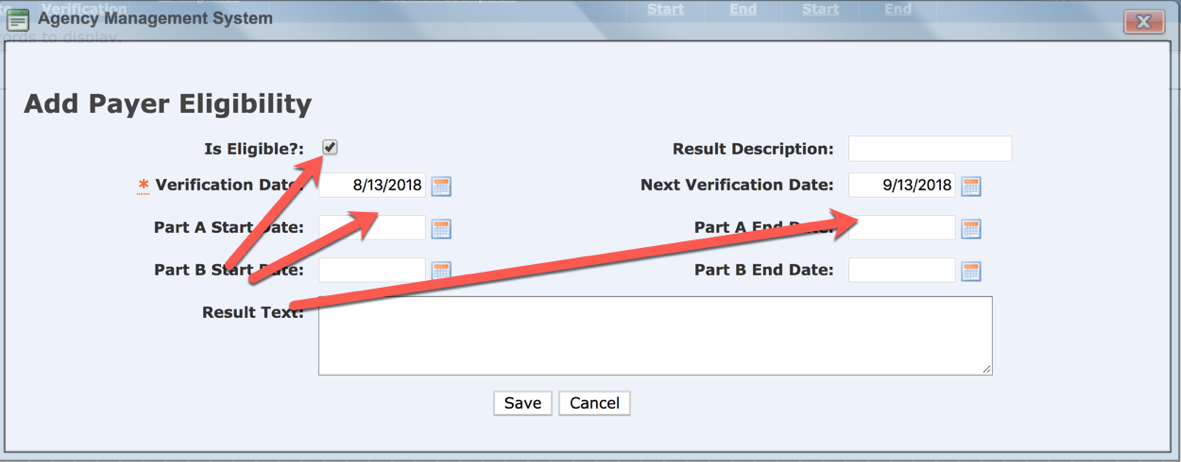
Click on “Add Eligibility”
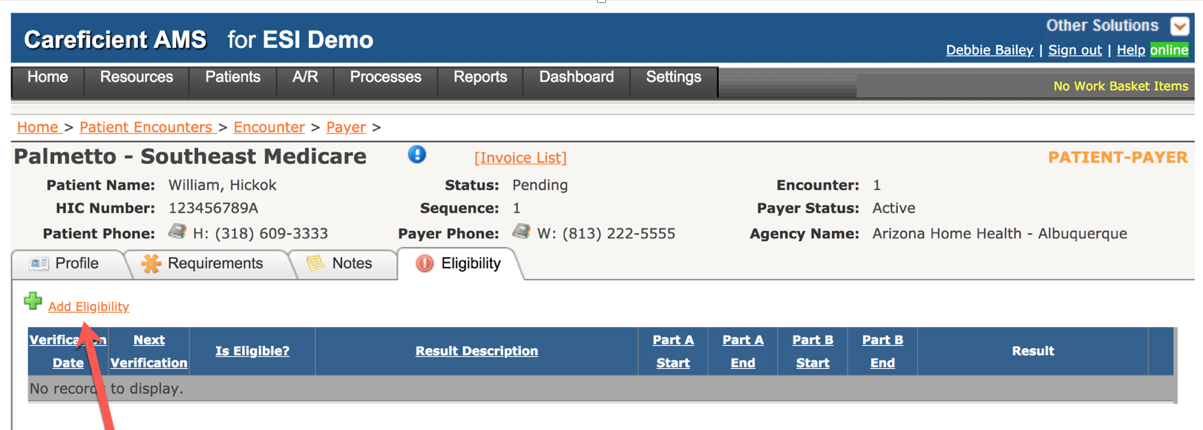
Once you have verified if the patient is eligible, click on “Is Eligible”, add the date you verified this and then add when you want to be notified to check eligibility again and click save.
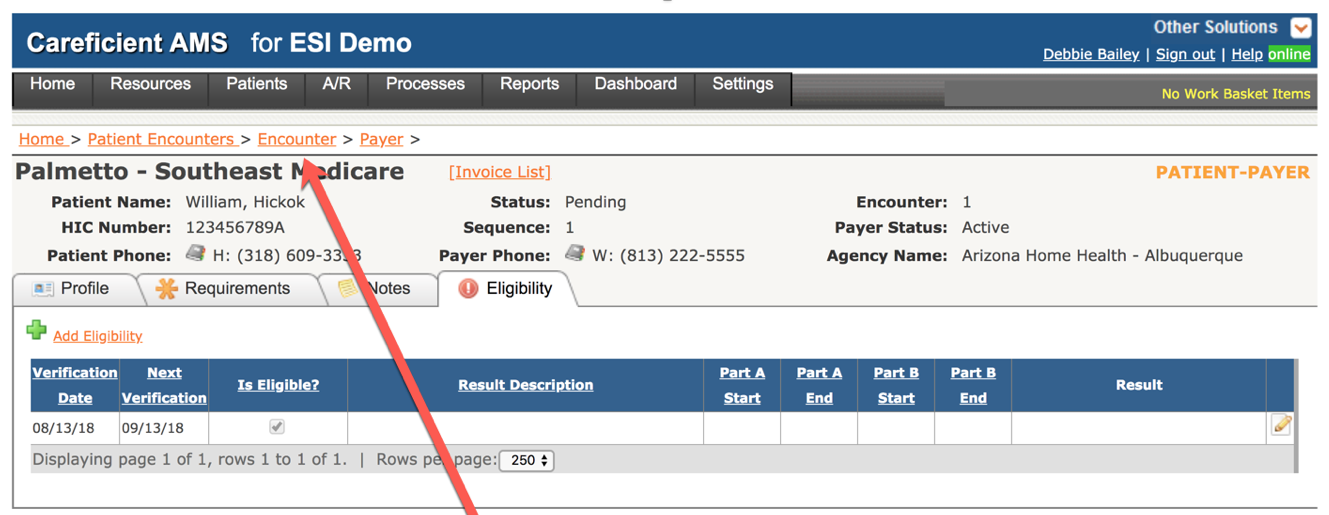
To get back to the patients chart from here, click on “Encounter”.
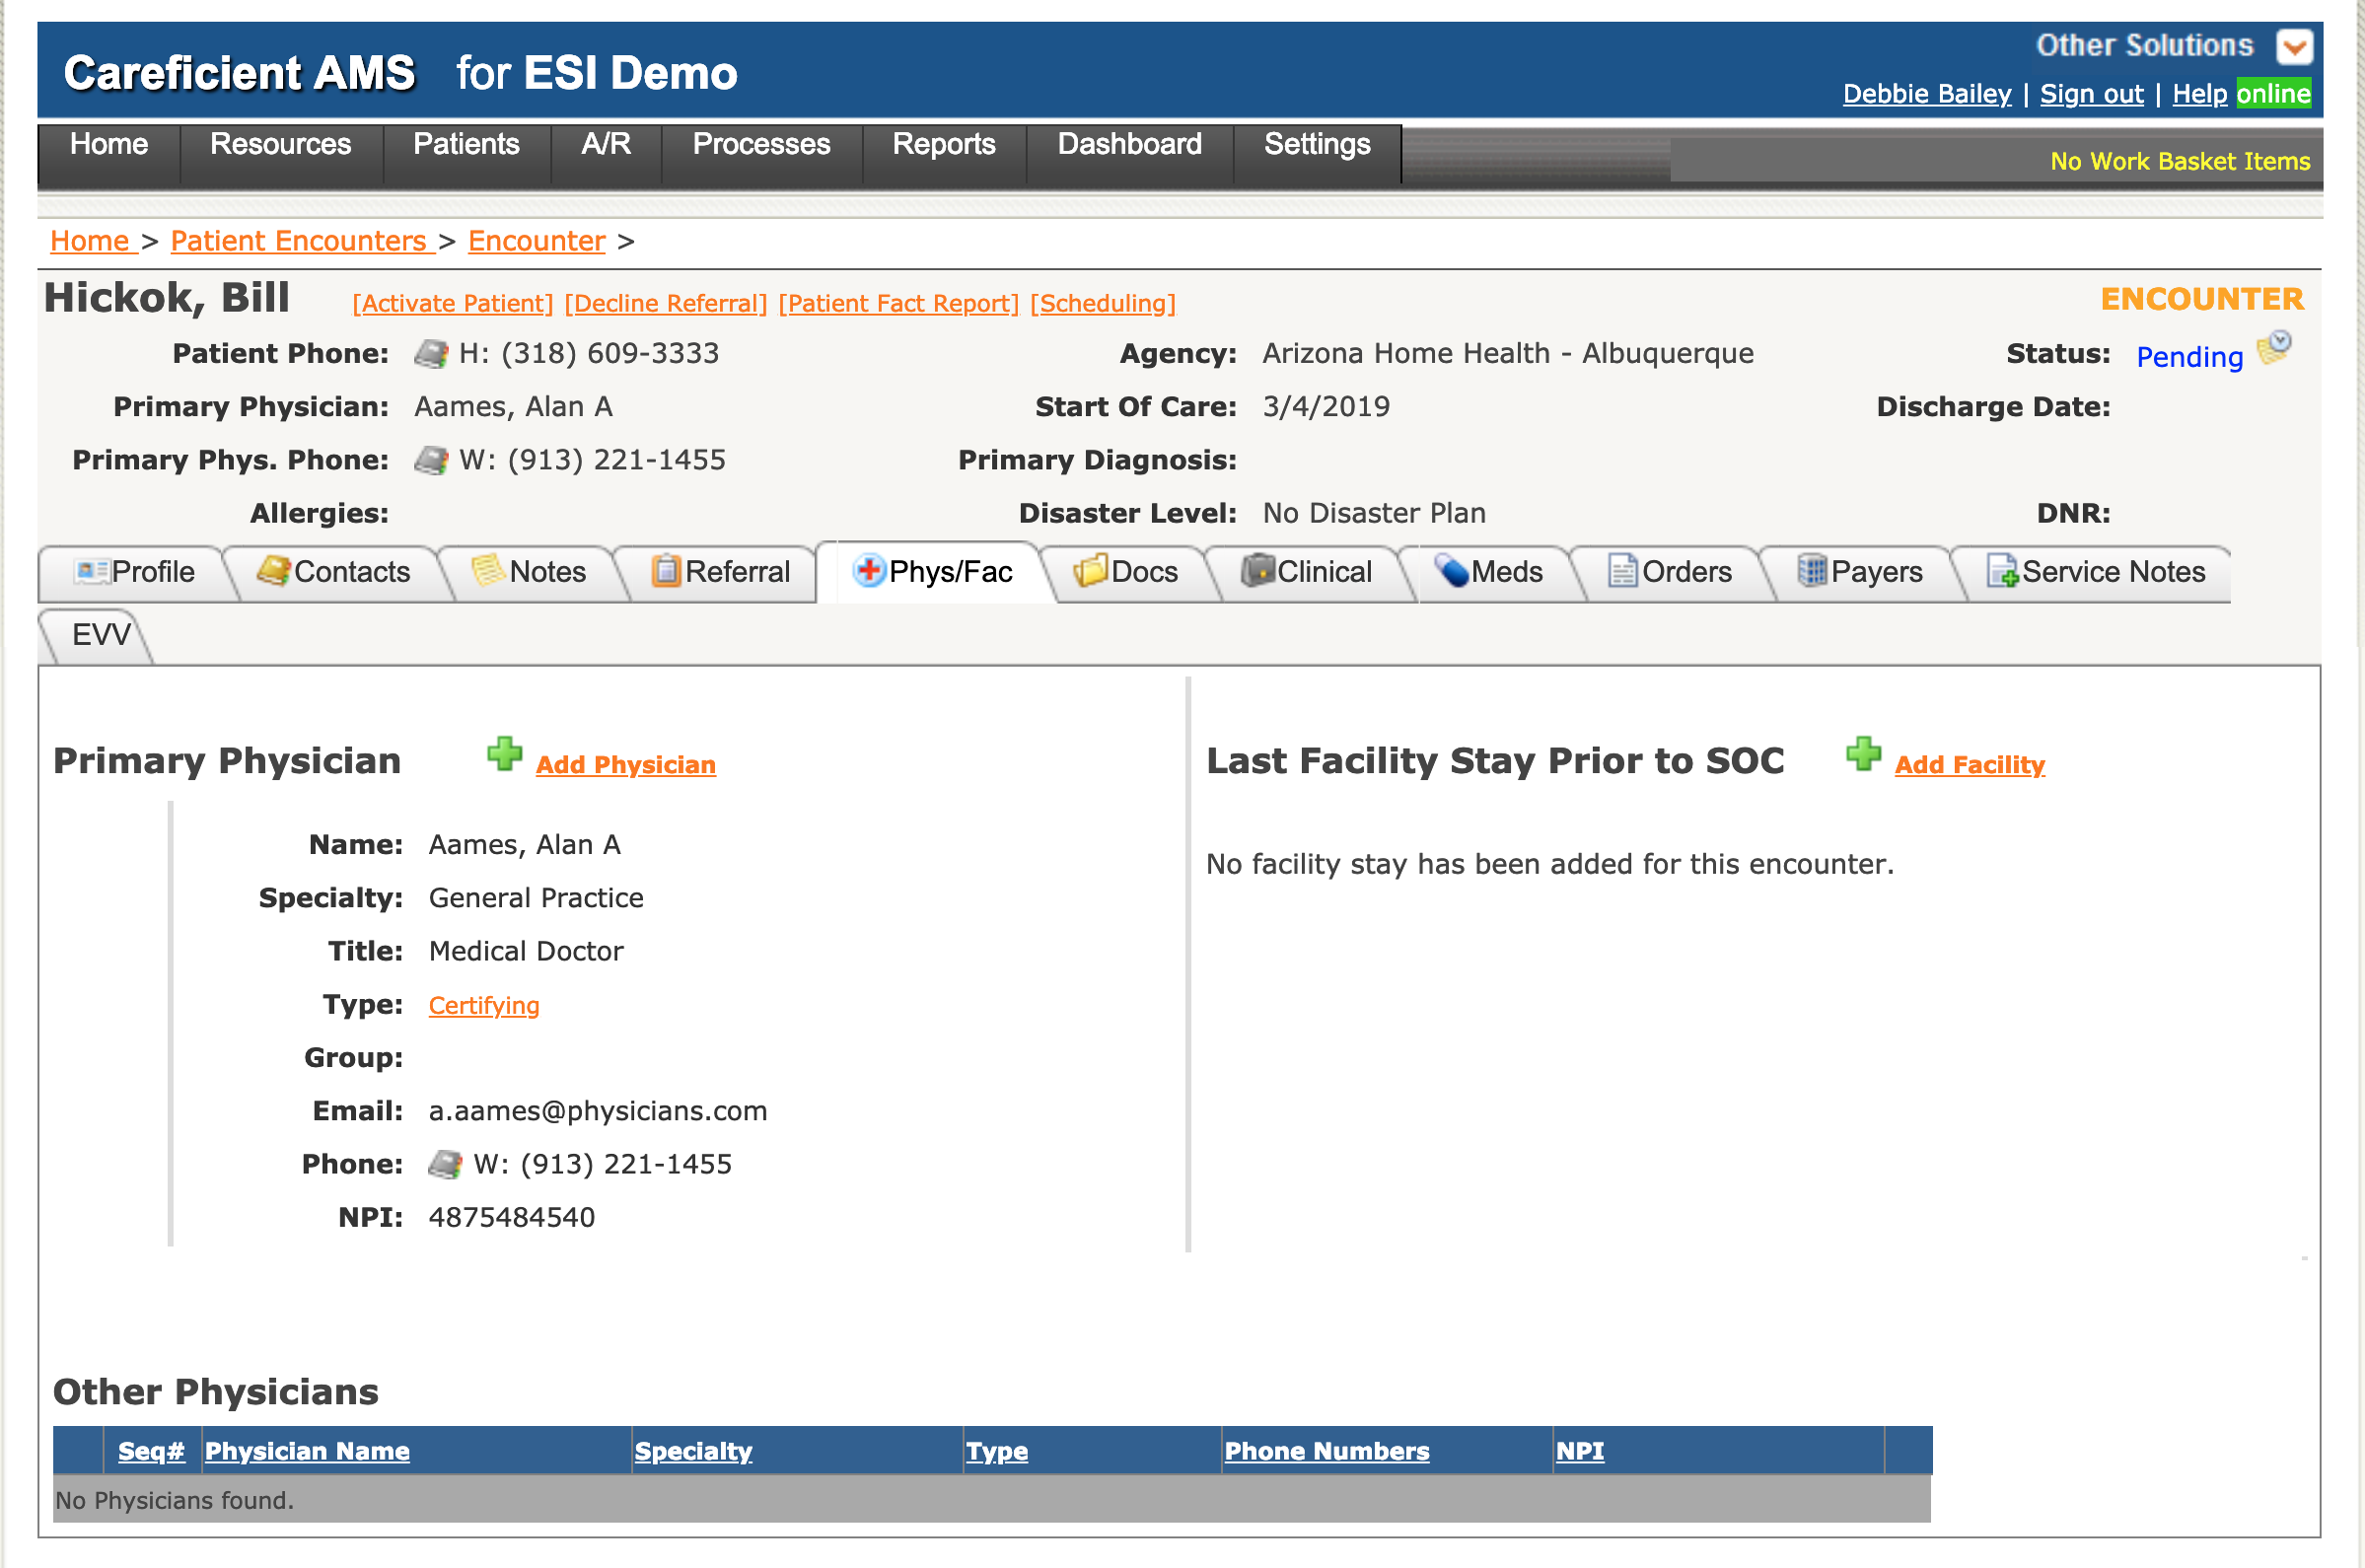
Click on “Phys/Fac” Tab > Add Physician - you will need to add the physician that will be signing the POC in the #1 spot. You may add any other physician’s that are also associated with this patient.
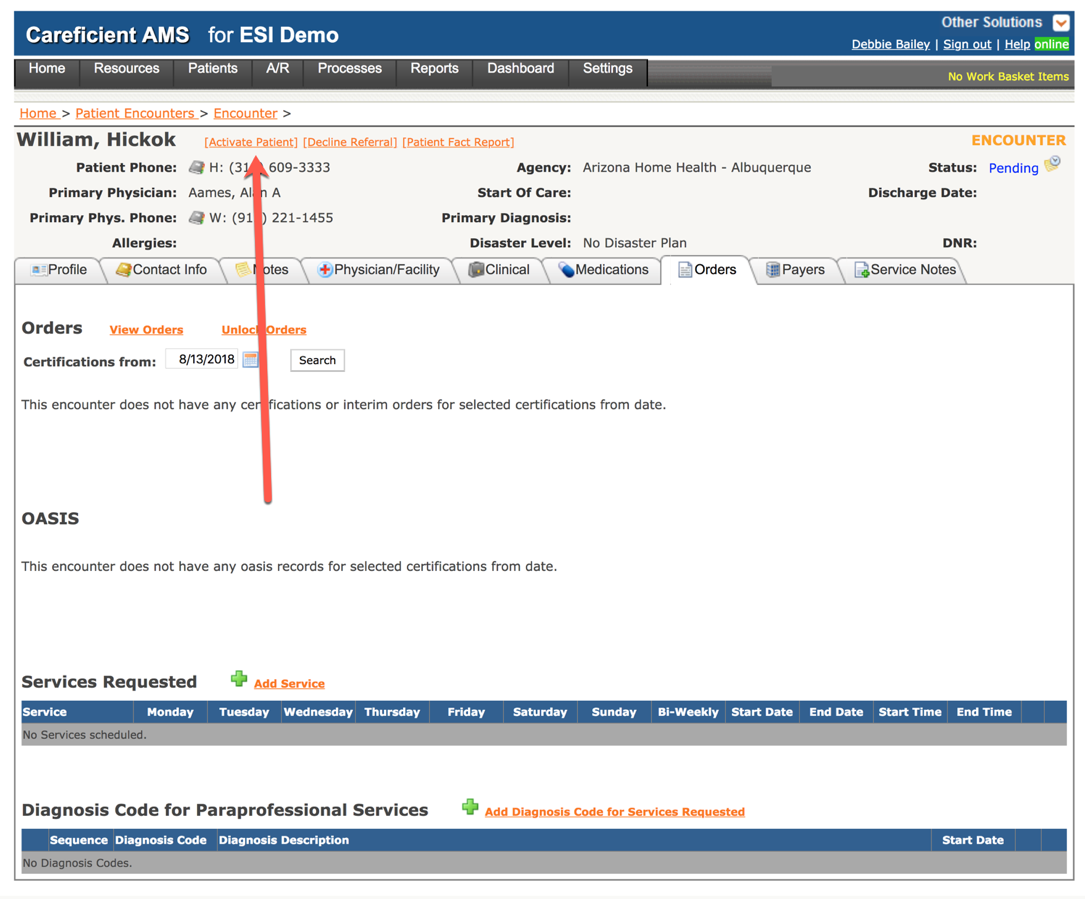
Go to the Orders tab. From here you will notice that you do not have a 485 or Oasis. The patient will need to be activated before you get the 485. Click on “Activate Patient” at the top to the right of patients name.
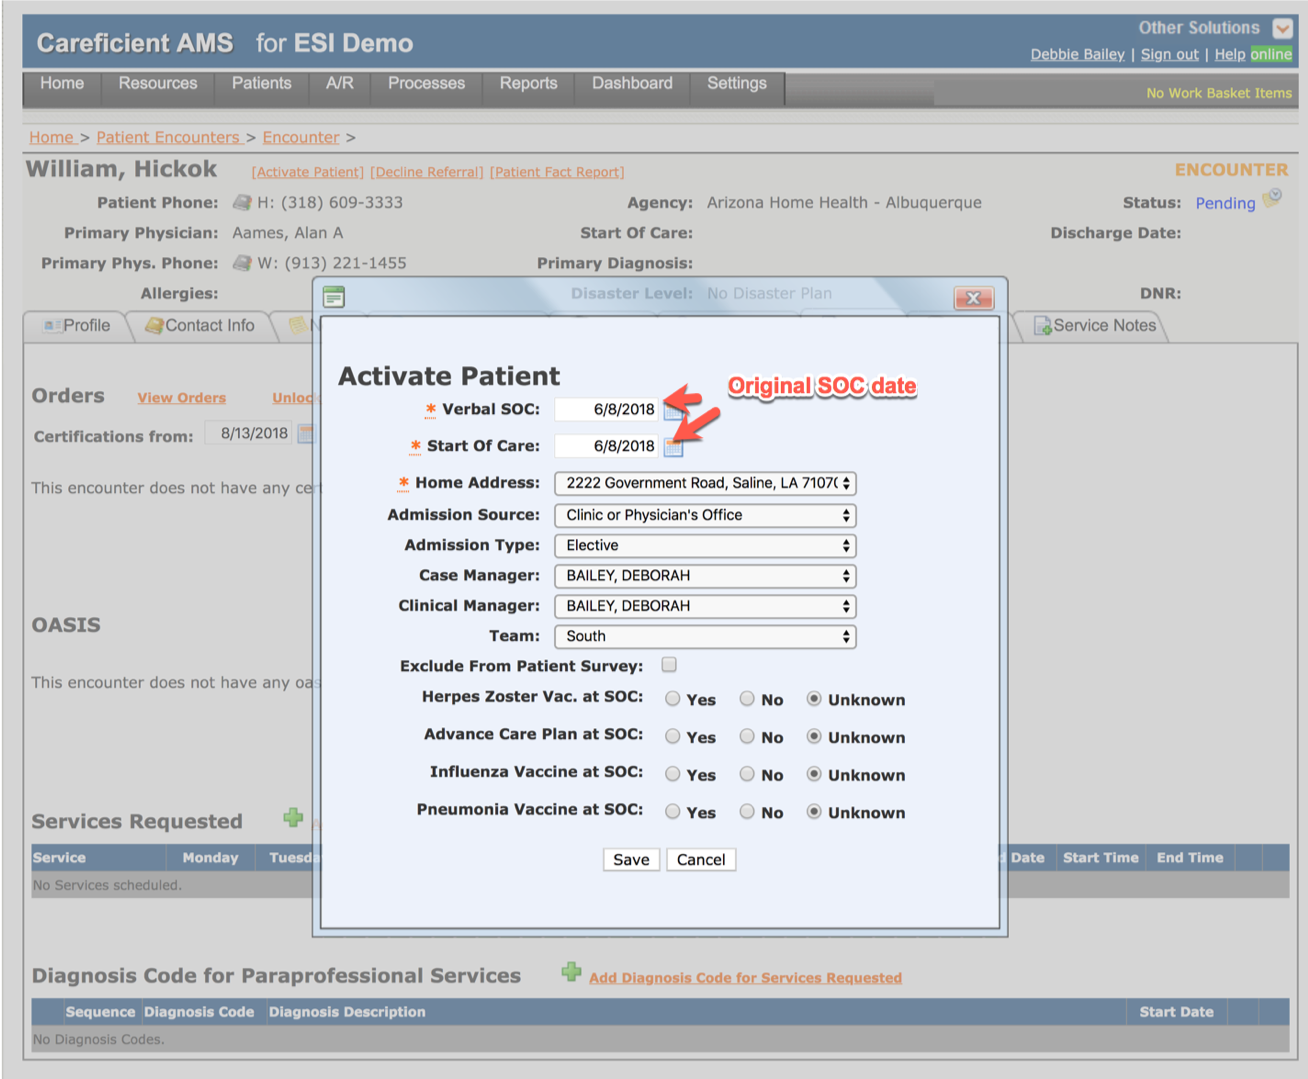
Because this is a transition patient, you will need to enter the original SOC date in both the “Verbal SOC” and Start of Care” boxes. Enter “Admission Source” and “Admission Type”. You may also fill out any of the other fields at this time or they can be filled out at a later date. “Save”.
NOTE: For Careficient Agency Administrators, “Admission Source” options can be set in Settings > Lookup Tables > Patient Support Tables > Admission Source.
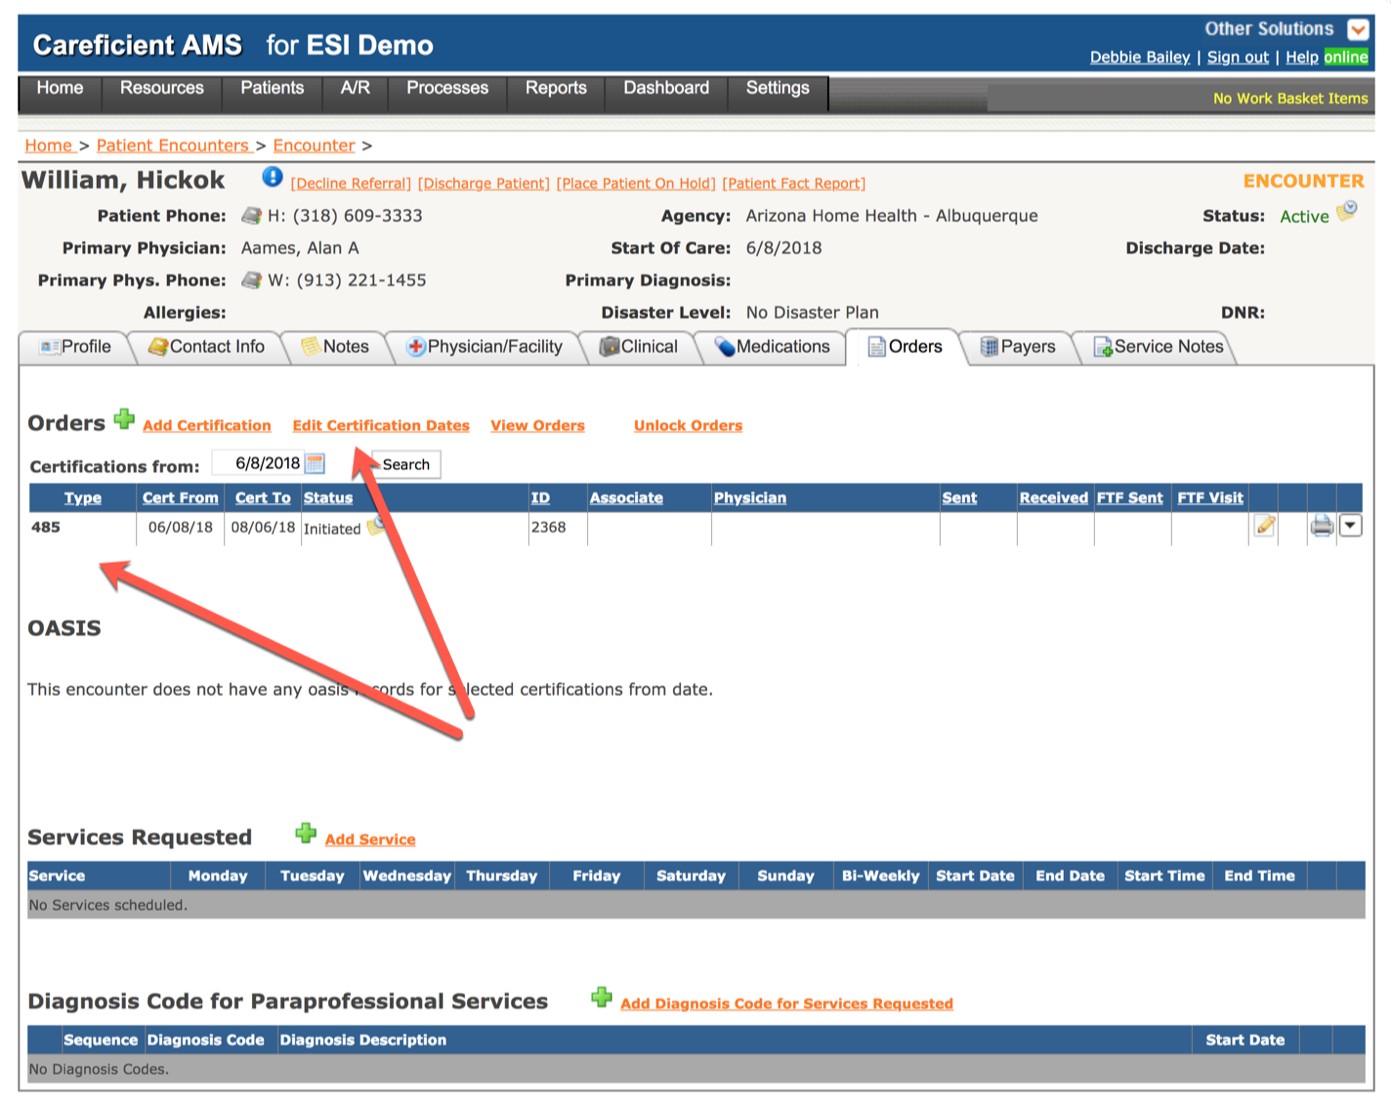
You should only have one 485 [Home Health & Private Duty] “Orders”. If you have more than one, click on the edit pencil to the right of the most recent one, go to the bottom and click on delete until you only have one.
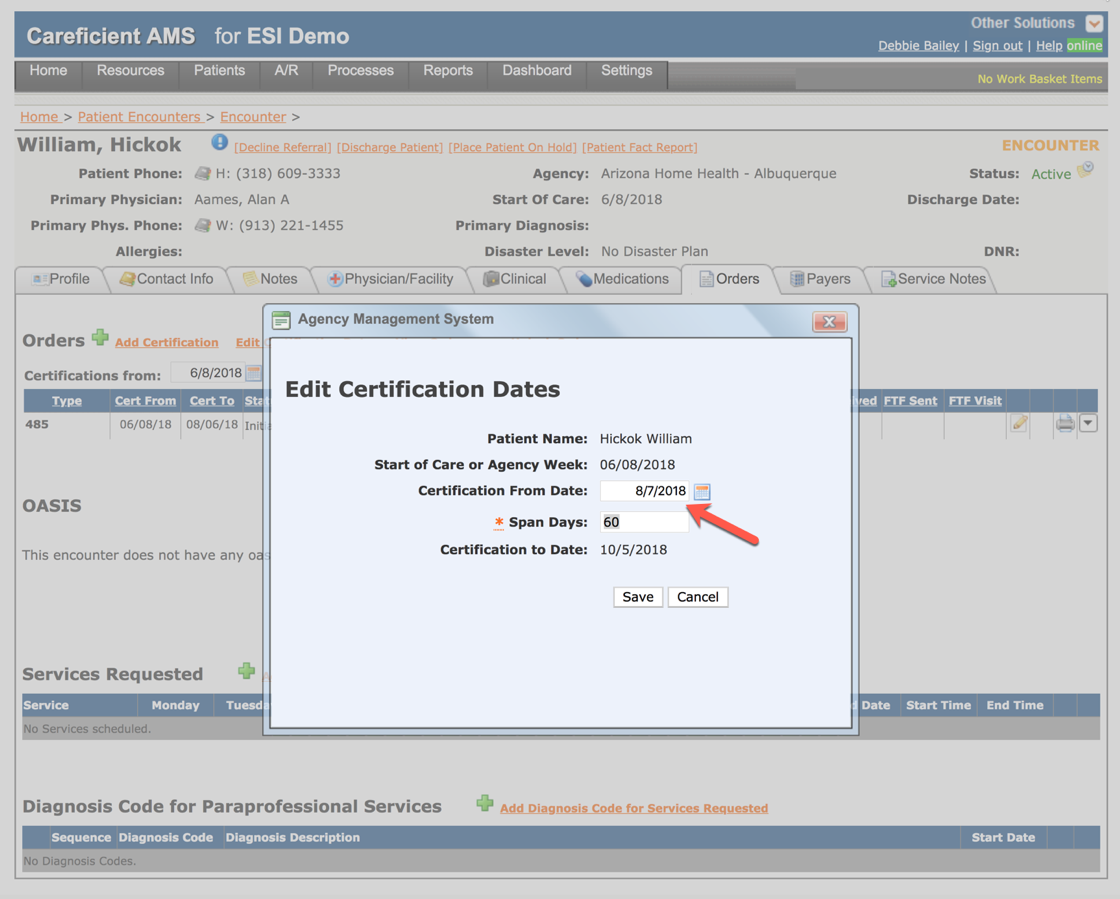
Click on “Edit Certification Dates” and enter the date that the patient's new certification period will start in the Cert From Field. The Span Days should be the time frame for the certification period. “Save”. This should be the date that you are going to start documenting on this patient in Careficient.
- For home health skilled services, it will have to be at the beginning of a certification period.
- For Private Duty, it can be at the beginning of the billing cycle.
(NOTE: If you leave more than one certification period without correcting this, when you realize the error, you will have to delete service notes and orders all the way back to this time frame to correct this)
Add the start date for your Certification. Make sure you check that the “Span Days” are correct. For Private Duty, you will need to adjust the “Span Days” to make sure the Cert To date is the end of your current benefit period. Once you have entered these things, your patient is ready for your associates to transition the patient into Careficient.
HOME HEALTH NURSING
- Click on the pencil for 485 and add the frequency for disciplines. Then click on “schedule discipline” when you are sure that your frequency is correct for the entire cert period. Once you click on this you can’t change frequency. Click here for more information on "Scheduling With The 485".
- Click on the drop down to the right of the 485 and “Add Oasis”. Fill out your OASIS and click on "Complete" or "Approve" (choice depends on agency settings).
- Click on the drop down to the right of the 485 and “Add Care Needs”. Add Multiple Care Needs. Make sure you only add one discipline at a time (example SN).
- You can always go back and click on “Add Multiple Care Needs” again for a different discipline (example PT/OT/ST).
- Once you have completed your care needs, sign your care need and send for approval. Make sure that the other disciplines ordered have added their interventions and goals prior to sending it for approval.
- Add the patients medications by clicking on the Med Tab. Click here for more information on "Medications Tab".
- You can now click on the “edit” pencil to the right of the 485 and complete your 485, sign it and send it for approval.SCHEDULER
- Click on “scheduling” at the right of the patient name (orange) and assign the clinicians responsible for doing the visits (if you are responsible for scheduling visits). See "Scheduling - Assigning Associates" for information on how to assign associates to the schedule.