ASSOCIATE PROCESS FOR QA REVIEW (Top)
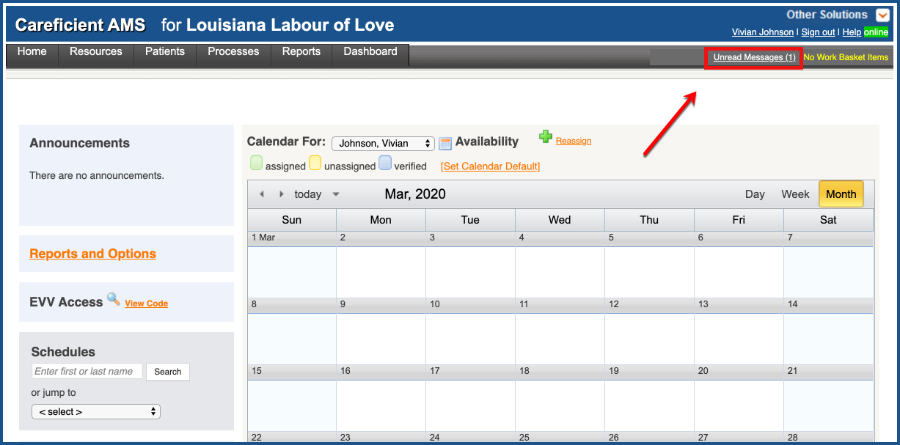
To view the message, click on “Unread Messages”
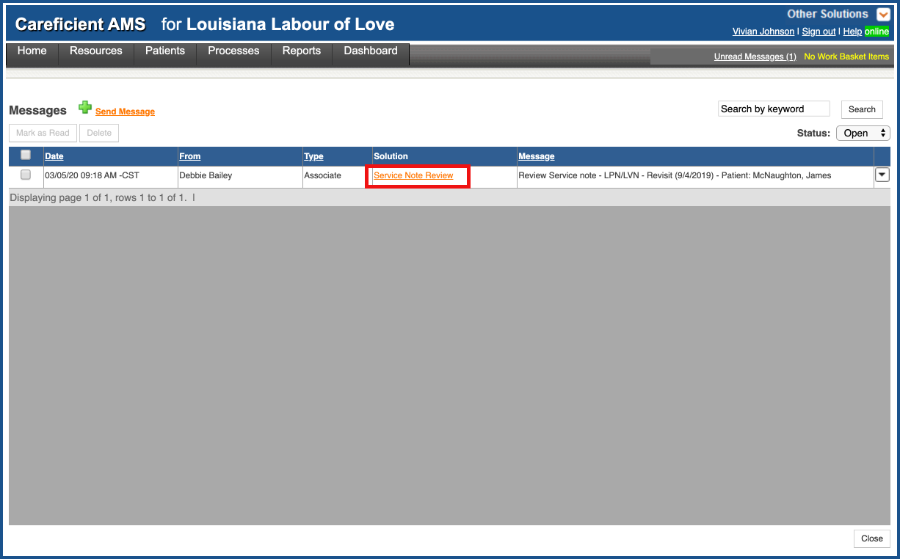
Click on the “Service Note Review”. This will take them directly to the service notes tab of the patient encounter.
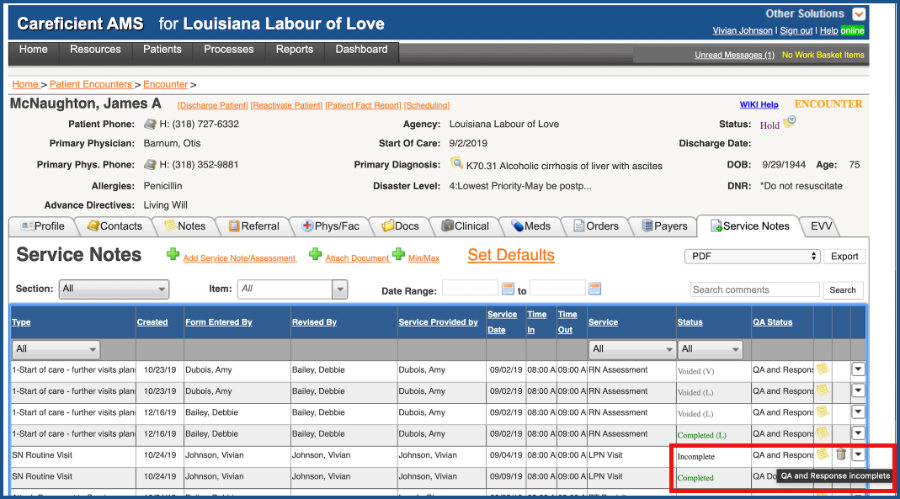
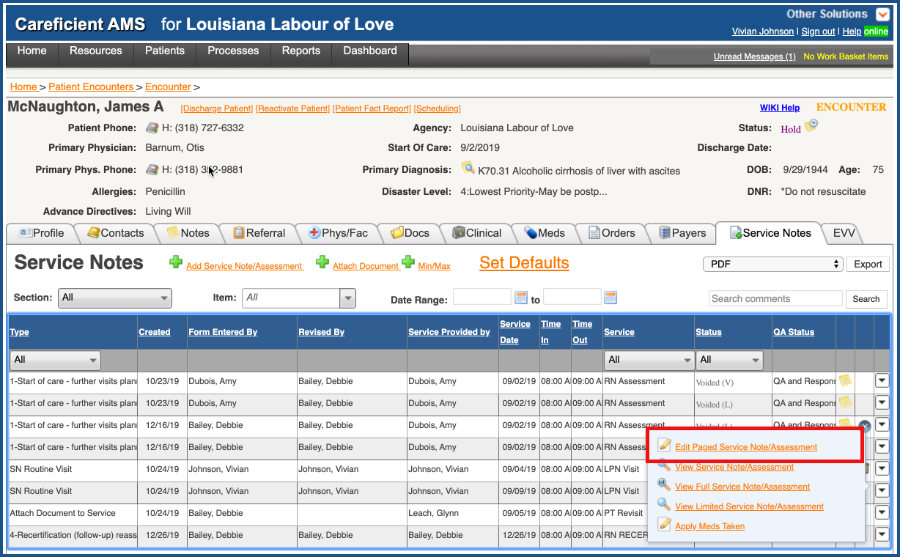
Here you will see that the status of the note is now “Incomplete” and the QA Status is now “QA and Response Incomplete”. Click on the drop down to the right of the service note.
Choose “Edit Paged Service Note/Assessment”.
NOTE: For Careficient Agency Administrators, click on the following to learn more about the privileges for Edit Service Note Assessment.
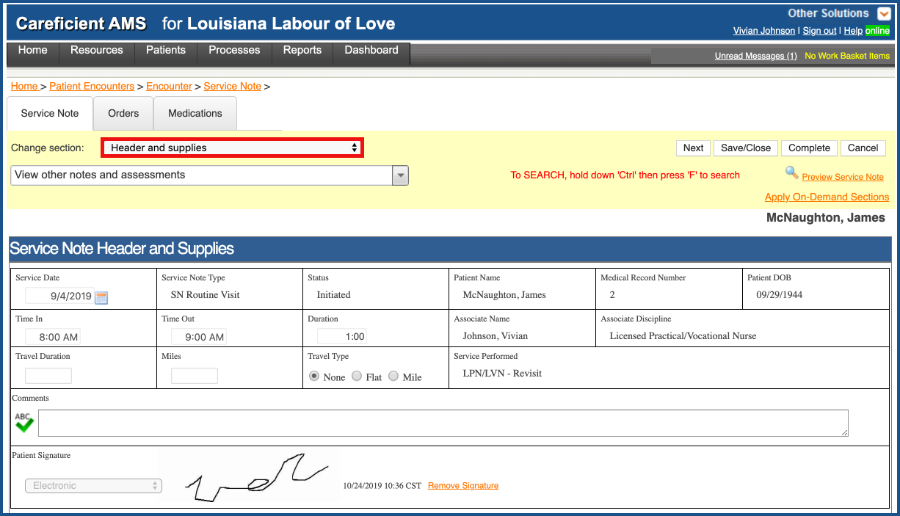
Click on the drop down to the right of “Change Section”
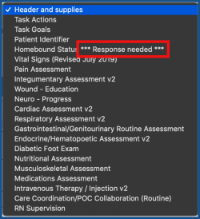
Every section that the reviewer added a comment to will now show “***Response Needed*** to the right of the section. Click on the section to review comments
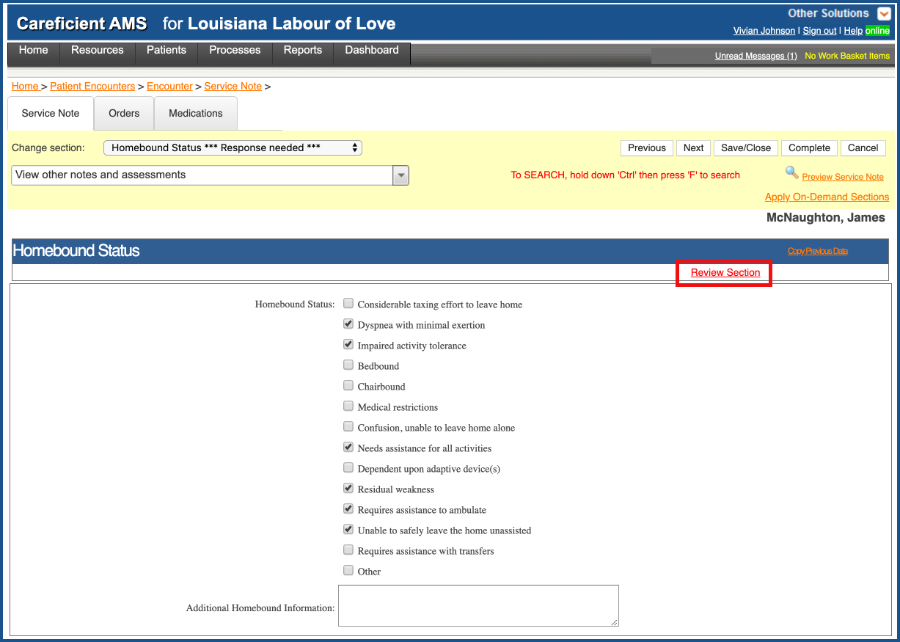
In the section, you will now see a “Review Section” link that is Red. Click on the link to address the reviewers comments
To view their comments if you can’t read everything in the “Review/Response” column, click on the magnifying glass to the right of the comment.
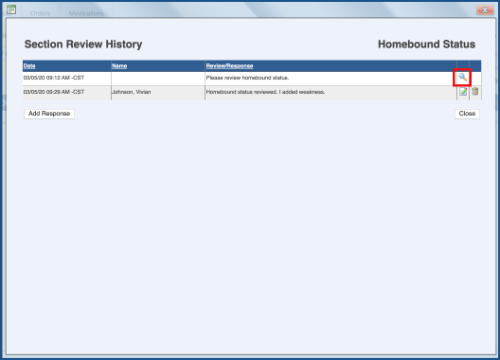
Click on “Add Response” to add a comment. Remember, for the red link to be removed, you must add a comment to each link whether or not you make any changes to the service note.
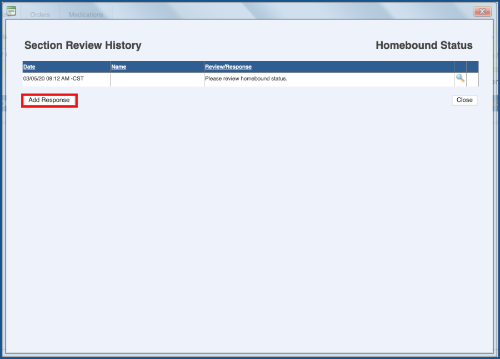
The comment box opens.
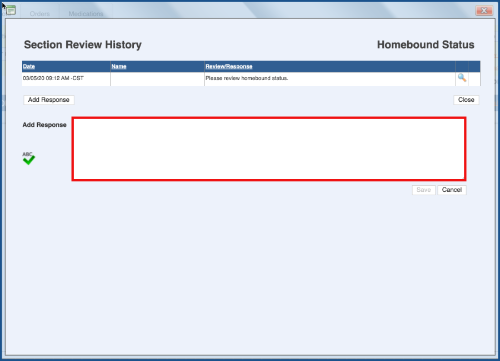
Enter your response and click “Save”
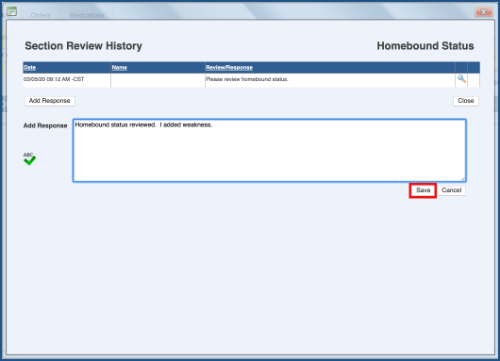
You can add another response
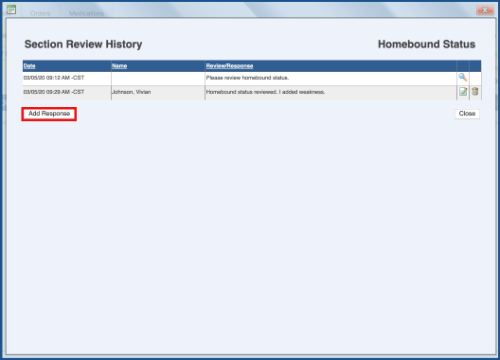
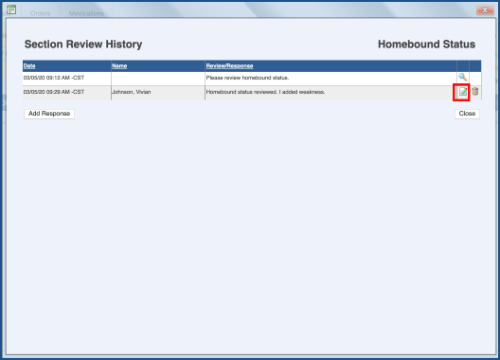
You can edit your comment
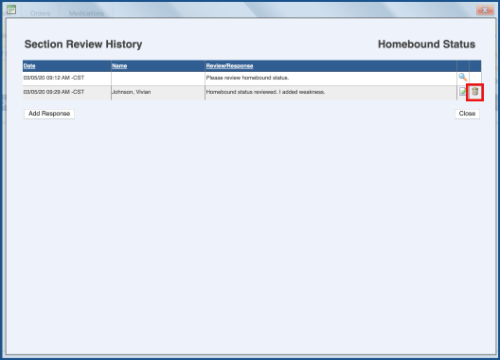
Or delete the comment.
You will be asked if you are sure you want to delete your comment. If so, click “OK”.

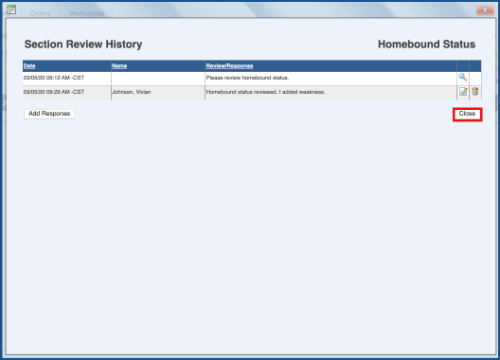
Click close when you are finished.
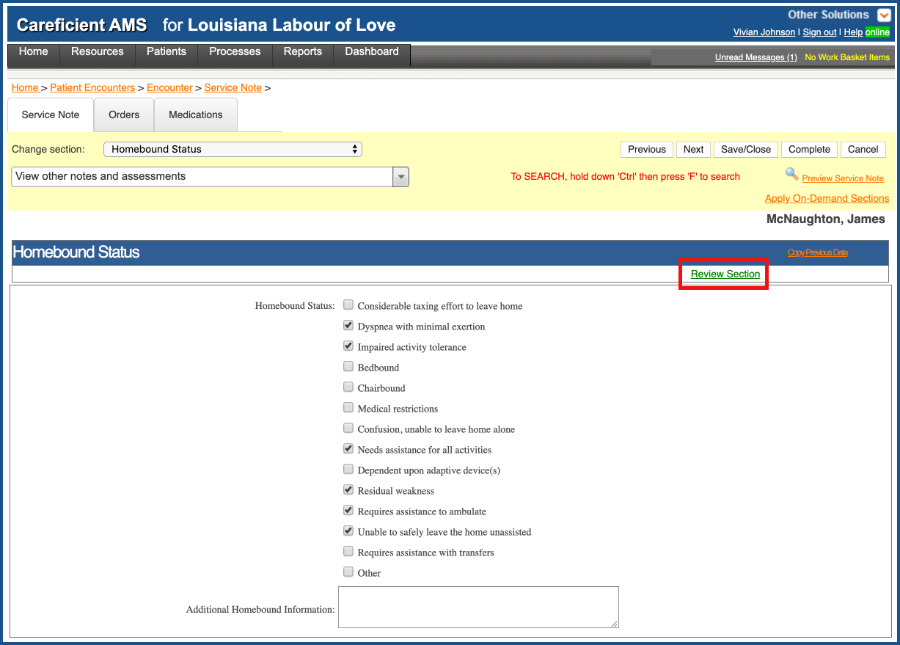
You will notice that the “Review Section” link is now green. All Review Sections must be green in order to complete the service note.
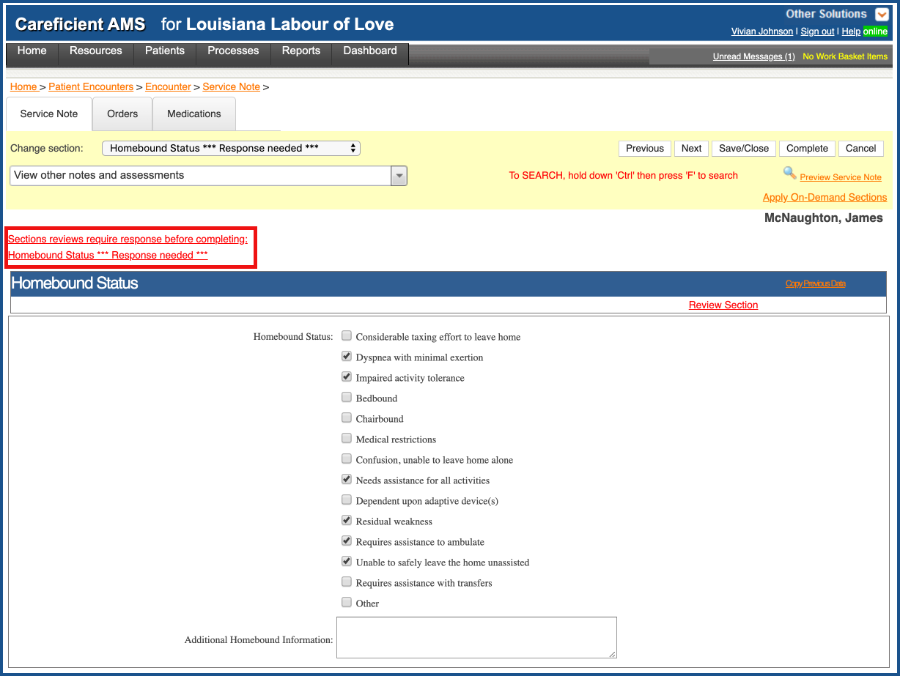
If you try to complete the service note and all sections are not addressed, you will get an error notifying you regarding the response needed.
QA AND RESPONSE EXIST (Top)
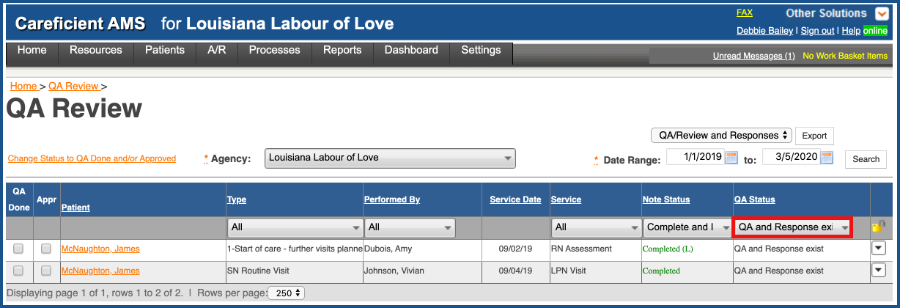
When your service note is back in a completed status, the service note will now appear in the QA Review Process under the status of “QA and Response Exist”.
To review the responses, click on the drop down to the right of the service note and choose “Review Service Note/Assessment” again just like you did initially.

Click on “Section Review History”
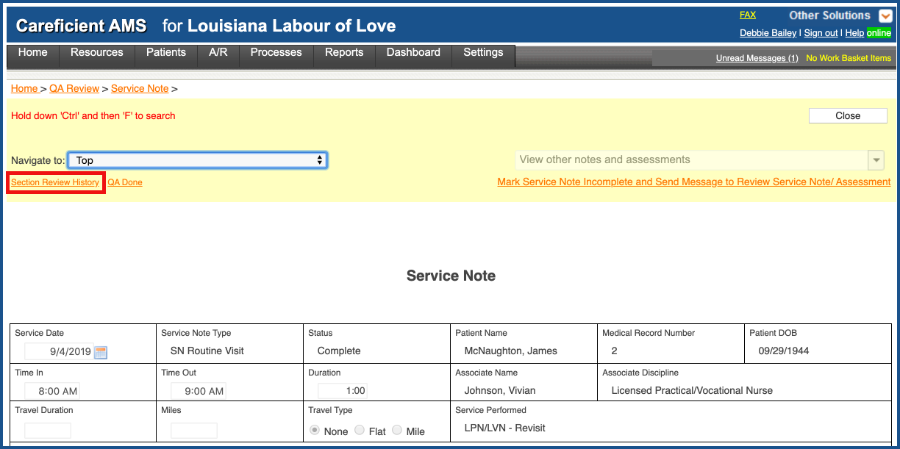
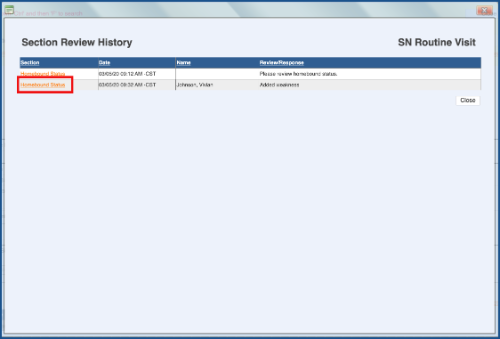
This will open up the Section Review History where you can view at a glance any comments you made and the responses per the associate. Click on the link to go to the section you reviewed.
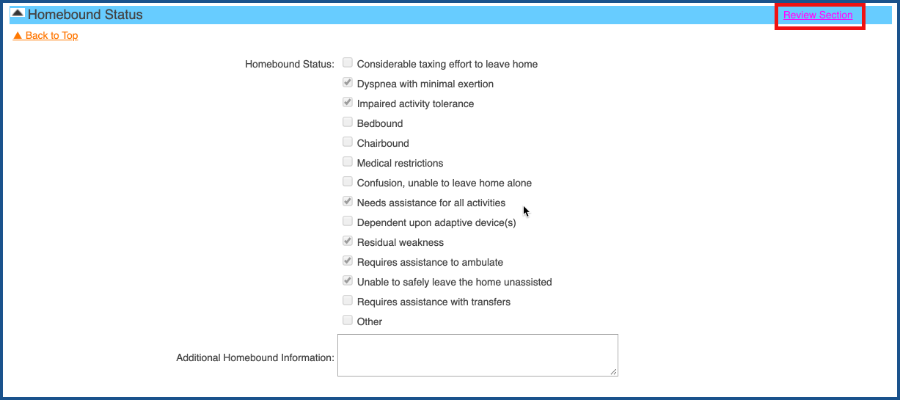
The “Review Section” link will now be pink. Review the changes made in the section and click on the “Review Section” Link if you are not satisfied with the changes and need to send it back to the associate.
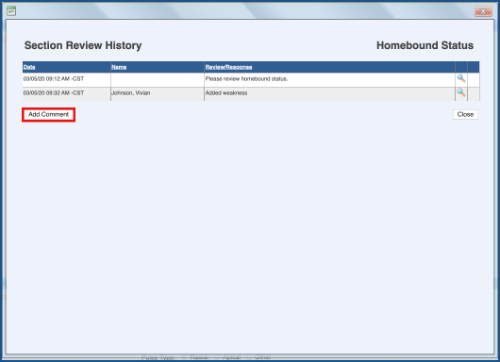
Here you can add another comment and send back for review. Each comment you add, must have a response from the associate before the note can be completed.
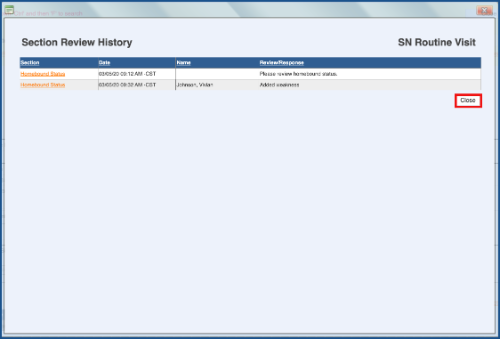
Once you have completed reviewing all section in the Section Review History, click close.
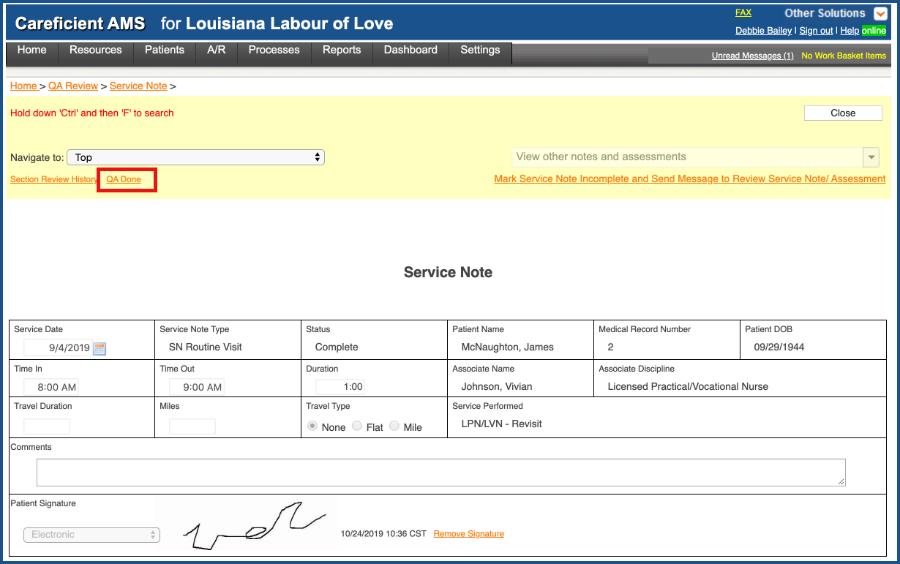
If you are satisfied with the corrections, click on the ”QA Done” link at the top of the service note
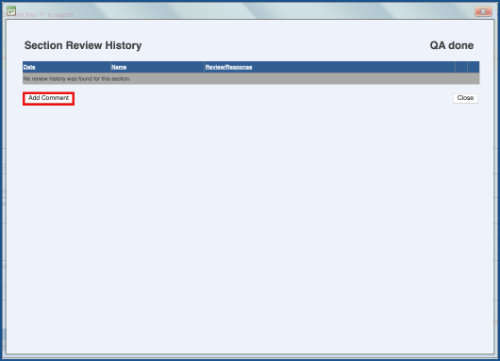
You will be prompted to add a QA Done comment. Click “Add Comment”
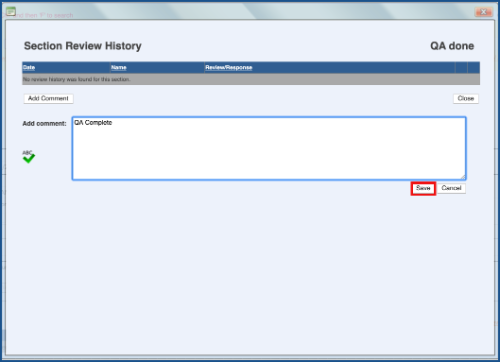
Enter a comment regarding the review and click “Save”.
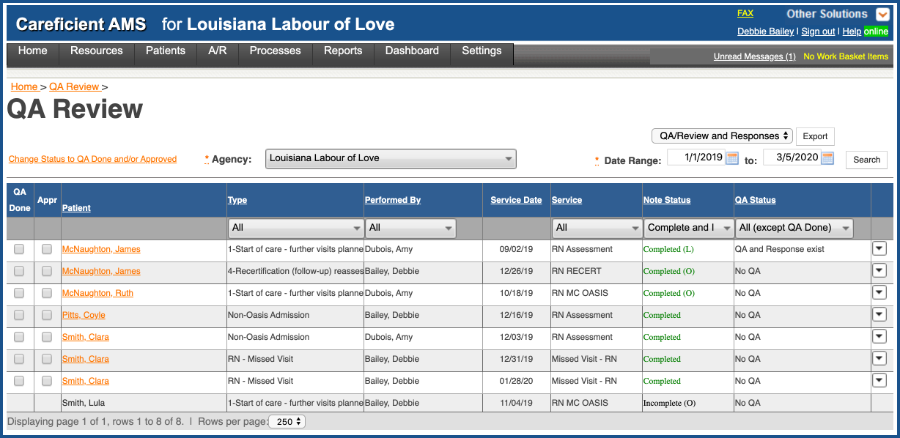
You will be returned to the QA Review Process where you will notice the note is no longer here if you chose ”QA Done’.
APPROVE SERVICE NOTES (Top)
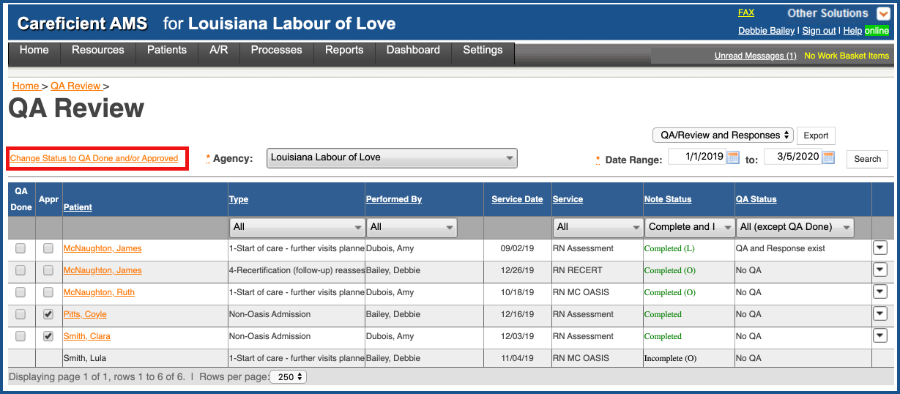
If your process is to approve service notes for associates, you can also do this in the QA Review Process by clicking on the service notes you need to approve and then choosing “Change Status to QA Done and/or Approved”.
NOTE: For Careficient Agency Administrators, click on the following to learn more about the privileges for Approve Service Note Assessment.
QA DONE (Top)
If your process is not to review every note, then you may want to mark the note as QA Done so that it no longer shows up in the QA Review Process. To do so, click on the service notes that you do not want to review and choose “Change Status to QA Done and/or Approved”.
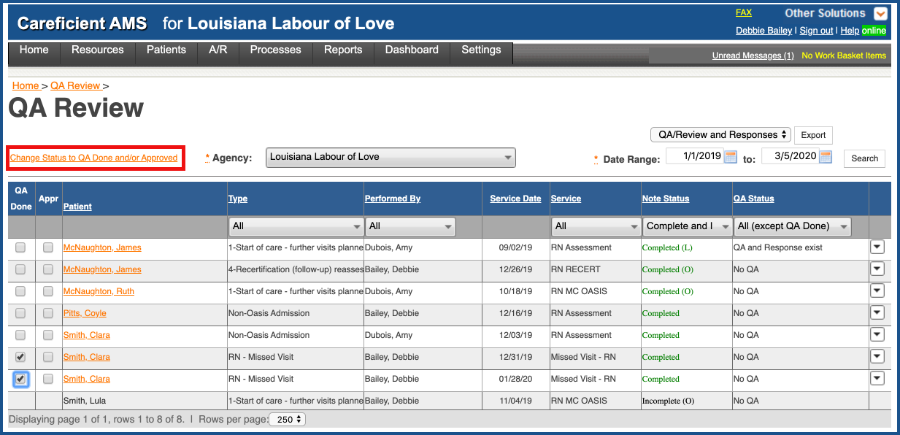
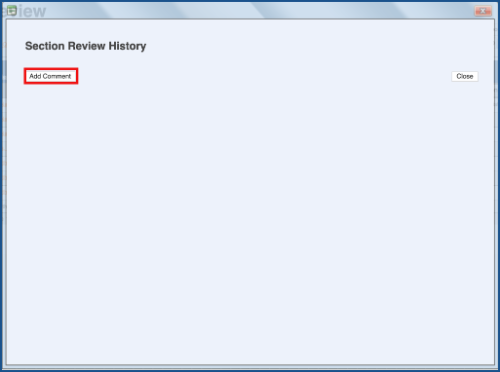
You will be prompted to add a comment.
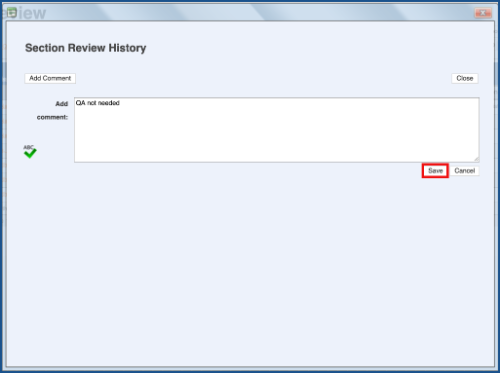
Add your comment and click “Save” when finished. All the notes that you just checked off will now show a status of “QA Done’.
UPDATE DIAGNOSES CODES (Top)
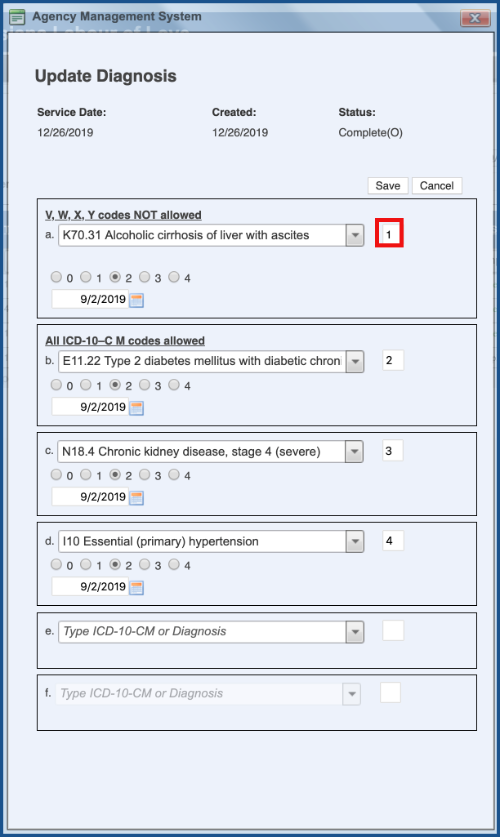
You can also update diagnoses codes for service notes that include them. Click on the drop down to the right of the service note and choose “Update Diagnosis Codes’.

Make the necessary changes. You can also change the sort order by changing the number to the right of the diagnosis code. Click “Save” when finished.
APPLY CO-SIGN SIGNATURE (Top)
If the service notes are in an approved or completed status, you can add a Co-Signature by clicking on the drop down to the right of the service note and choosing “Apply Co-Sign Signature”. This could include RN’s signing LPN Service Notes as well as Therapists co-signing Therapy Assistant Service Notes. This feature/function appears on the Patient Encounter Service Notes tab and is only available for Service Notes that do not contain OASIS information.
NOTE: For Careficient Agency Administrators, click here to learn more about the privileges for Ability To Co-Sign.
Hover over the “View actions” dropdown arrow for the Service Note you want to co-sign > Select the Apply Co-Sign Signature link from to pop-up list

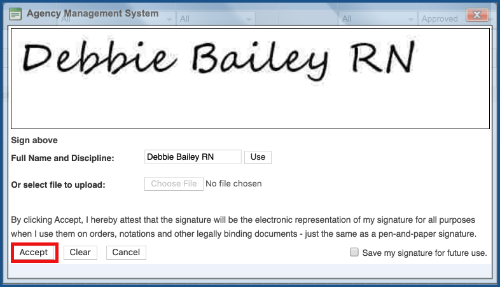
Click “Accept” to apply your signature
Additional signature section prints below the signature of the clinician that completed the Service Note.
Example of Service Note with both Signatures

REMOVE CO-SIGN SIGNATURE (Top)
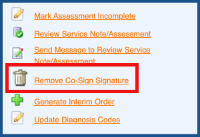
If for some reason, you need to remove the Co-Signature, click on the drop down to the right of the service note and choose “Remove Co-Sign Signature”. Just remember, if you mark a service note incomplete, it automatically removes the co-signature.
GENERATE INTERIM ORDER (Top)
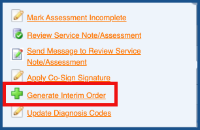
In some situations you such as maybe a Therapy Evaluation or Discharge, you may want to send the service note to the physician for a signature. You can generate an interim order from service notes that are approved as well by clicking on the drop down to the right of the service note and choosing “Generate Interim Order”.
NOTE: For Careficient Agency Administrators, click here to learn more about the privileges for Ability To Generate An Order.
You will be asked if you are sure you want to create an other interim order. Click “OK” to do so.

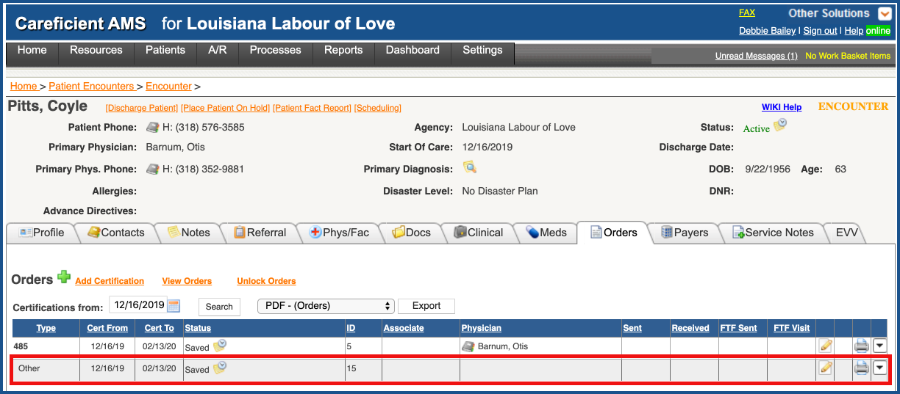
This will create an other interim order on the Orders tab for you to sign and then you can send the service note to the physician for signature.
REPORTS (Top)
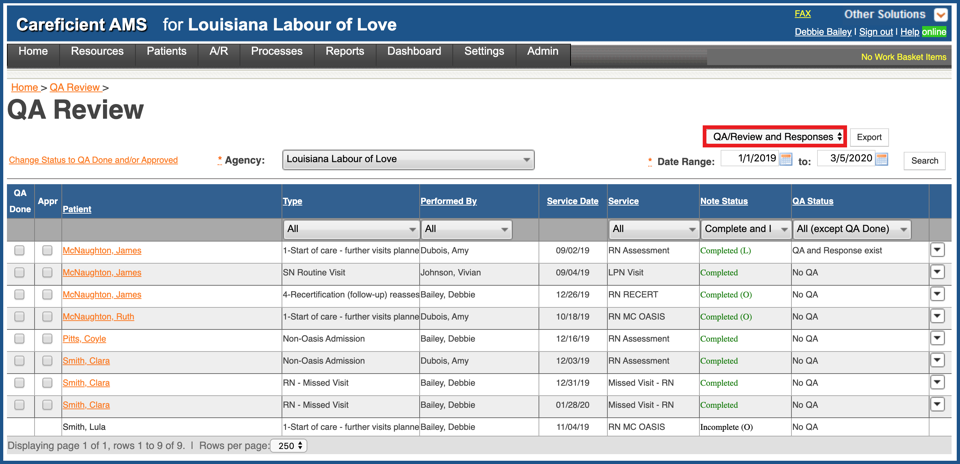
You can also run reports on QA/Review and Responses” if you need to after you have set all your parameters, click on ‘Search” and then choose “Export”.
QA/Review and Response (Spreadsheet)
- Patient
- Service
- Note Type
- Service Date
- QA Status
- Performed by
- Section
- QA Review Name
- Create Date
- Comment
- Response
- Responded by
- Responded Date
- Assessment Status
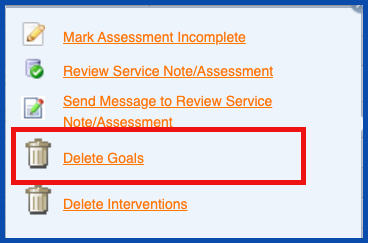
DELETE GOALS (Top)
Only available to Careficient Employees.
DELETE INTERVENTIONS (Top)
Only available to Careficient Employees.
