If you are connected to the internet, Careficient automatically confirms that you have the most current version of Offline Forms. If you do not have the most current version (and you are connected to the Internet), Careficient automatically downloads it.
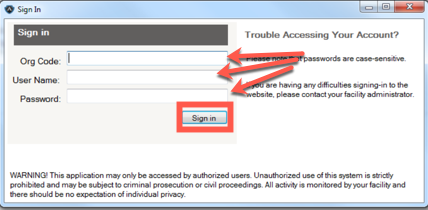
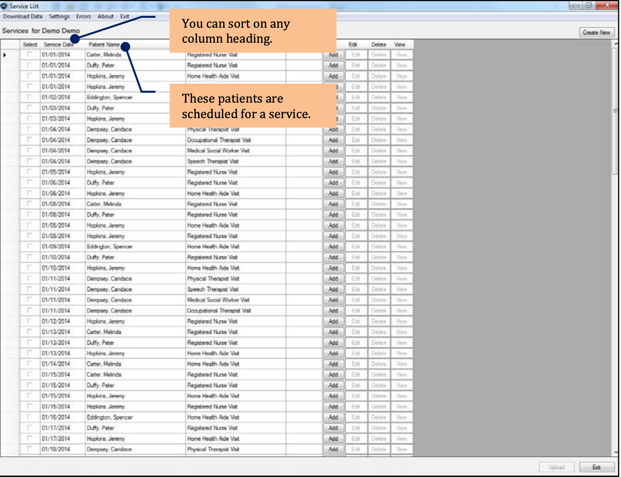
When you initially sign in to Offline Forms, the Service List displays. The Service List displays the patients scheduled and assigned to you. From the Service List, you can
• Create a new service note
• Add, edit, or delete a service note
• Upload a completed form to Careficient
• You can also view errors, change default display settings, and sort the Service List by any column heading.
Creating a Service Note for a Patient
To create a service note for a patient, click the Add button next to the patient’s name in the Service List.
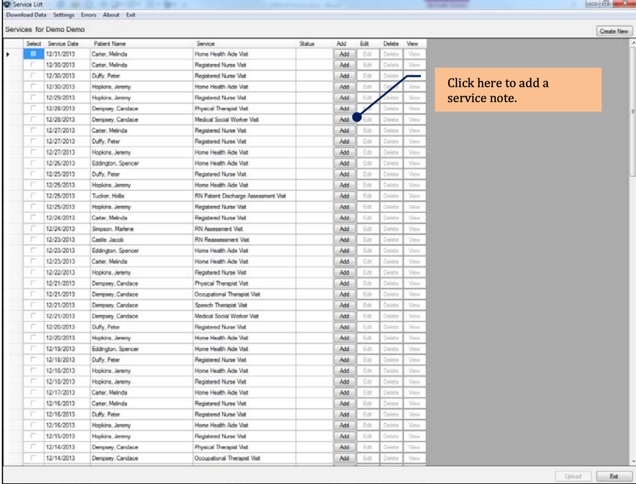
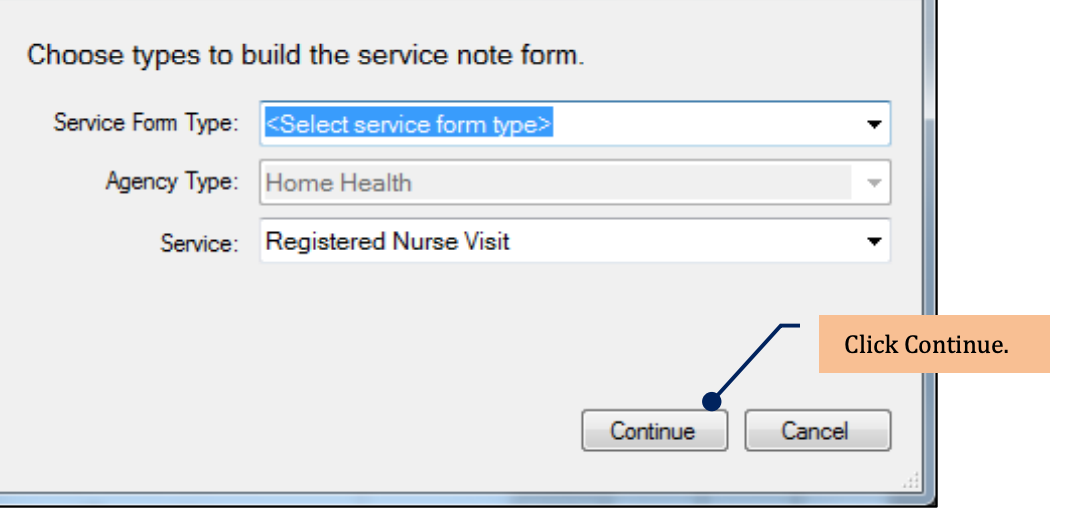
If you have orders, but the service note does not appear on your schedule or is not assigned to you, you can click the Create New button. Note that orders must exist before you use this option. If orders do not exist, the agency cannot process the new service. When you click the Add button, the Create Service Note dialog displays. From the drop-down list, select Service Form Type.
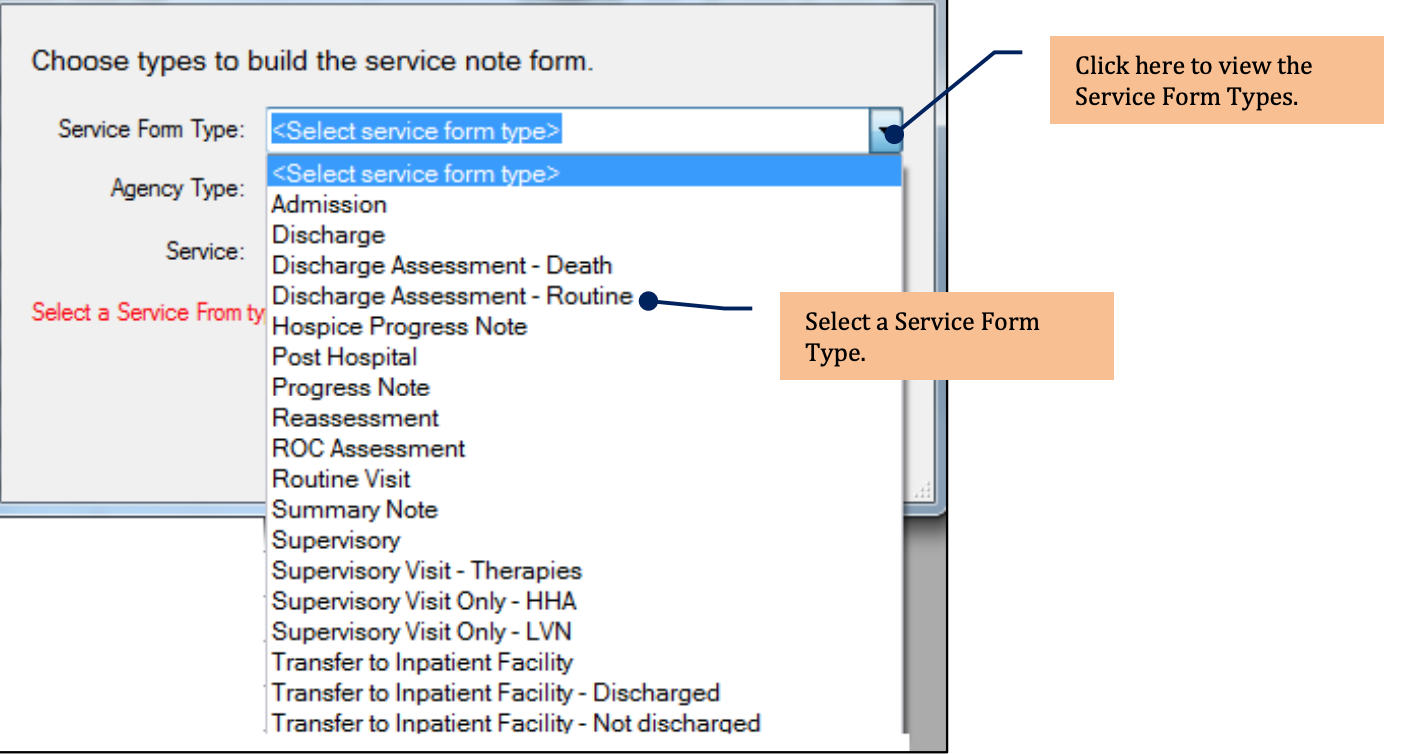
Select a Service and click Continue
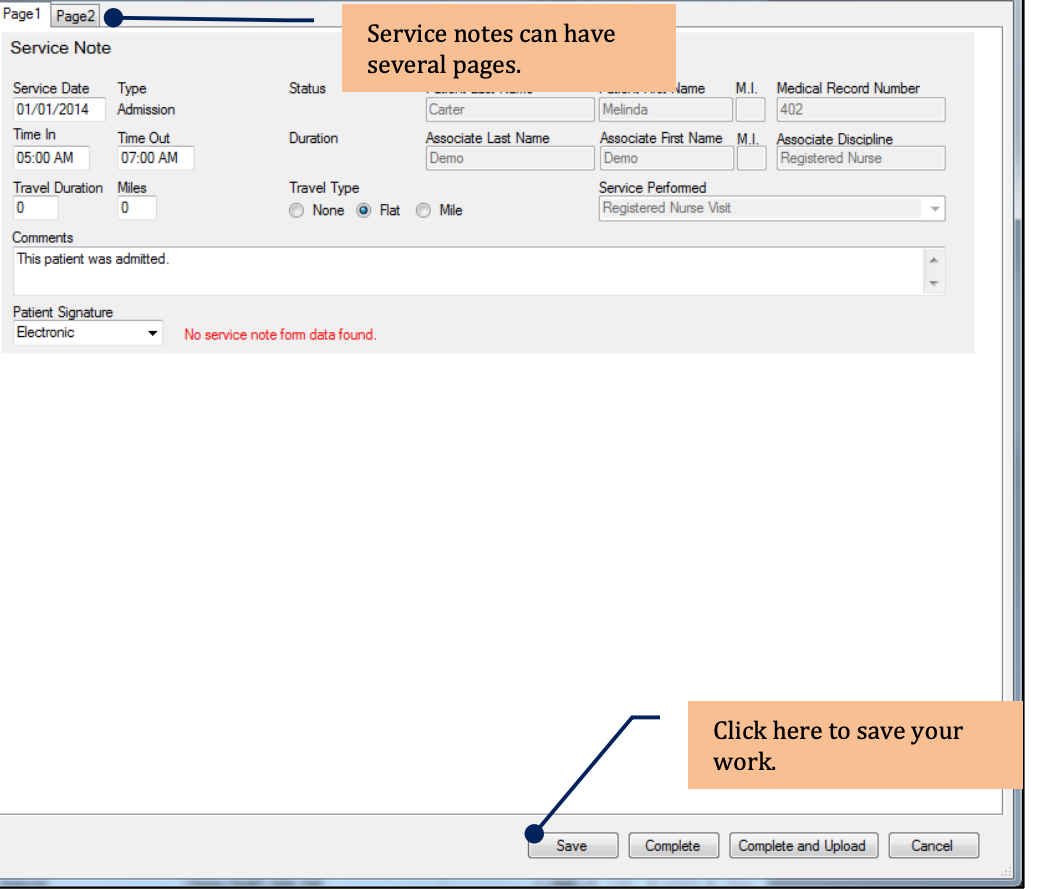
The Service Note displays.
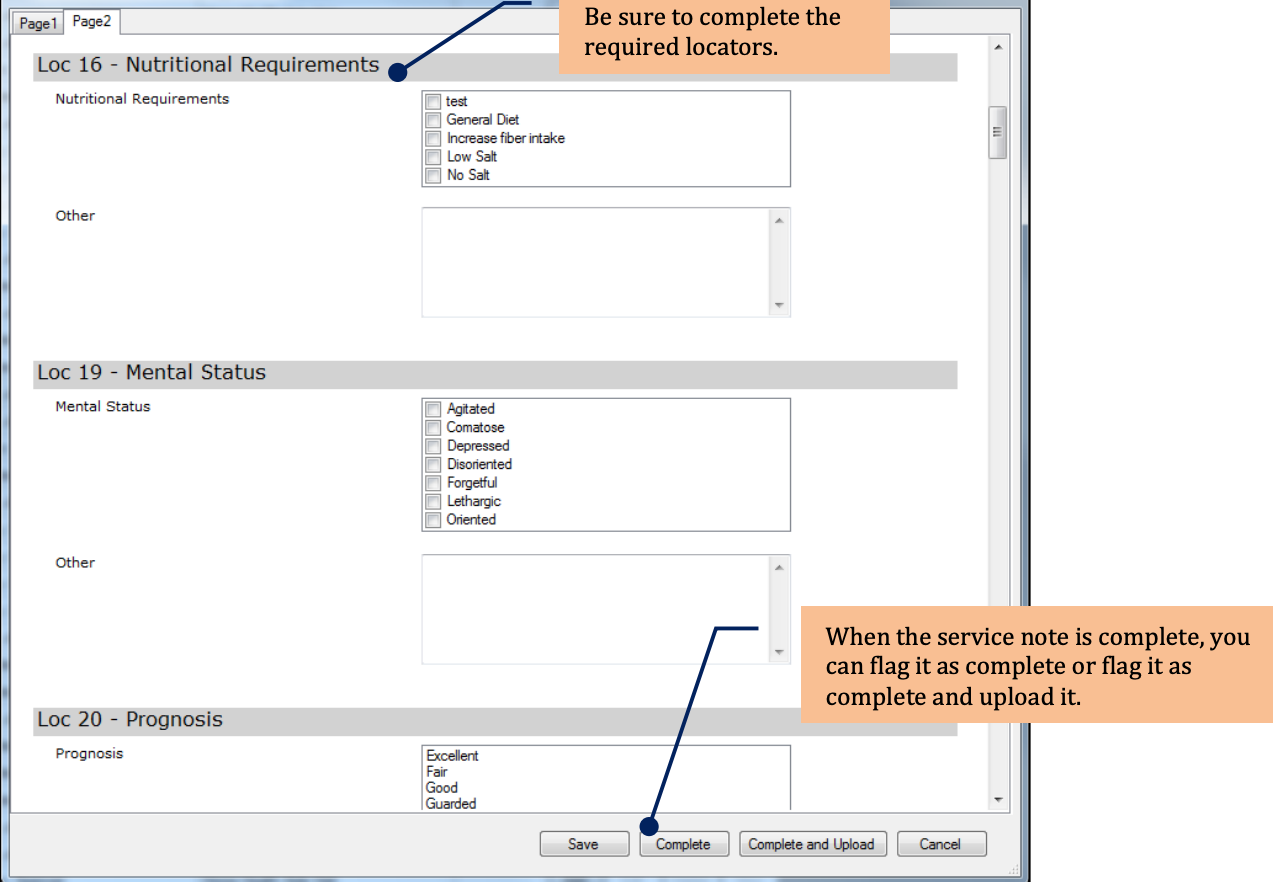
Each service note has different requirements. Be sure to complete all necessary information based on your assessment and the services you provide.
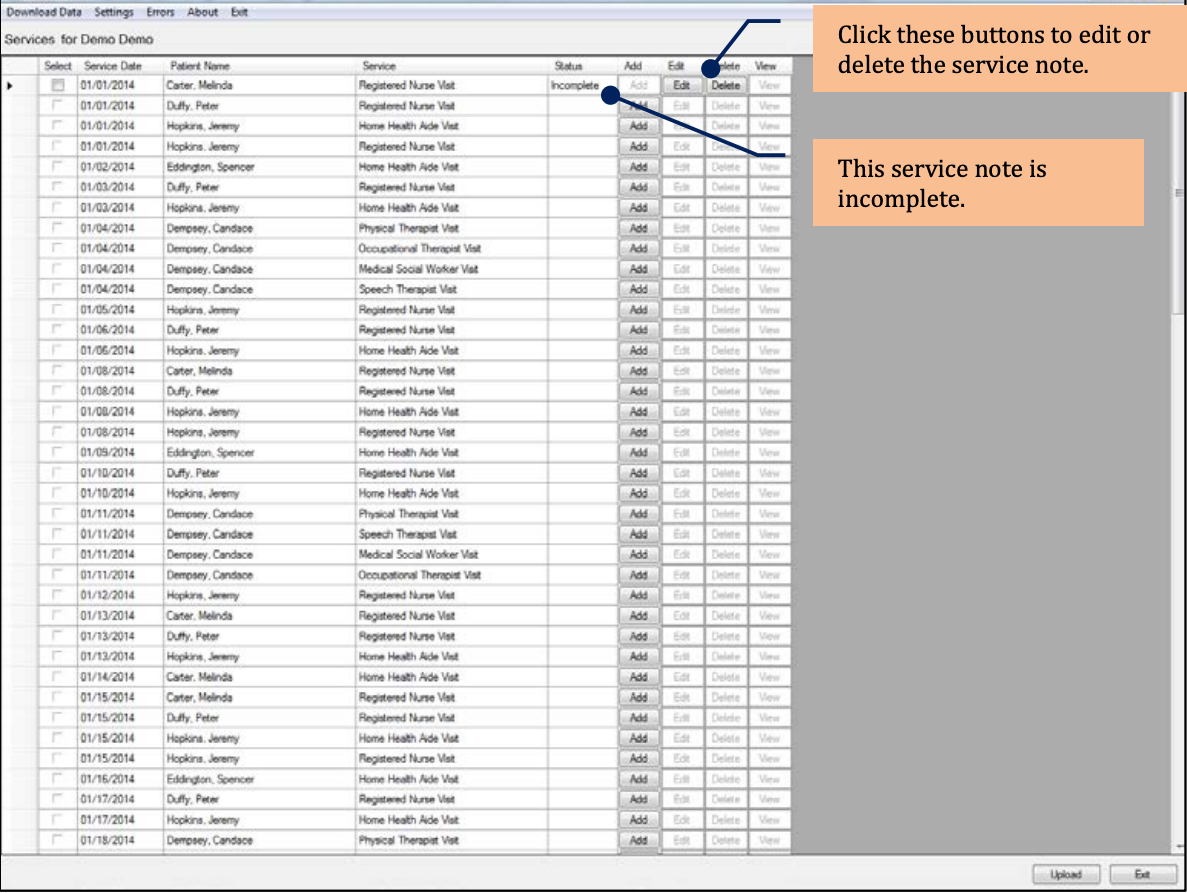
From the Service List, you can edit or delete the saved service note.
You can also upload the service note to Careficient.
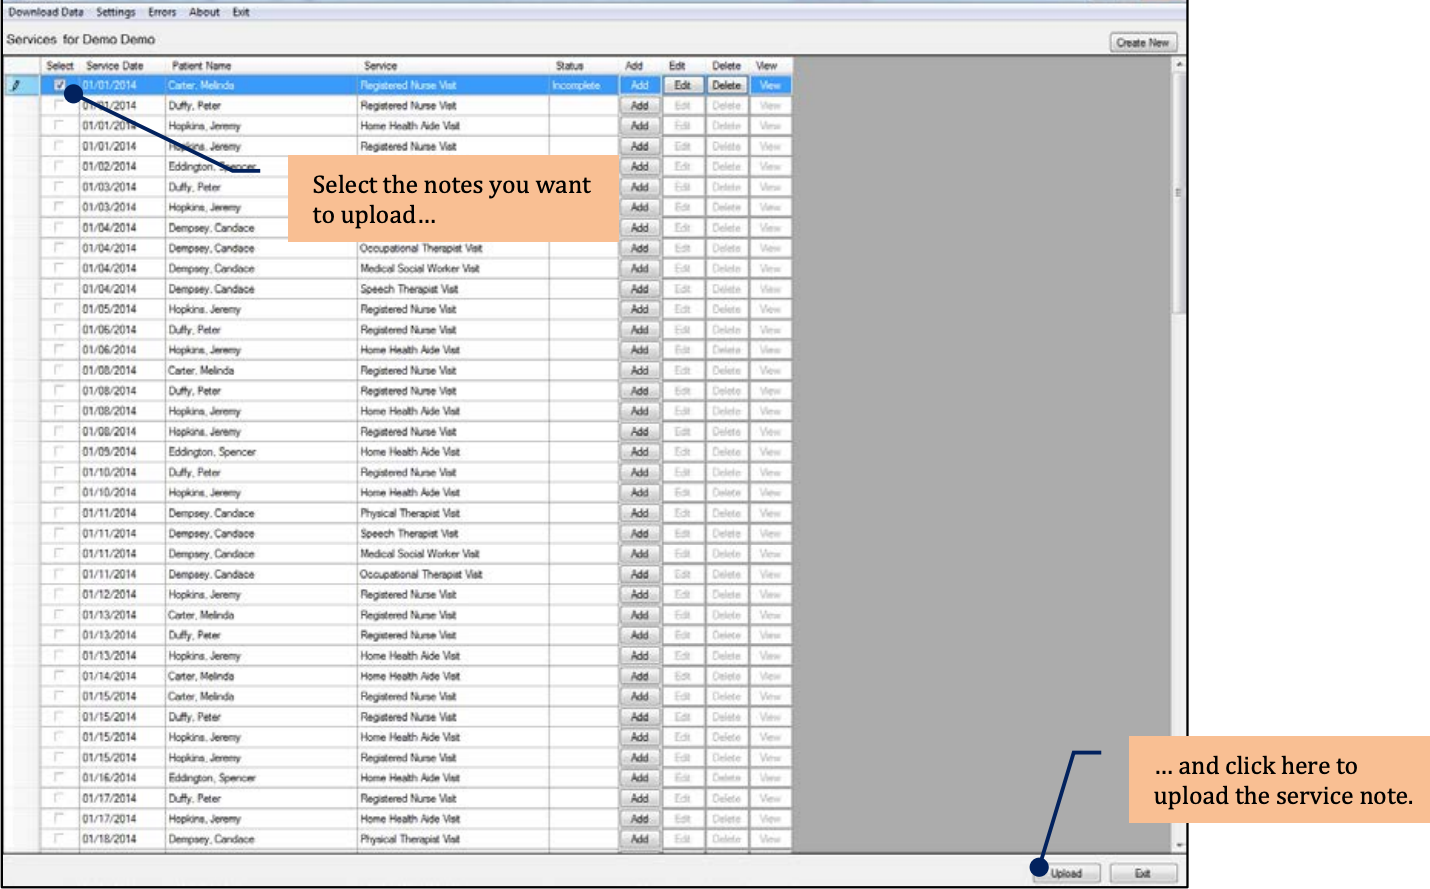
When you upload a service note to Careficient, it becomes an online form and can be used in the clinical setting or in the field. The Service list has the following information:
- Download Data - Download additional patients scheduling information.
- Settings - Do not change any of the following default settings unless instructed by Careficient Support:
- Show services through - Current and prior days' schedule for services that do not have a completed service note.
- Automatically download data - No.
- Automatically upload service notes - No.
- Upload/download data every - Never.
- Show services with uploaded forms - Yes.
- Show error log - Yes.
- Enable event tracing - No
- Errors - Use this link only as requested by Careficient Support to troubleshoot issues. This link lets you create the following:
- Error Log
- Save Error Log
- Save Event Log
- Save File
- About - Click to display the current version of Careficient Offline Forms
- Exit Link - Closes the Service List page
- Create New - If the Patient Service Note is not on the Service List, click to add a new (blank) service note for the patient. Note: Orders must already exit before you use this option. If orders do not exist, the agency cannot process the new service.
- Select check box - Check one or more completed forms to upload.
- Service Date - Service date of the visit scheduled in Careficient.
- Patient Name - Patient scheduled for service.
- Service - Type of service.
- Status - Service notes can have the following statuses:
- Blank - No service note exists
- Incomplete - You started a service not but have not marked it as complete.
- Complete - You completed the service note and it is ready to be uploaded into Careficient.
- Uploaded - A completed service note was uploaded into Careficient.
- Add/Edit/Delete
- To begin a service note for the patient, click Add
- To edit or update an existing, click Edit
- To remove a service note that you previously started, click Delete
- Upload - Upload the completed forms that you selected.
- Exit - Close the Service List page.
Adding a Service Note to an Existing Scheduled Service
To add a service note to an existing scheduled service for a patient:
1. To the right of the patient information on the Service List, click the Add button. The Create Service Note page displays.
2. From the drop-down menus, select Service Form Type, Agency Type and Service
3. Click Continue
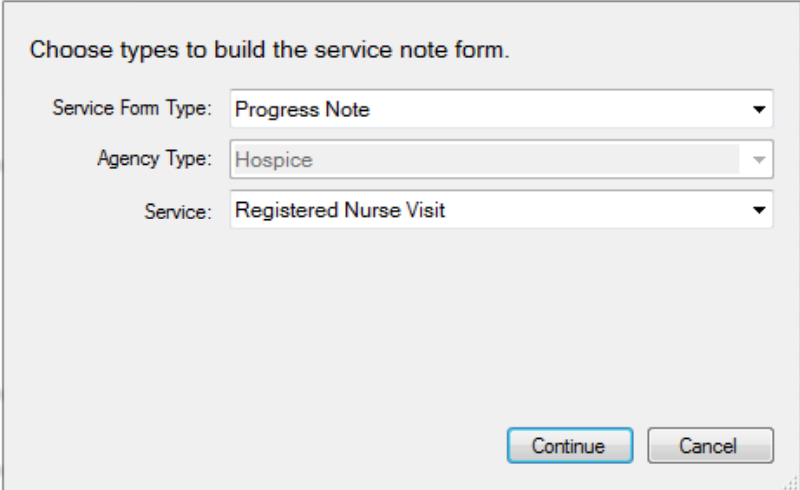
The Service Note Assessment Form displays. This form has two types of sections:
• Time Slip
• Service Note Assessment
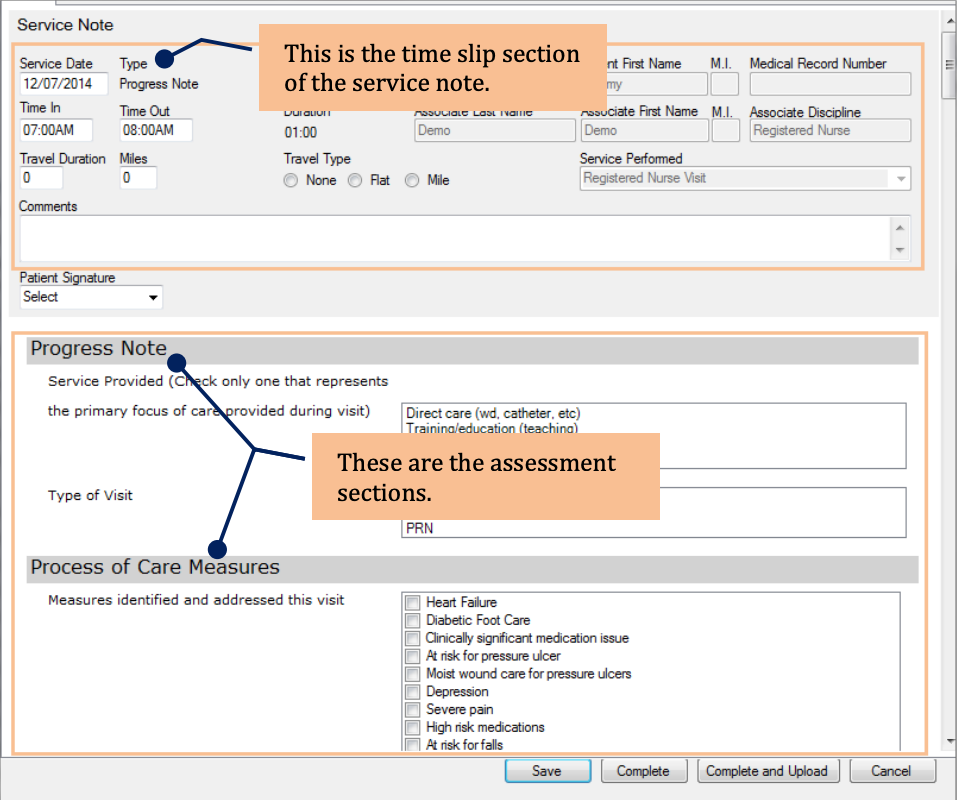
Time Slip
The time slip section of the service note has the following fields:
- Service Date - Today's date
- Patient Information - The patient's first name, last name, and medical record number.
- Associate Information - The associate's first name, last name, and discipline.
- Service Performed - The service provided to the patient.
- Time In/Time Out - Clock in and out time (required).
- Travel duration/miles - Time and distance of travel.
- Comments - General comments related to this service (required).
- Patient Signature - Identify how you collect the patient's signature. If you select the electronic signature option, click the Add Signature link.
Assessment Information
A service note can have several sections of assessment information. Each section can have several questions and fields. Items in bold text are for labelling purposes only and do not require a response.
The following options are available when you finish working with the service note:
• Save - Save and close the service note.
• Complete - Label the service note as complete, indicating it is ready to upload to Careficient.
• Complete and Upload - Label the service note as complete and upload it to Careficient. (You must
already have access to the internet and Careficient.)
• Cancel - Cancel your changes and return to the Service List.
Create New (When the Patient is not on the Service List)
You can use the Create New option when you have orders but the service does not appear on your schedule. Creating a new service note is the same if the patient is not on the Service List.
It is strongly suggested that you refrain from using the Create New option, or at least reserve its use for urgent situations. If you use this option and orders do not exist, the agency cannot process the service.
Editing a Service Note
You can edit service notes that have either an incomplete or complete status. To edit a service note, click the Edit button to the right of the patient information.
Deleting a Service Note
To delete a service note, click the Delete button to the right of the patient information. If you downloaded a patient from your Careficient schedule, clicking Delete removes the service note information. It also changes the patient status to Blank. The patient information no longer displays in the Service List.
Uploading a Completed Service Note
You can upload service notes as you complete them. You can also upload a group of completed service notes. To use the Upload feature, you must already have access to the internet and Careficient.
To upload a service note, click Complete and Upload at the bottom of the service note. To upload multiple service notes:
1. On the Service List, select each service note that has a Complete status.
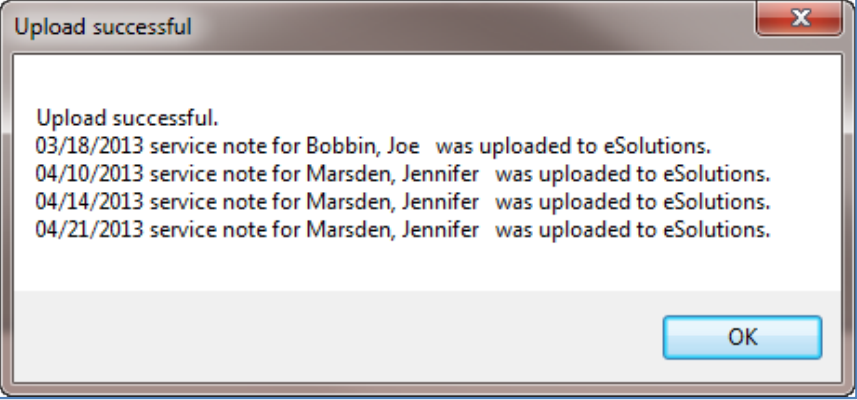
2. Click Upload. A message displays to confirm the upload.
3. The Upload Successful message displays a list of patients and related service dates.
4. Click OK
Attaching a Service Note to a Patient Schedule
The final step to completing the service note is to attach the uploaded service note to the scheduled service in Careficient. To complete this process:
1. From the Home page, right-click the scheduled service on the calendar
2. Click the Add Service Note/Assessment link.
3. In the Add Service Note dialog, click Apply Uploaded Service Note.
4. Click Continue.
5. When the Apply Service Note page displays, select the service note and click Continue.
6. When you attach the service note, the Service Note Assessment Form displays with the
information you completed on the offline form.
7. Review the information and make changes, if necessary.
8. Click Complete/Approve.