
WORK BASKET SETUP AND INSTRUCTION
To setup workbasket for associates, click on User Rules.
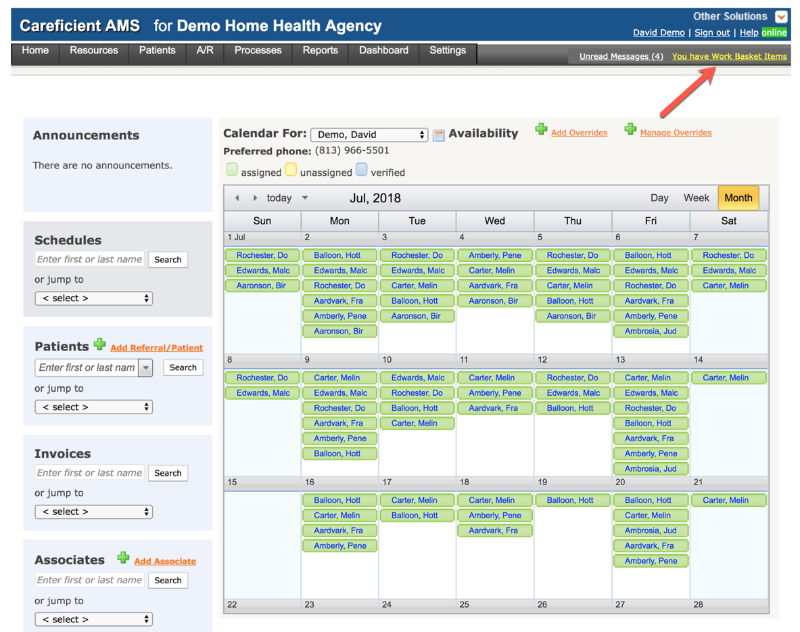
So to begin, let's go to the workbasket by clicking on “You have work basket items” in the top right corner.
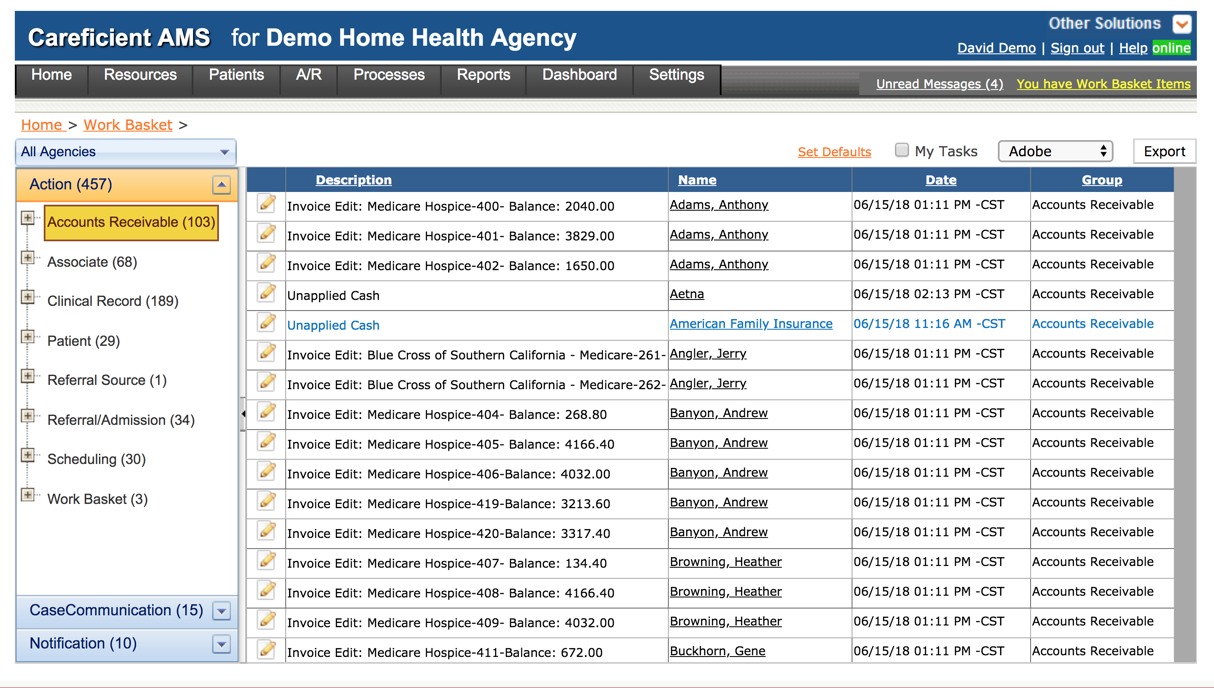
Looking at the workbasket, you will notice three areas. At the top you will see “Action” and further down, you will have “Case Communications and Notifications”. We will start with the “Actions”. Each Action has a “+” sign to the left that when clicked on will expand to show workbasket items associated with that specific action. Here we have:
 Accounts Receivable
 Agency
 Associate
 Clinical Record
 Patient
 Referral Source
 Referral/Admission
 Scheduling
 Work Basket
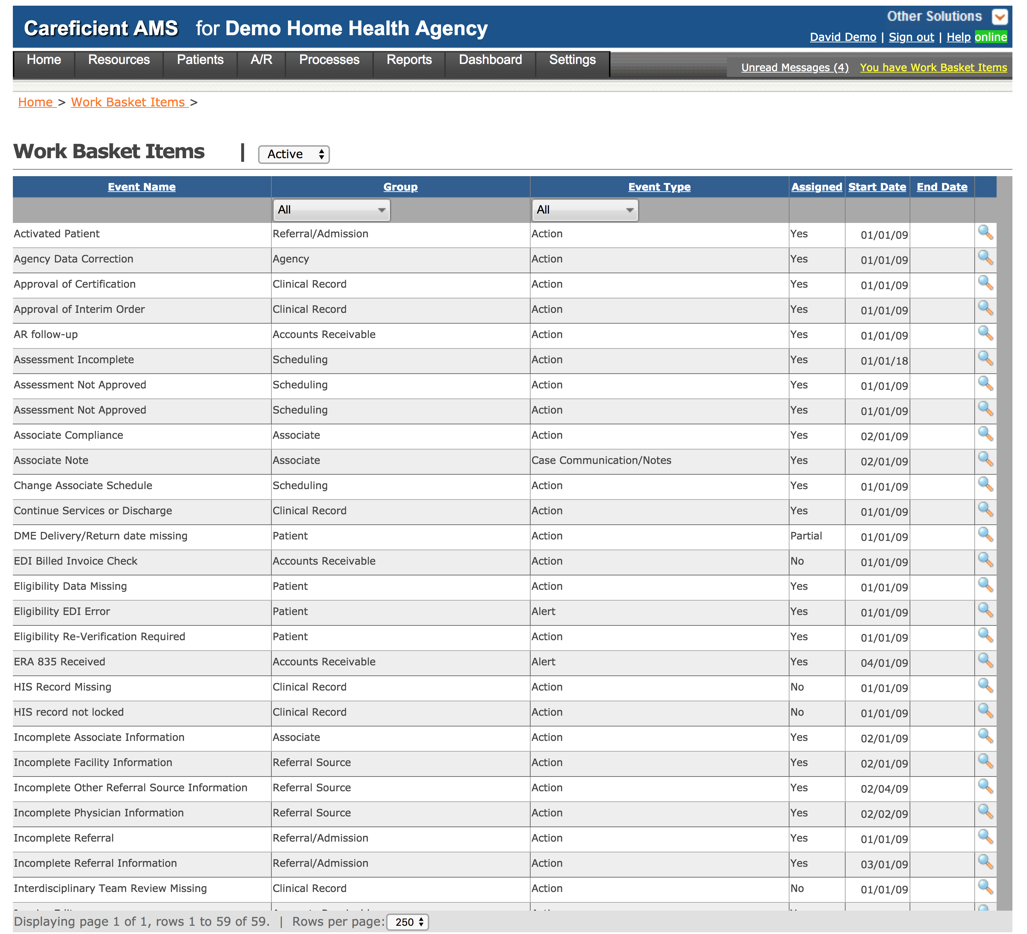
You can learn more about these Work Basket User Rules here: Work Basket Items.
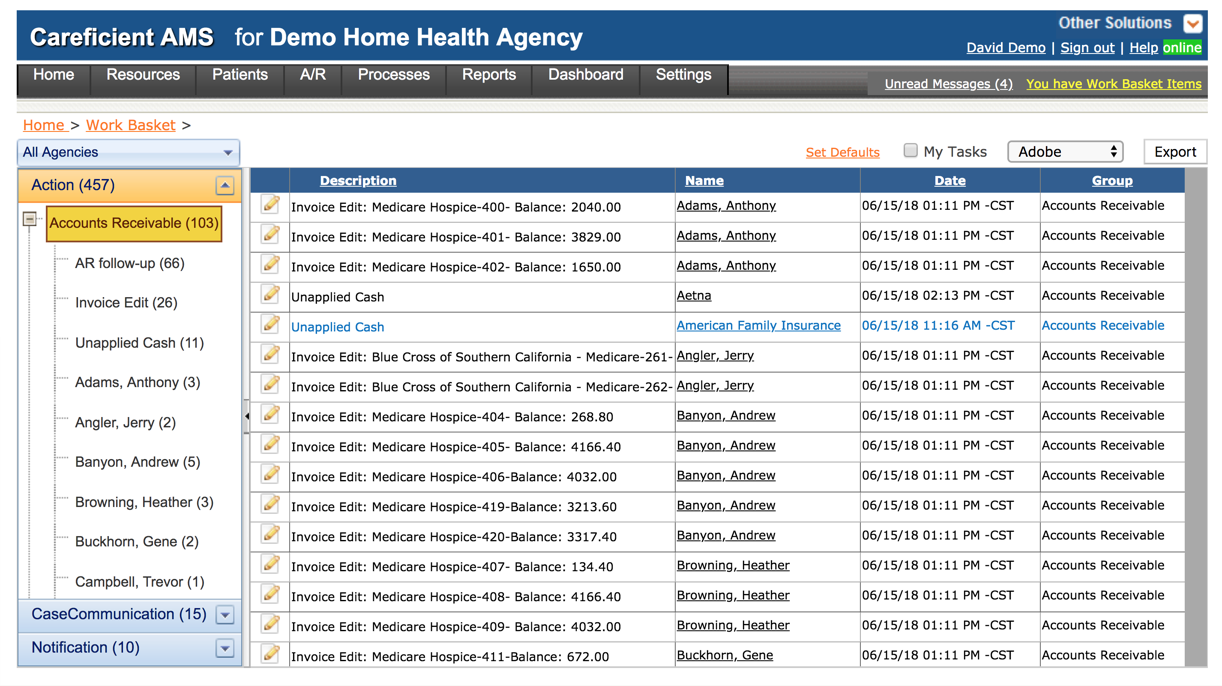
Under ”Accounts Receivable” you have the following action items to the right of the screen. We will not go over every item but you will have this PDF to go by. Action Items do not fall out of workbasket until they are taken care of. You will notice to the right that there is a link under “name”. If you click on the link it will take you to the area where the item needs to be corrected. You can also click on the "edit pencil" to go to the area. You can run reports from each item as you see the “export” button to the top right. These can be exported in adobe or spreadsheet format.
 AR Follow-up
 EDI Billed Invoice Check
 ERA 835 Received
 Invoice Edit
 Unapplied Cash
Under "Agency" you will find
 Agency Data Correction
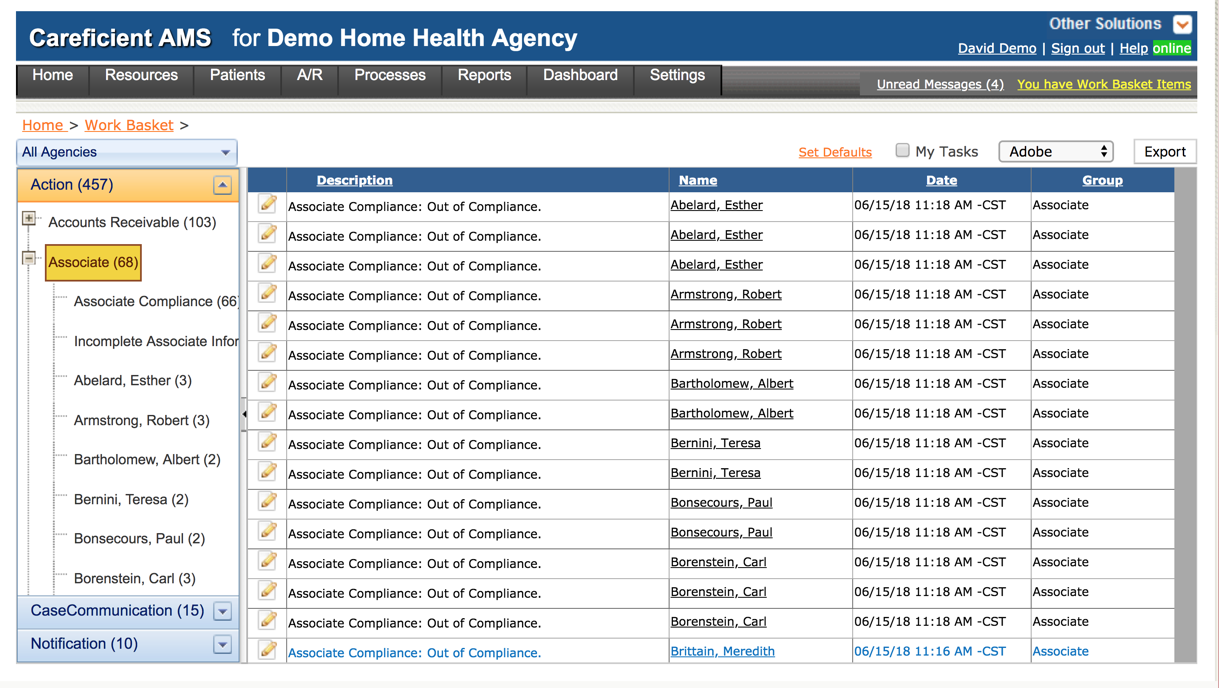
Under “Associate” you will find items that notify you when the associate is not compliant such as with things like their license may be expired, CPR training needed, etc.
 Associate Compliance
 Associate License Information
 Incomplete Associate Information
 Territory Assignment - No Associate Assigned To Territory
Clinical record items notify you that you have certs, orders, etc that need to be reviewed and/or approved. It will let you know that you have oasis records that are not locked. There are many types of notifications within workbasket that help to keep your agency running smooth.
 Approval of Certification
 Approval of Interim Order
 Continue Services or Discharge
 HIS Record Missing
 HIS record not locked
 Interdisciplinary Team Review Missing
 OASIS record missing
 Oasis record not locked
 Oasis rejects from transmission
 Pain Response Follow-Up
You can also tell that you have orders out that you need physician signature for or orders that need to be sent to the physician for signature. You will receive notification of upcoming recerts and a need to either recertify or discharge the patient. This helps you know when recerts are coming up so that you know who to hold case conference on.
 Physician Signature Date missing I/O
 Physician Signature/Date Missing Certification
 Physician Visit Date Missing on Certification
 Physician Visit Date Missing on Interim Order
 Print/Mail Certification
 Print/Mail Interim Order
 Recertification or Discharge required
 Therapy Utilization Check
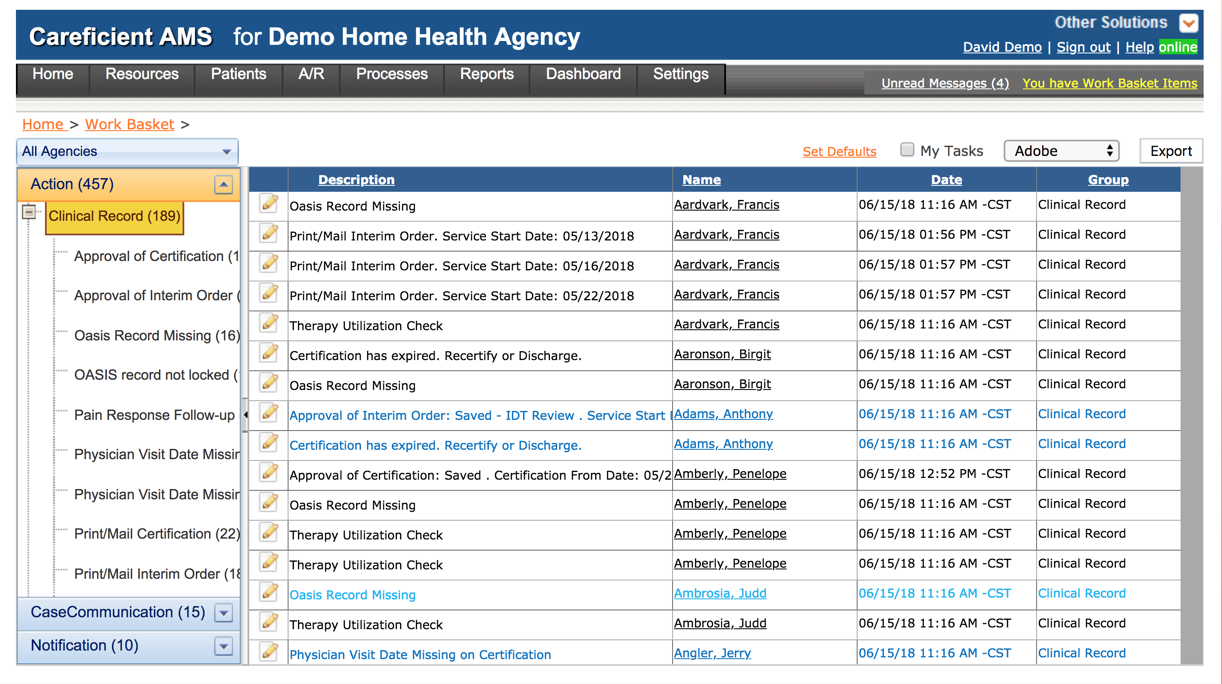
Under EDI you have the following options:
 Transmit HIS
 Transmit Oasis
The items under Patient will notify you when you need to reverify the patients eligibility or if you have a patient that needs to be scheduled to have their initial visit.
 DME Delivery/Return date missing
 Eligibility Data Missing
 Eligibility Re-Verification Required
 Patient with no Services
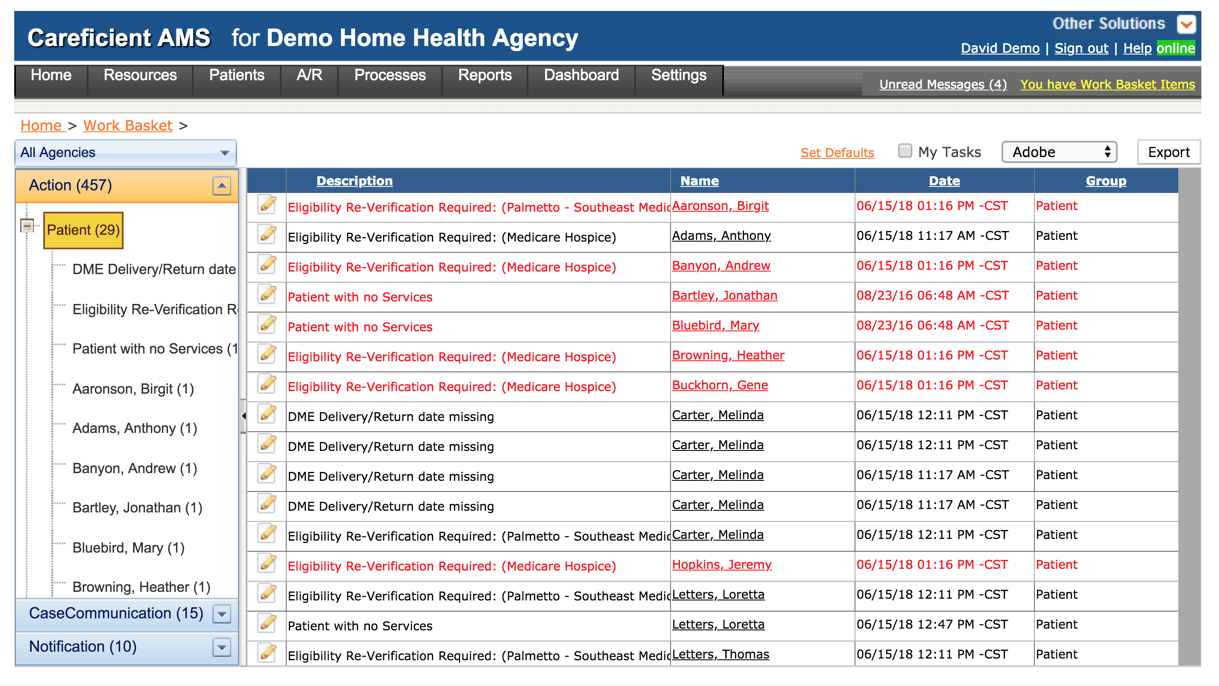
Payer items are as follows:
 Payer Data Correction
Referral Source items notify you that you have incomplete facility, referral source or physician information
 Incomplete Facility Information
 Incomplete Other Referral Source Information
 Incomplete Physician Information
 Physician License Information
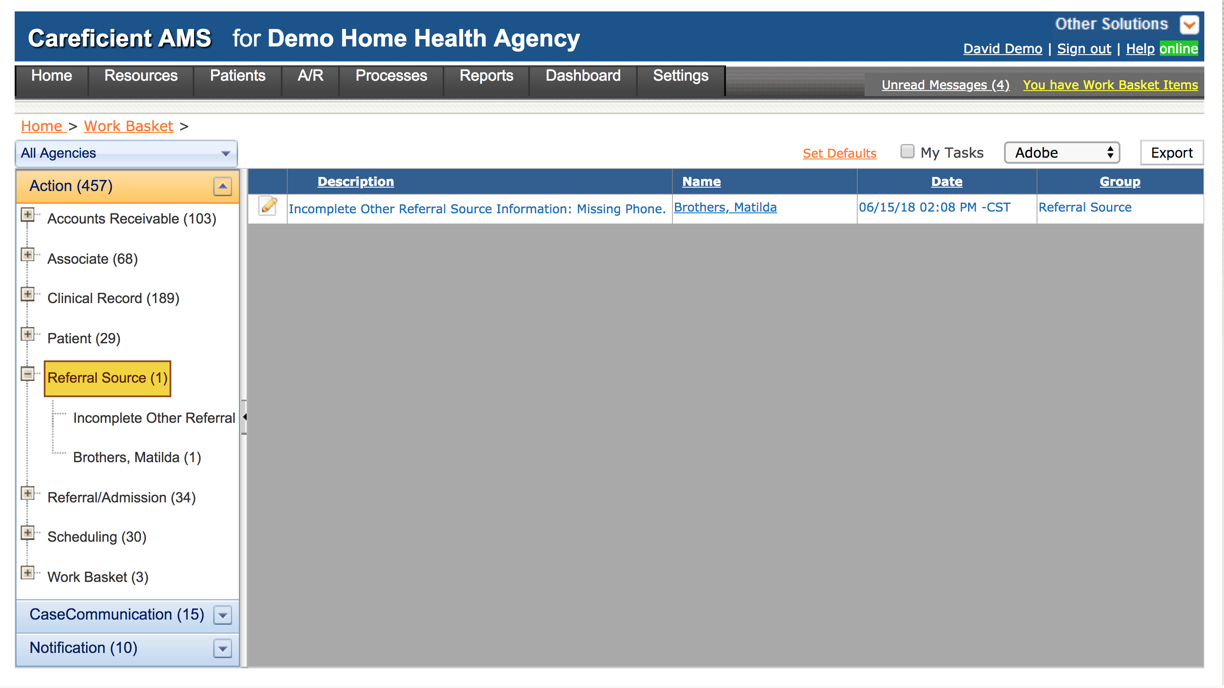
Referral / Admission items notify you of missing information in a patients record, incomplete referrals, and incomplete payer data.
 Activated Patient
 Incomplete Referral
 Incomplete Referral Information
 Patient-Payer Data Incomplete
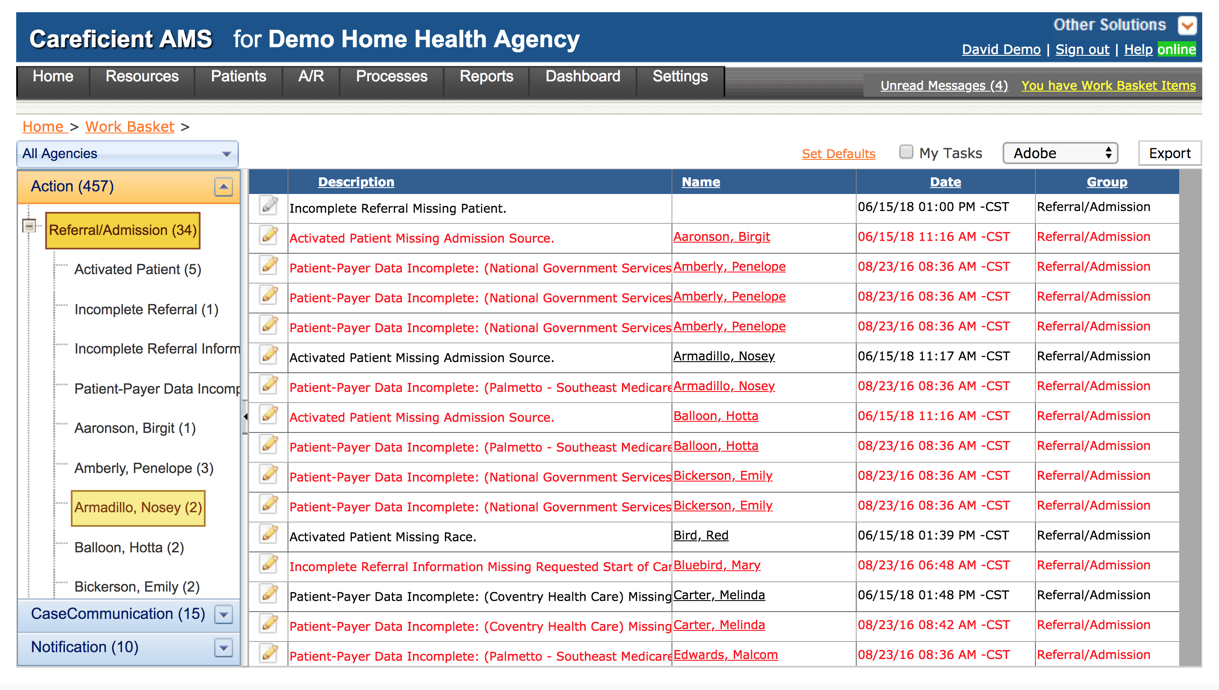
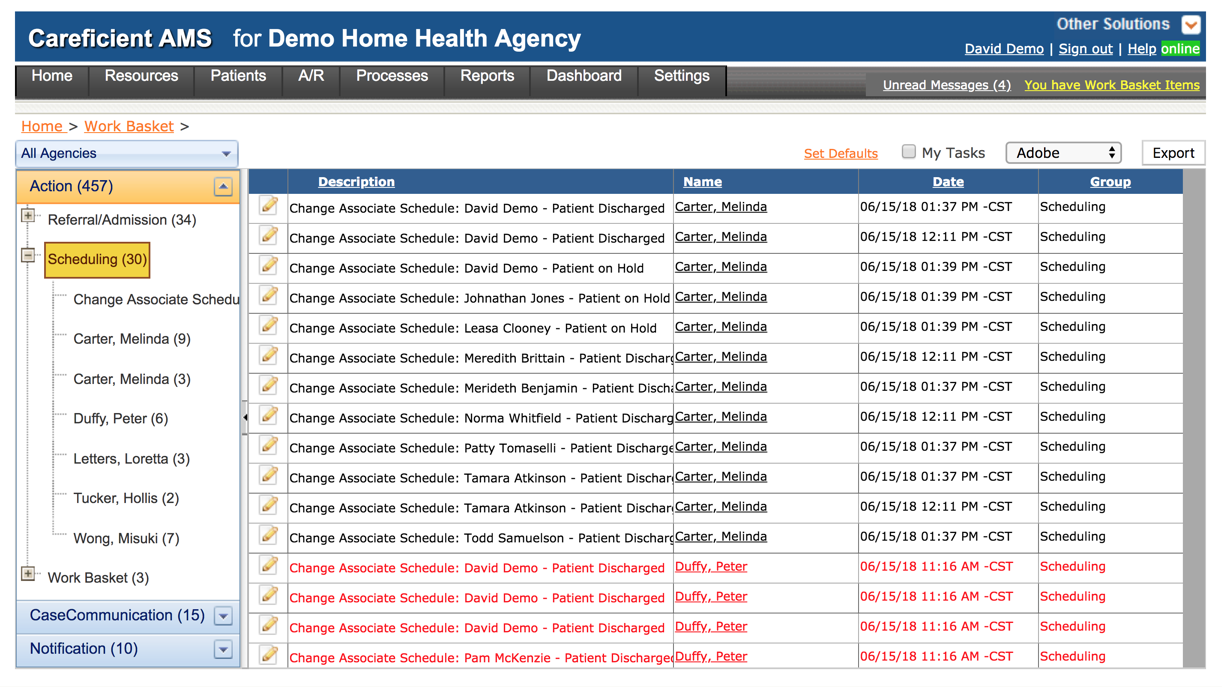
Scheduling items notify you that you have assessments that have been added but are not completed or completed and not approved yet. It will also let you know you have patients that have visits but an associate has not been scheduled to those visits yet.
 Assessment Incomplete
 Assessment Not Approved
 Change Associate Schedule
 Scheduling Assignment
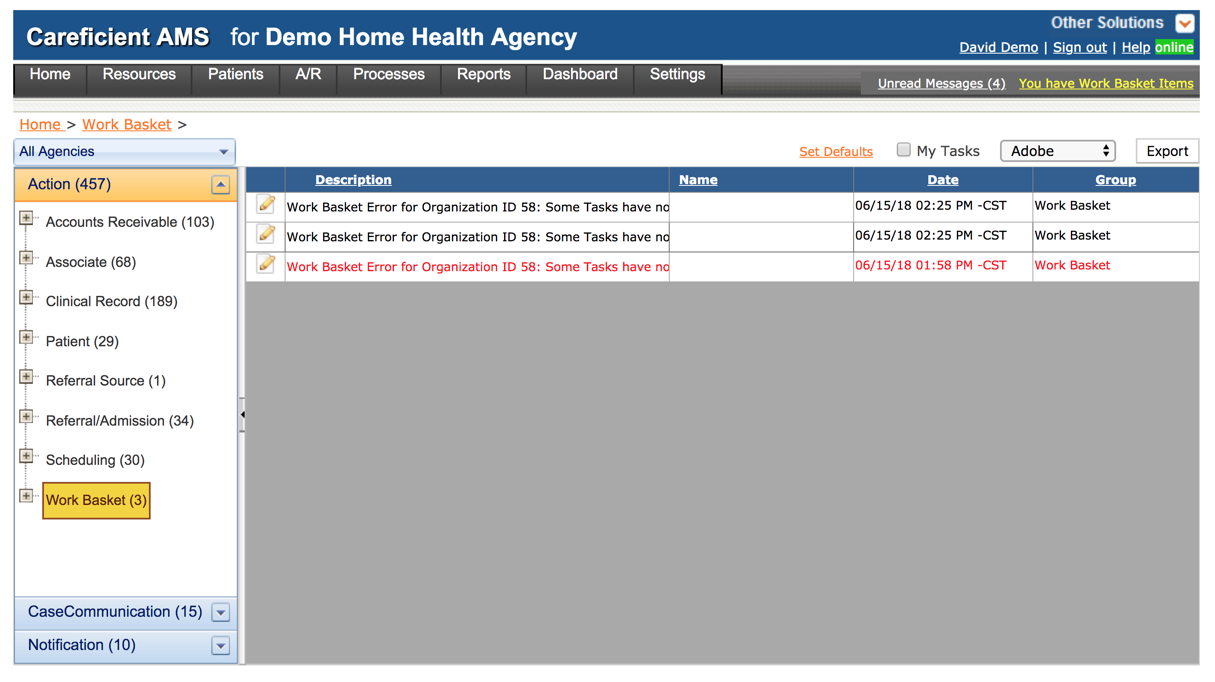
Workbasket errors usually indicate that you have a workbasket item but you haven’t assigned anyone to get the notifications yet.
 Work Basket Error
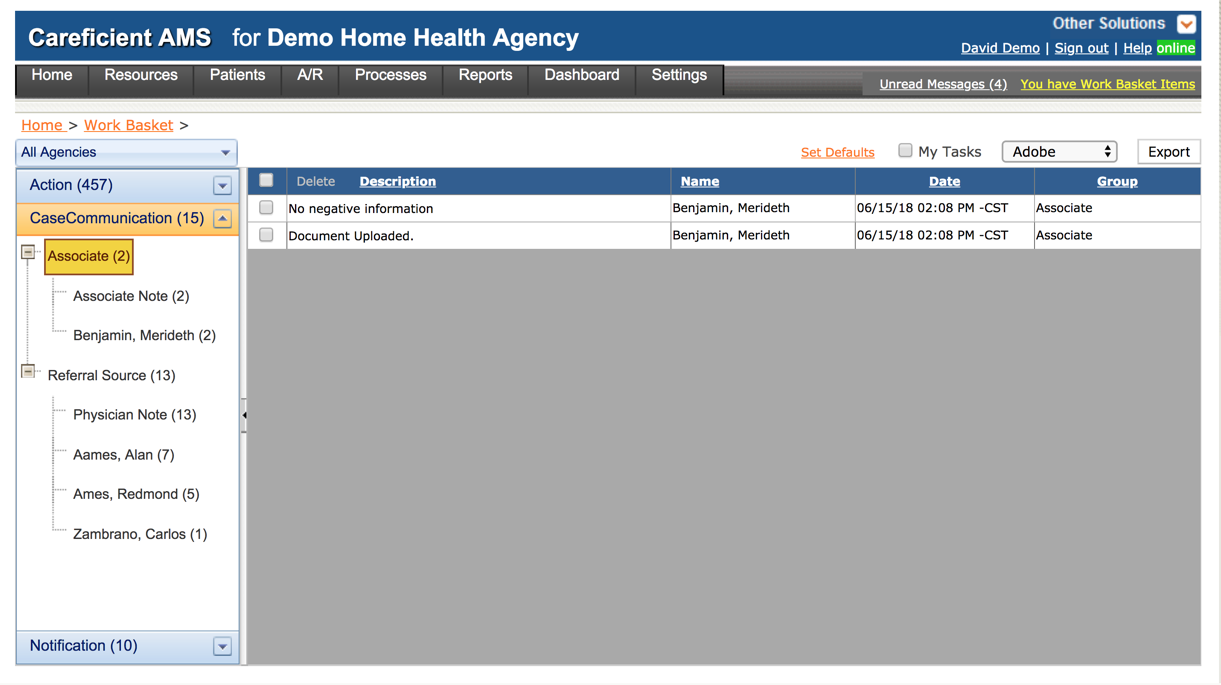
Case Communication is the 2nd area in the workbasket that we will discuss. It works differently than the Action Items. These are more like notifications. For instance if a note is added to an associates master file, it will notify you that you need to view the note. Same with the physician notes.
 Associate Note
 Physician Note
Notifications works pretty much like the Case CommunIcations. Accounts receivable notifies you of transmission errors, new admissions, referrals, non-admits, oasis warnings from transmission, patients discharged, placed on hold or care resumed.
 Eligibility EDI Error
 New Admission
 New Referral
 Non-admits
 Oasis warnings from transmission
 Patient discharged
 Patient on-hold
 Resume Patient Care
 Service Note Alerts
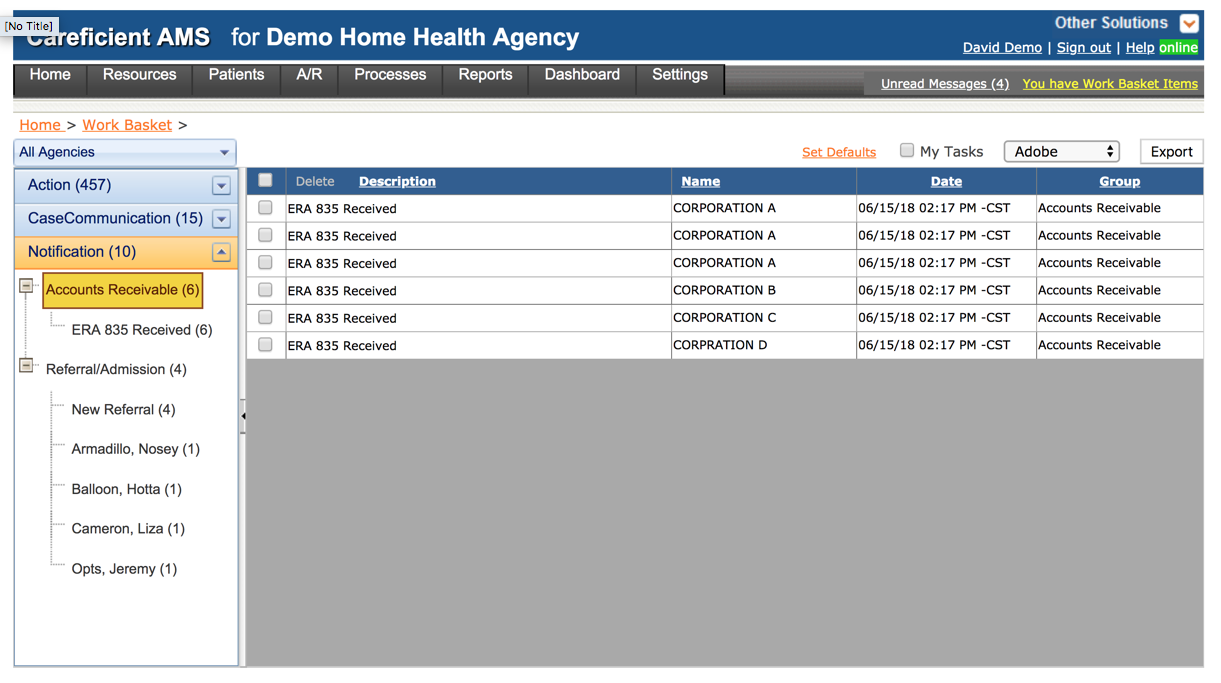
For Case Communications and Notifications, once you have reviewed these, they can be deleted by clicking on the checkbox to the left of them and clicking on “delete”.
If you allow the workbasket to get full of these type of notifications, it will slow your workbasket down tremendously. I recommend deleting them once you have looked at them.
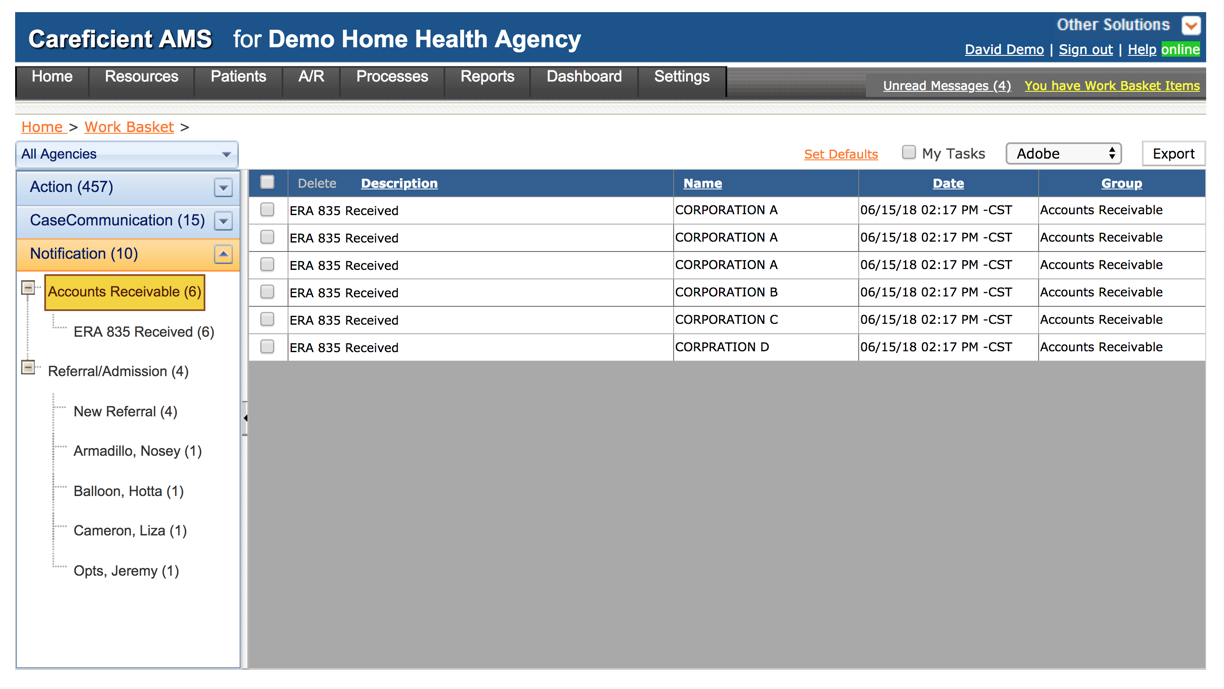
You can change the default display screen to show only the group(s) of action items you want to work with every time you access your Work Basket. For example: You have access to every Work Basket action item. The default is “Accounts Receivable”. You want your default to be “Clinical Record”, “Patient” and “Scheduling” “action groups. You can change this default using the following path:
 Select the You have Work Basket Items link from the menu bar
 Select the Set Defaults link above the Work Basket items listing
 Check one or multiple items that appear in Action Items pop-up screen
 Select the SAVE button
This will change your display to allow access to only those action item groups that you checked every time you access Work Basket. If you changed the display and want to return to the original display, you will need to select the Set Defaults link, check the box next to the Action Items label and select the SAVE button.
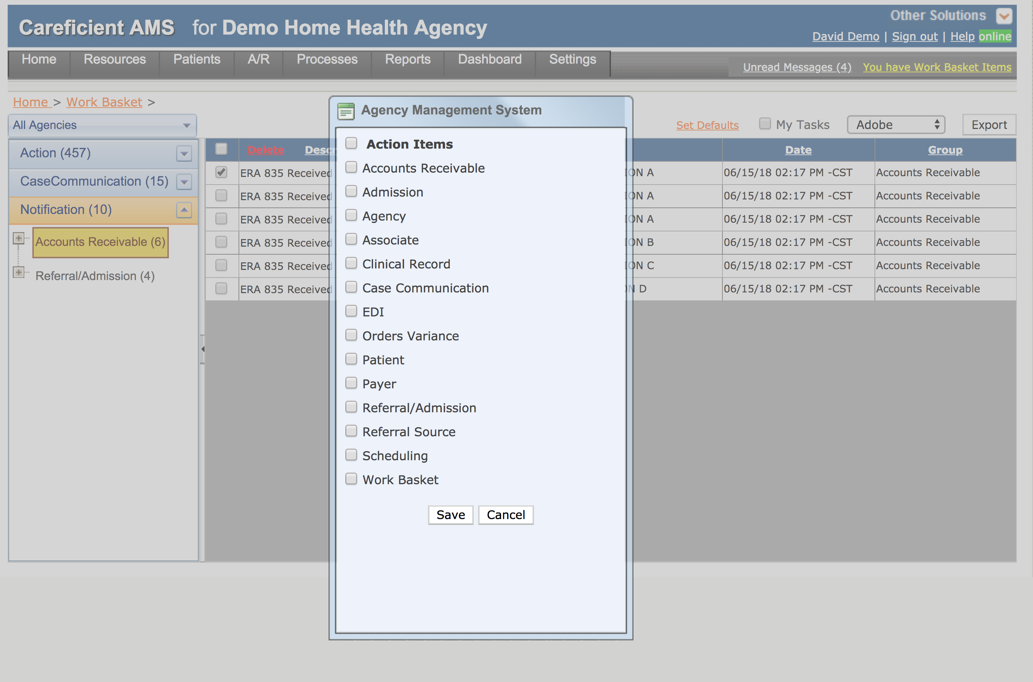
You can identify individual tasks that you may be responsible for from a listing of all tasks that fall under a specific group or action item. For example: There are 50 incomplete Service Notes that appear in Work Basket. You started 15 of these service notes. You can change the Work Basket view to only display those 15 records that you need to complete/approve. To make this change, use the following path:
 Select the You have Work Basket Items link from the menu bar
 Check the box for "My Tasks" that appears above the Work Basket Items listing.
This will show Work Basket action items that are your responsibility.
The “My Tasks” feature will automatically display items that you started, but have not completed (i.e., Service Notes or if you are the last person to update physician orders, or other areas of the application that are not in a completed/approved status, etc. For example:
If you approve a physician order, the next step is to send the order to the Physician for signature. If your Work Basket Assignment provides you access to see this next step in the process, this will show up in your individual Work Basket as an open item as you are the last person to complete this record before it moves to the next step in the process. If you have an administrative associate that distributes orders to the physician, it will show in their Work Basket action items list if they do not check the “My Tasks”.
Depending on the action items, users may want to toggle back and forth between viewing “My Tasks” and all tasks (no checkmark).
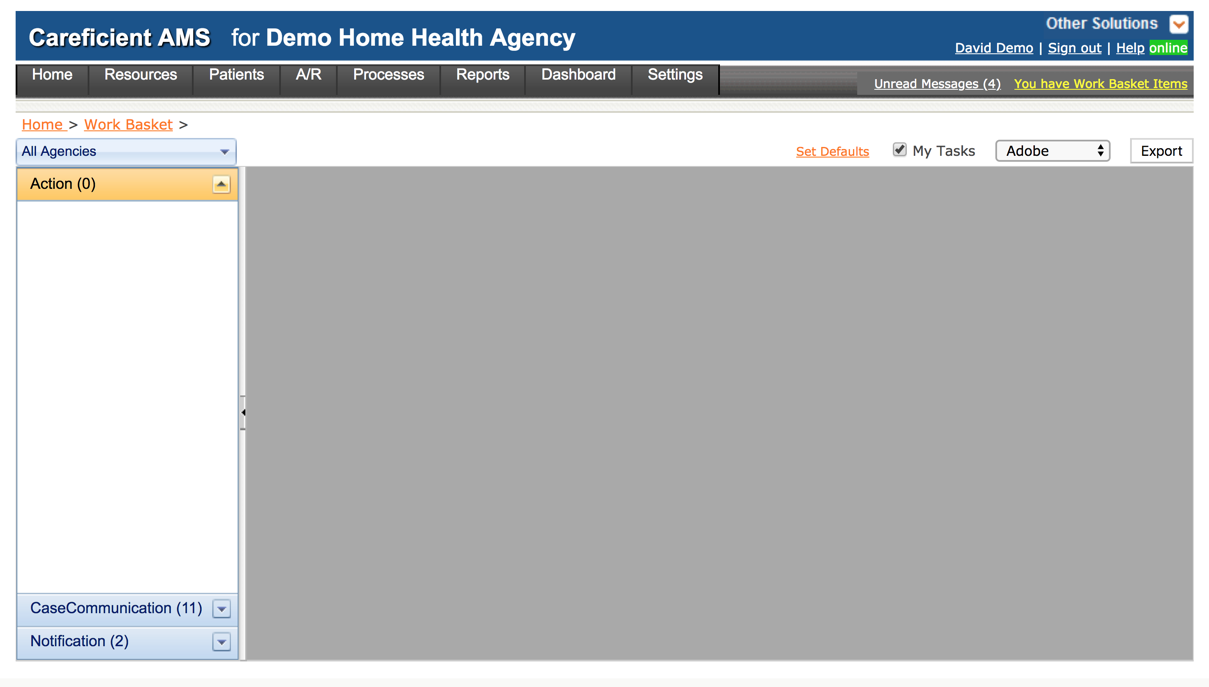
You can now filter Work Basket records by an individual team assigned to patient encounter records. You can use this filter for the following action items:
 Accounts Receivable group
 AR follow-up
 InvoiceEdit
 Clinical Record group
 All action events for this group
 Patient group
 All action events for this group
 Referral/Admission group
 All action events for this group
 Scheduling group
 All action events for this group
Additionally, you can filter Case Communication and Notification information by team for patient related information. Use the following path to access Work Basket:
 Select the You have Work Basket Items link from the main menu toolbar
 Select an “Action” group from the left side of the screen that you want to work with; if you want a specific “Action” item, select the “plus sign” to the left the “Action” group and then select the item from the list (i.e., Action group = Clinical Record, item = Approval of Certification)
 To filter by team, select the appropriate team from the “All Teams” dropdown list that appears above the detail grid
If you want to work with Case Communications or Notifications select either one of them to display information for that area of Work Basket. Once you see that area of Work Basket display you can also filter the patient information that is listed by team.
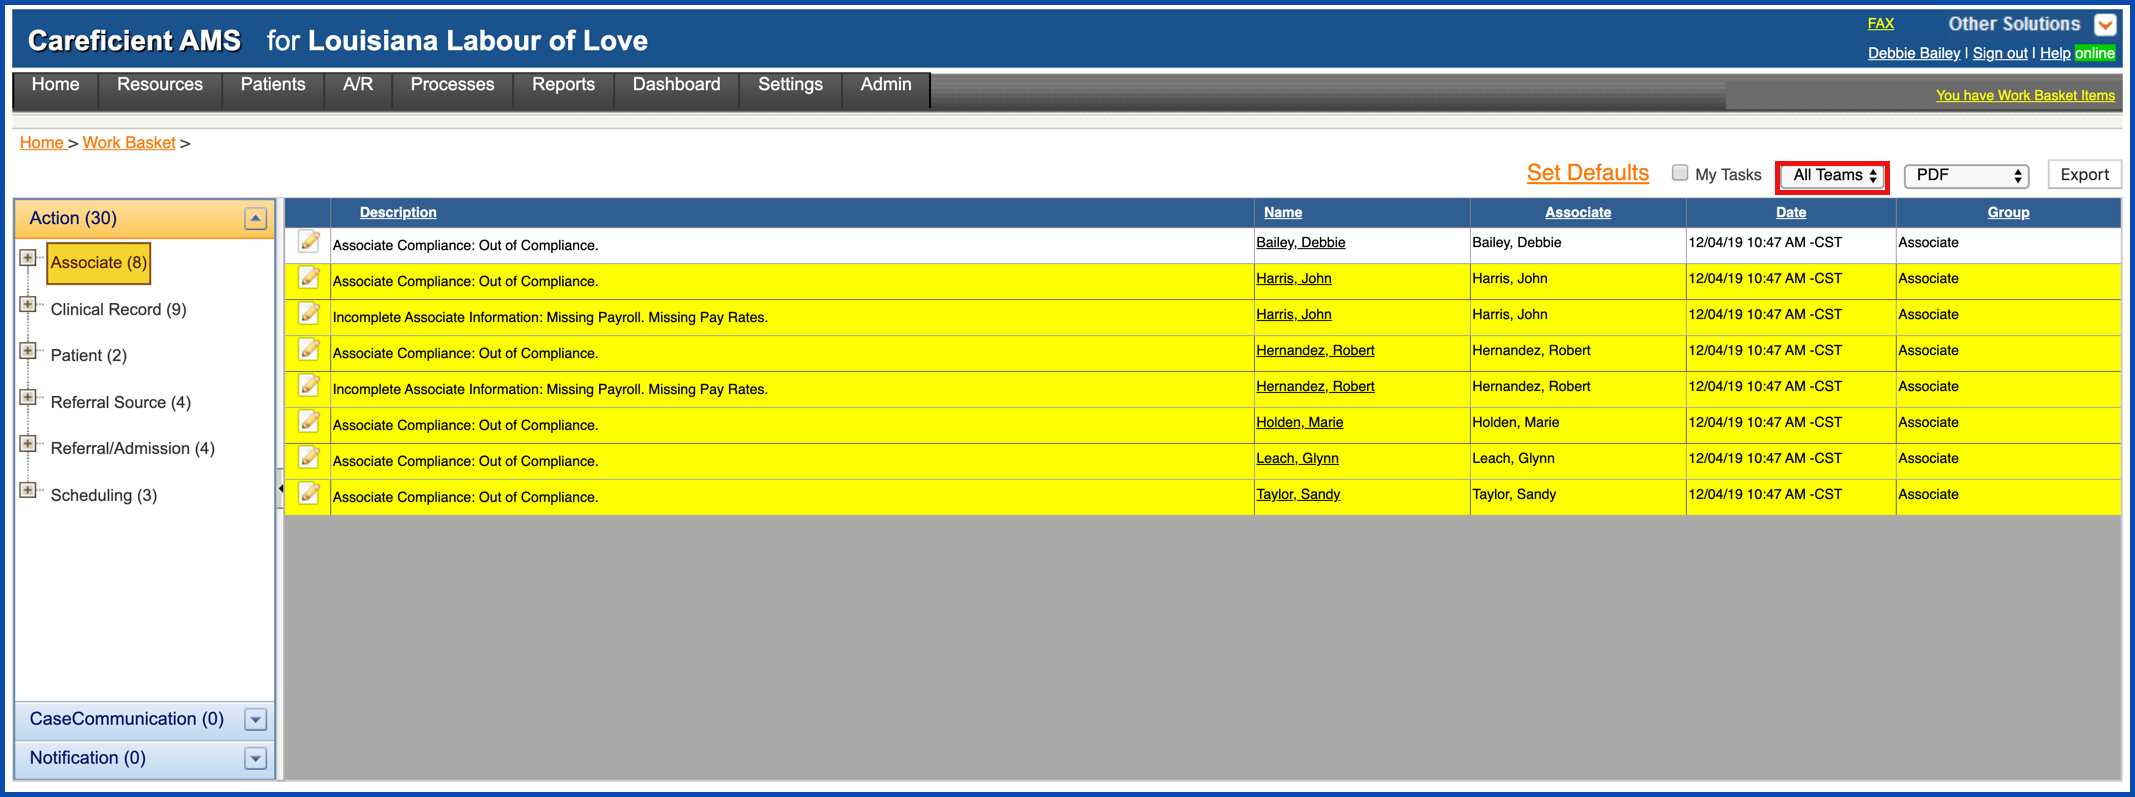
Click here to learn more about Work Basket Items.
Now let's look at the User Rules and how to setup your associates workbasket.