CUP REVIEW 
This option provides you with a list of Patients that have a Clinical Update interim order. If you are not using the Agency rule that reads: “Process To Connect Care Needs To 485/CUP”, you will only see the following information:
- Patient Name
- Effective Date (of interim order)
- From Date (Hover over the actual date to see the cert period from/to dates)
- CUP status
- ID (interim order ID)
- Physician
- CC (Case Conference: Yes/No)
- “Edit” icon that lets you edit the interim order
- “Printer” icon that lets you view/to print the interim order
- “View actions” dropdown arrow that lets you attach care needs, edit the effective date as well as apply service note data to the form
The rest of the columns will be blank.
If you activate the agency rule that reads: “Process to connect care needs to 485/CUP”, additional information displays in the rest of the columns for Clinical Updates that you are using to document your Case Conference/Meetings.
This additional information includes:
- Care Need (shows each Care Need attached to the CUP interim order)
- Discipline attached to the Care Need
- Start Date (shows the date the Care Need starts)
- Level (severity/priority of the Care Need)
- CN, G, I (Other Care Needs, Other Goals, Other Interventions documented on the Care Need)
- Icons to Edit Care Need , Delete Care Need , Print Care Need
- “View actions” dropdown arrow that lets you:
- Add/Edit Goals, including descriptions
- Add/Edit Interventions, including descriptions
You can use this option to manage your Case Conference/Meetings and easily update Care Needs, Goals and Interventions as a result of the Case Conference/Meeting outcome for each patient.
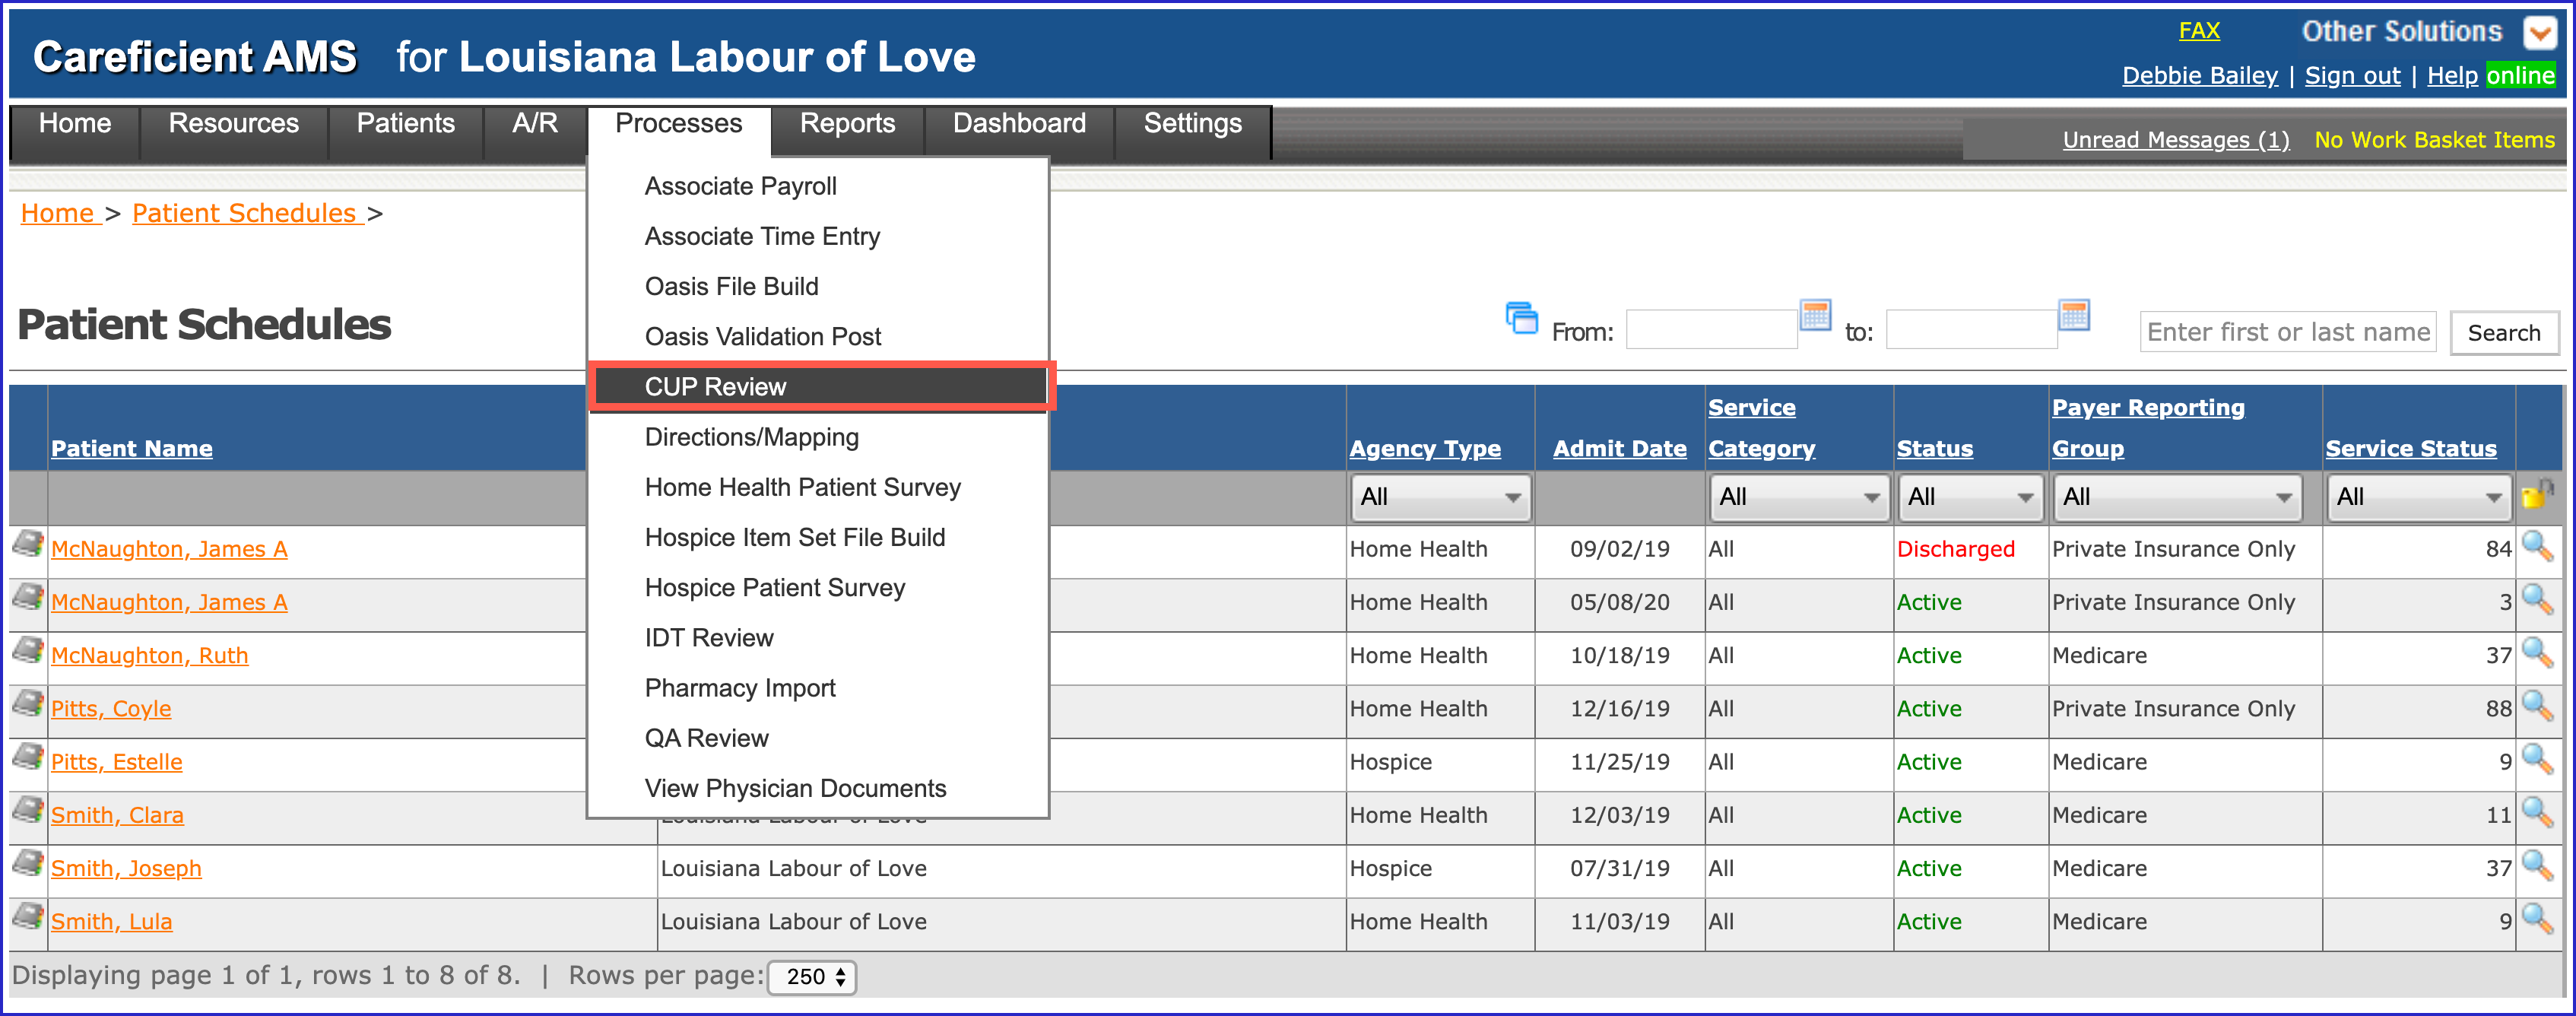
Go to Processes > CUP Review
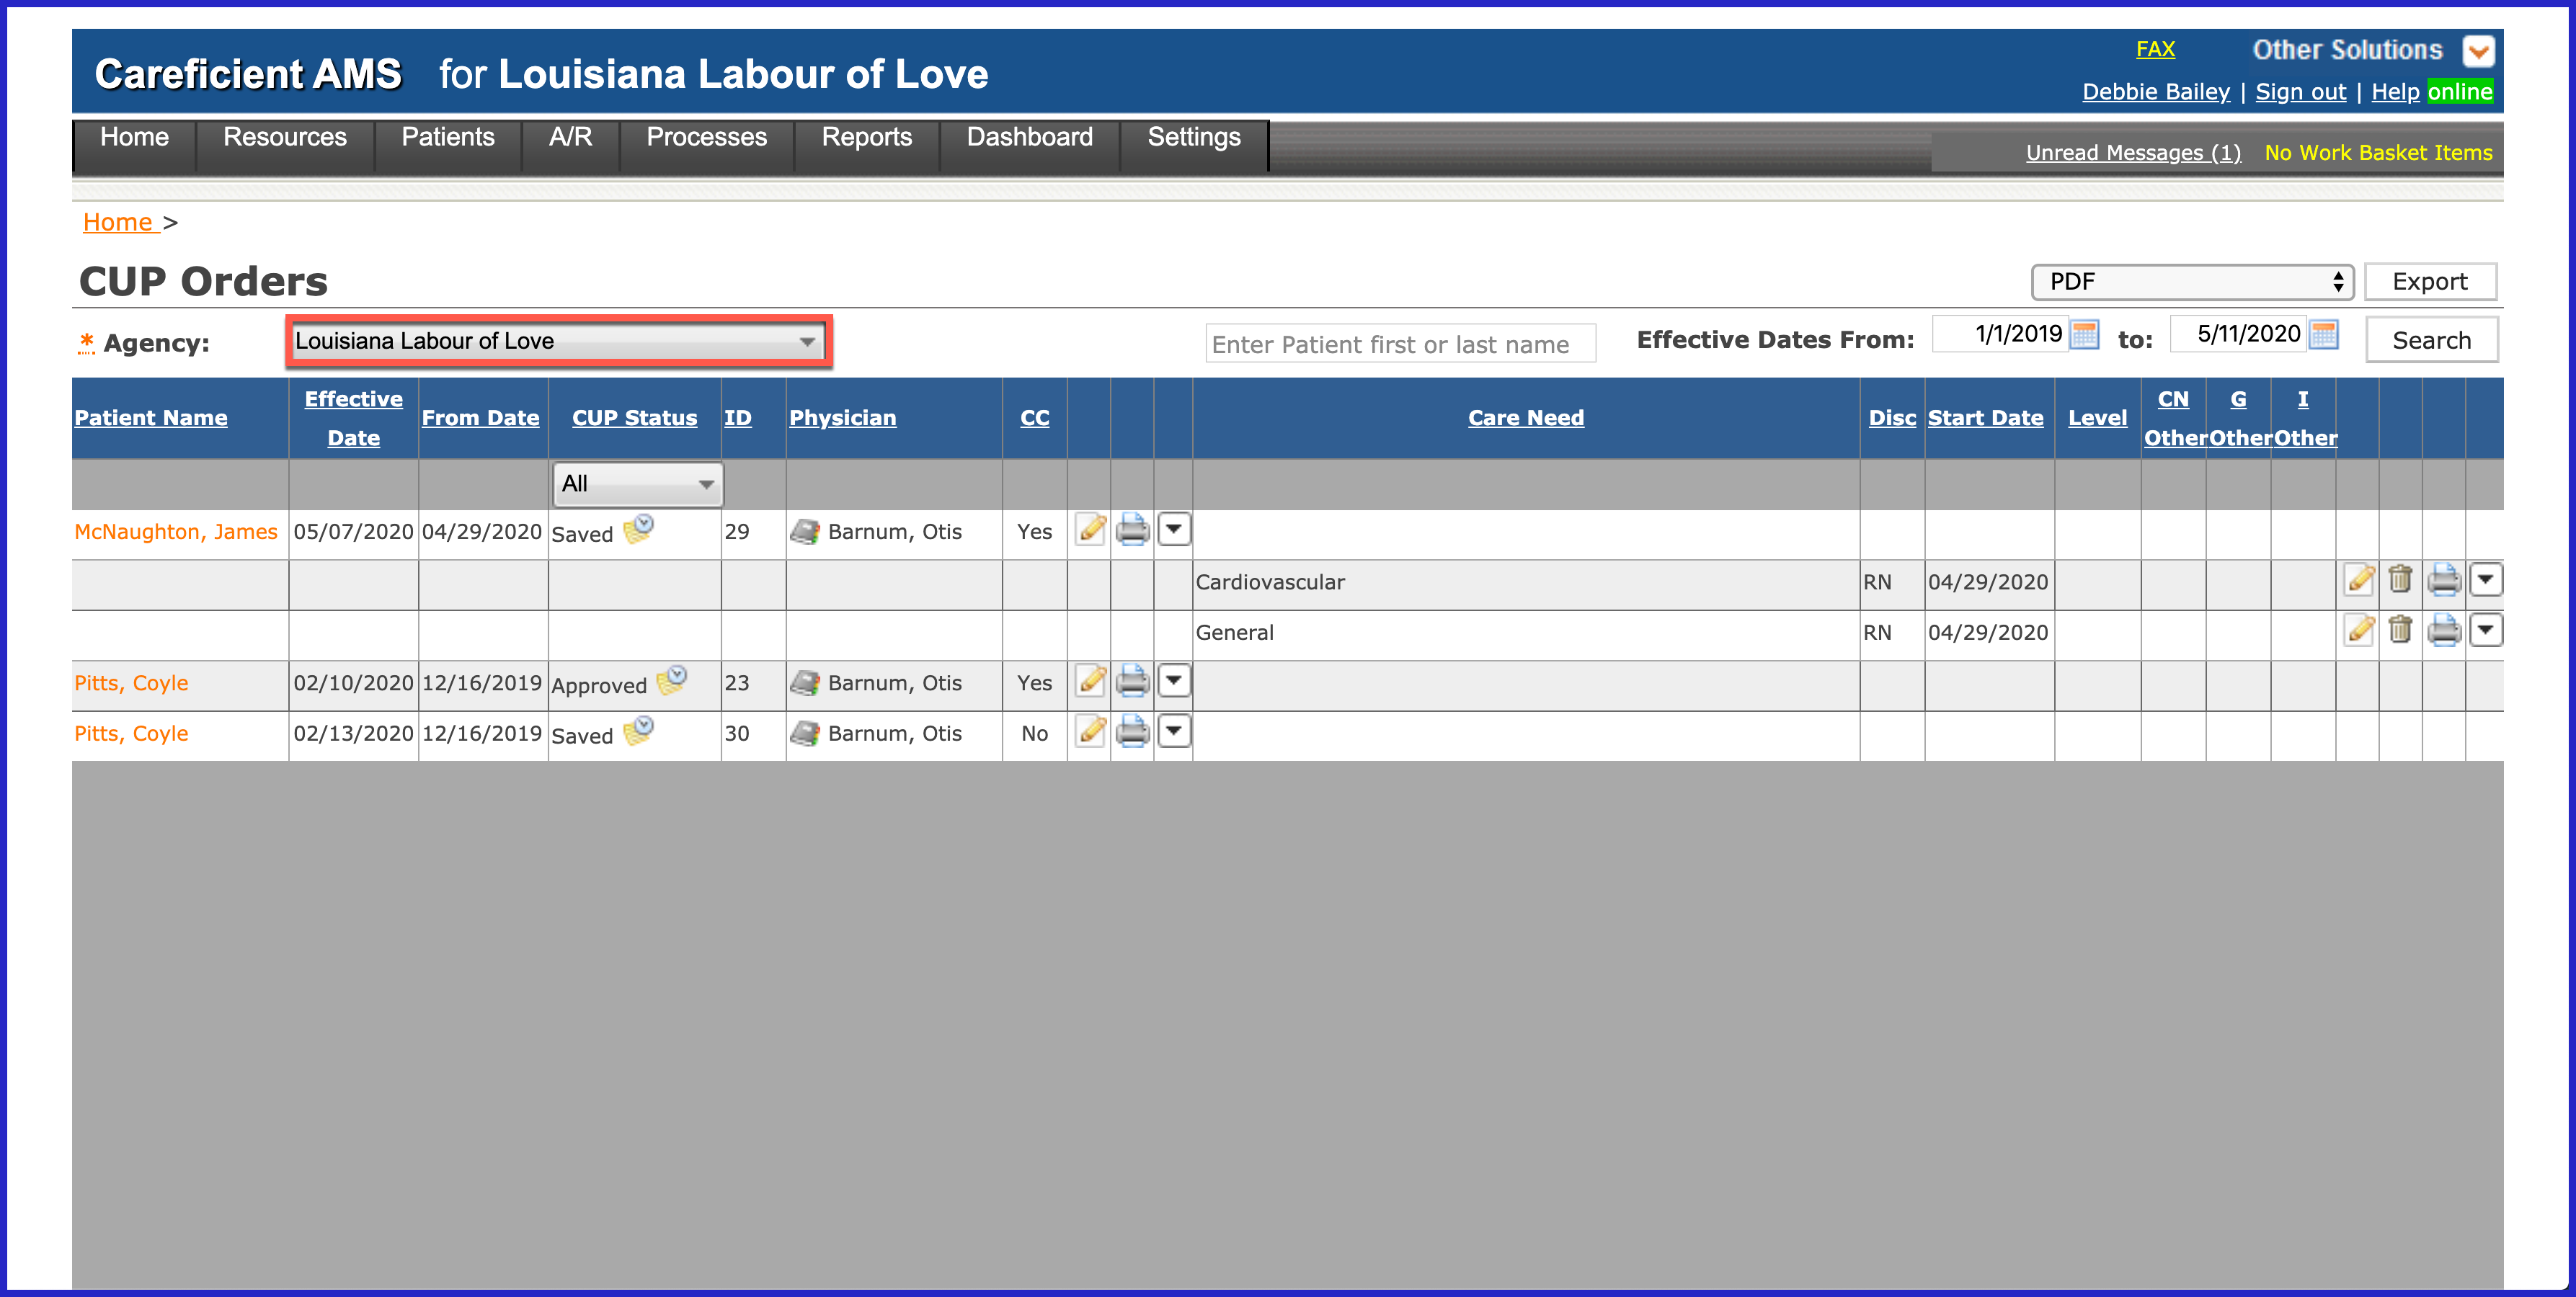
All CUP orders will populate here regardless of whether they are for Case Conference or just a normal Clinical Update Order. Choose your agency from the drop down.
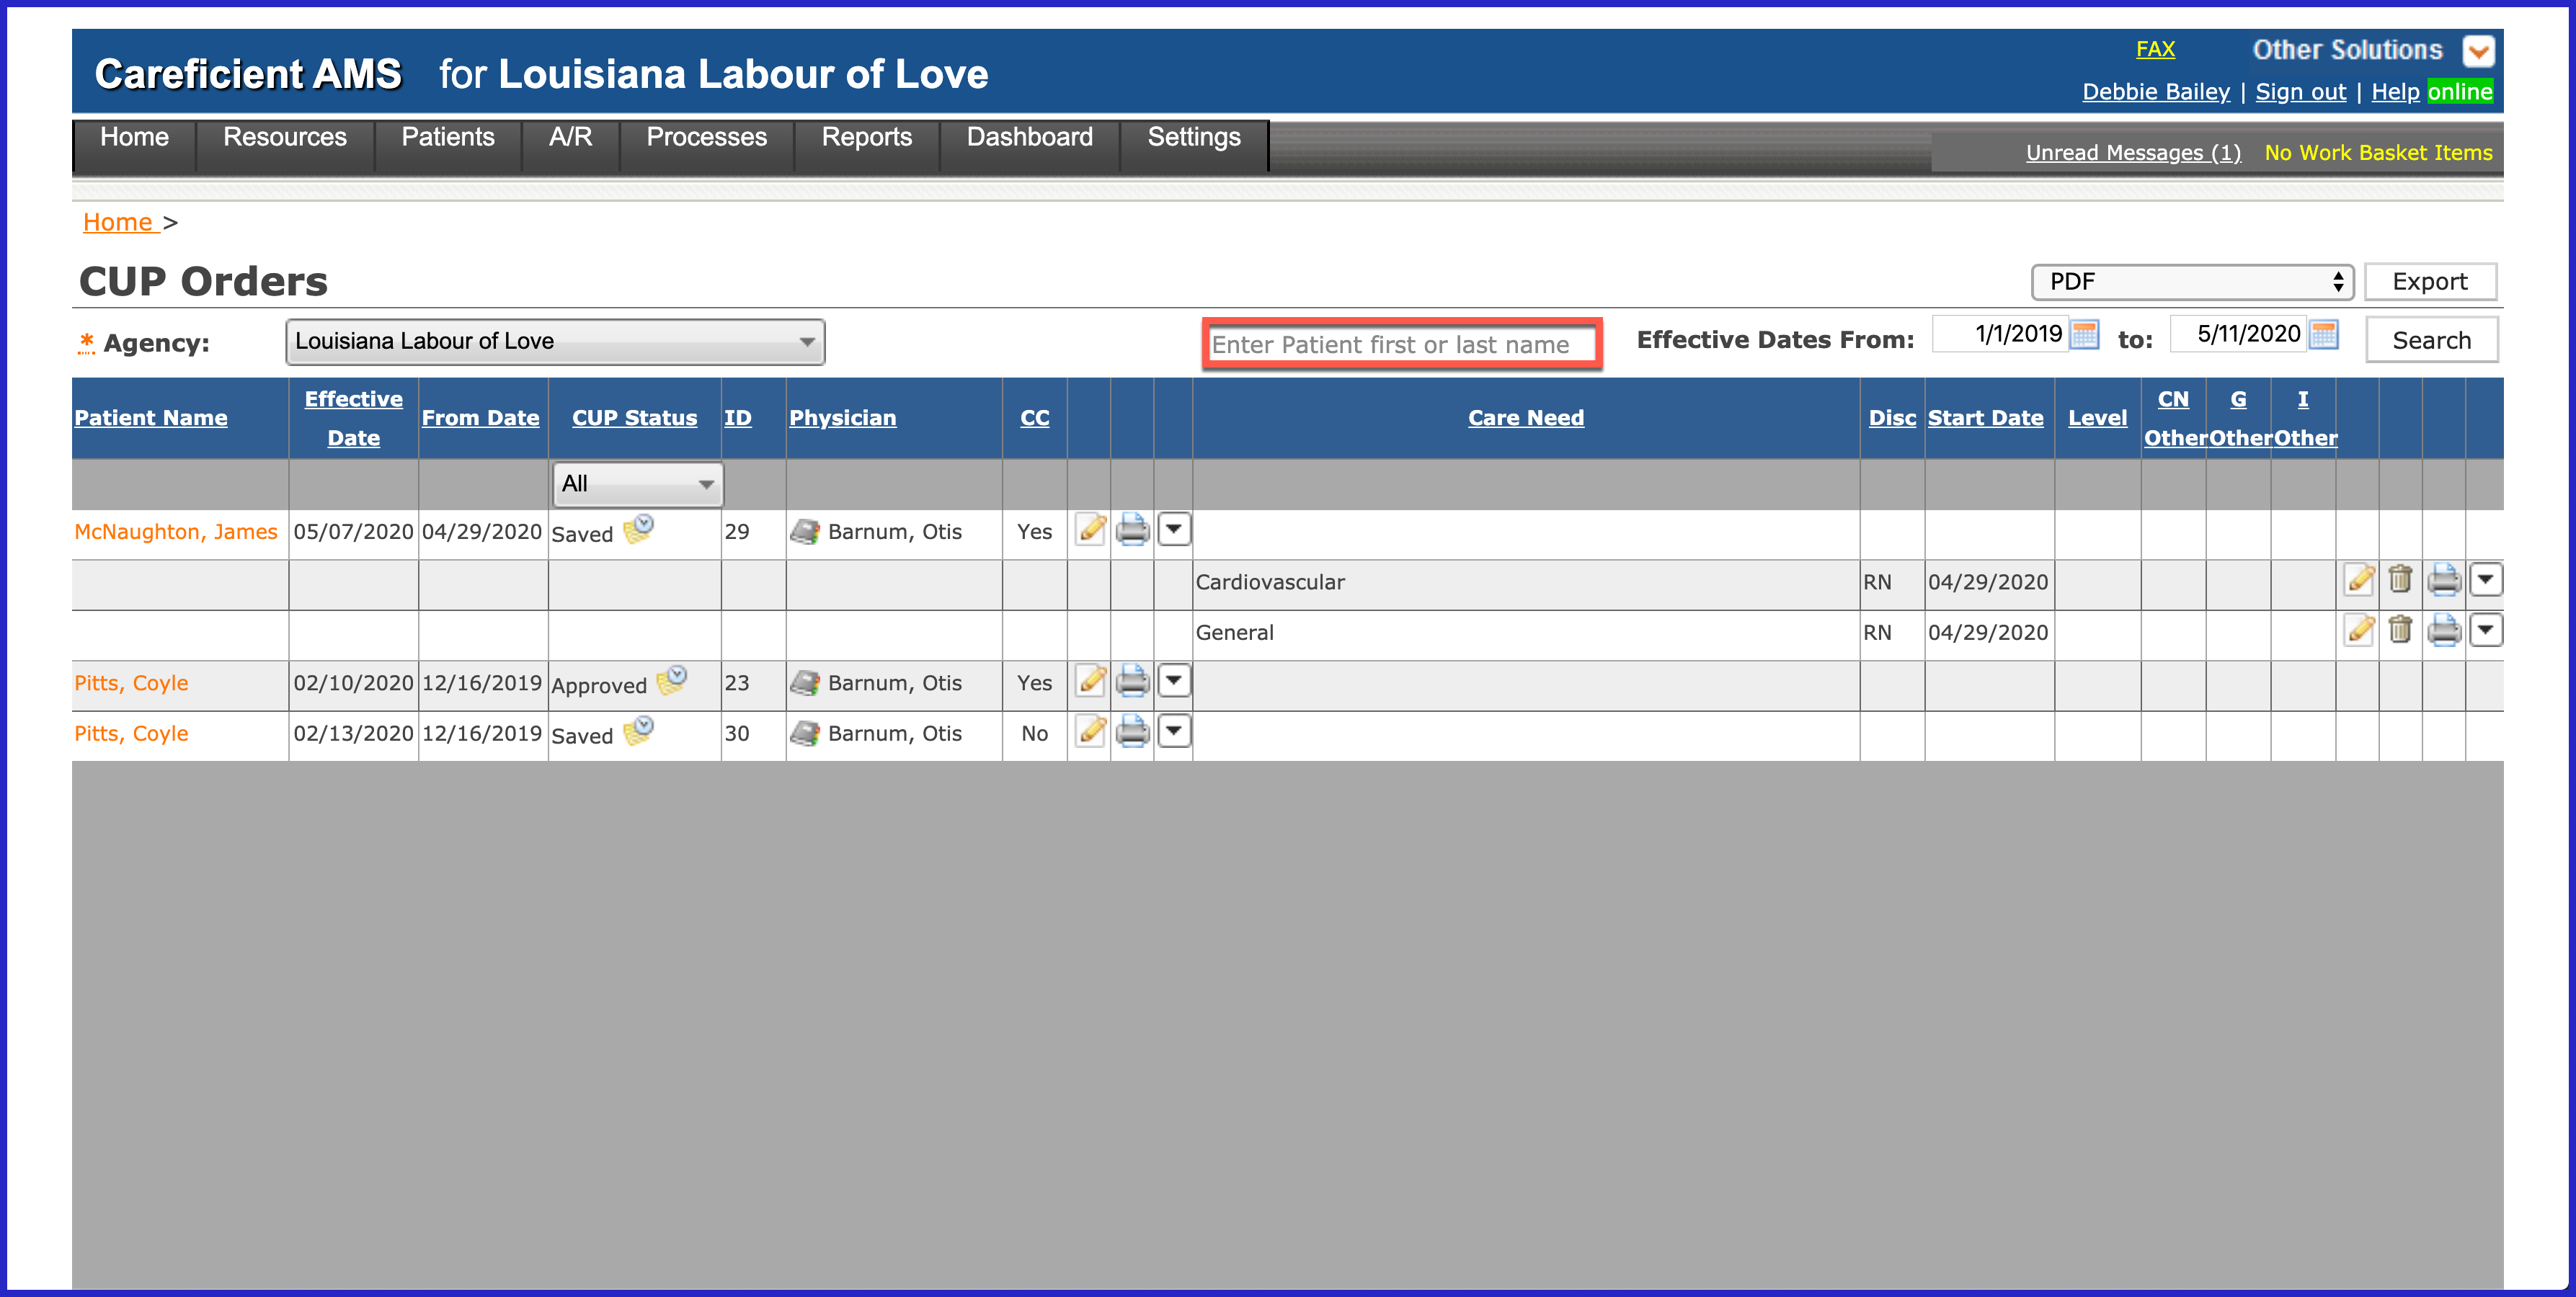
You can search by patient first or last name...
or by effective dates from and to.
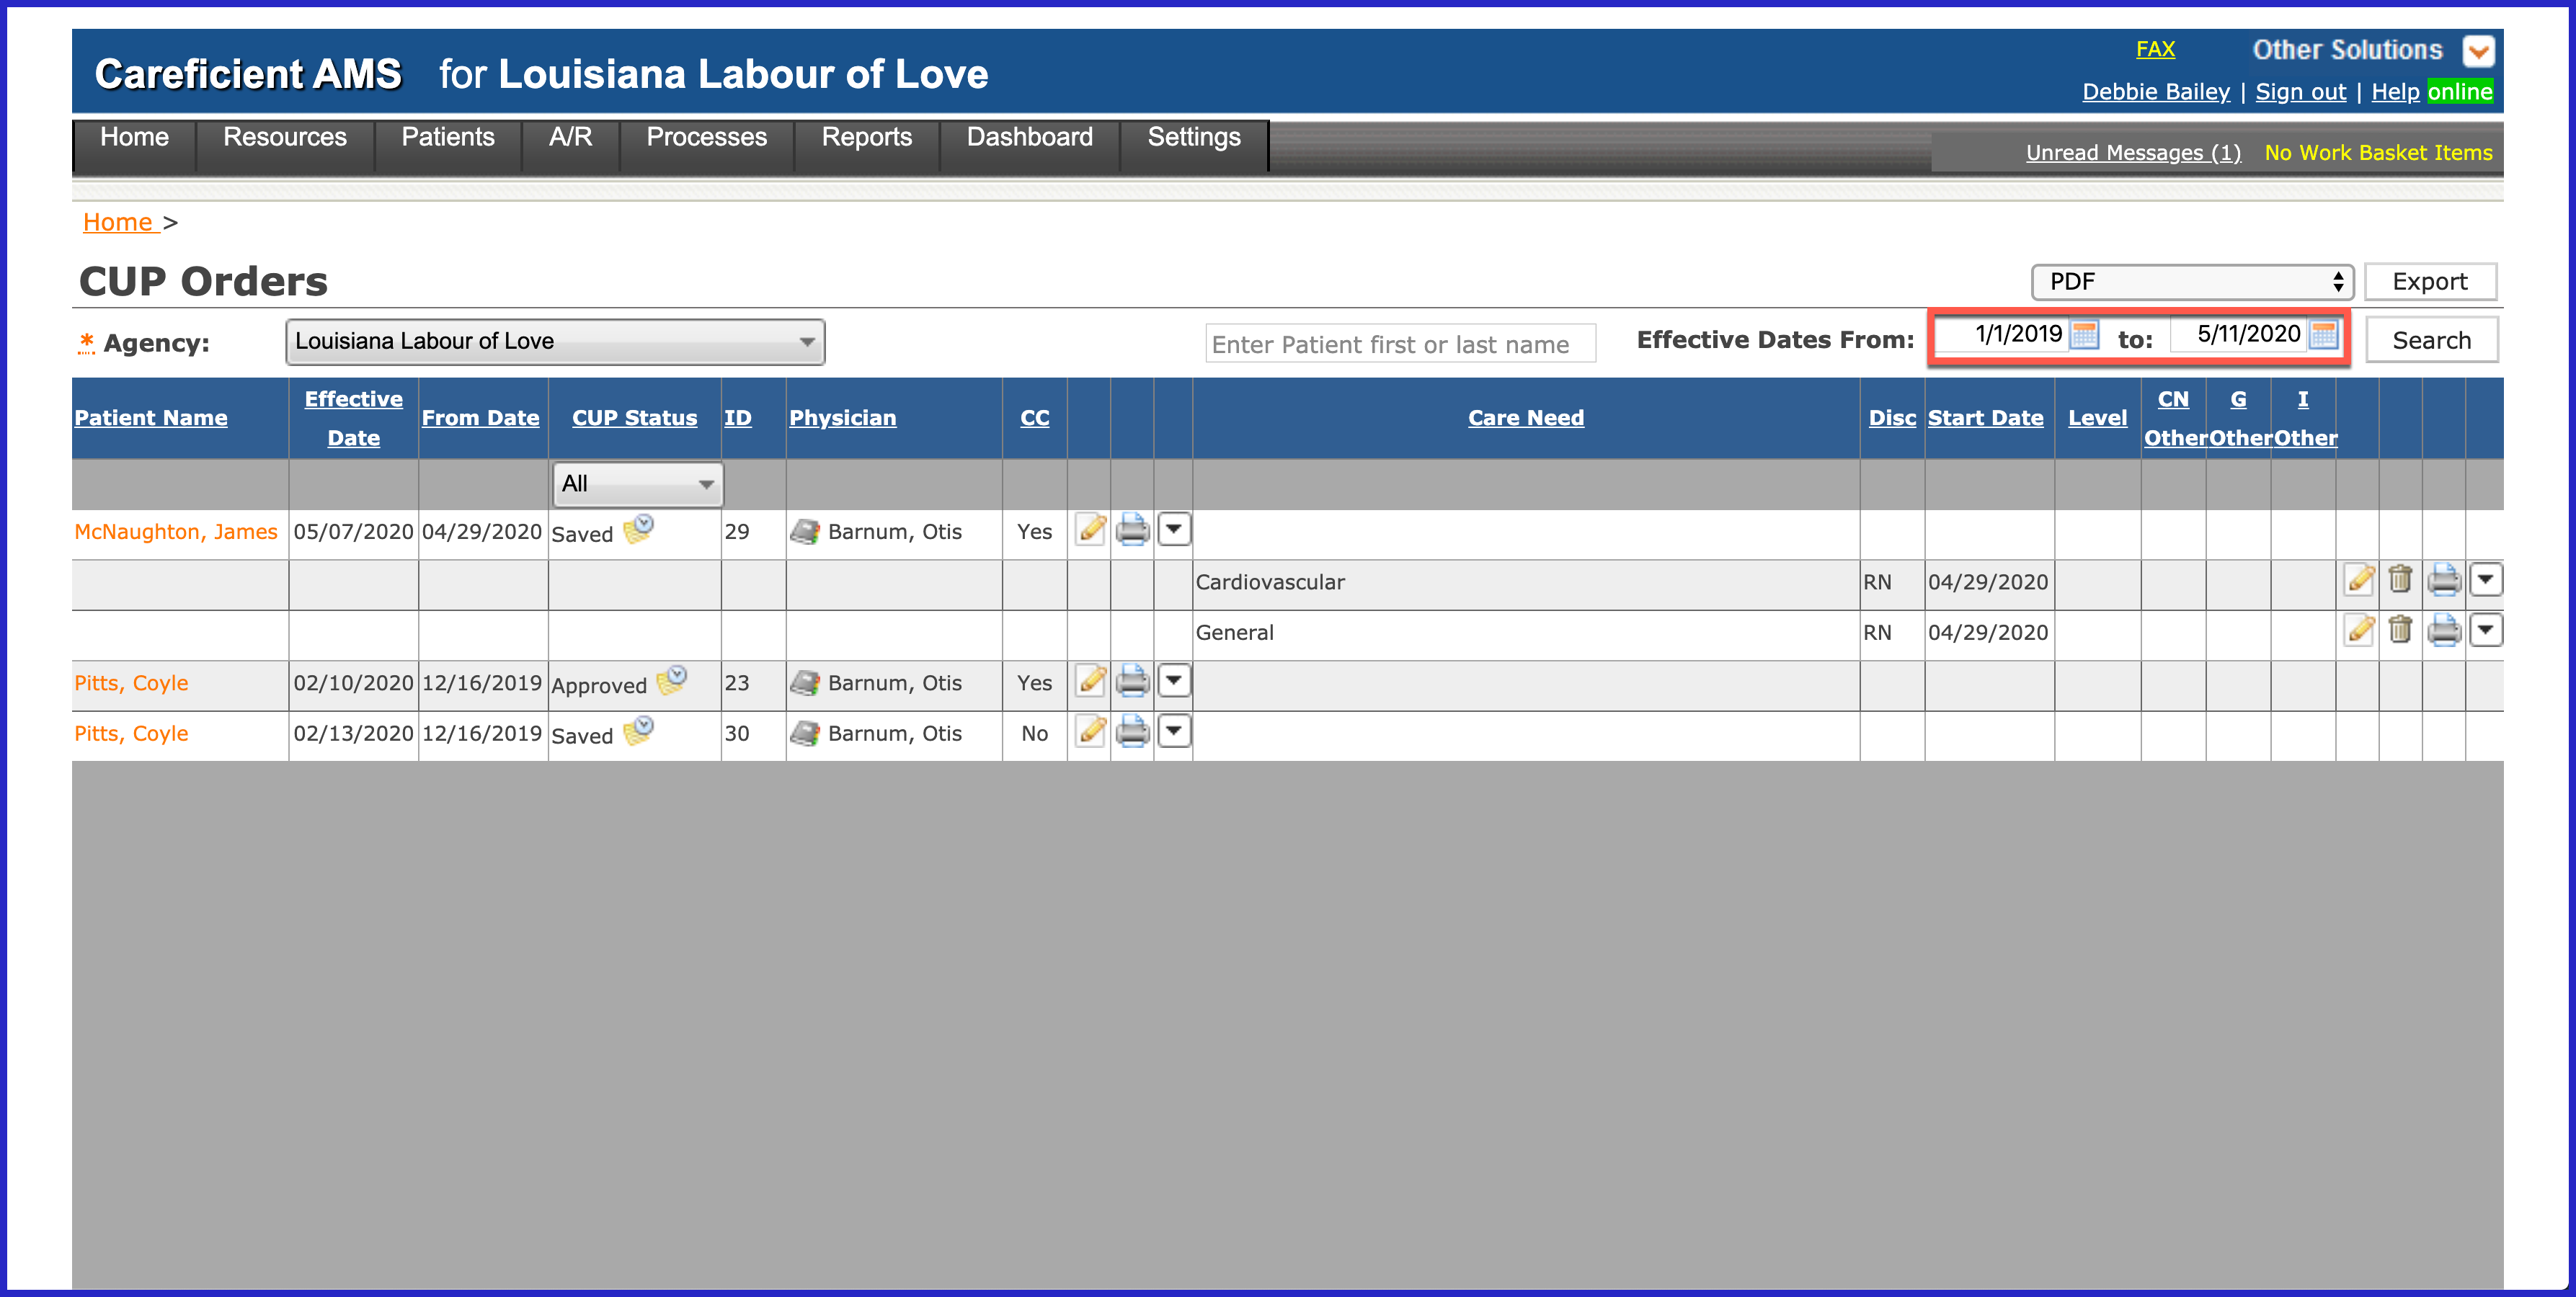
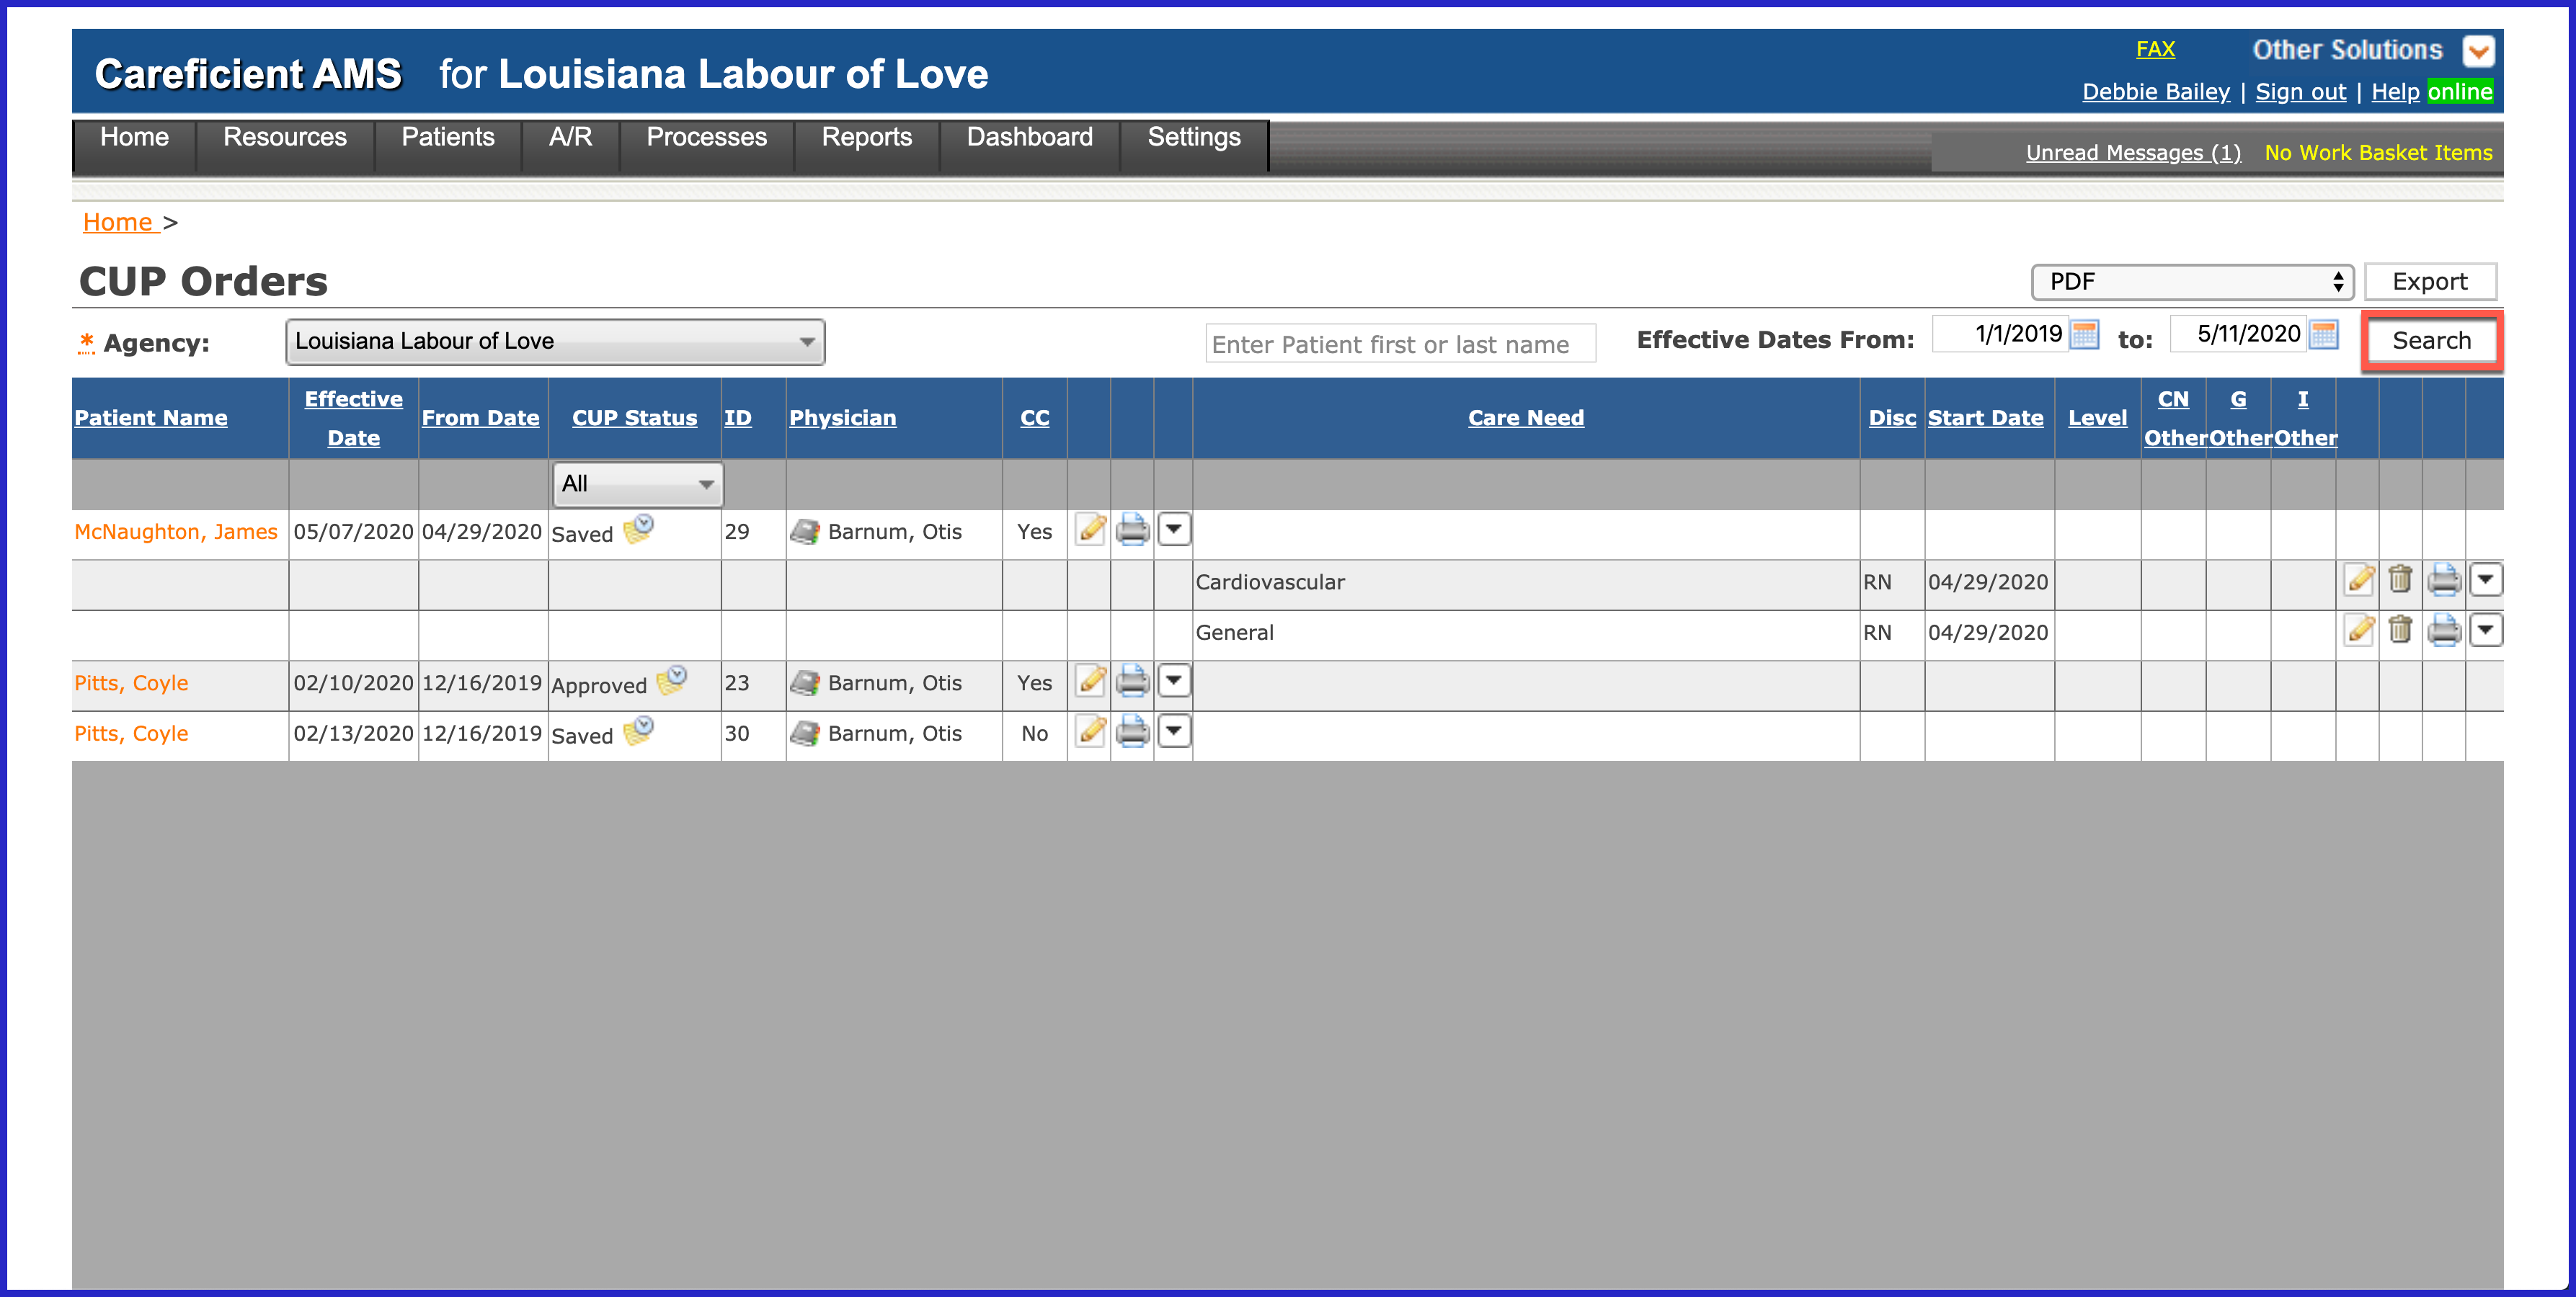
Click "Search" when you have made all your changes.
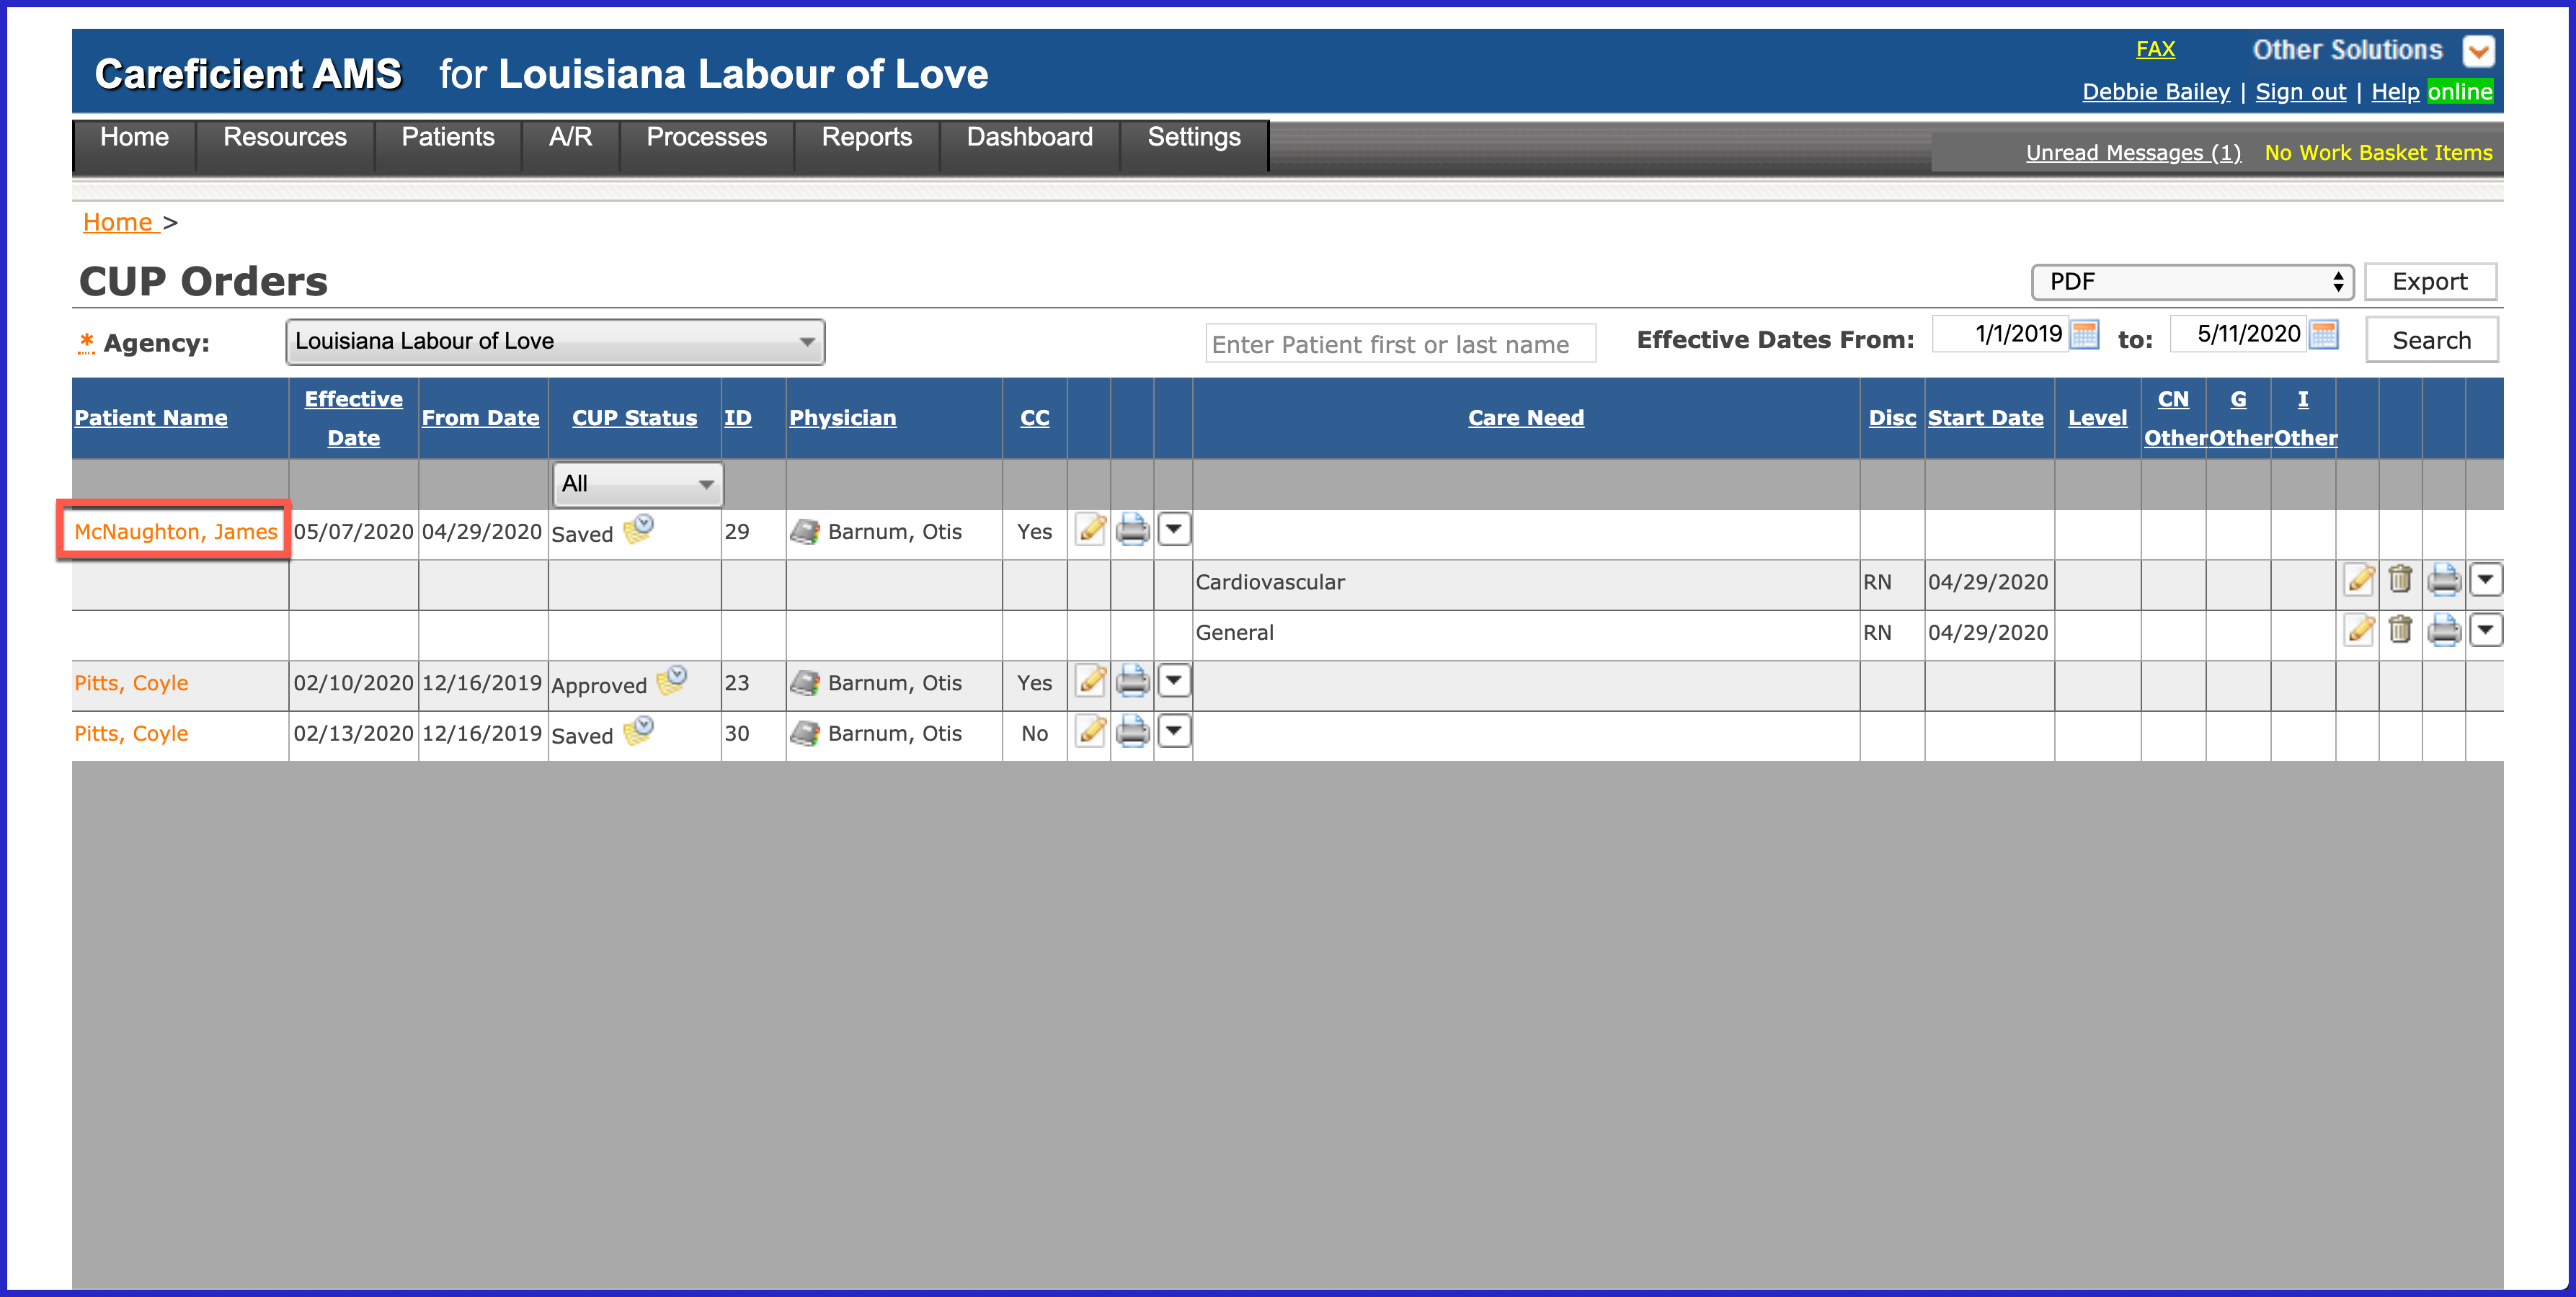
Clicking on the "Patient Name" link, will take you to the patient's encounter (chart).
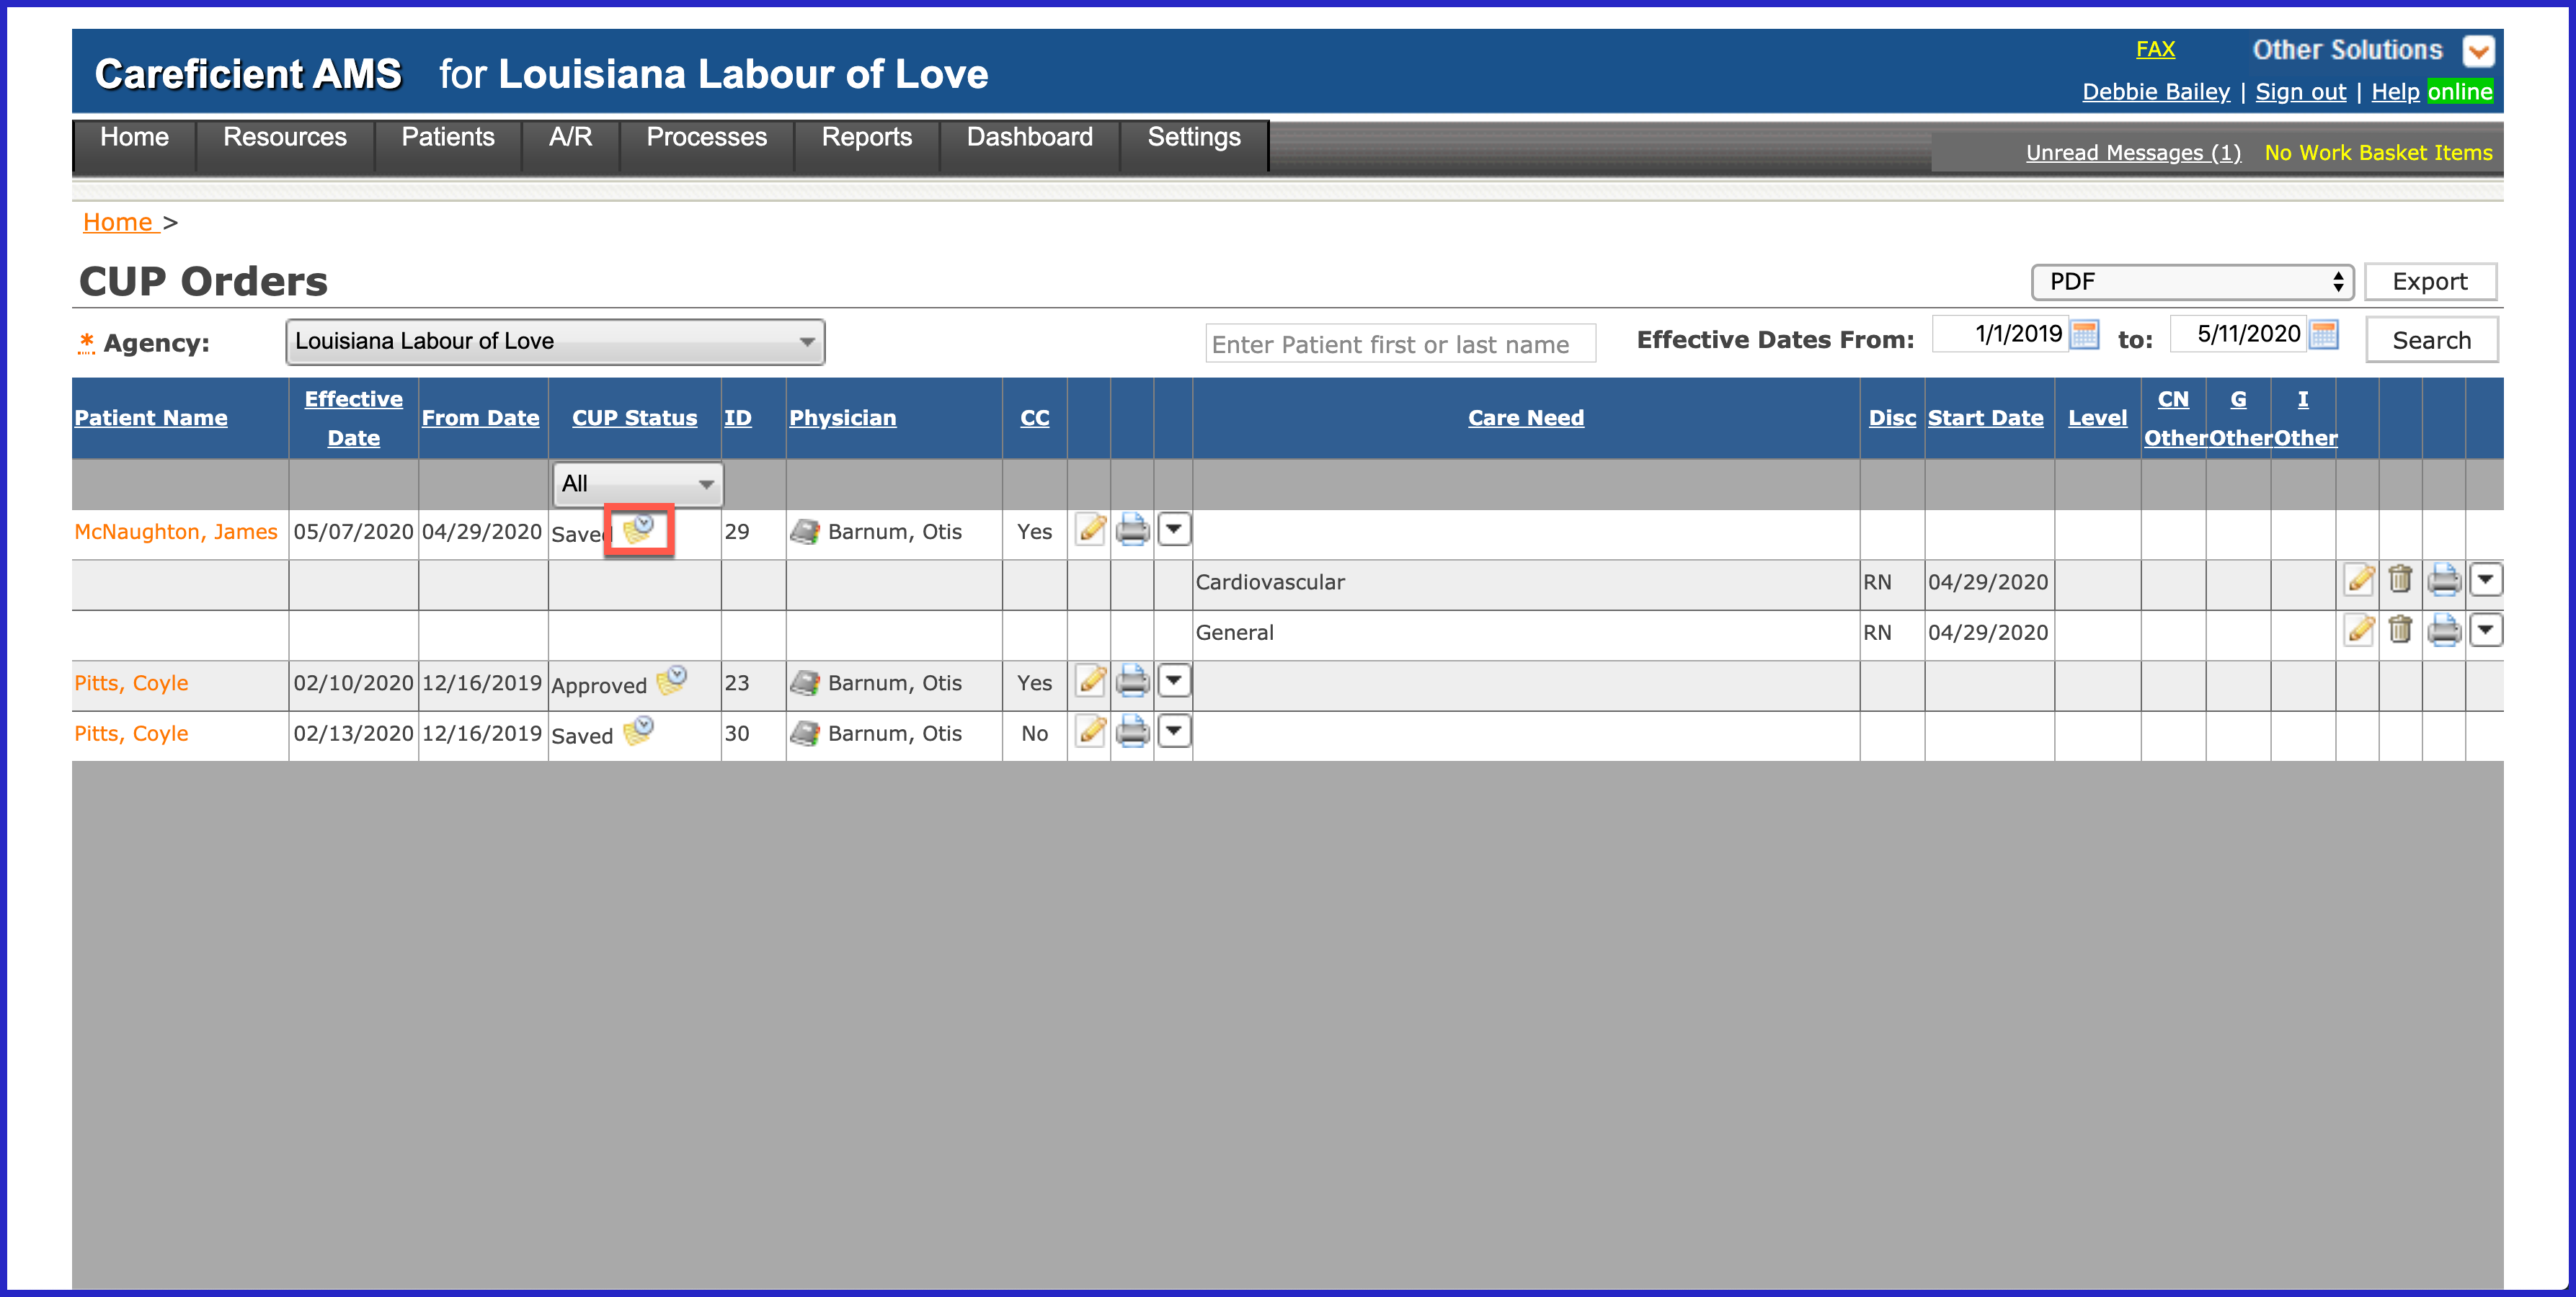
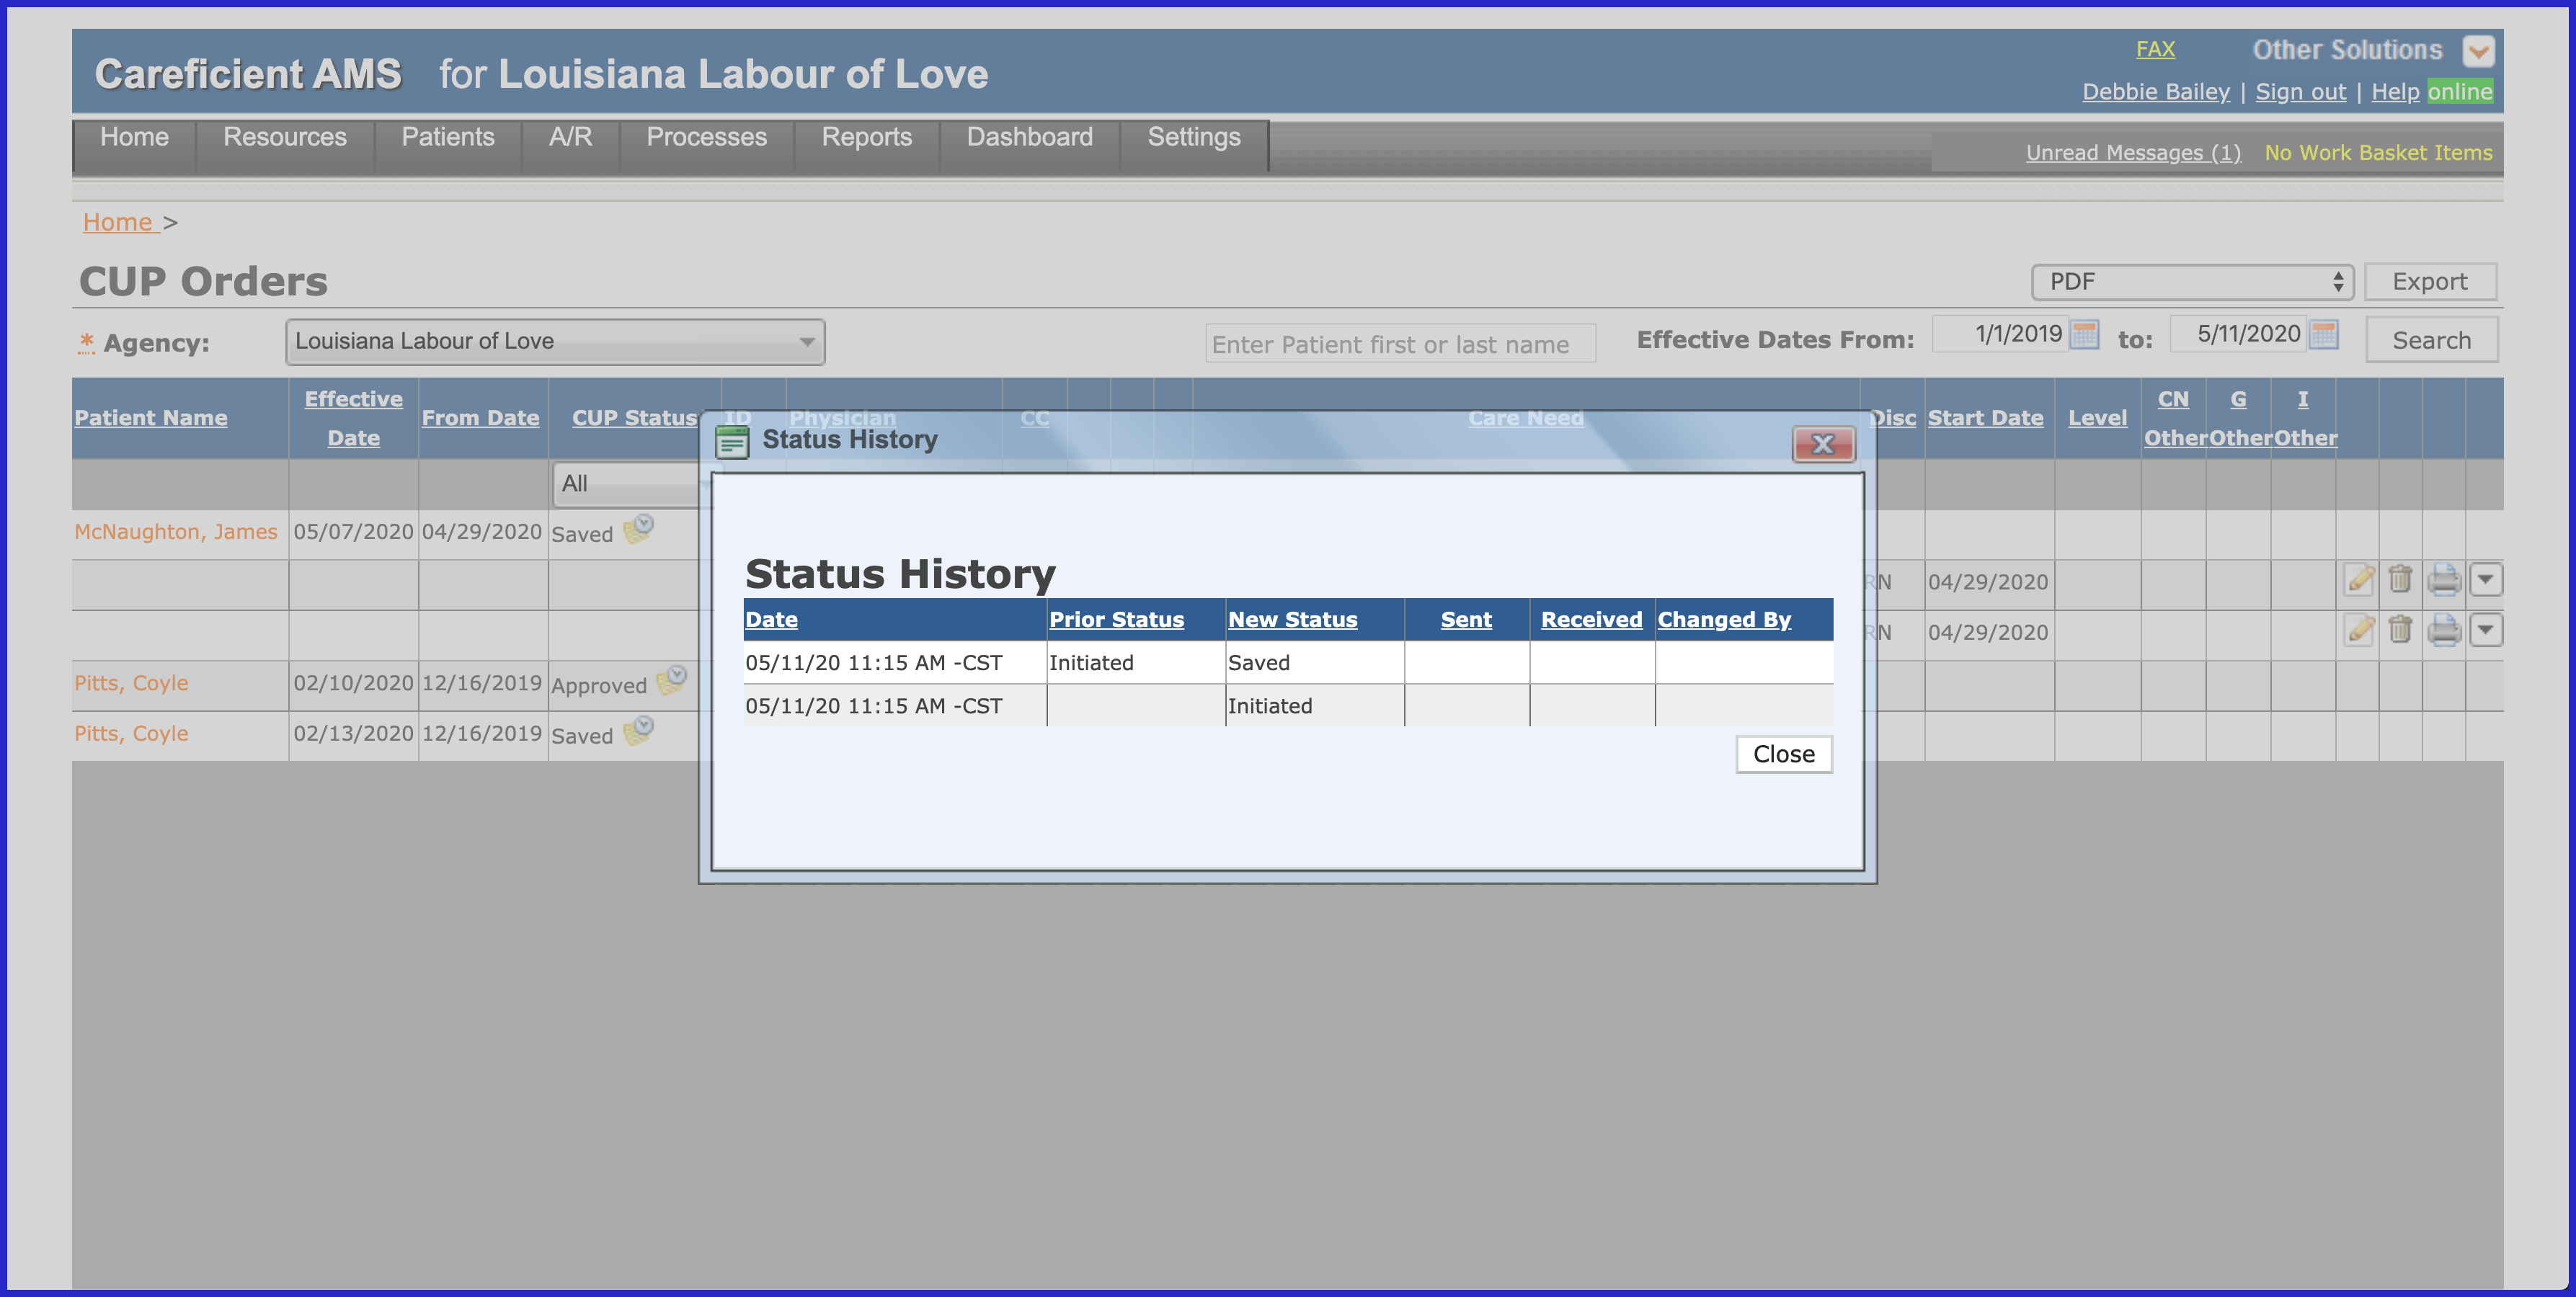
The drop down to the right of the CUP Status, will give you information regarding the status changes of the order.
Example of Status History.
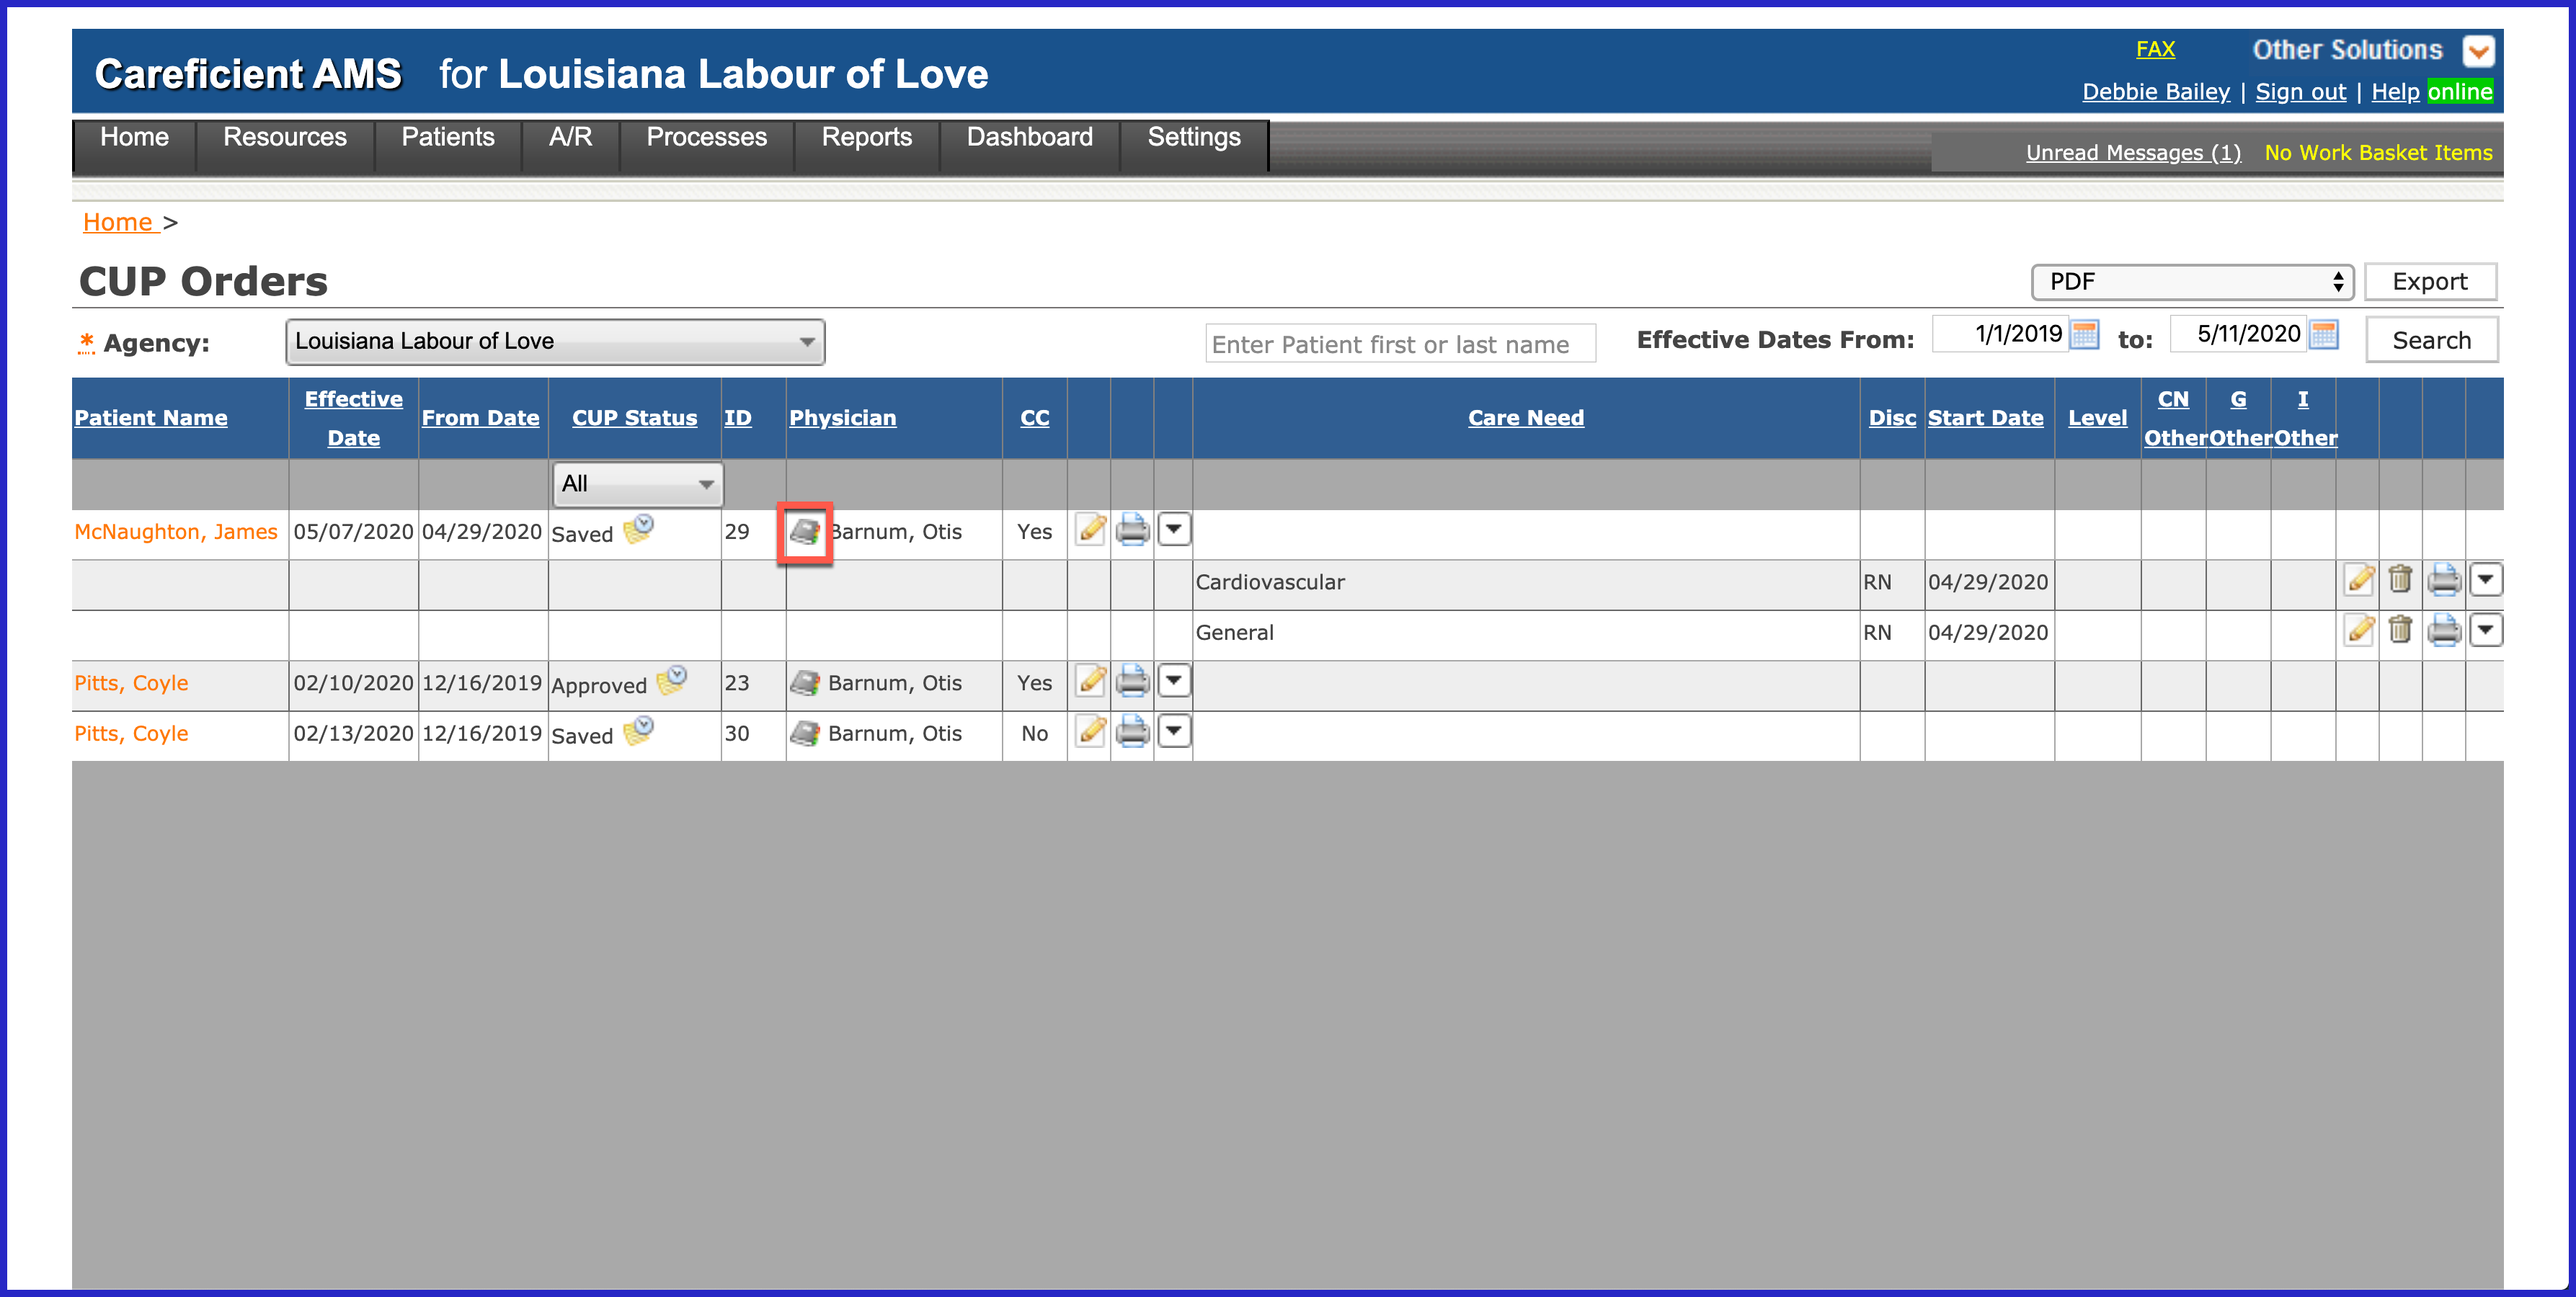
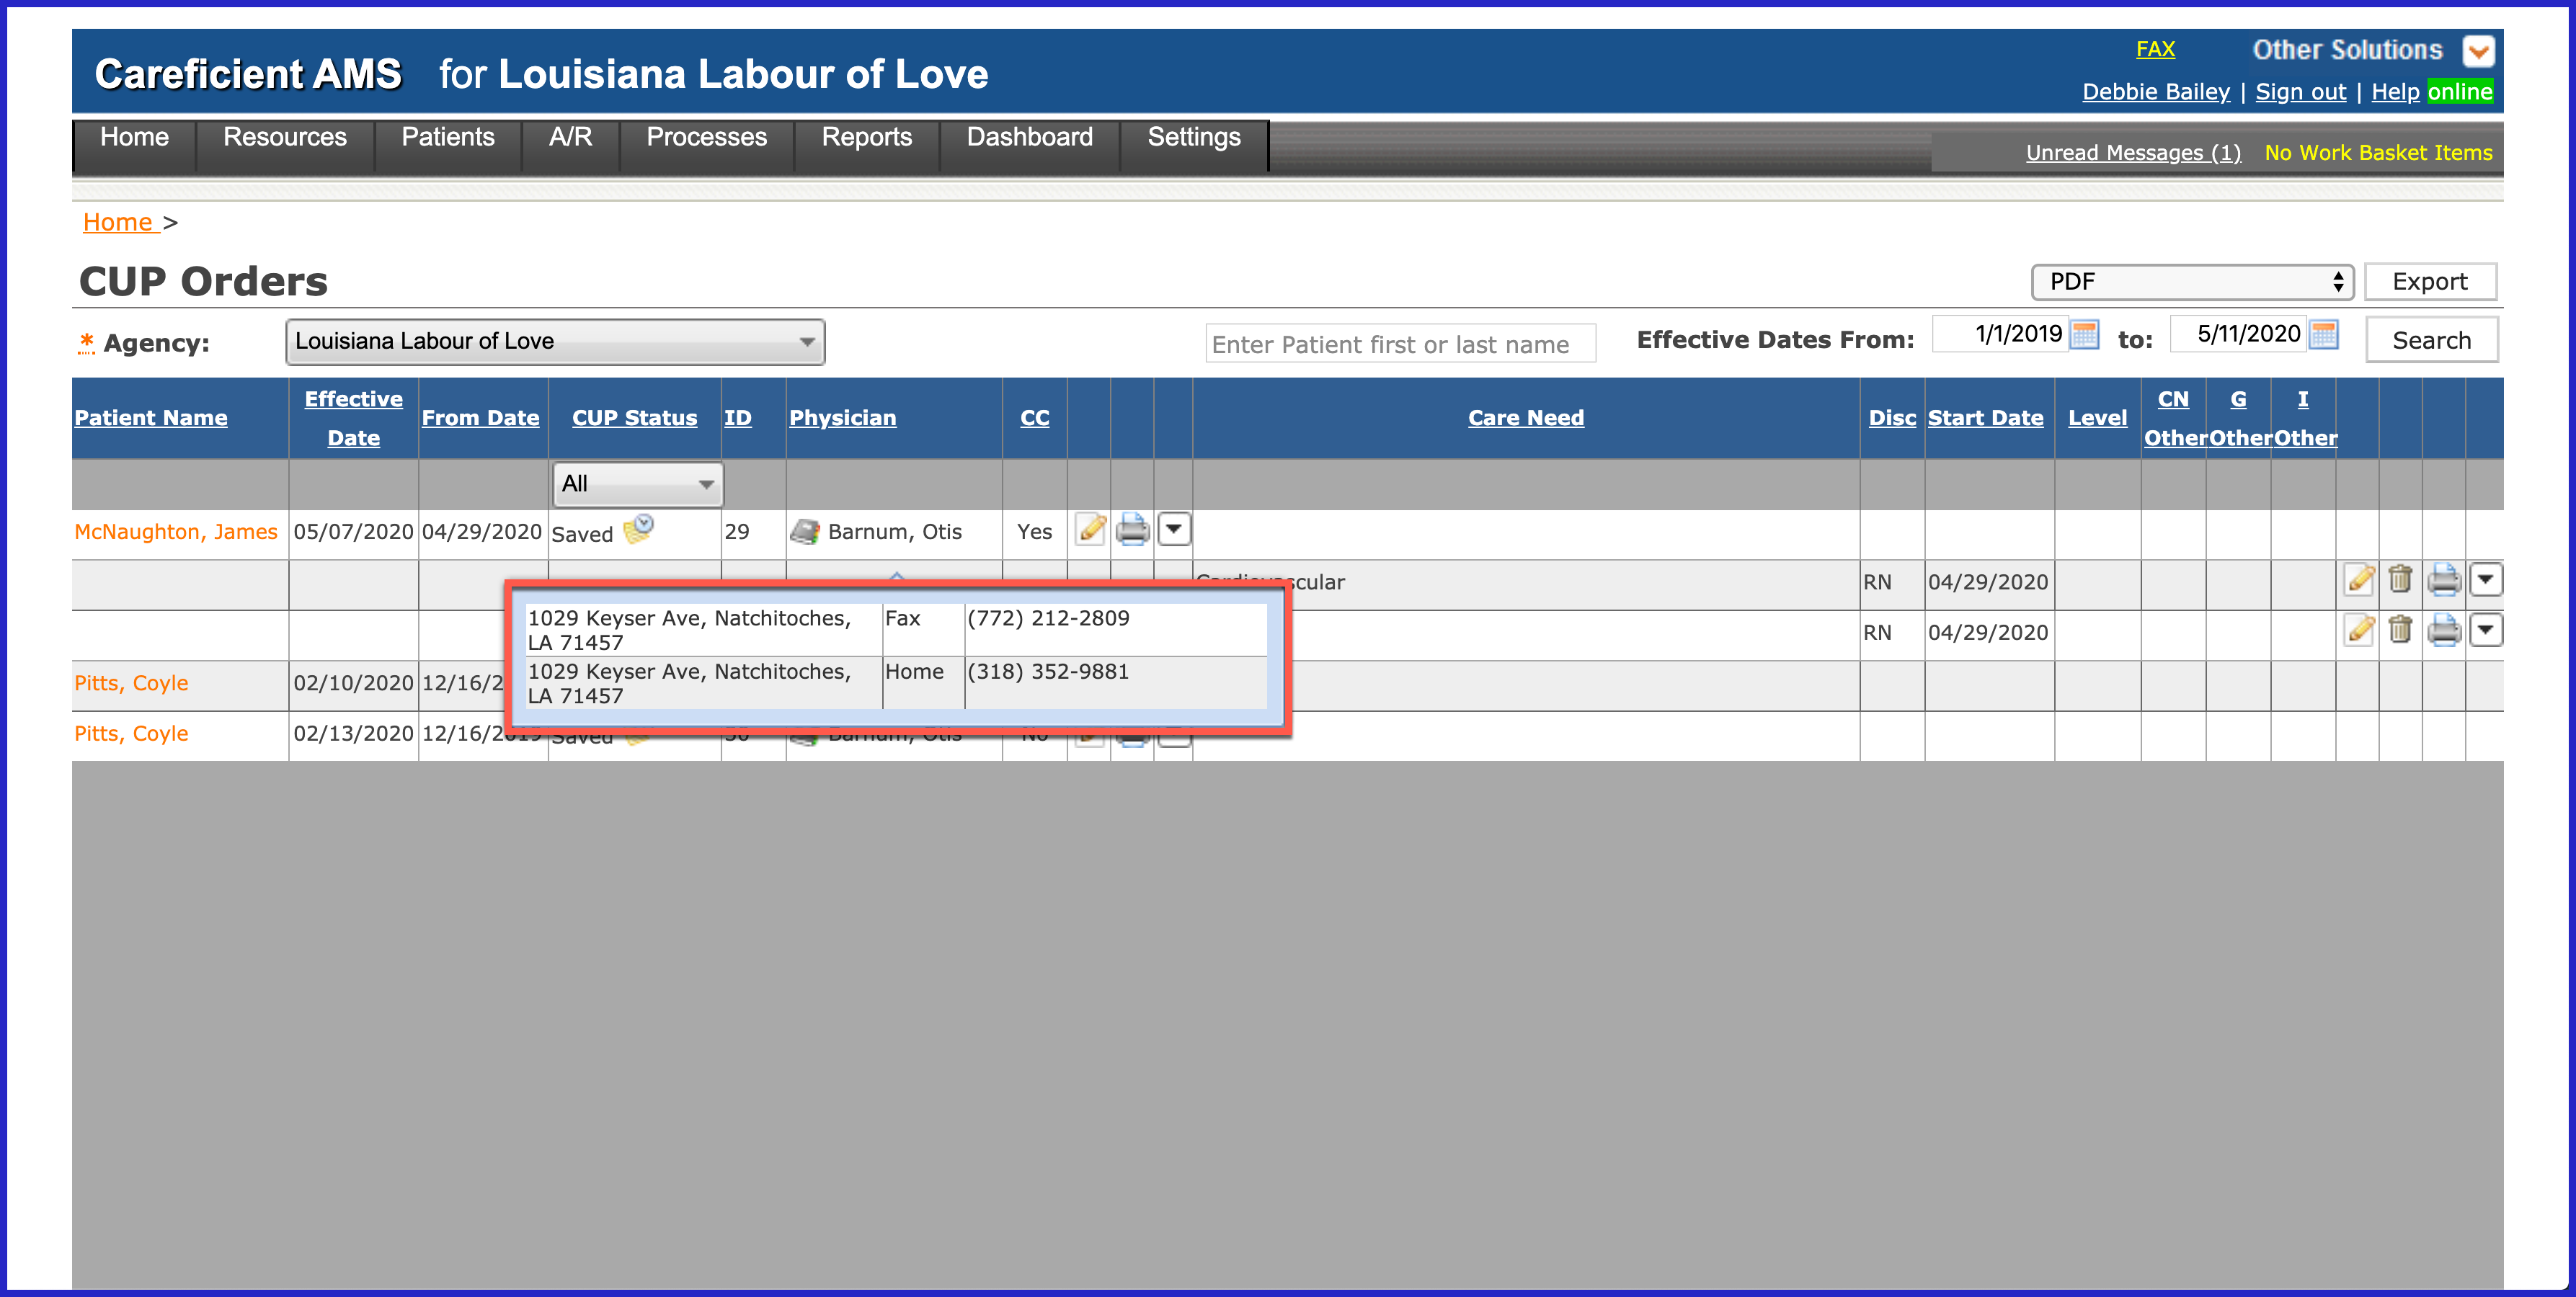
If you hover over the address book you will get a pop-up with the physician's contact information.
Example of Physician Contact Information
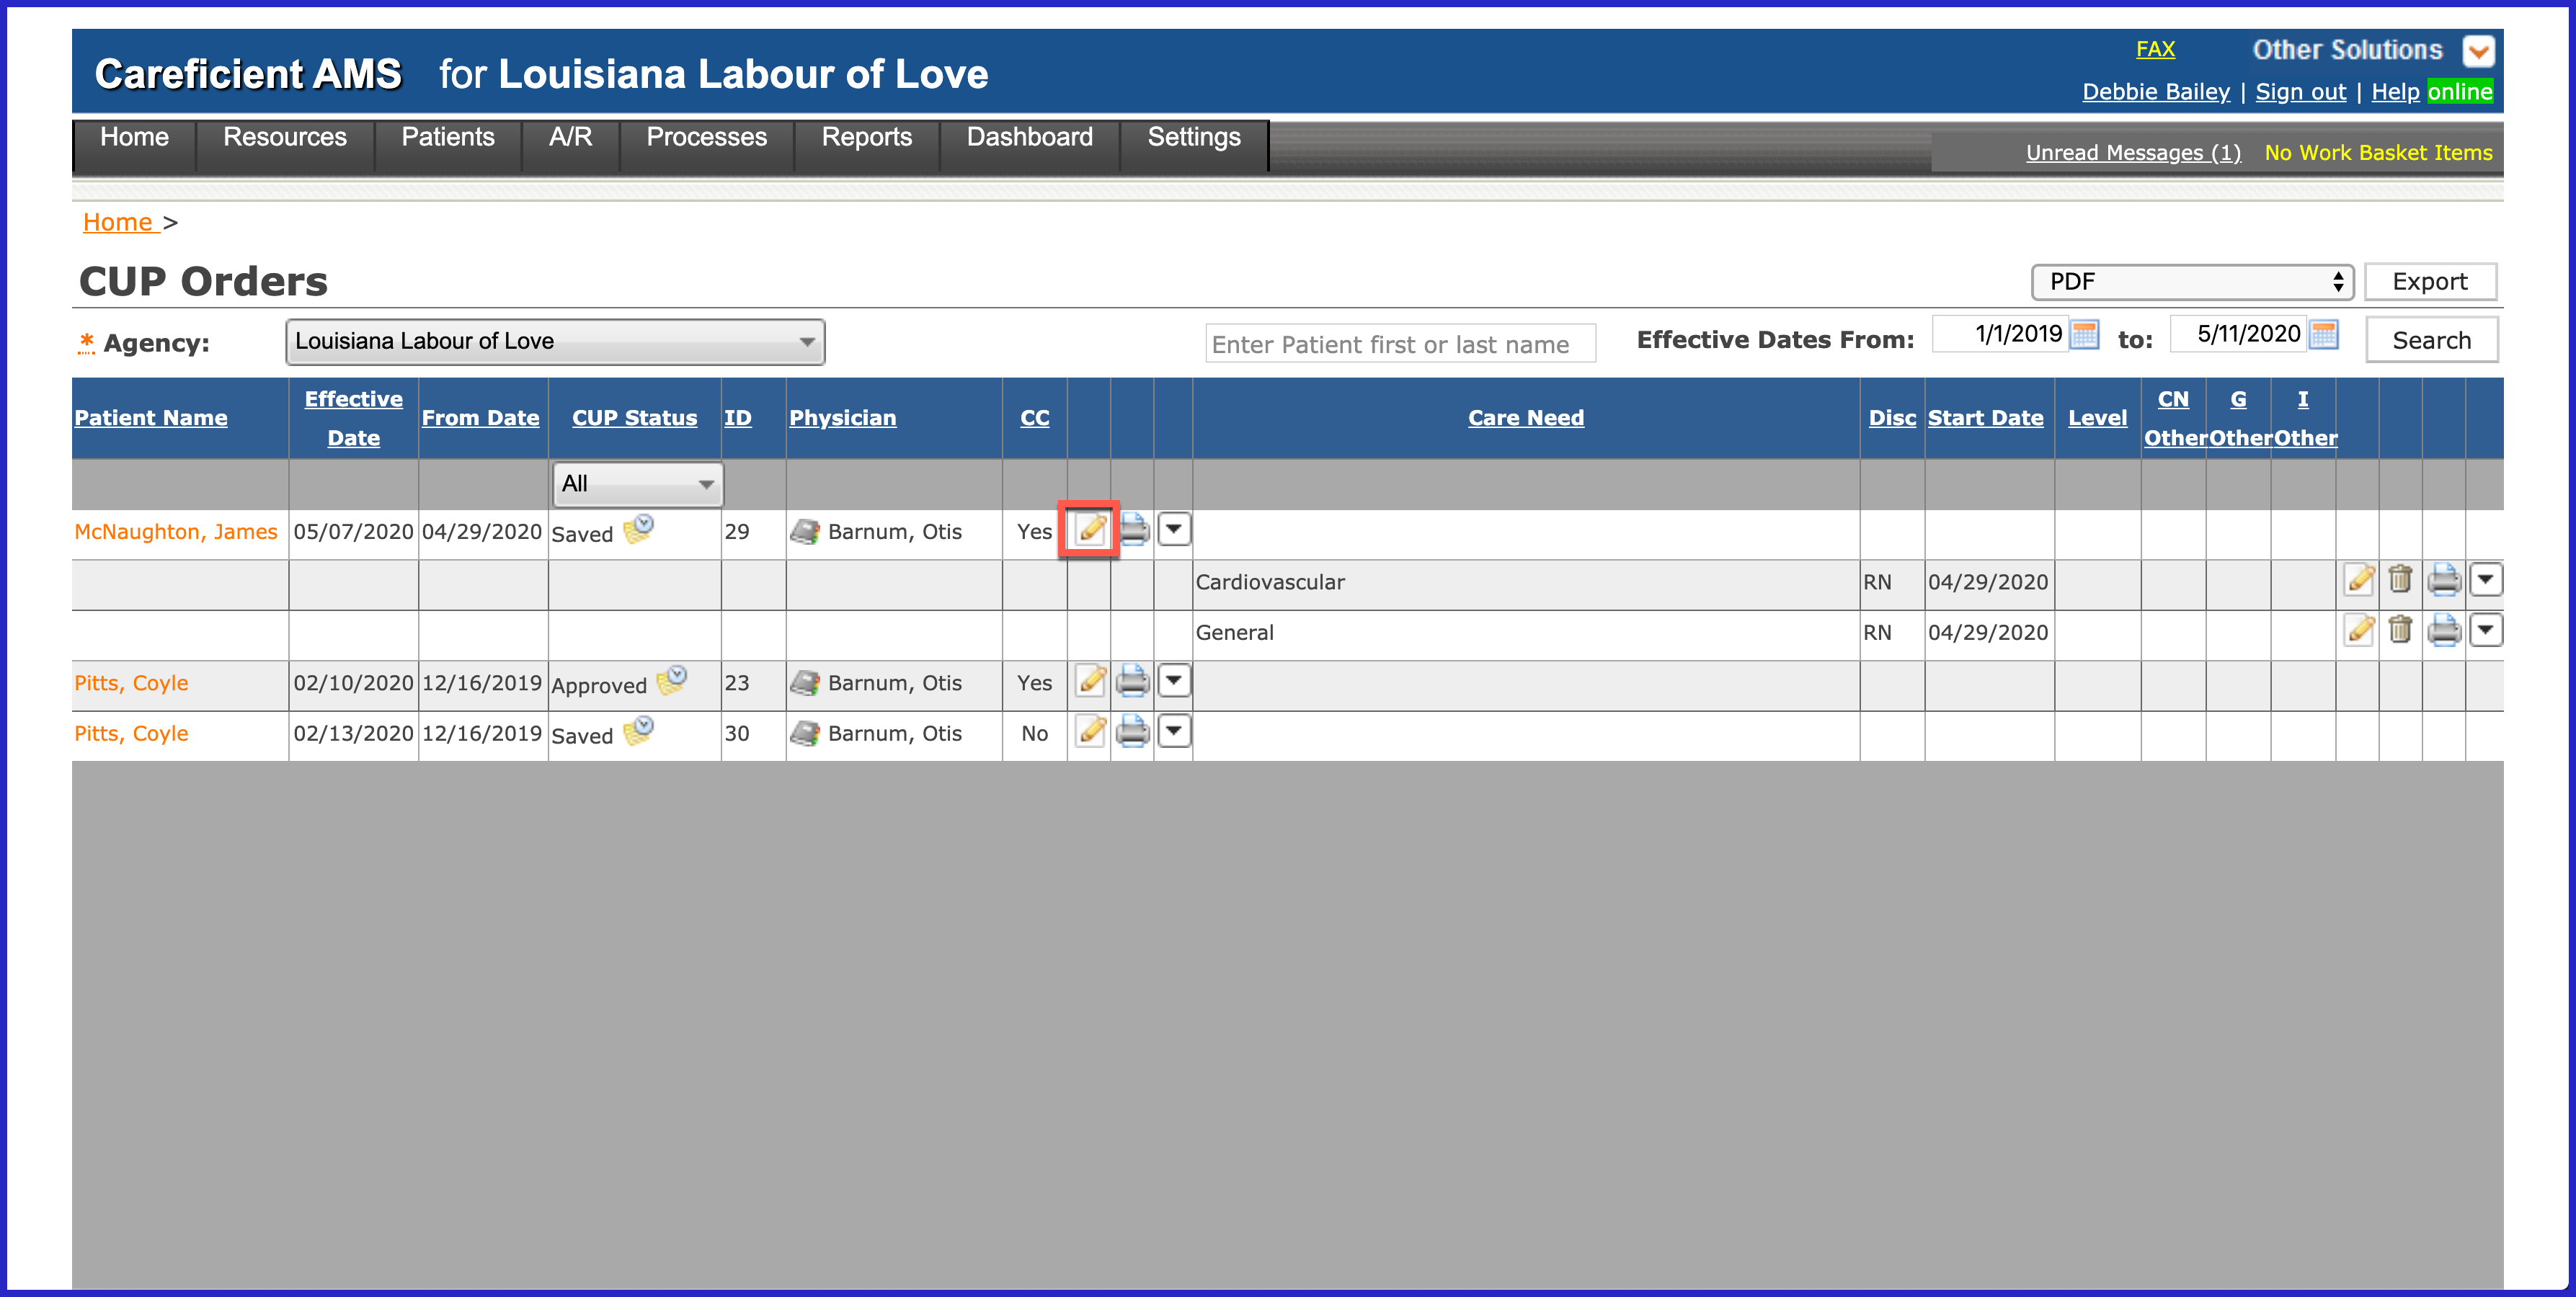
Clicking on the edit pencil to the right of the physician's order, will allow you to edit the order just like you normally would from the Orders Tab.
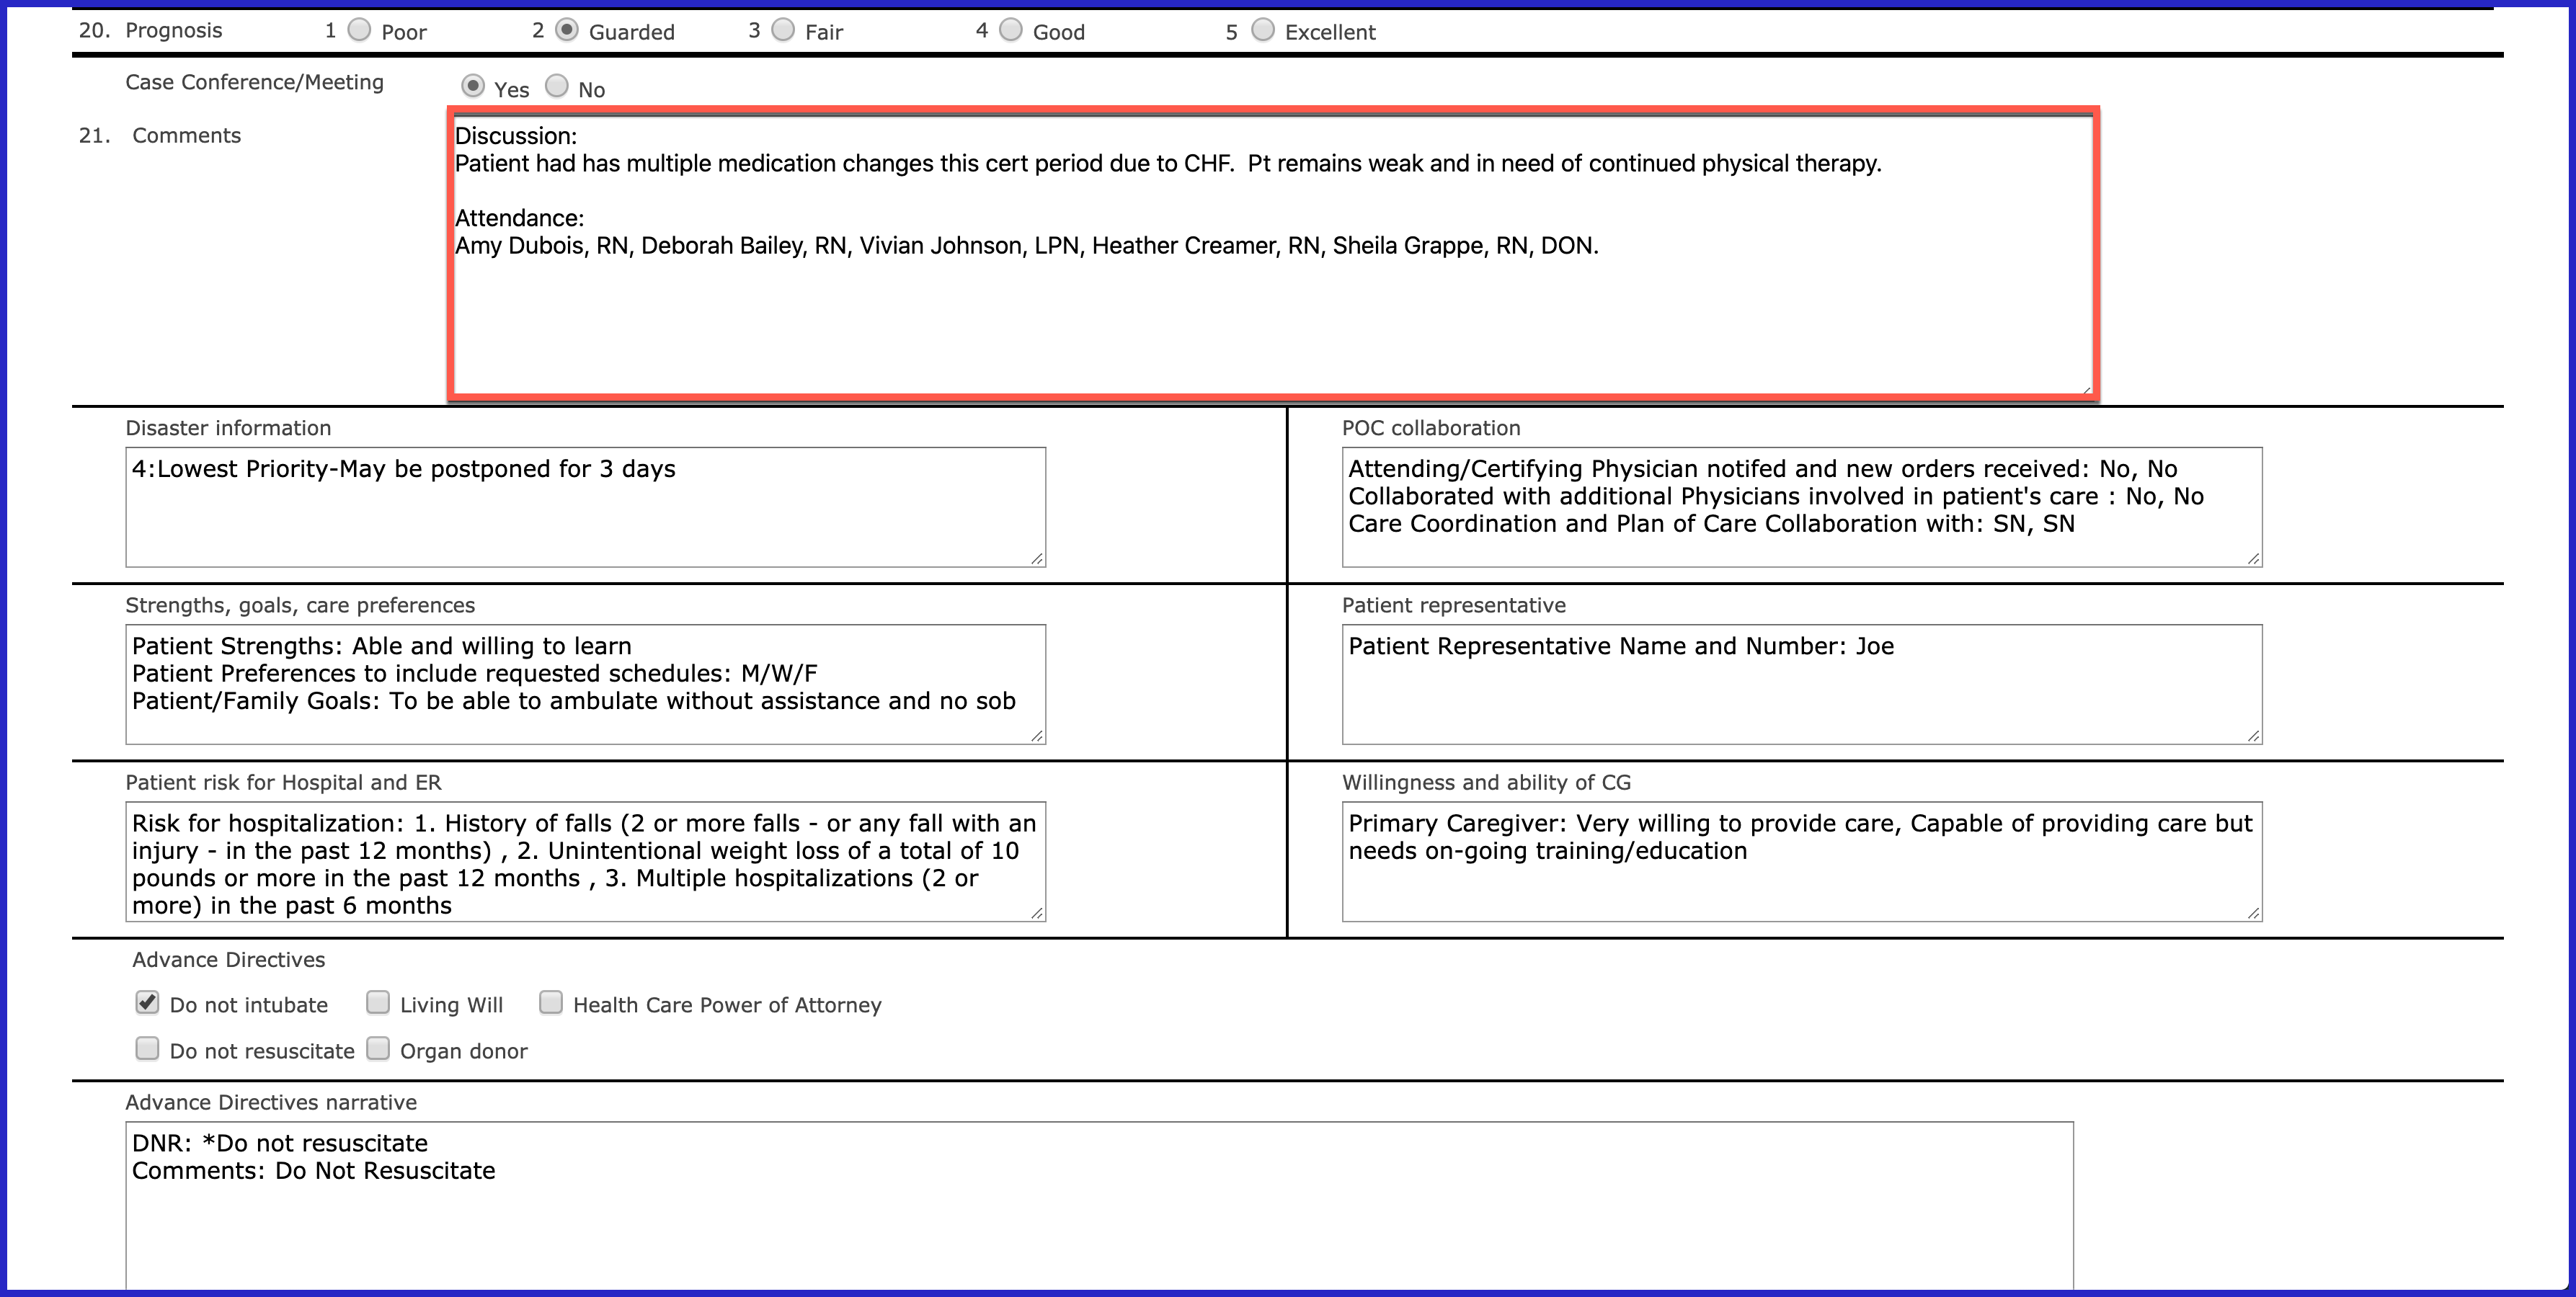
We recommend including specifically the discussion during the Case Conference as well as those in attendance.
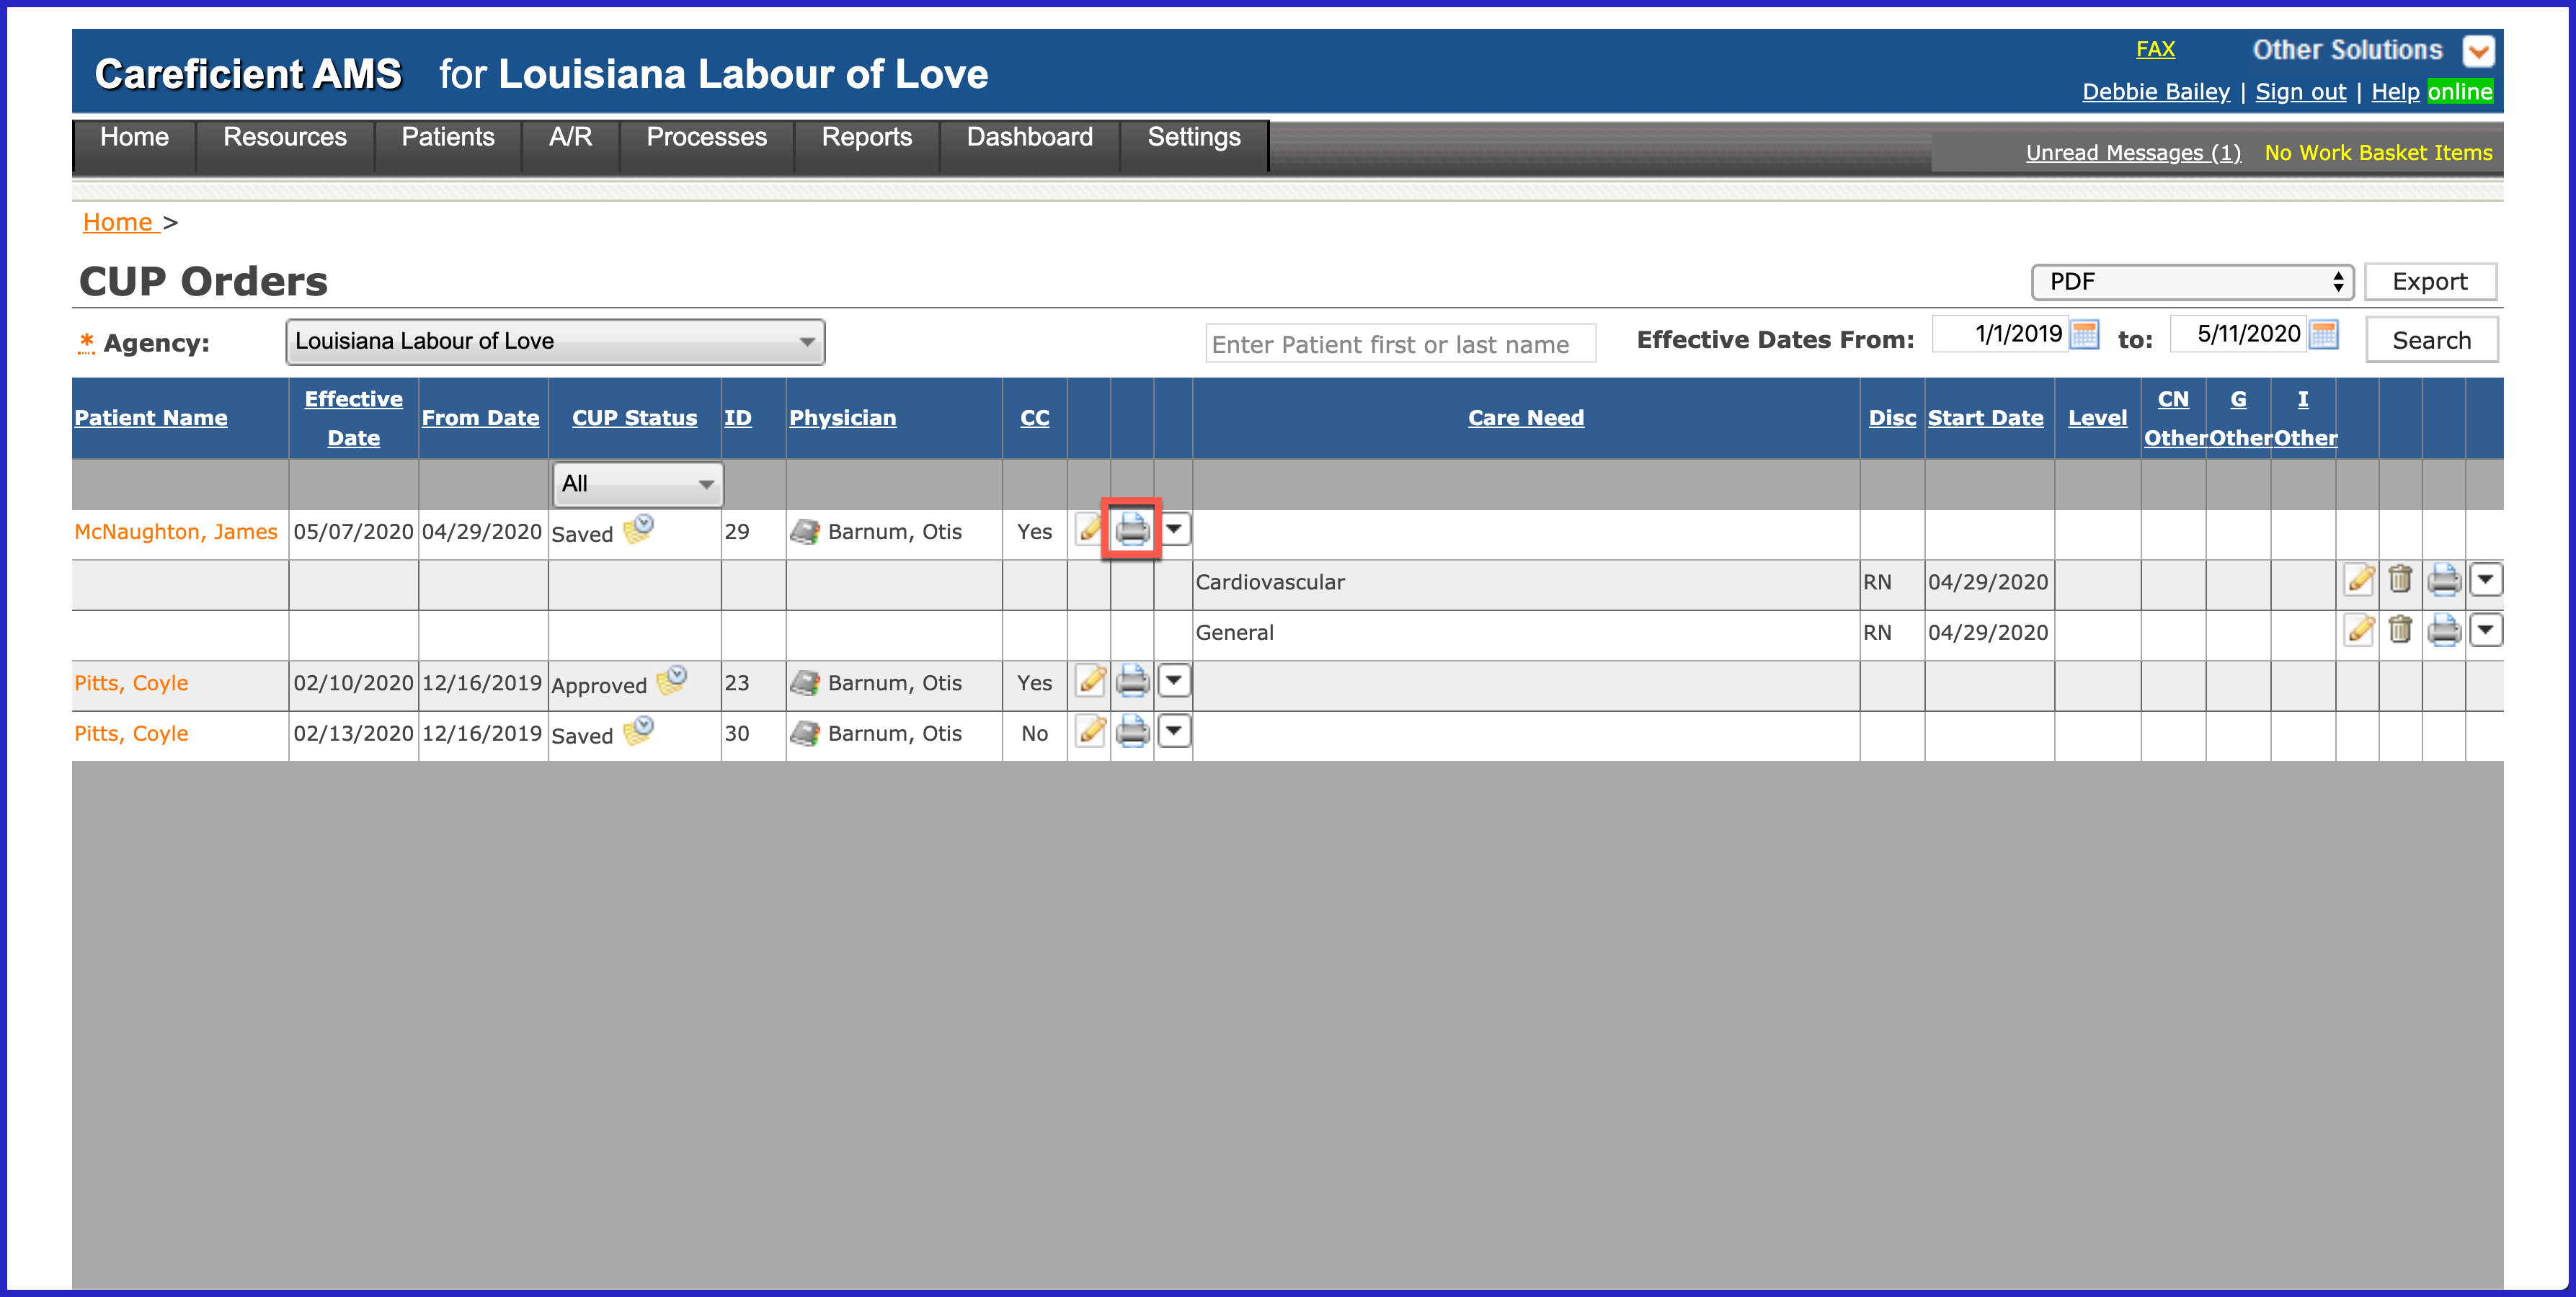
You can print the CUP Order as well by clicking on the printer icon.
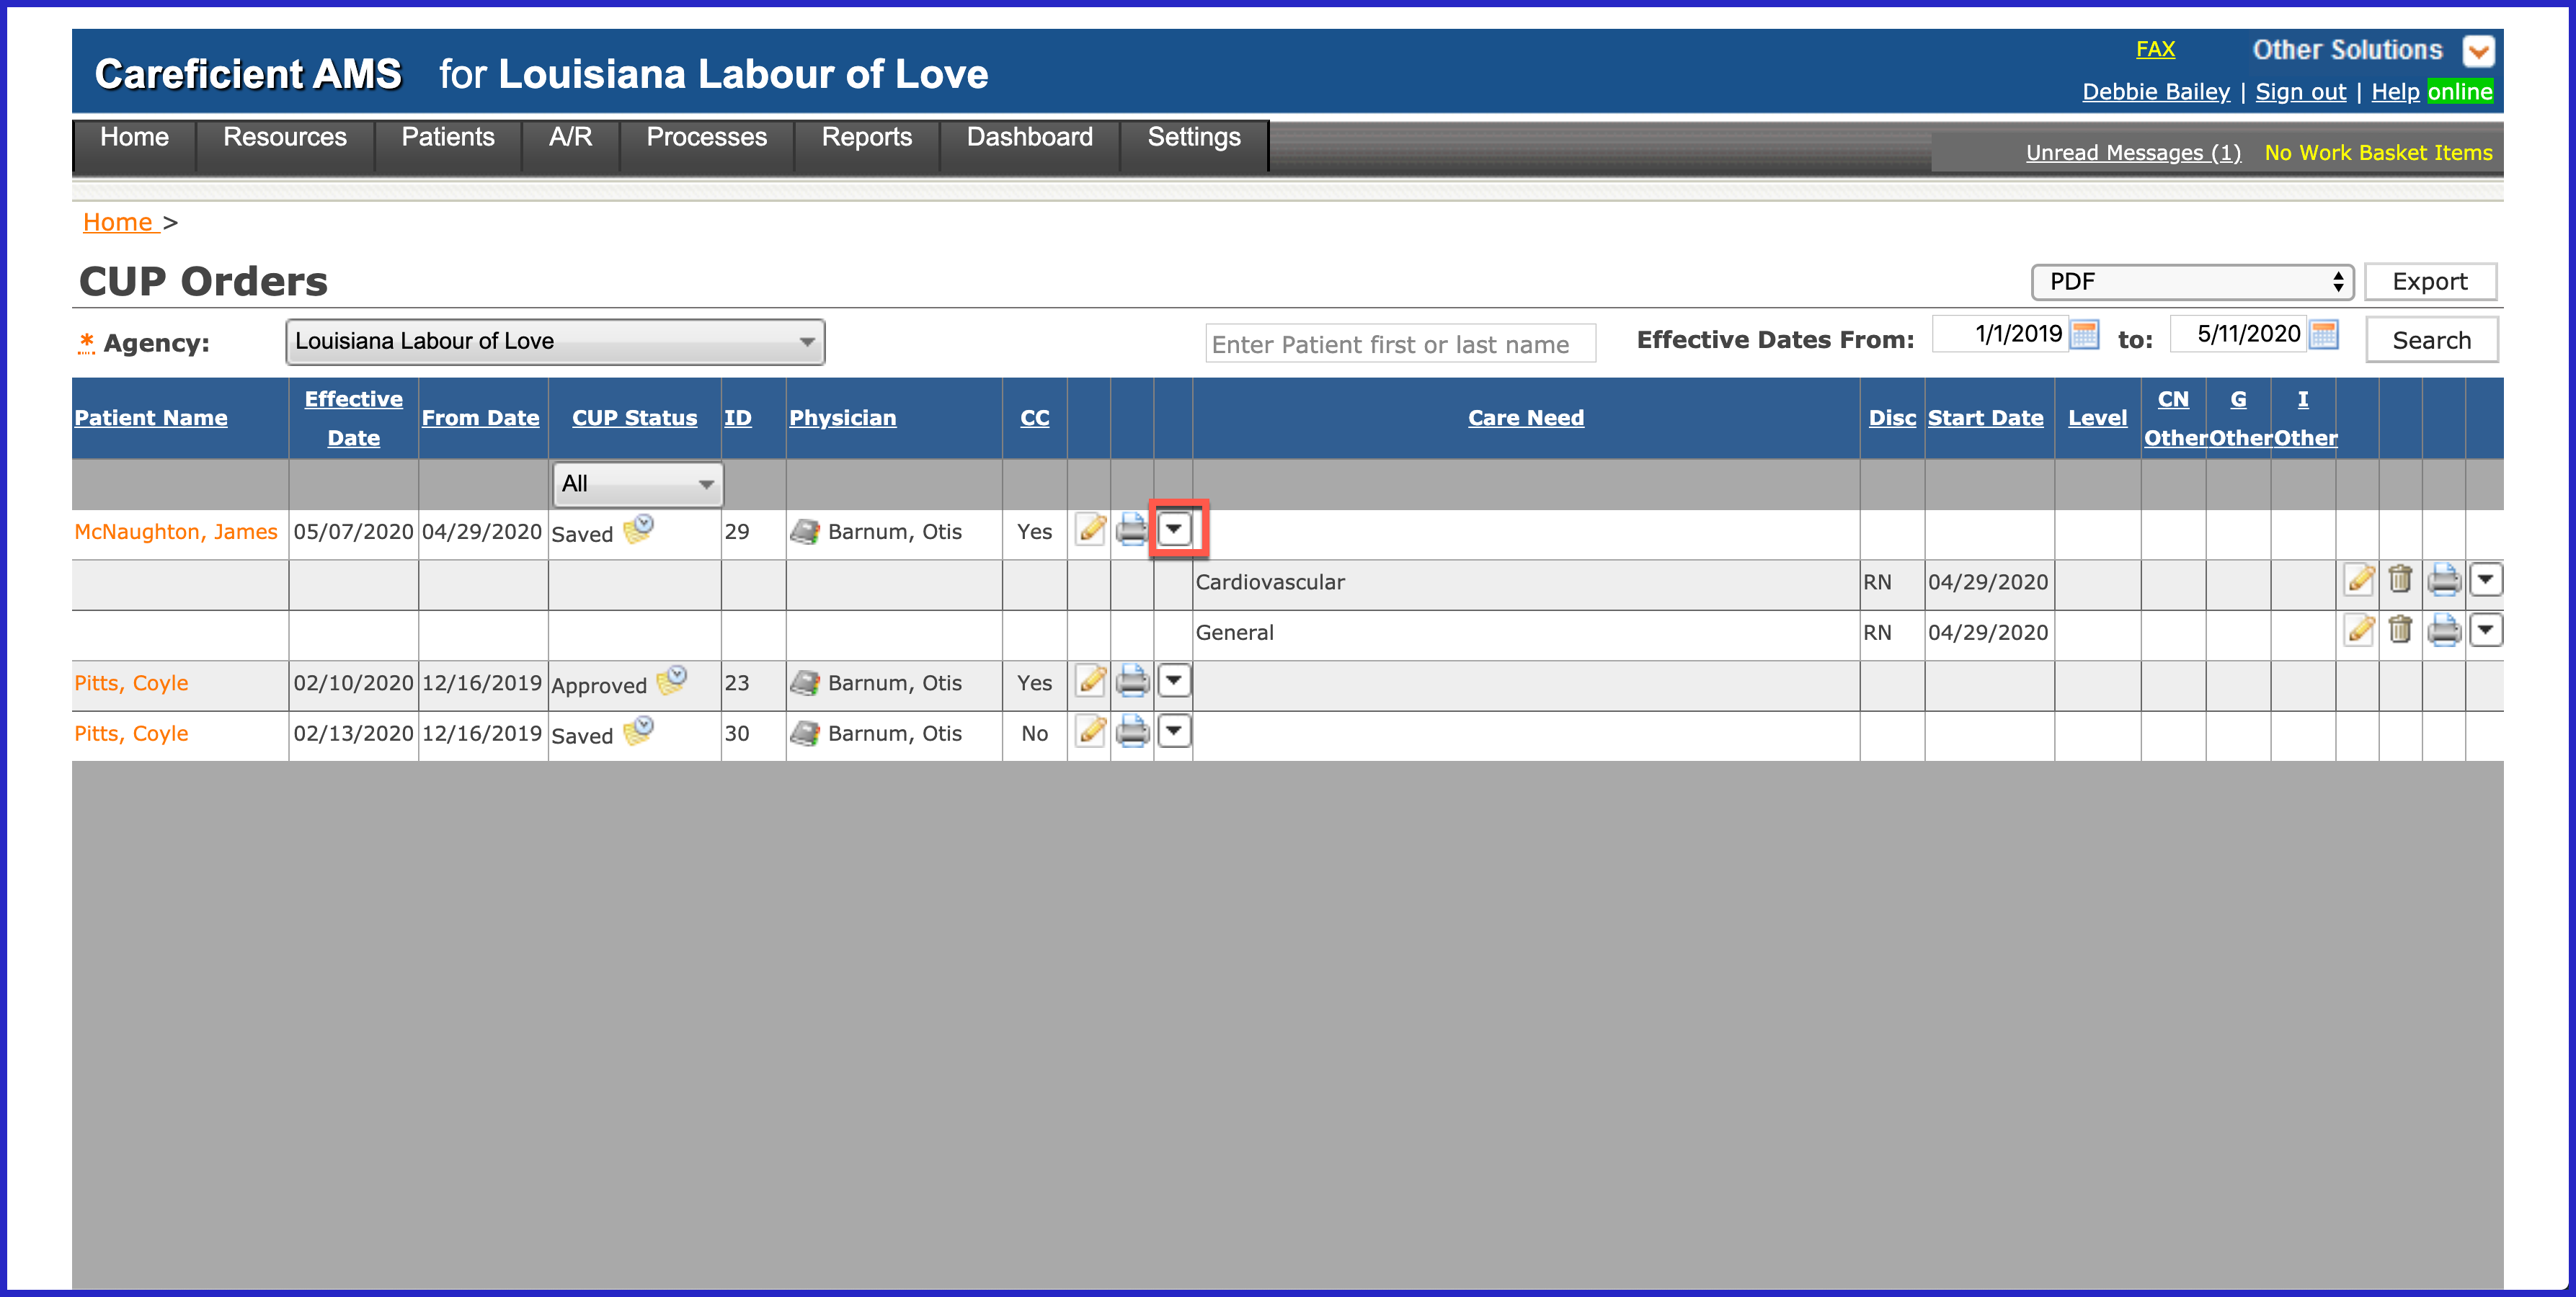
To the right of the order you have several drop down options. Click on the drop down arrow.
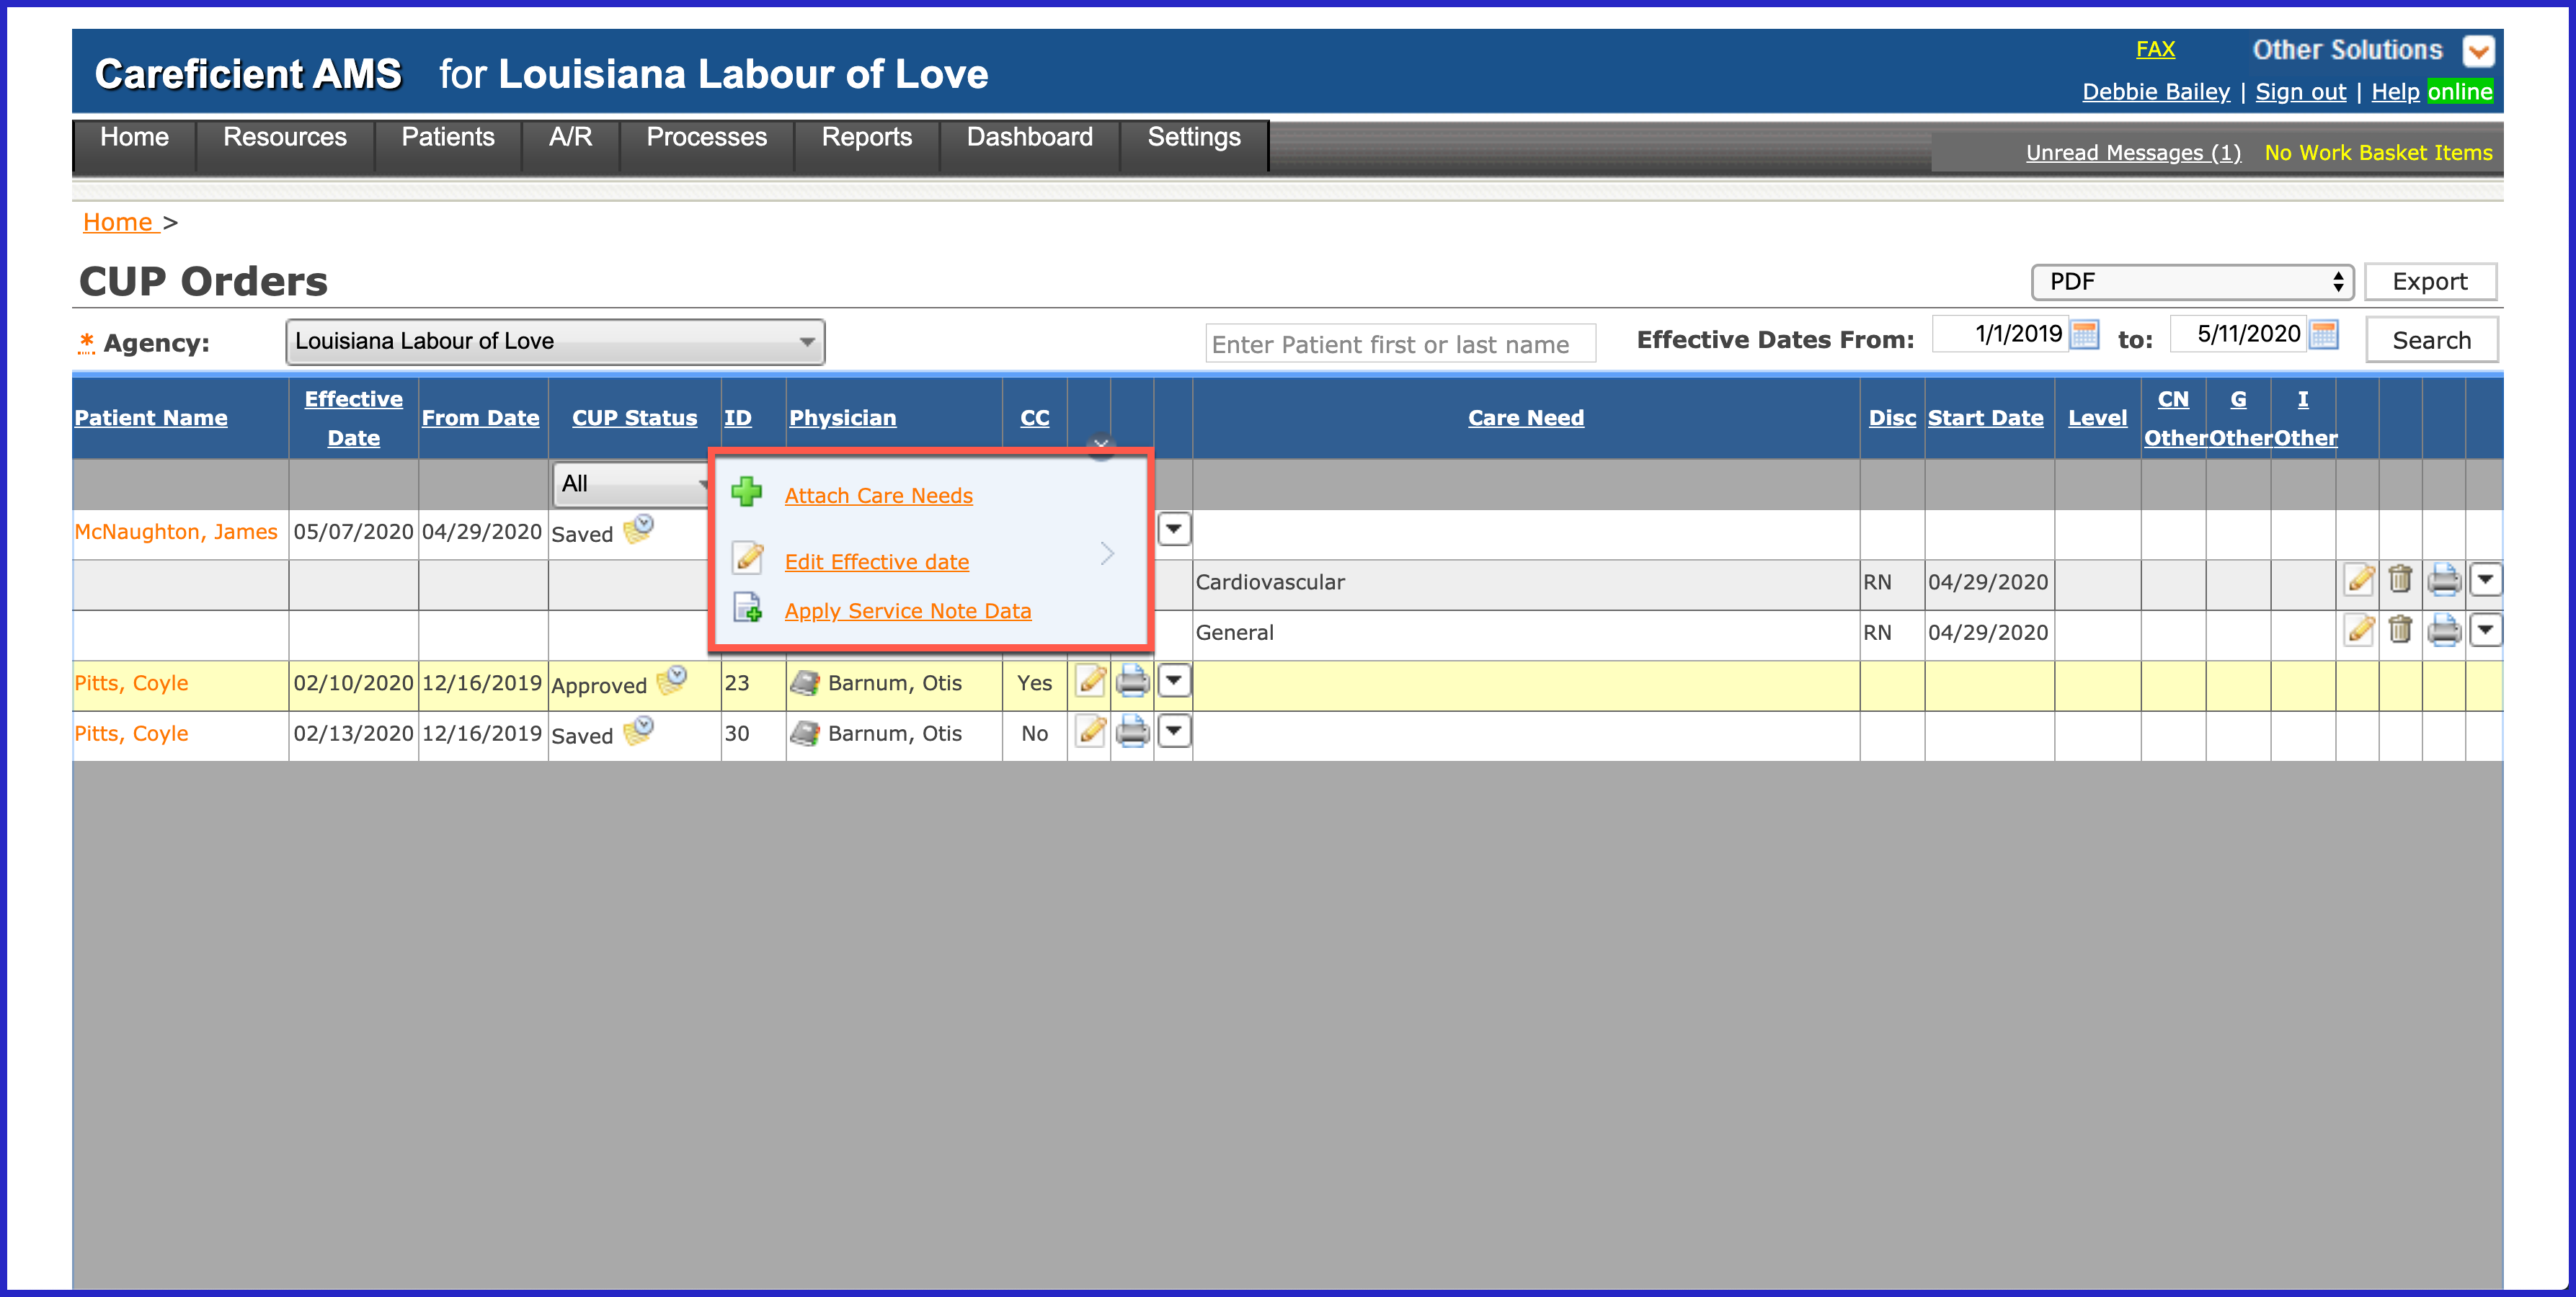
You will notice that there are Cardiovascular and General Care Needs added already but you can add additional Care Needs by clicking on "Attach Care Needs". You can change the effective date of the order, or if you have had a ROC or Follow-up since the last CUP Order, you can pull the Locator items to this CUP Order from that service note by choosing "Apply Service Note Data" and choosing the specific service note.
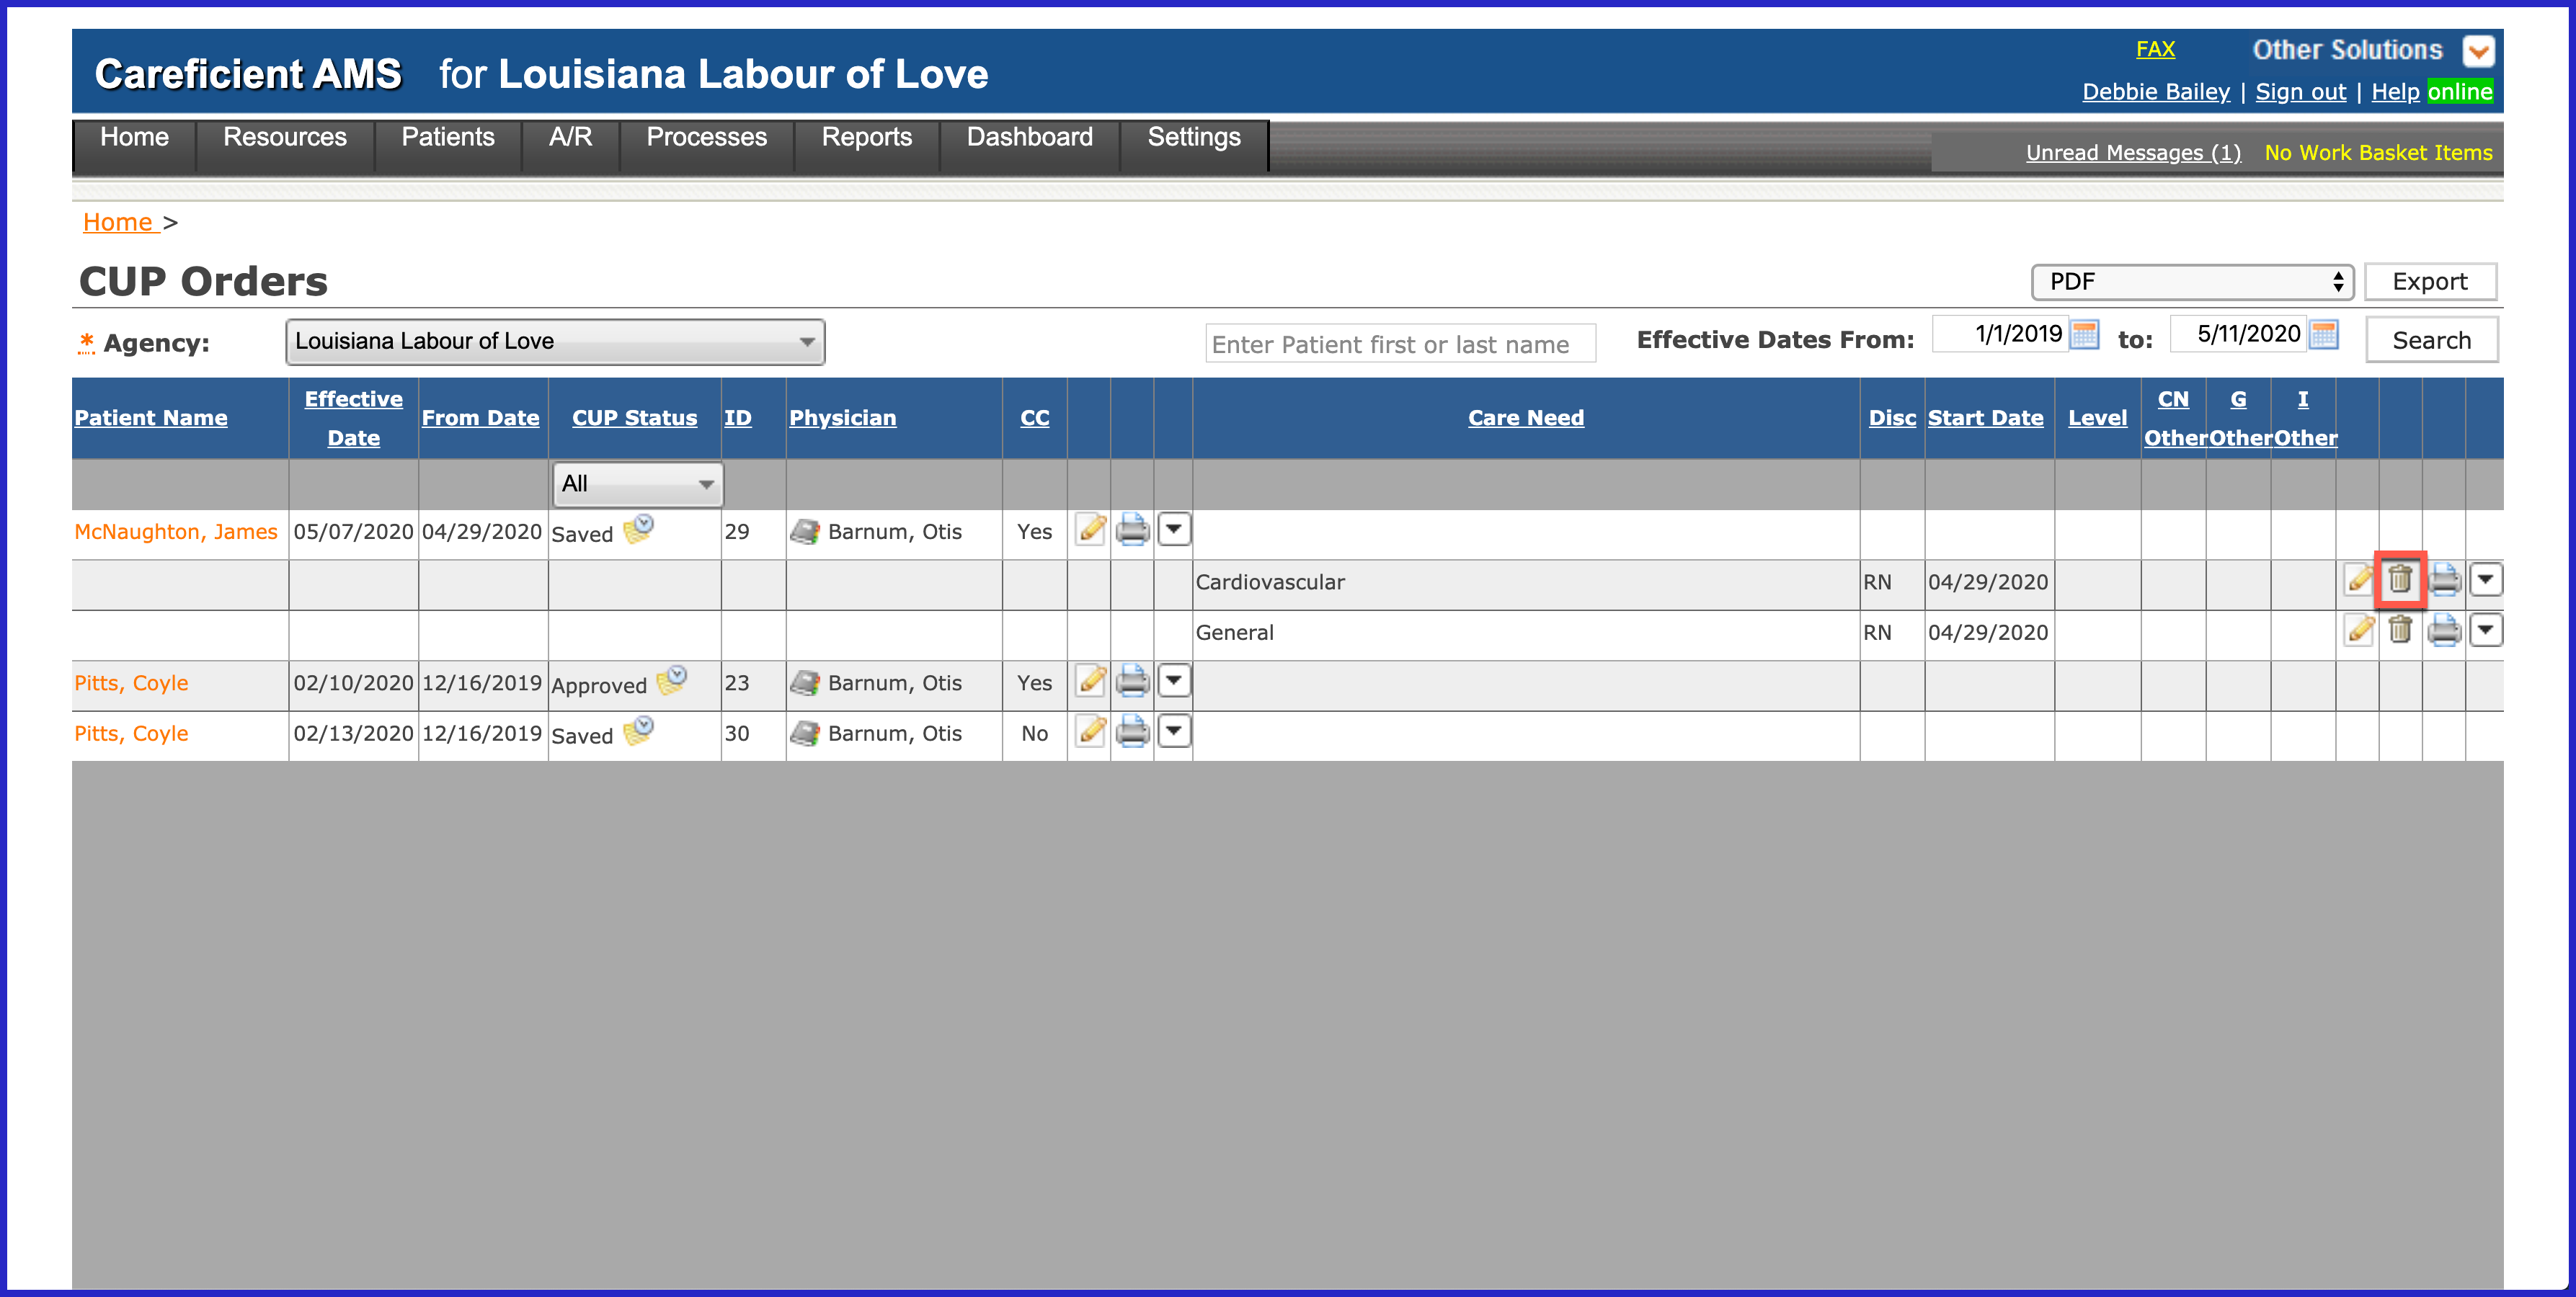
If you have not documented in the service notes against this Care Need, you can delete it by clicking on the Trash Can. If there is documentation in the service note against this Care Need, you will not be able to delete it.
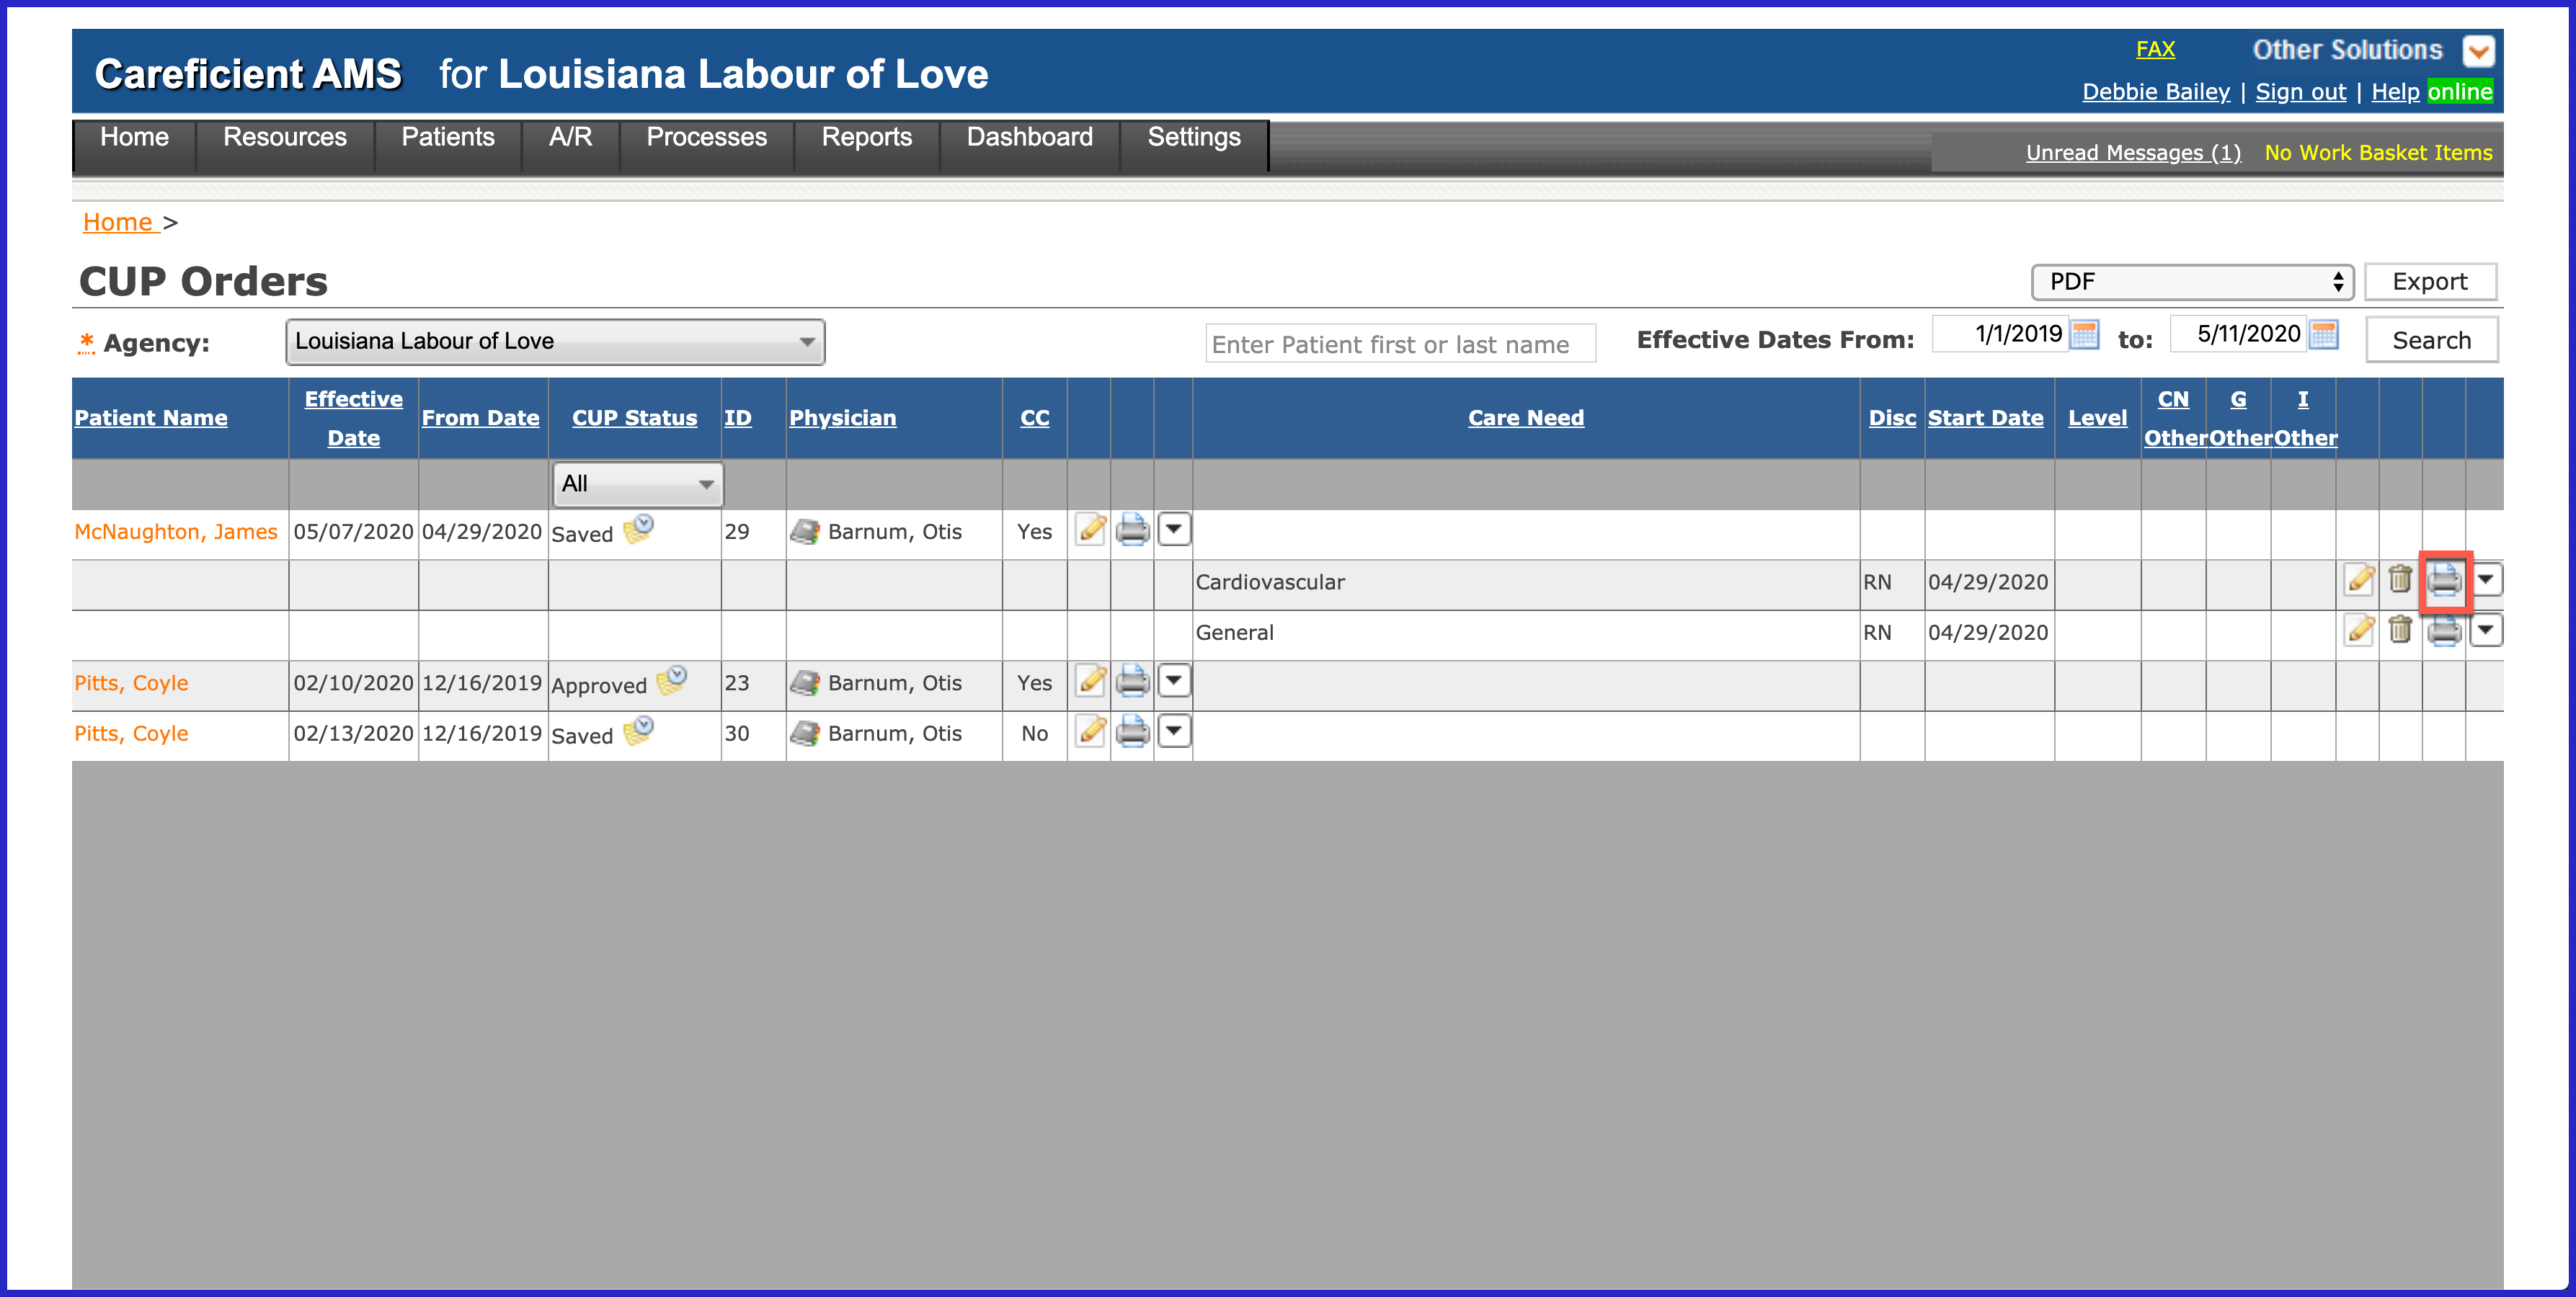
You can print the selected Care Need by clicking on the Printer Icon.
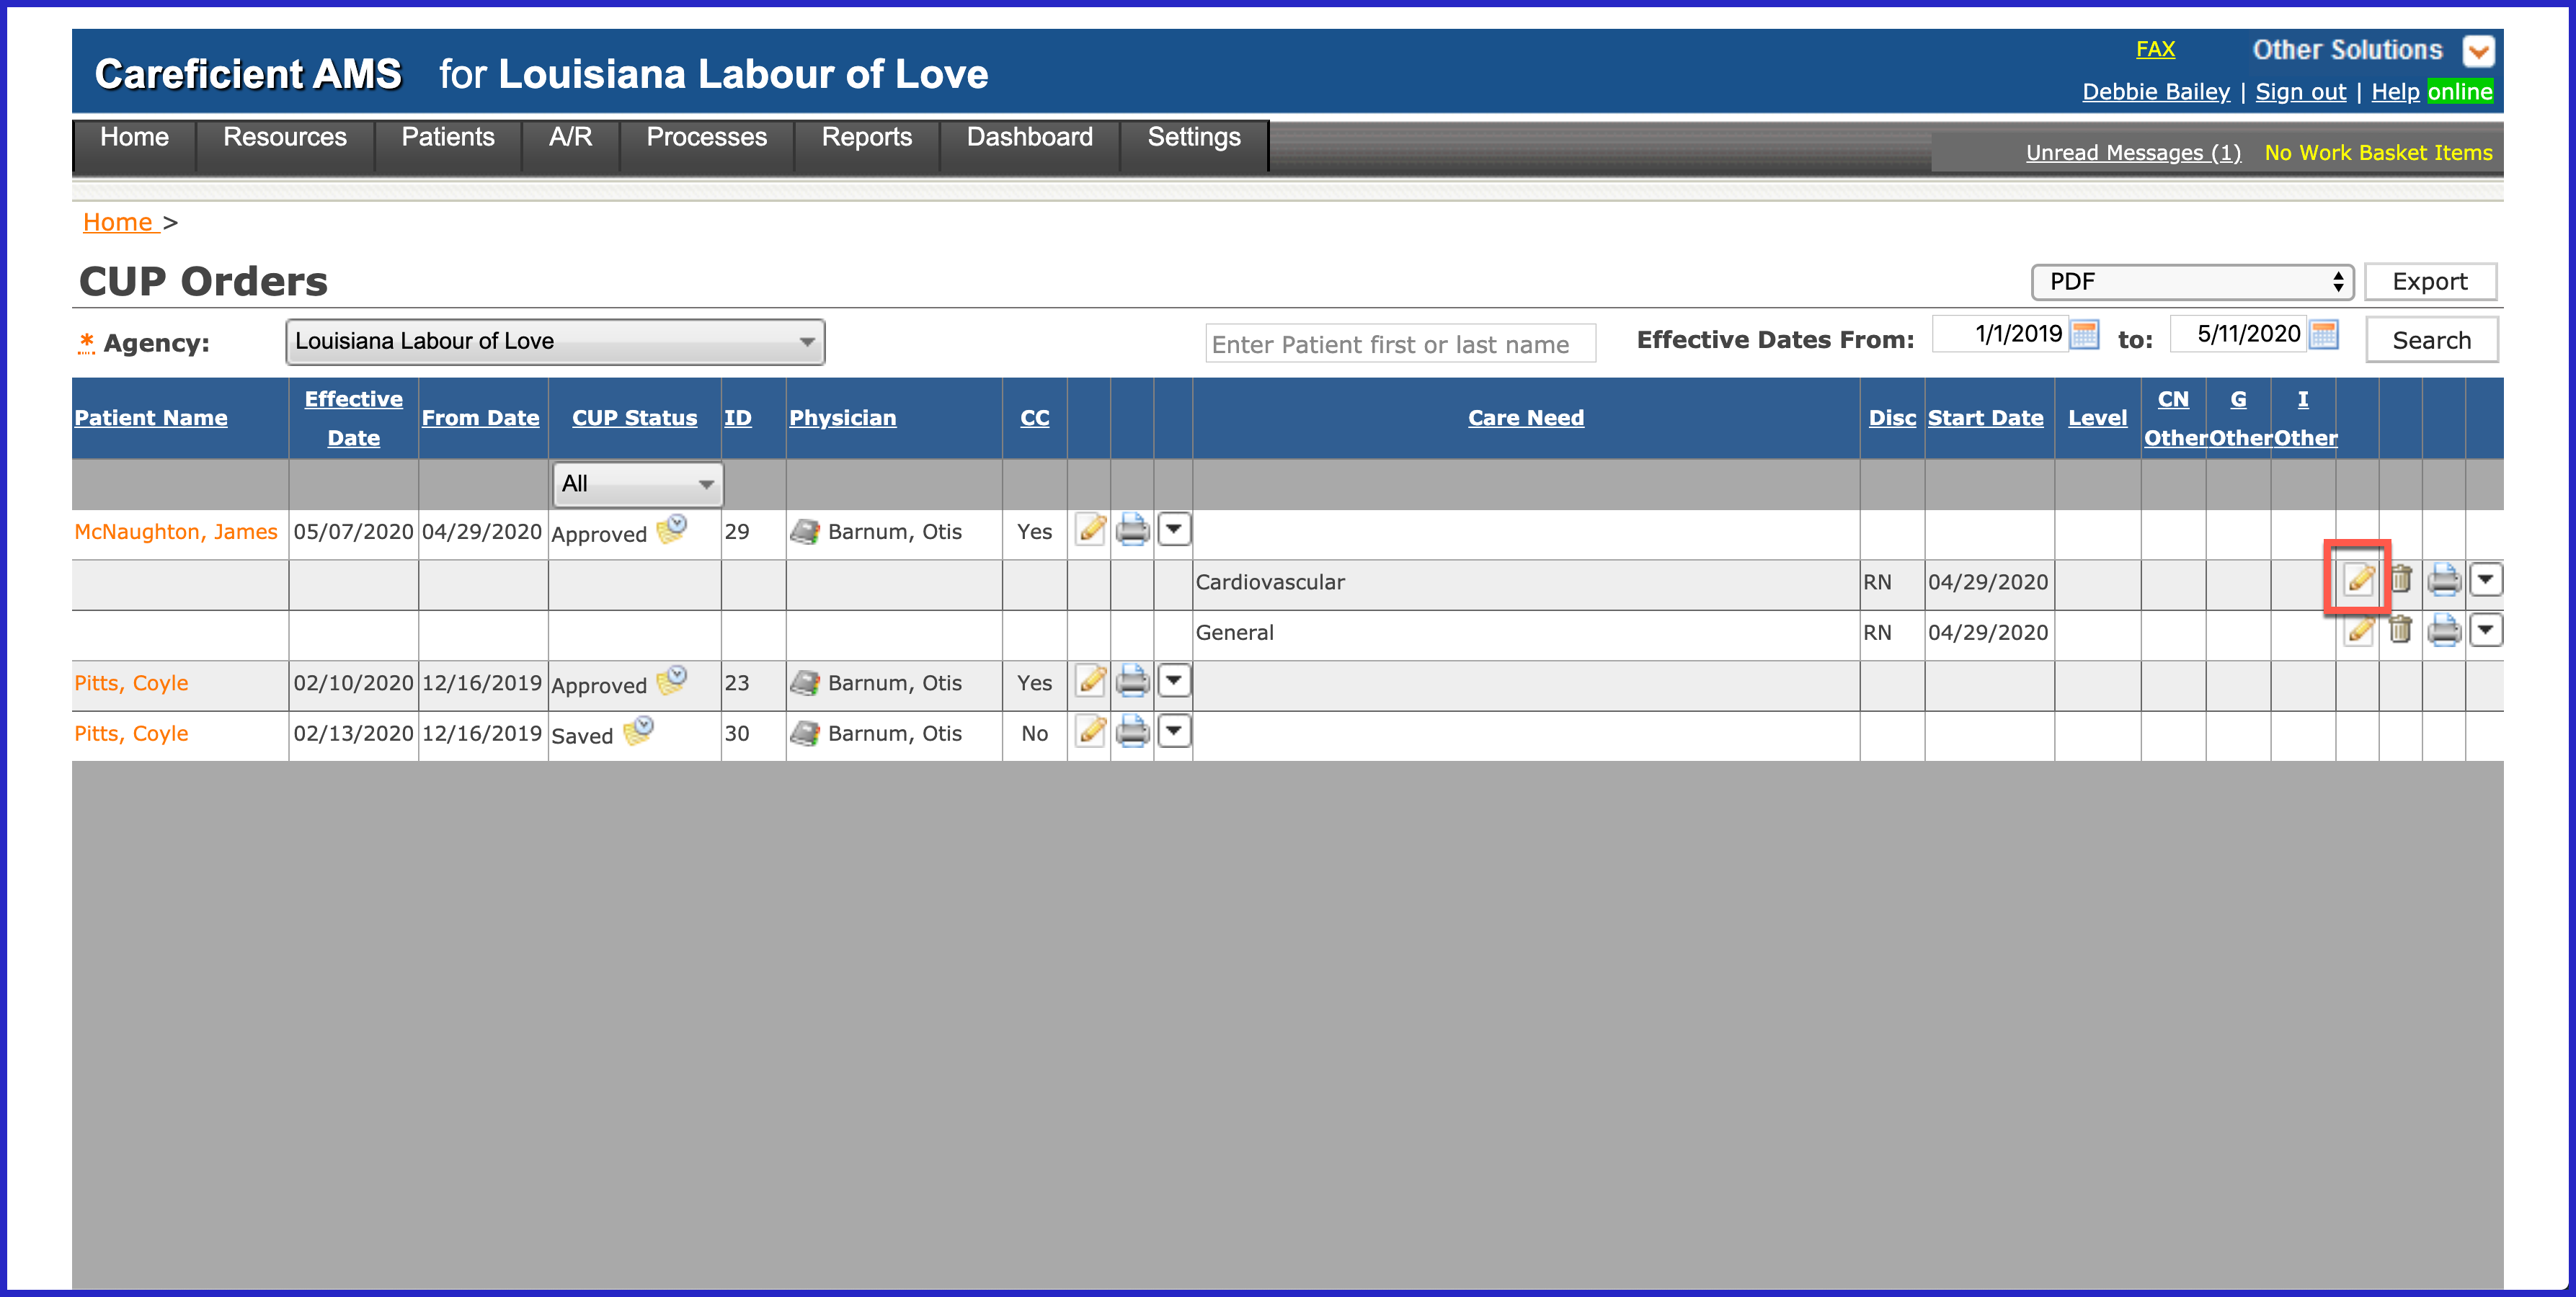
To edit a Care Plan, click on the edit pencil to the right of the Care Need that you want to make changes to.
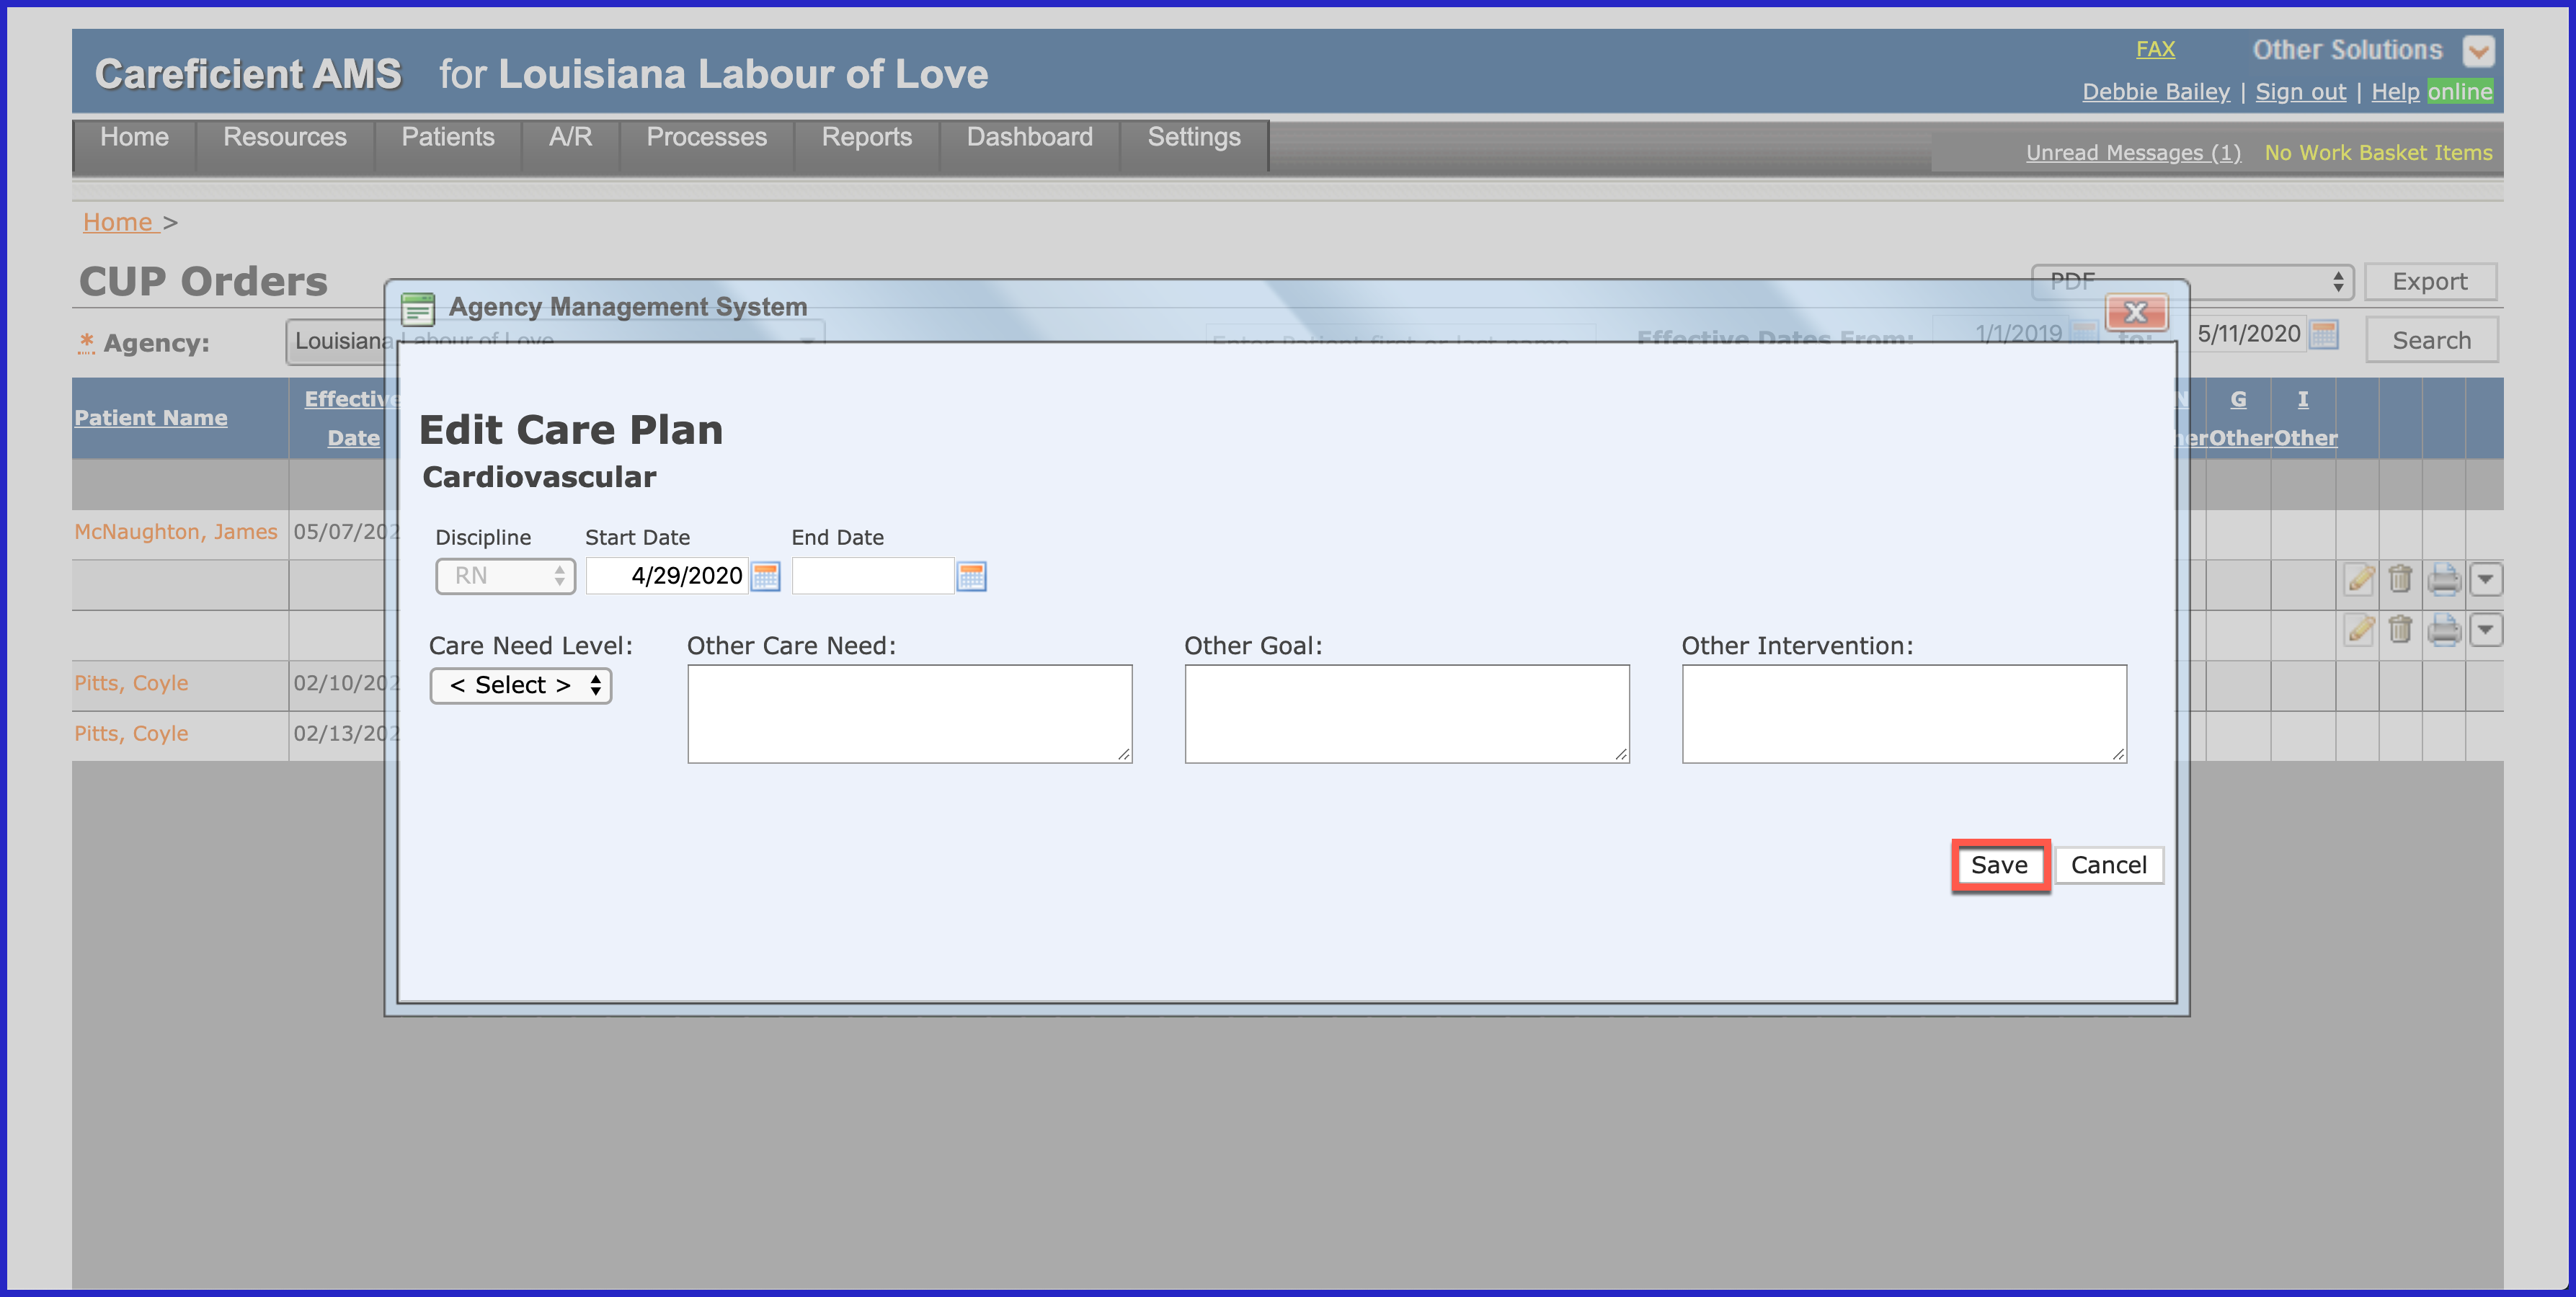
Here you can end the Care Need by entering an end date, Change the Care Need Level, Add "Other Care Need", "Other Goal", or "Other Intervention". I do not recommend adding them here as they will not flow to the service notes to be documented on.
There are several ways to update a Care Need. Click on the drop down to the right of the Care Need that you are wanting to make changes to.
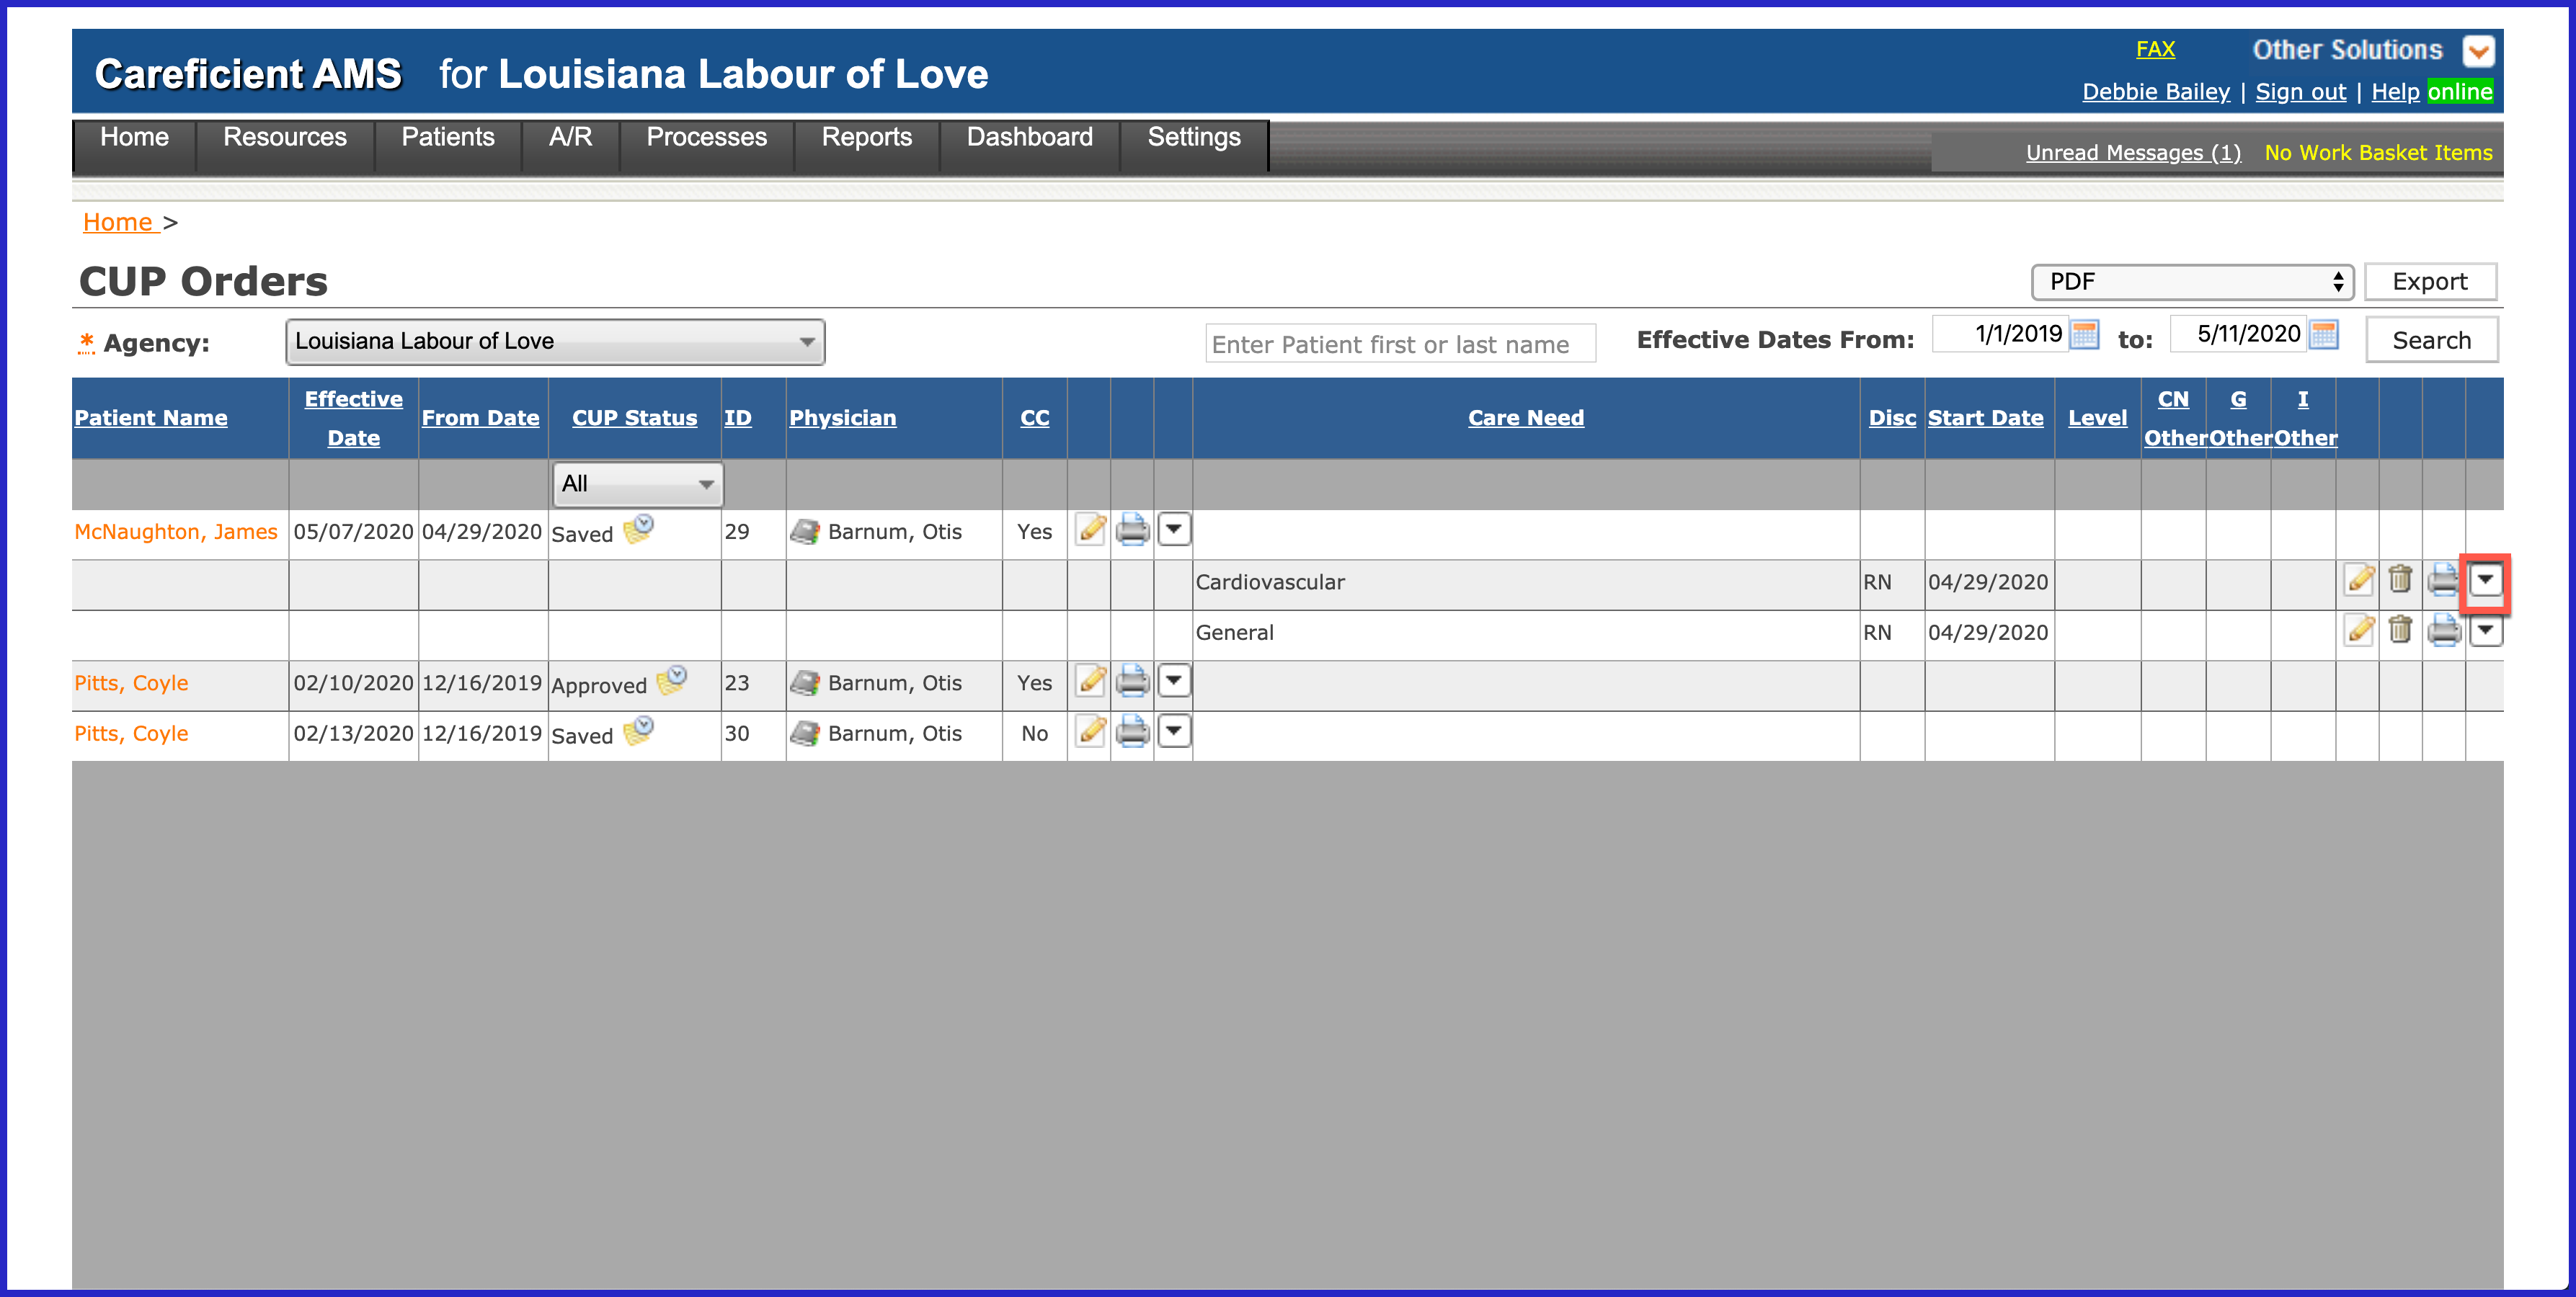
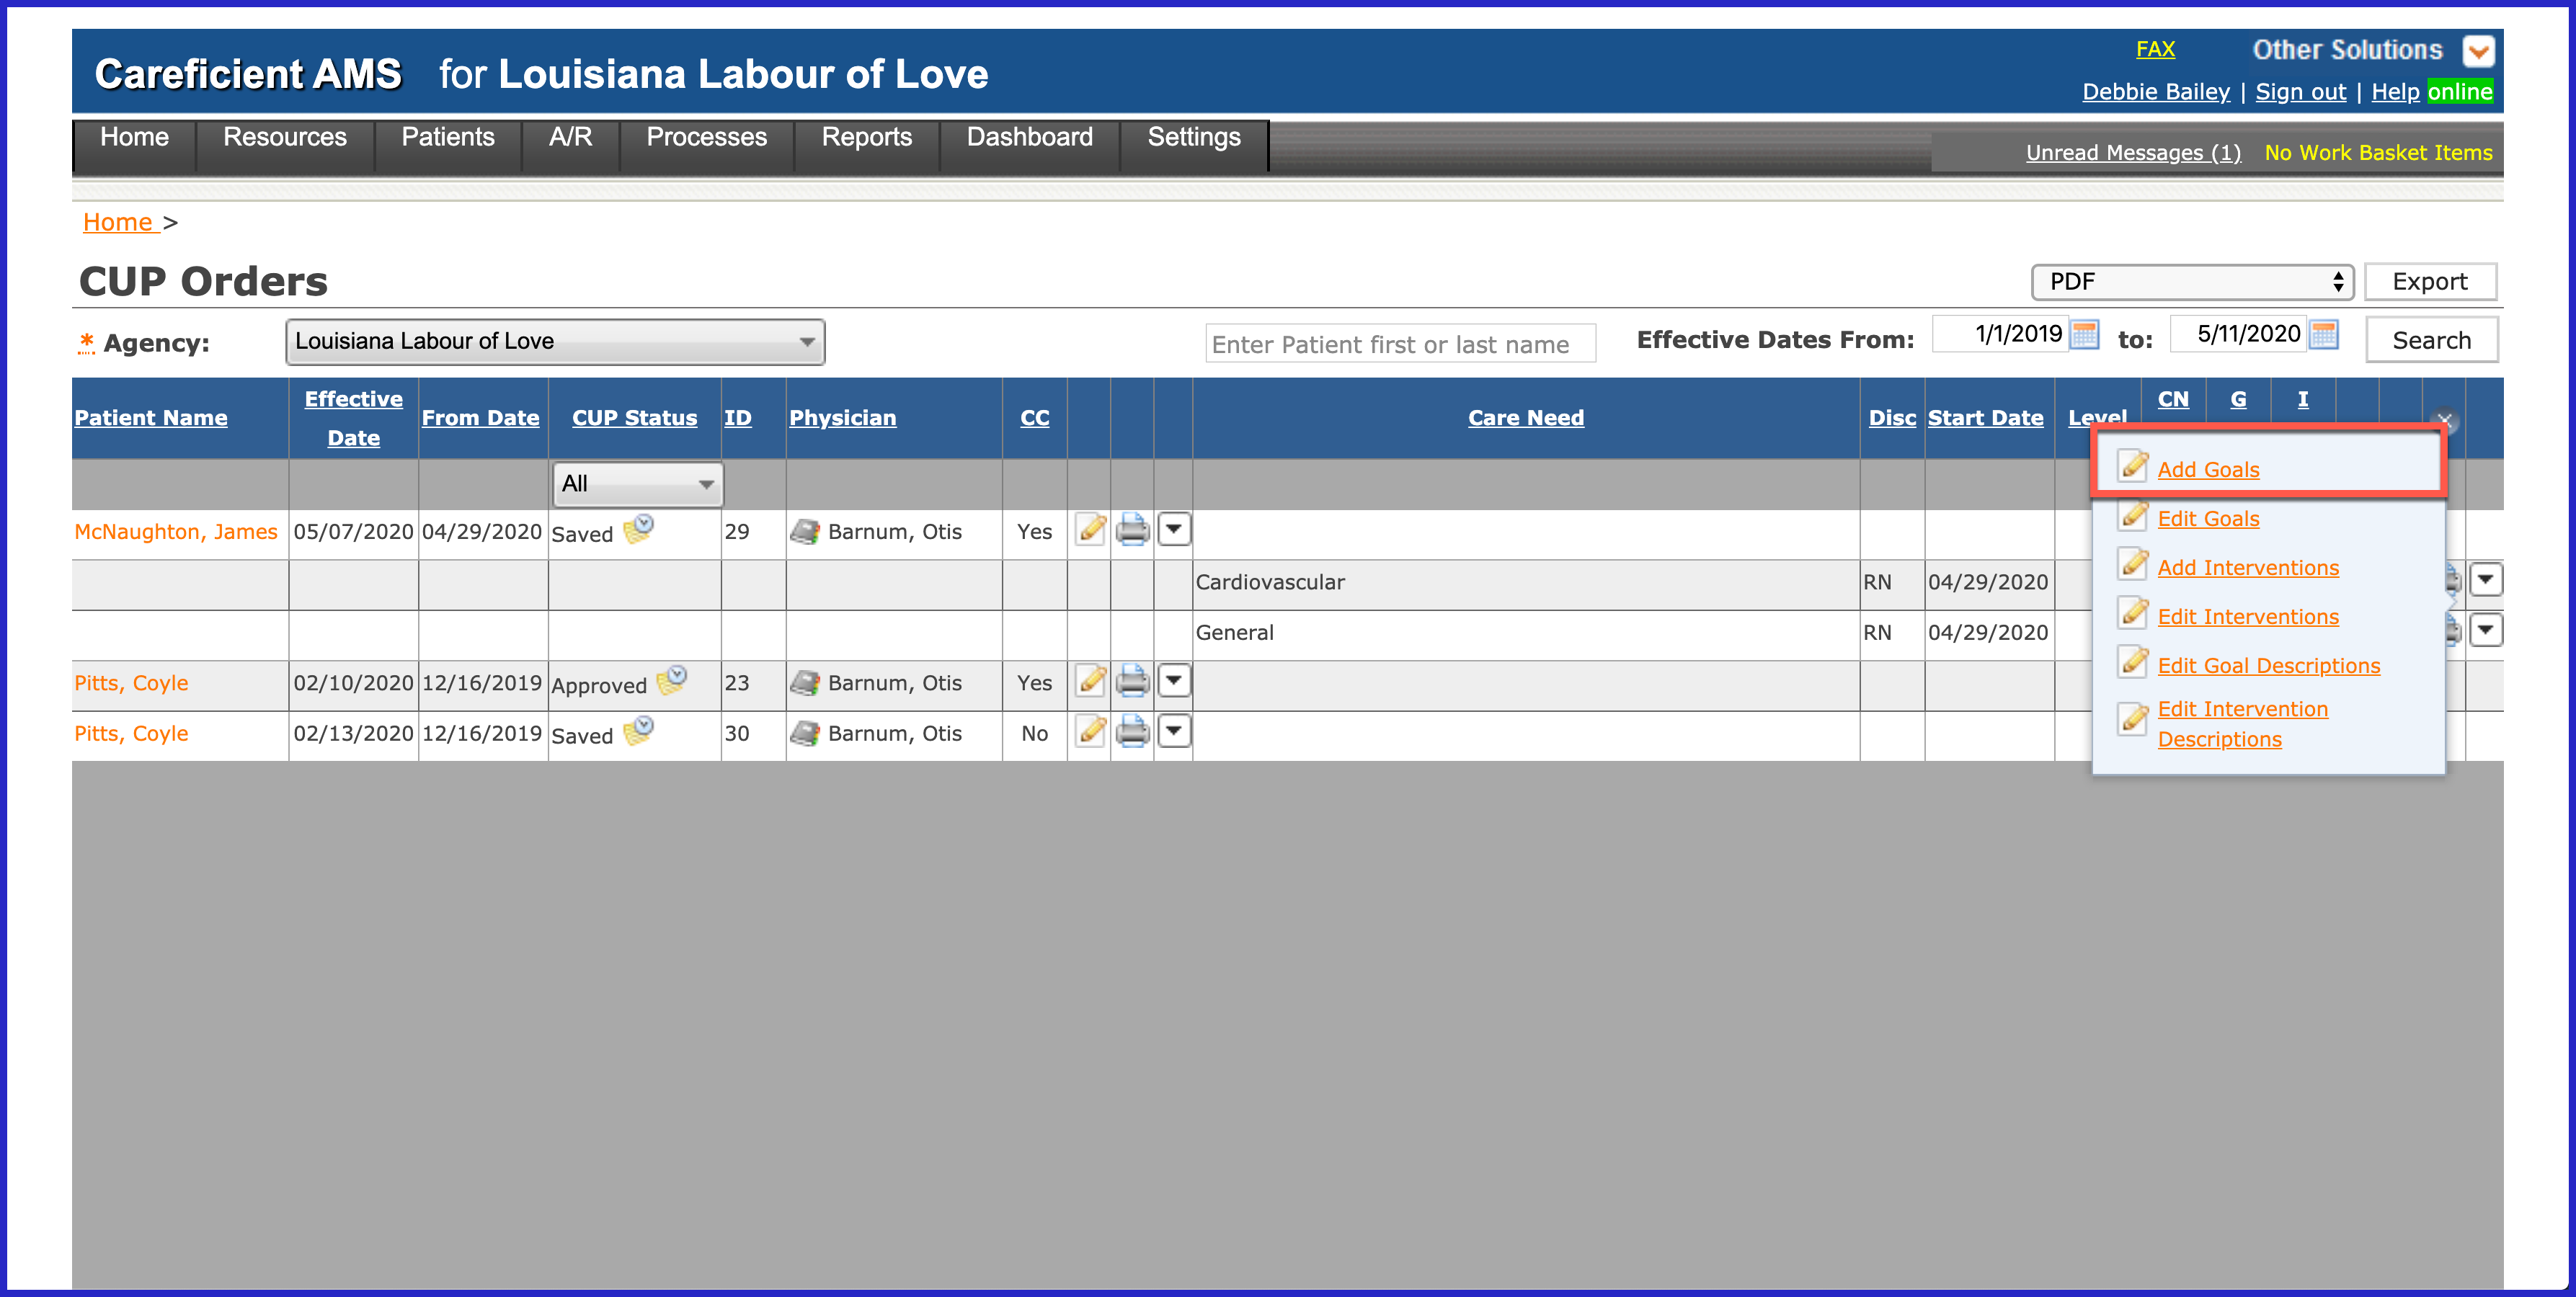
To add goals, click on the drop down to the right of the Care Need that you want to add goals to and click "Add Goals".
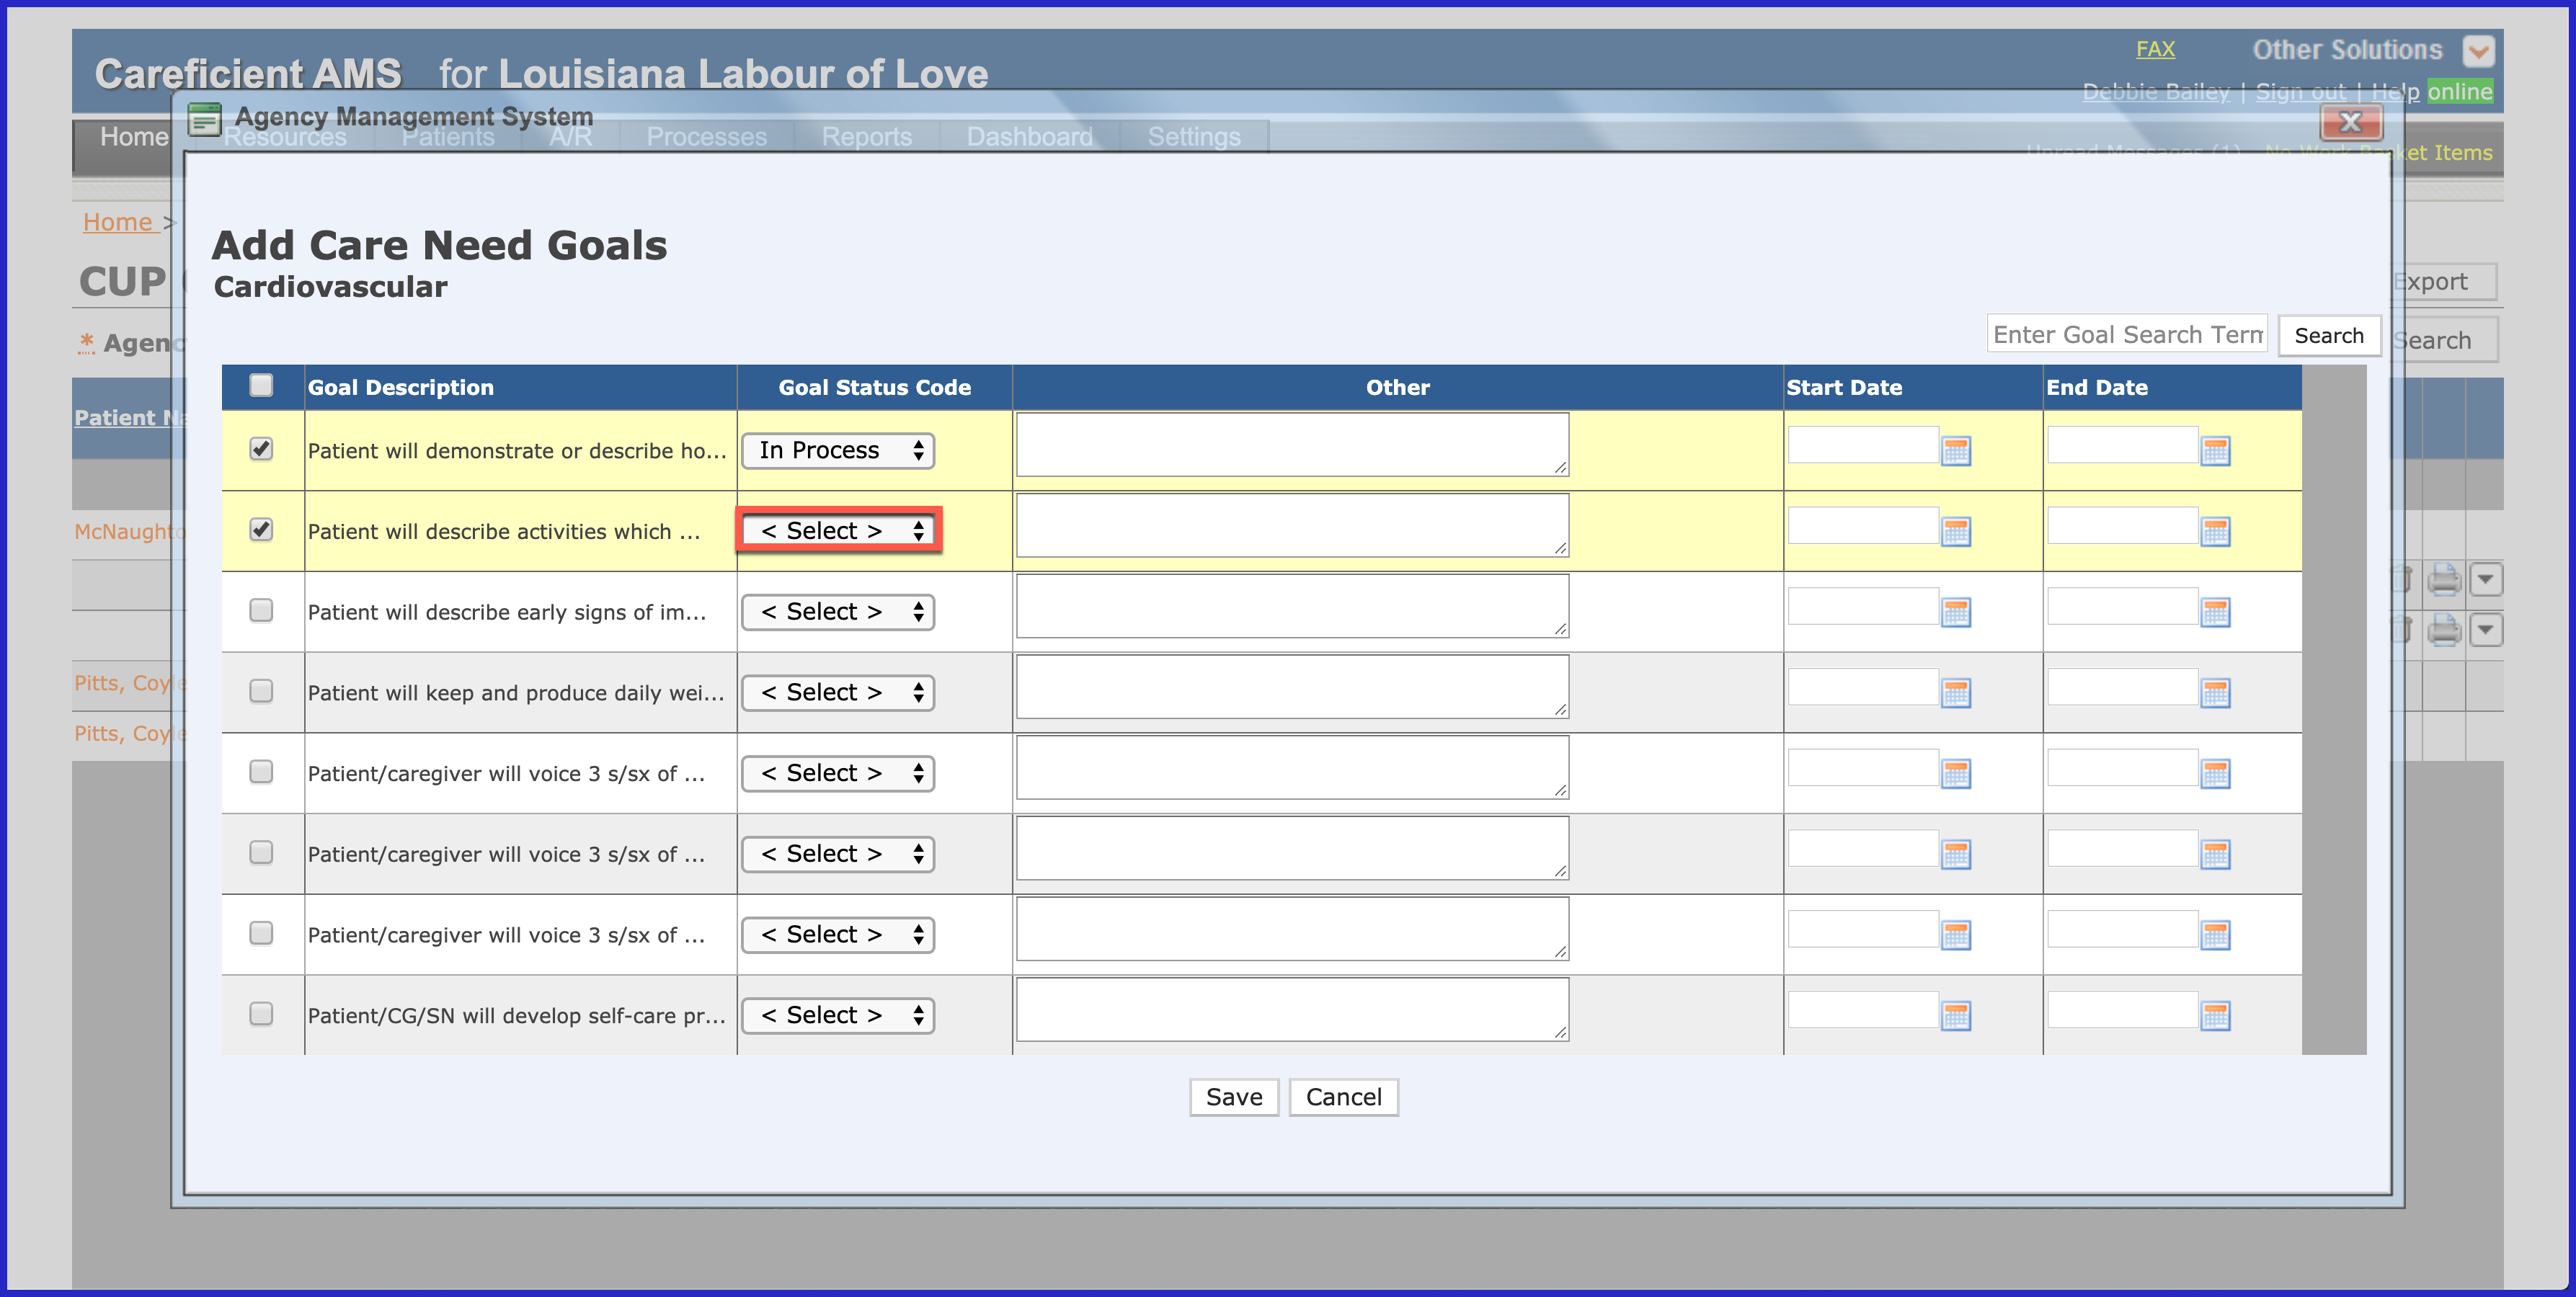
When you have added the goals that you desire, click on the drop down to the right of "Select".
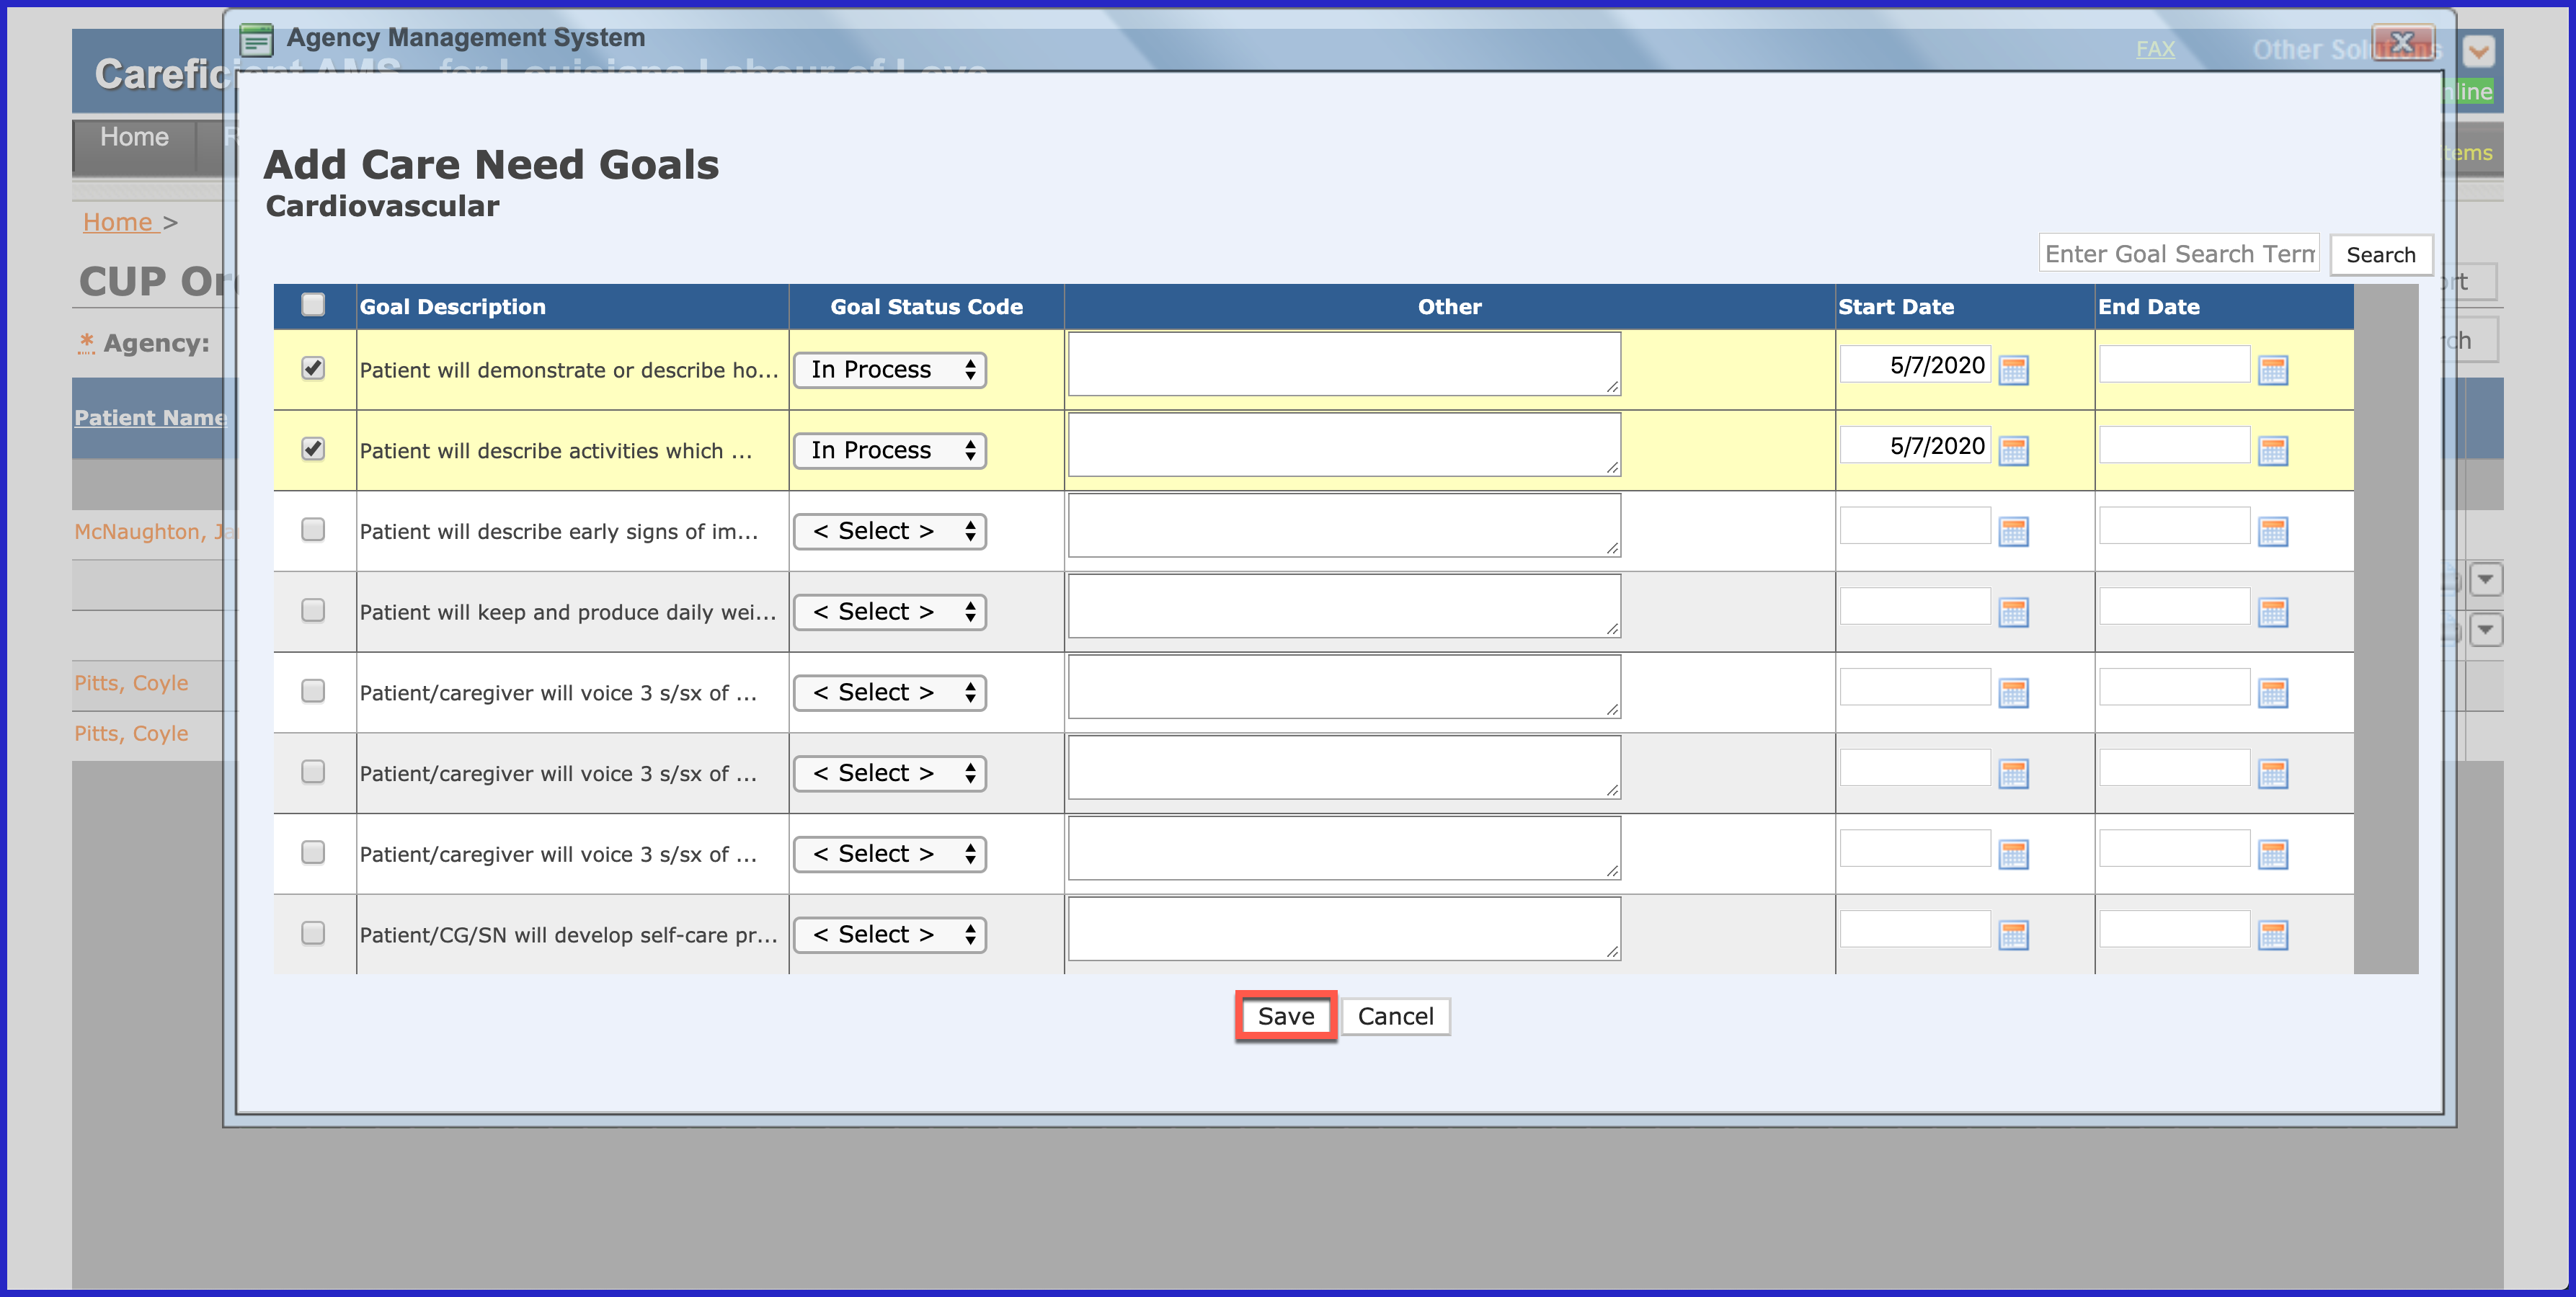
Here you can indicate the status of the goal. When adding new goals during the cert period, make sure to add the start date for the goals so that they don't show up in prior service notes. Click "Save" when you are finished.
NOTE: For Careficient Agency Administrators, click here to learn more about setting up Goal Status Types in the lookup tables.
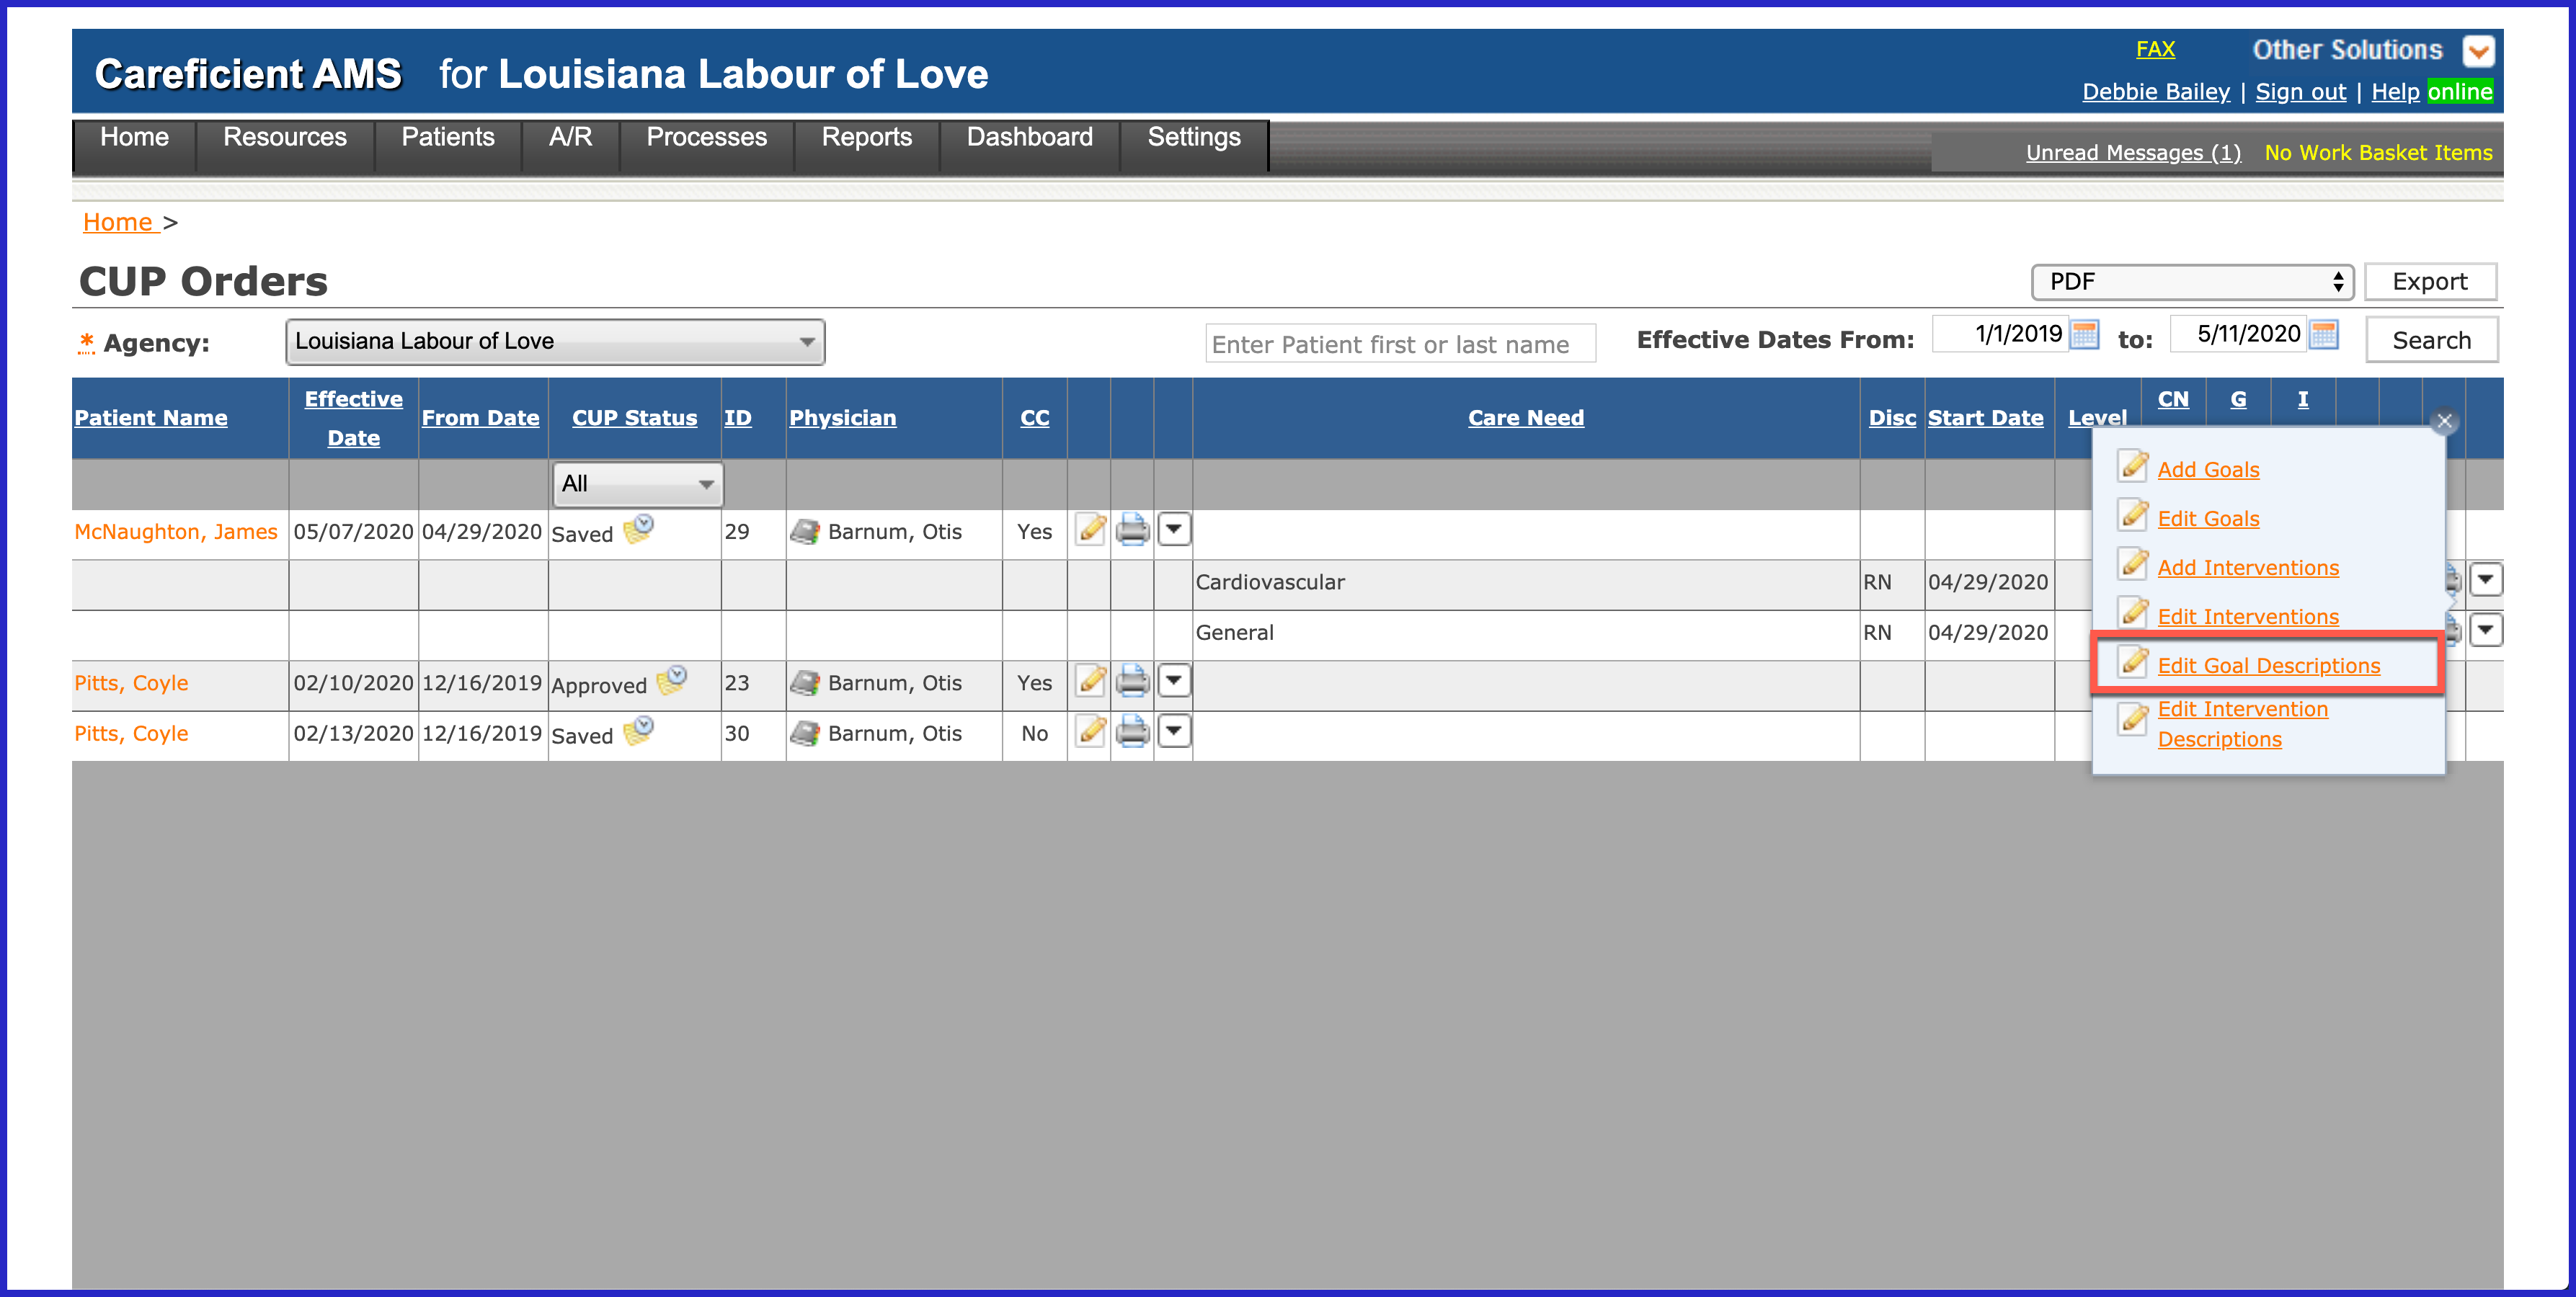
To make the goals more specific to your patient, click on the drop down to the right of the Care Need that you want to edit descriptions for and choose "Edit Goal Descriptions".
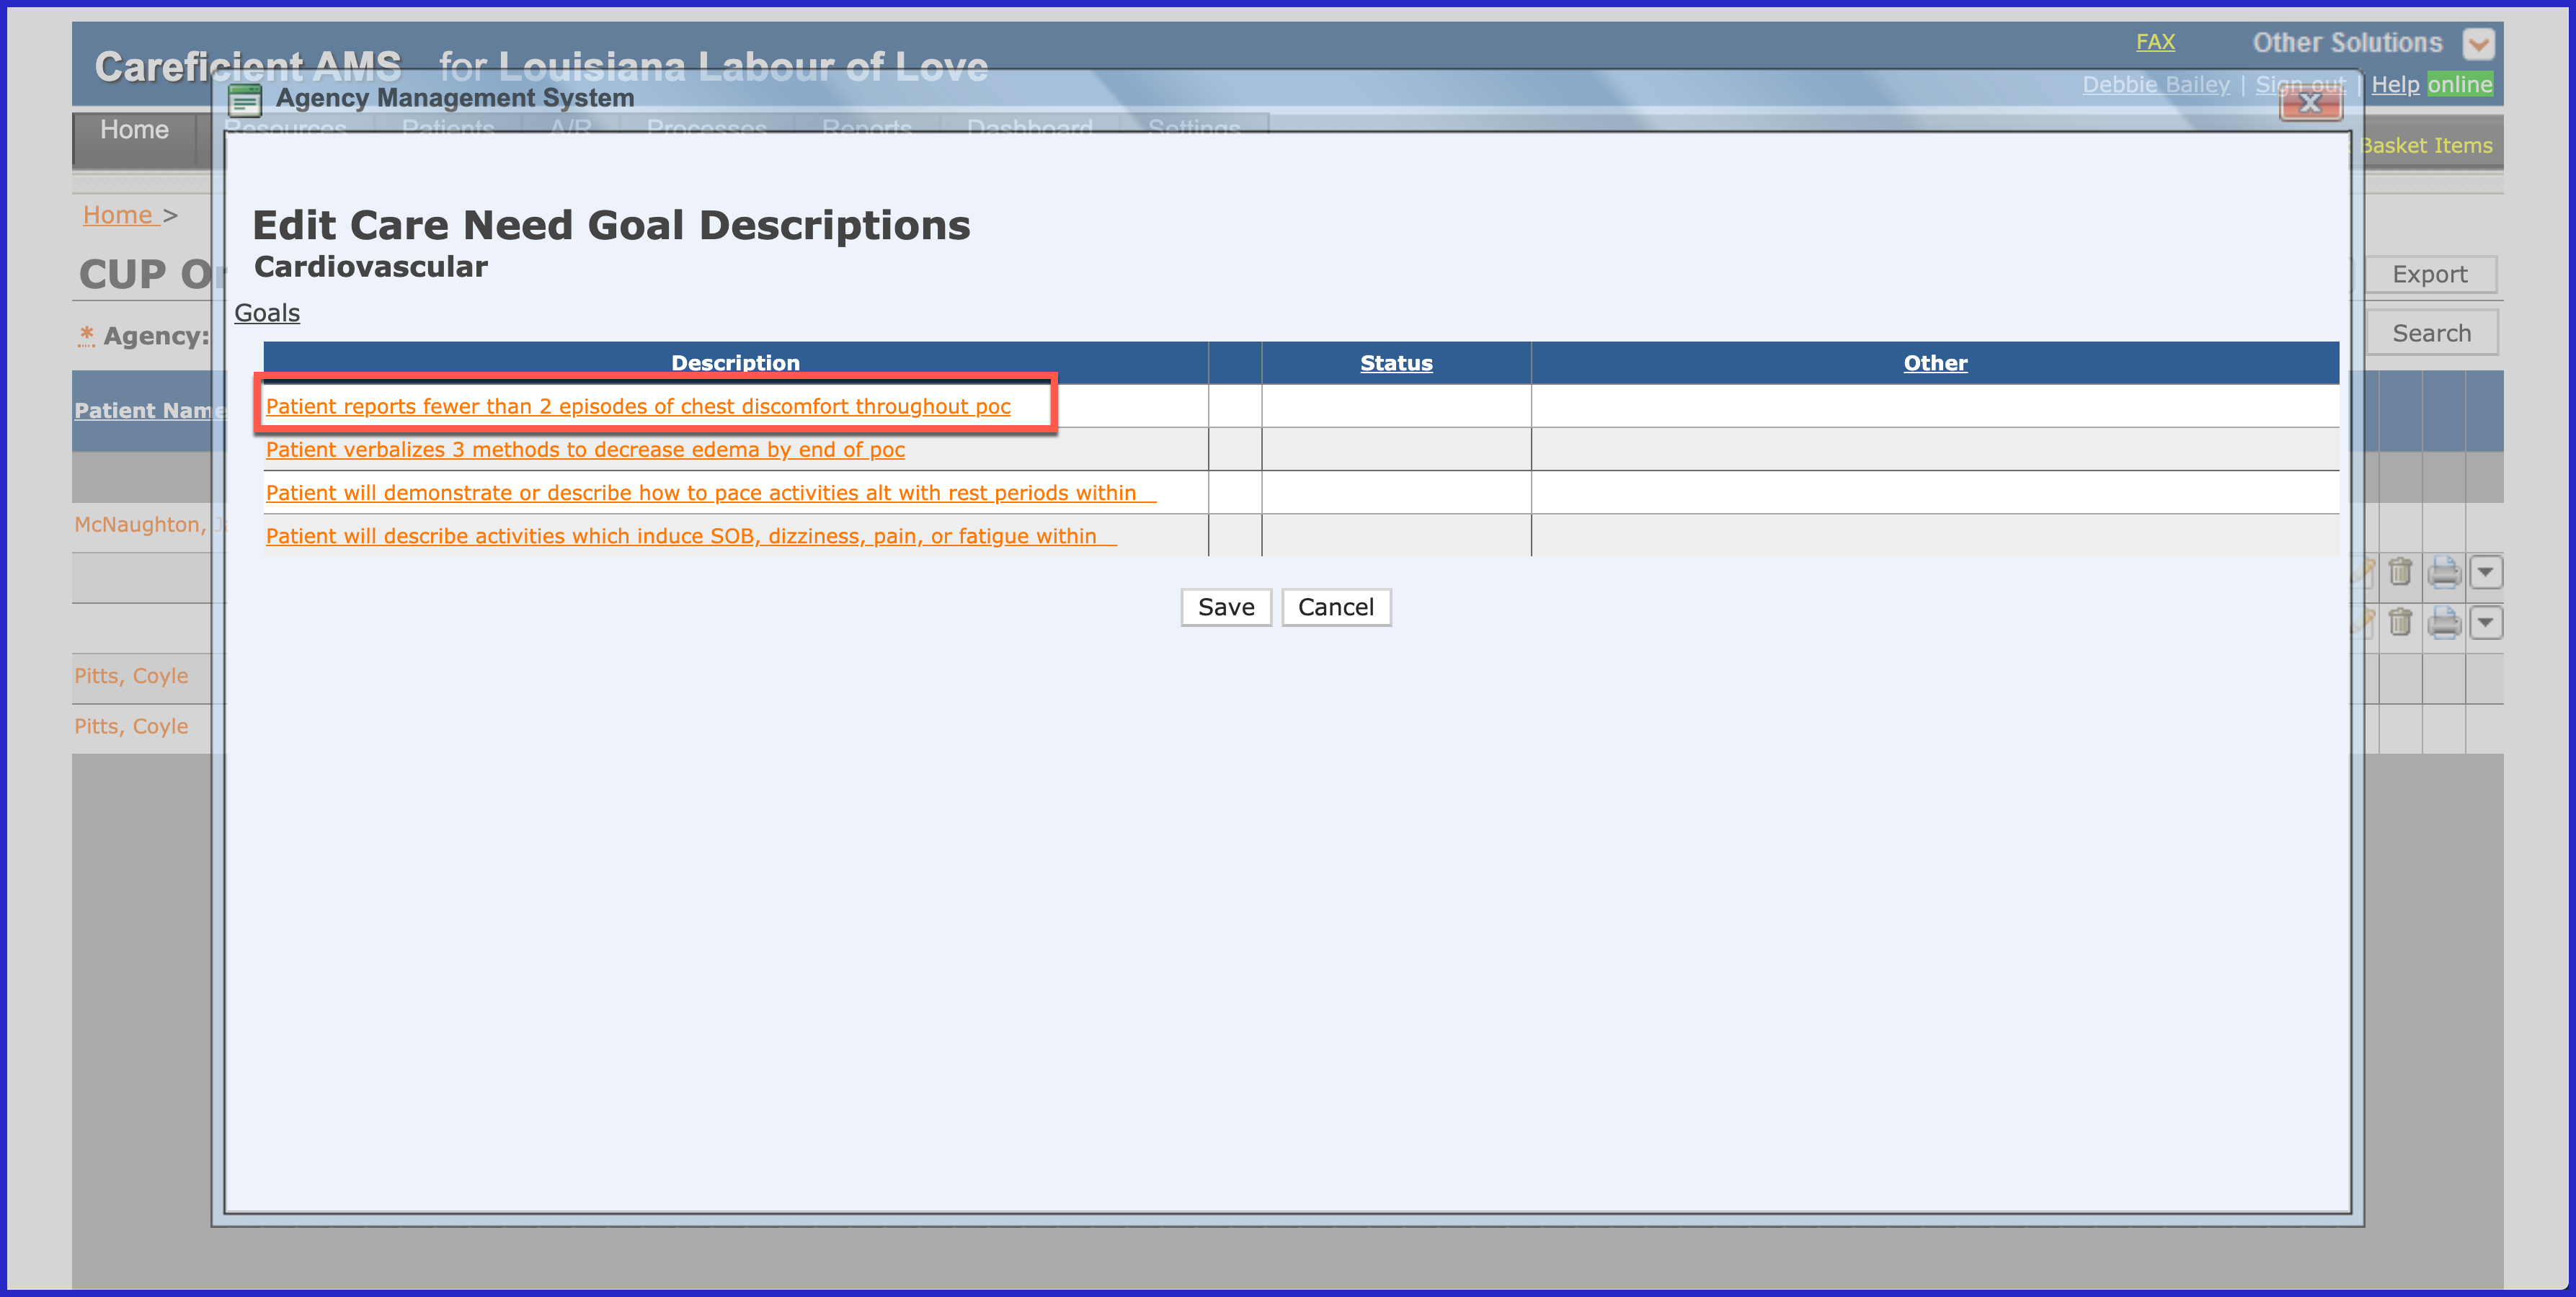
Click on the goal that you want to edit.
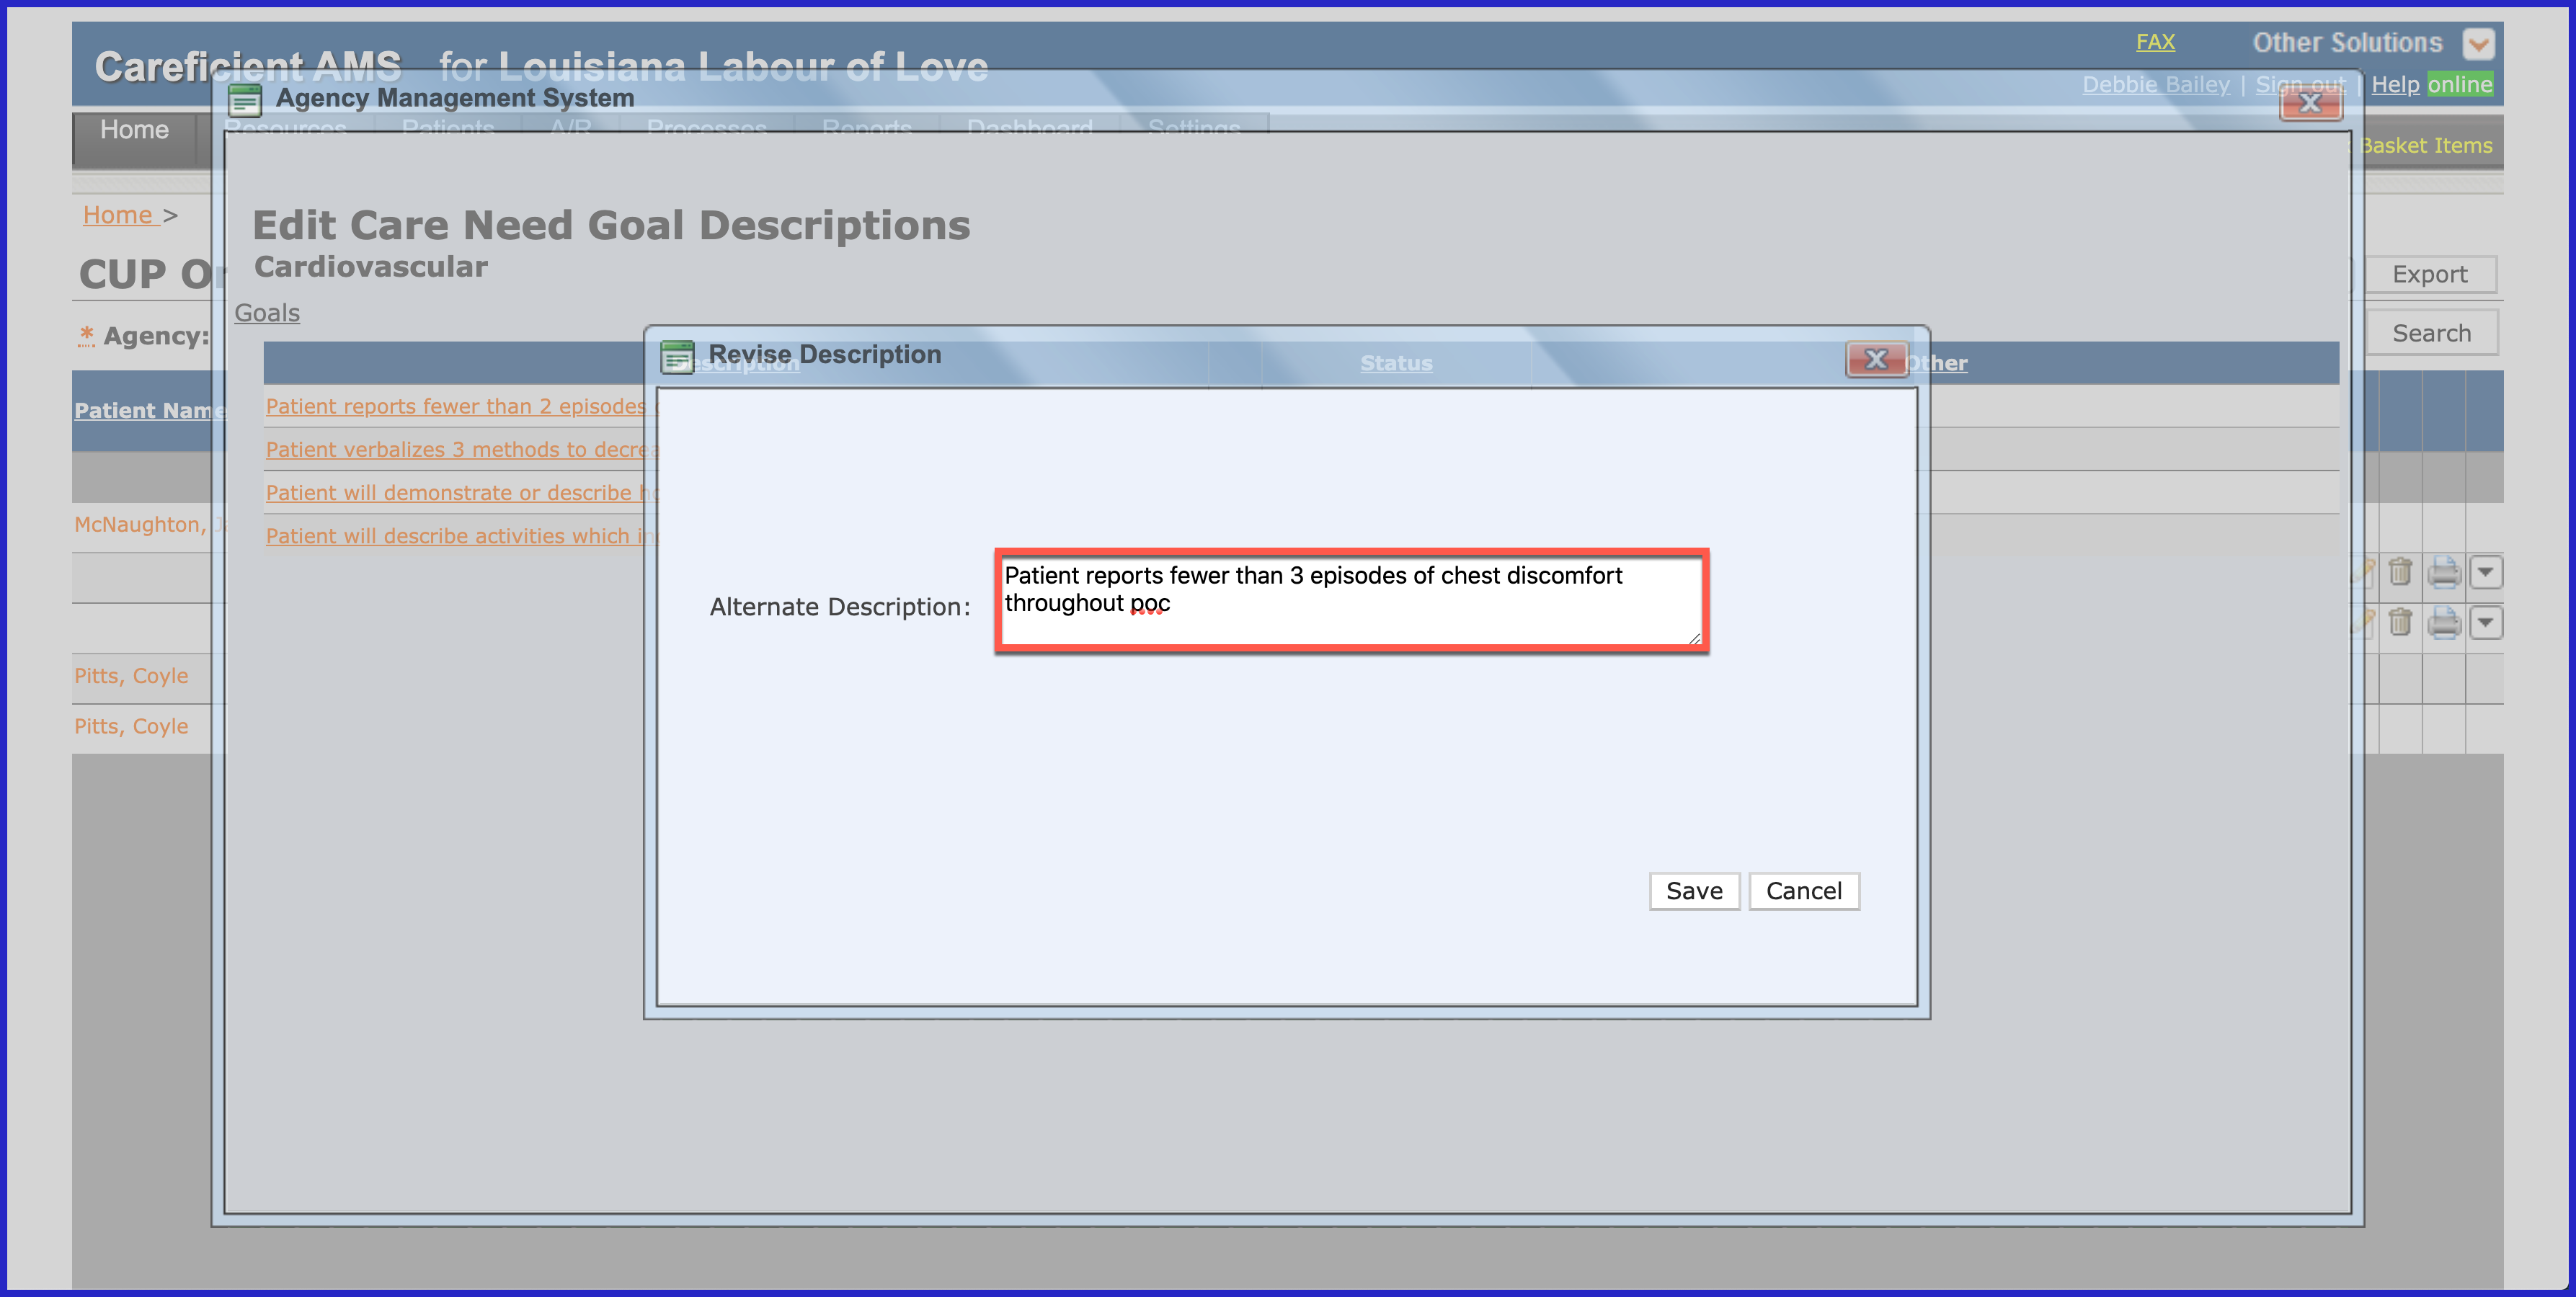
Make the necessary changes and click "Save".
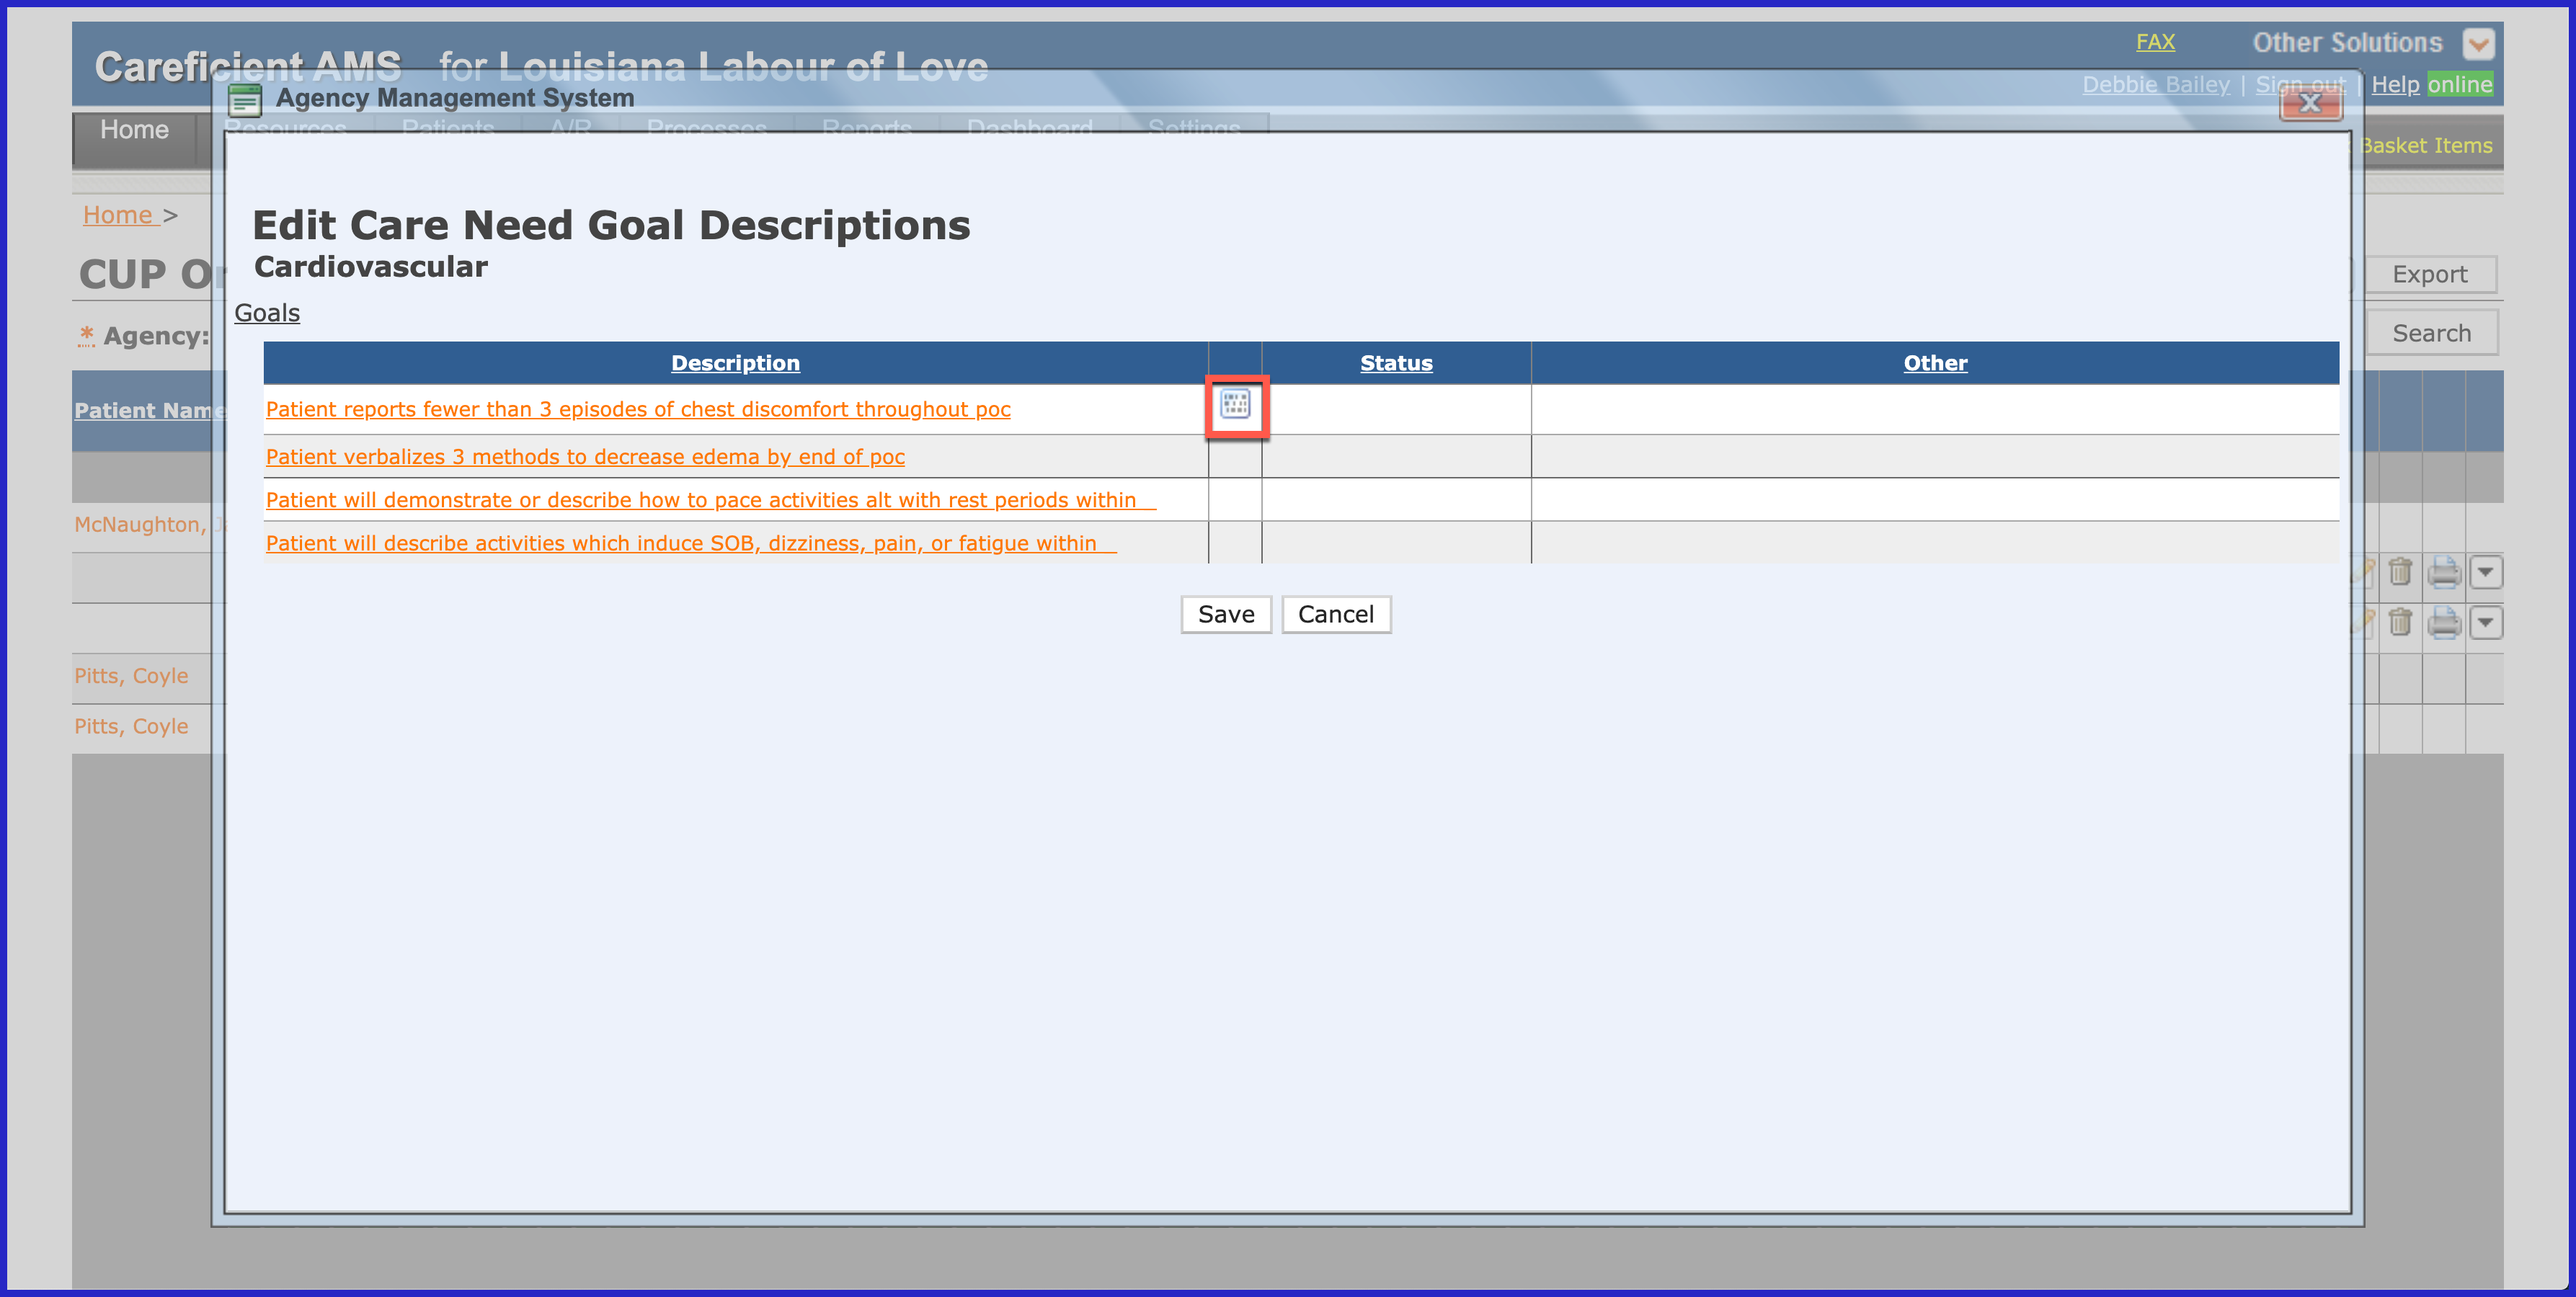
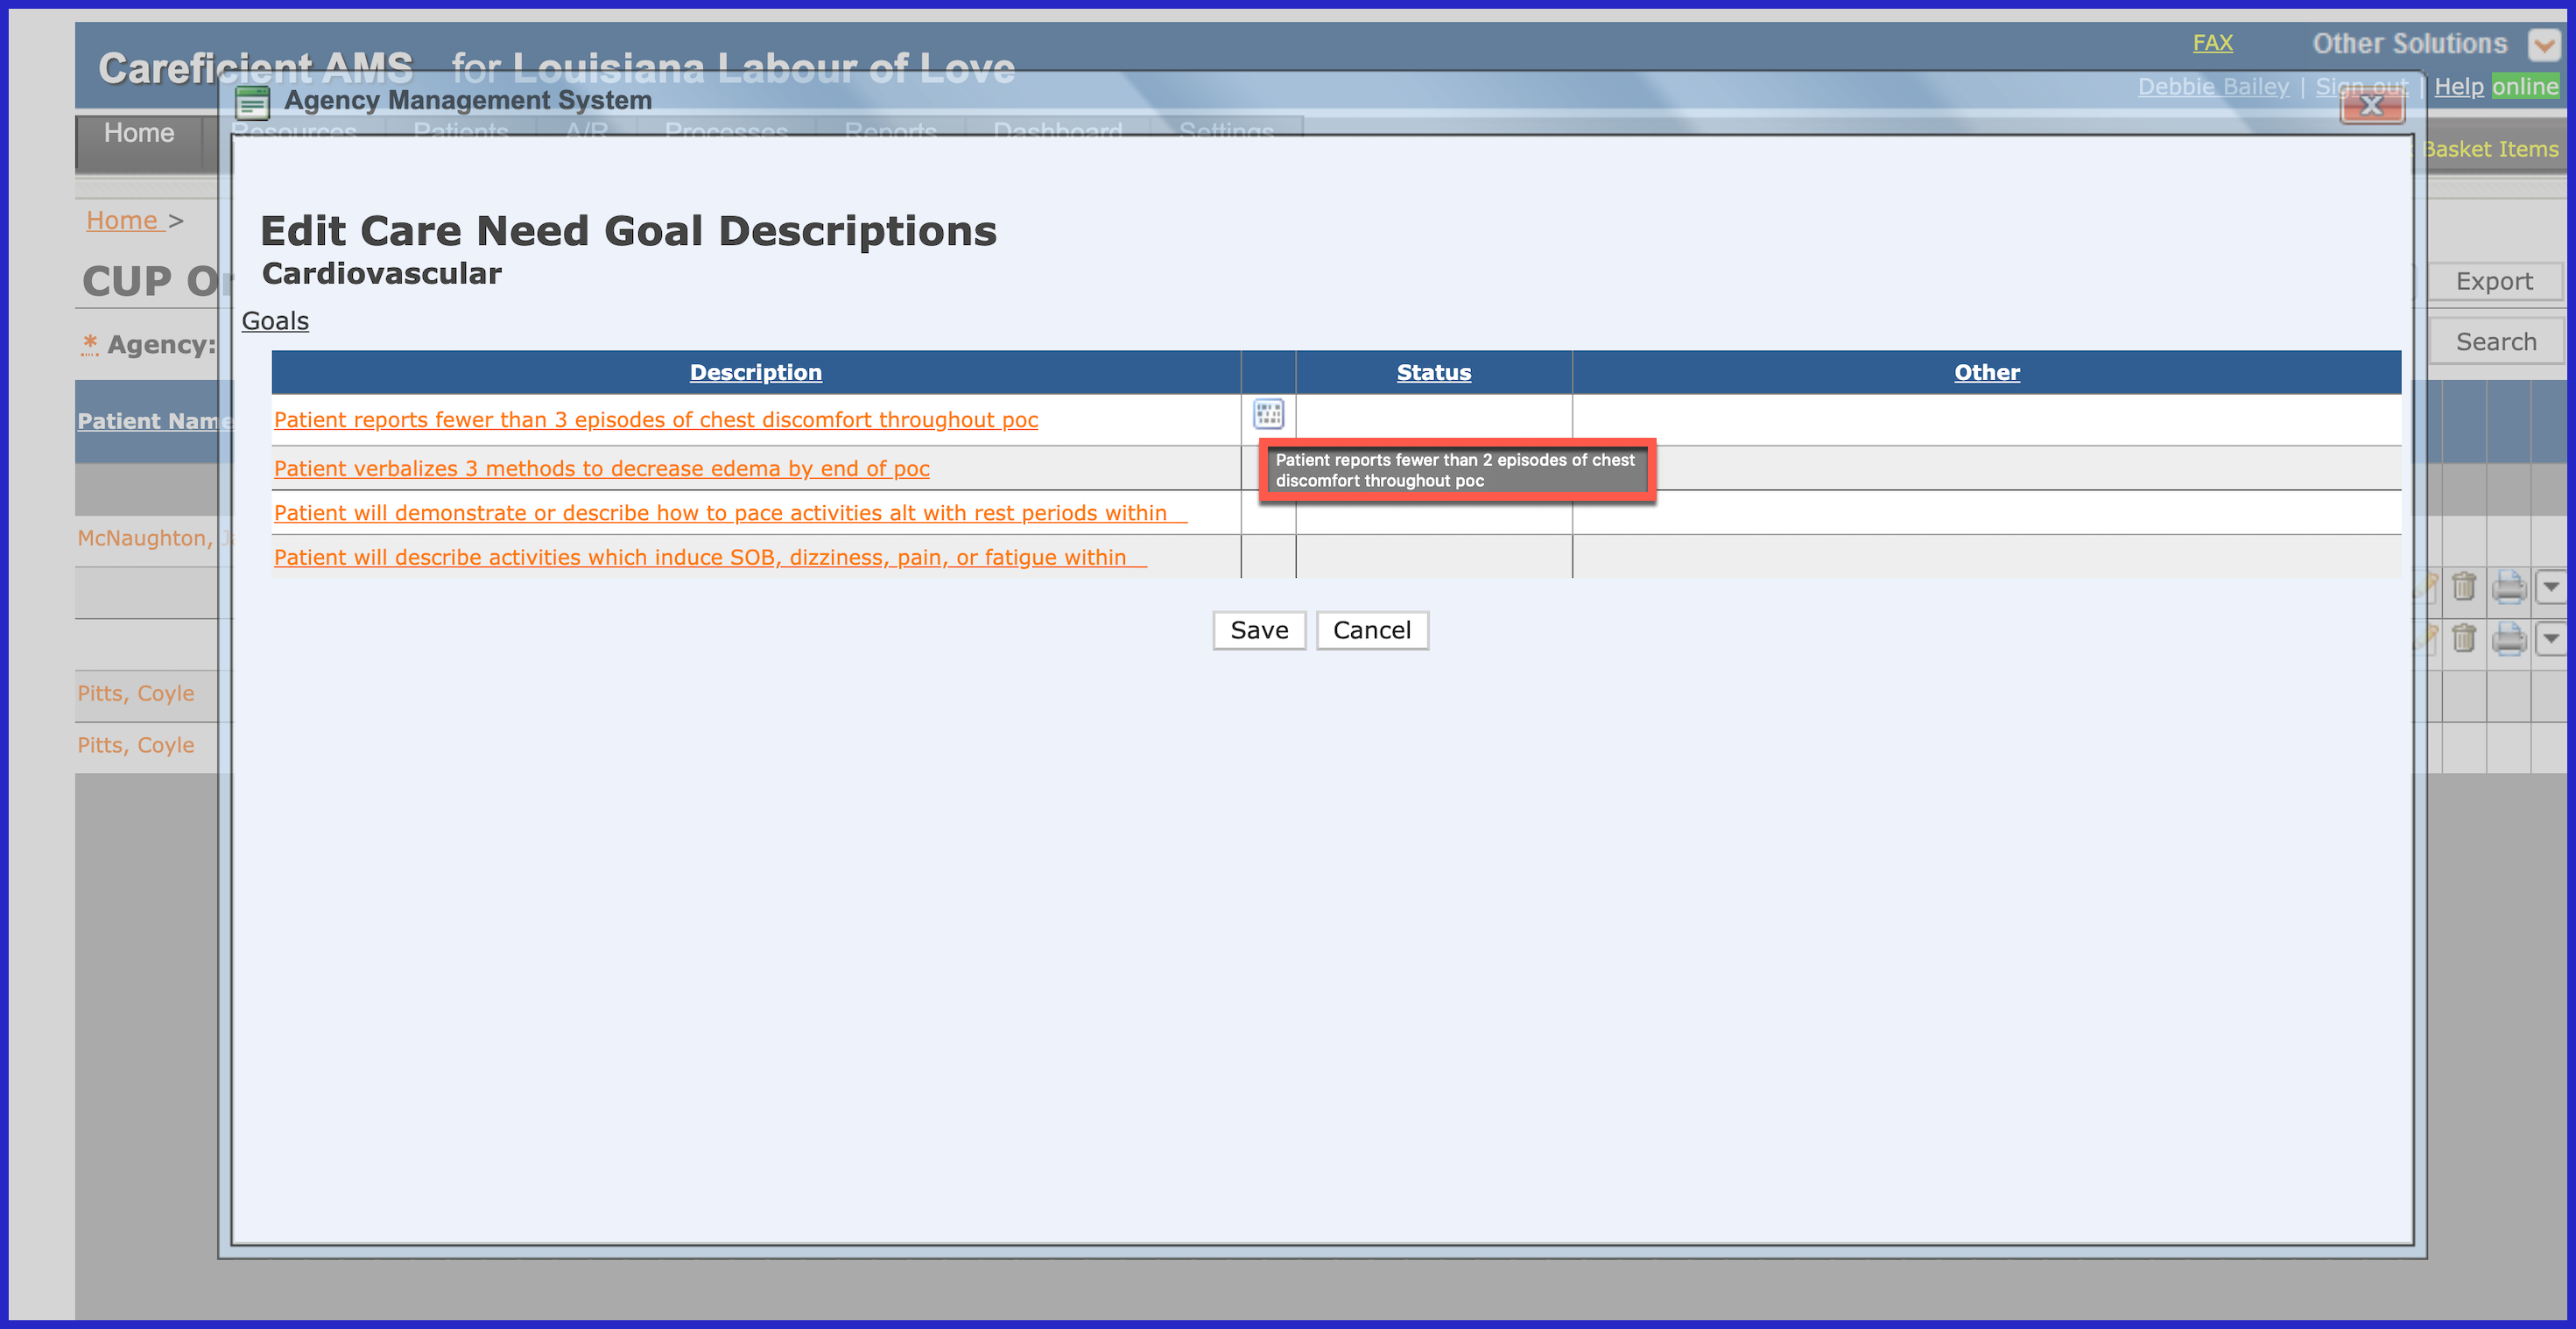
You will now see the following icon. Hover over this icon to see what the goal was prior to your changes.
A pop-up displays showing the the goal prior to editing. Click "Save" when finished.
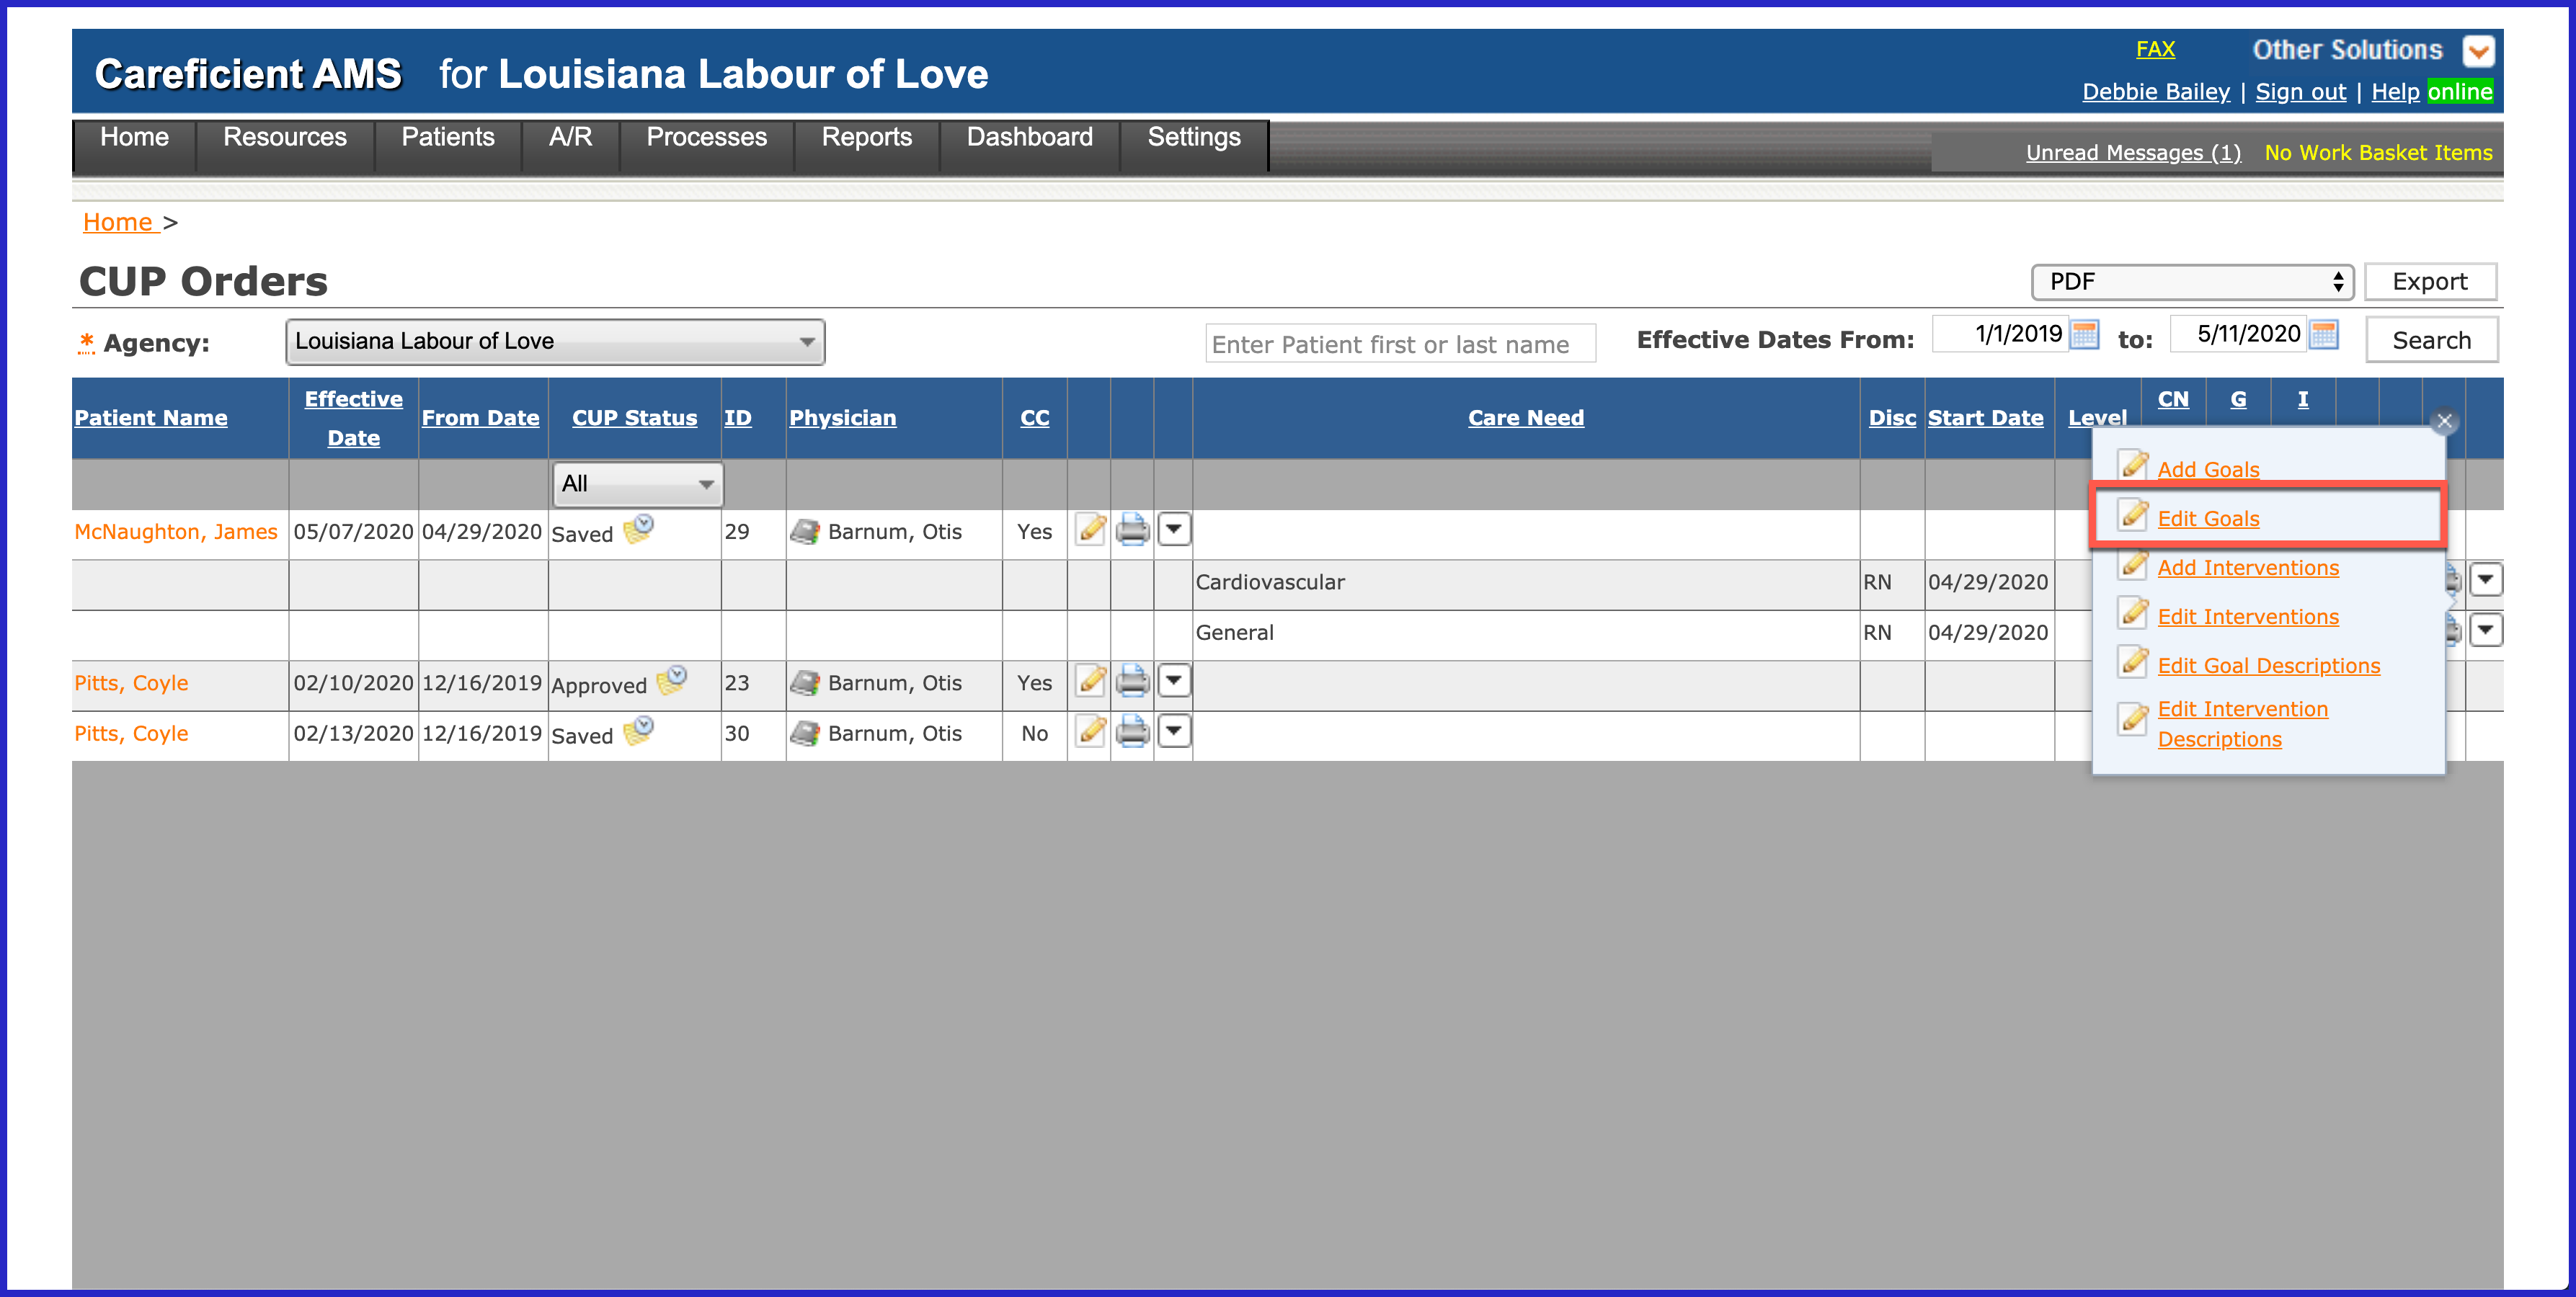
To edit current goals, click on the "Edit Goals" link.
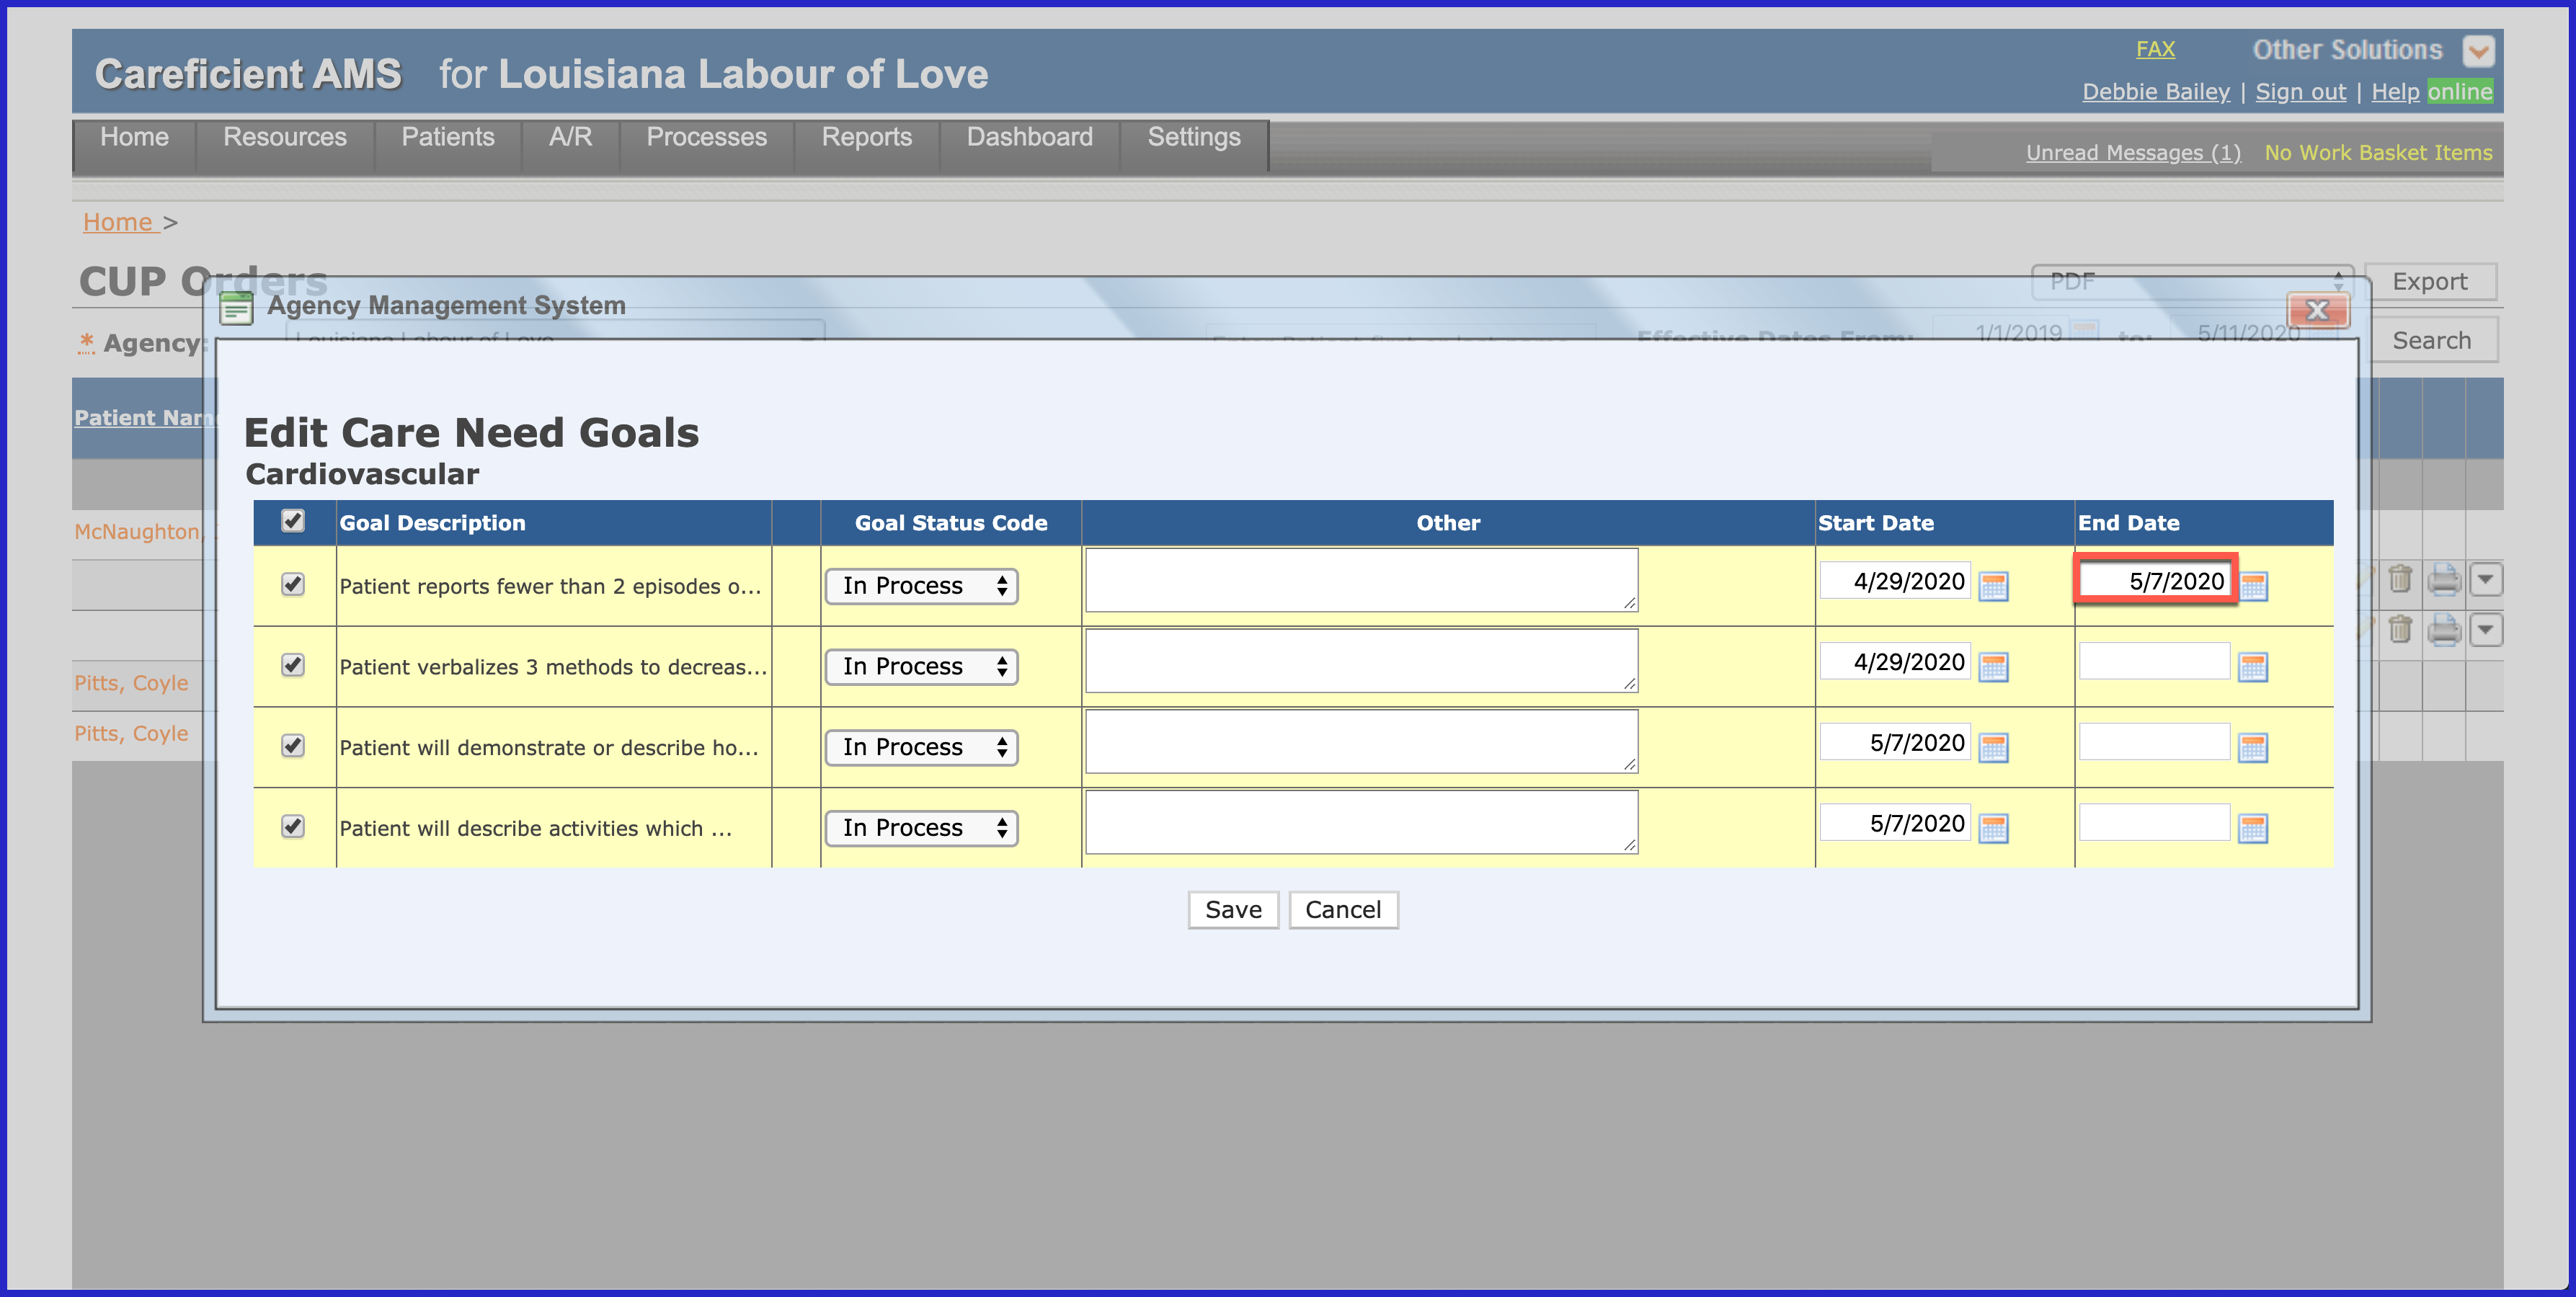
Keep in mind that the only editing you can do once they have been added from a prior order, is to end them. Only newly added goals can be edited to read something different. Add the end date for the goals you want to end and click "Save" when finished.
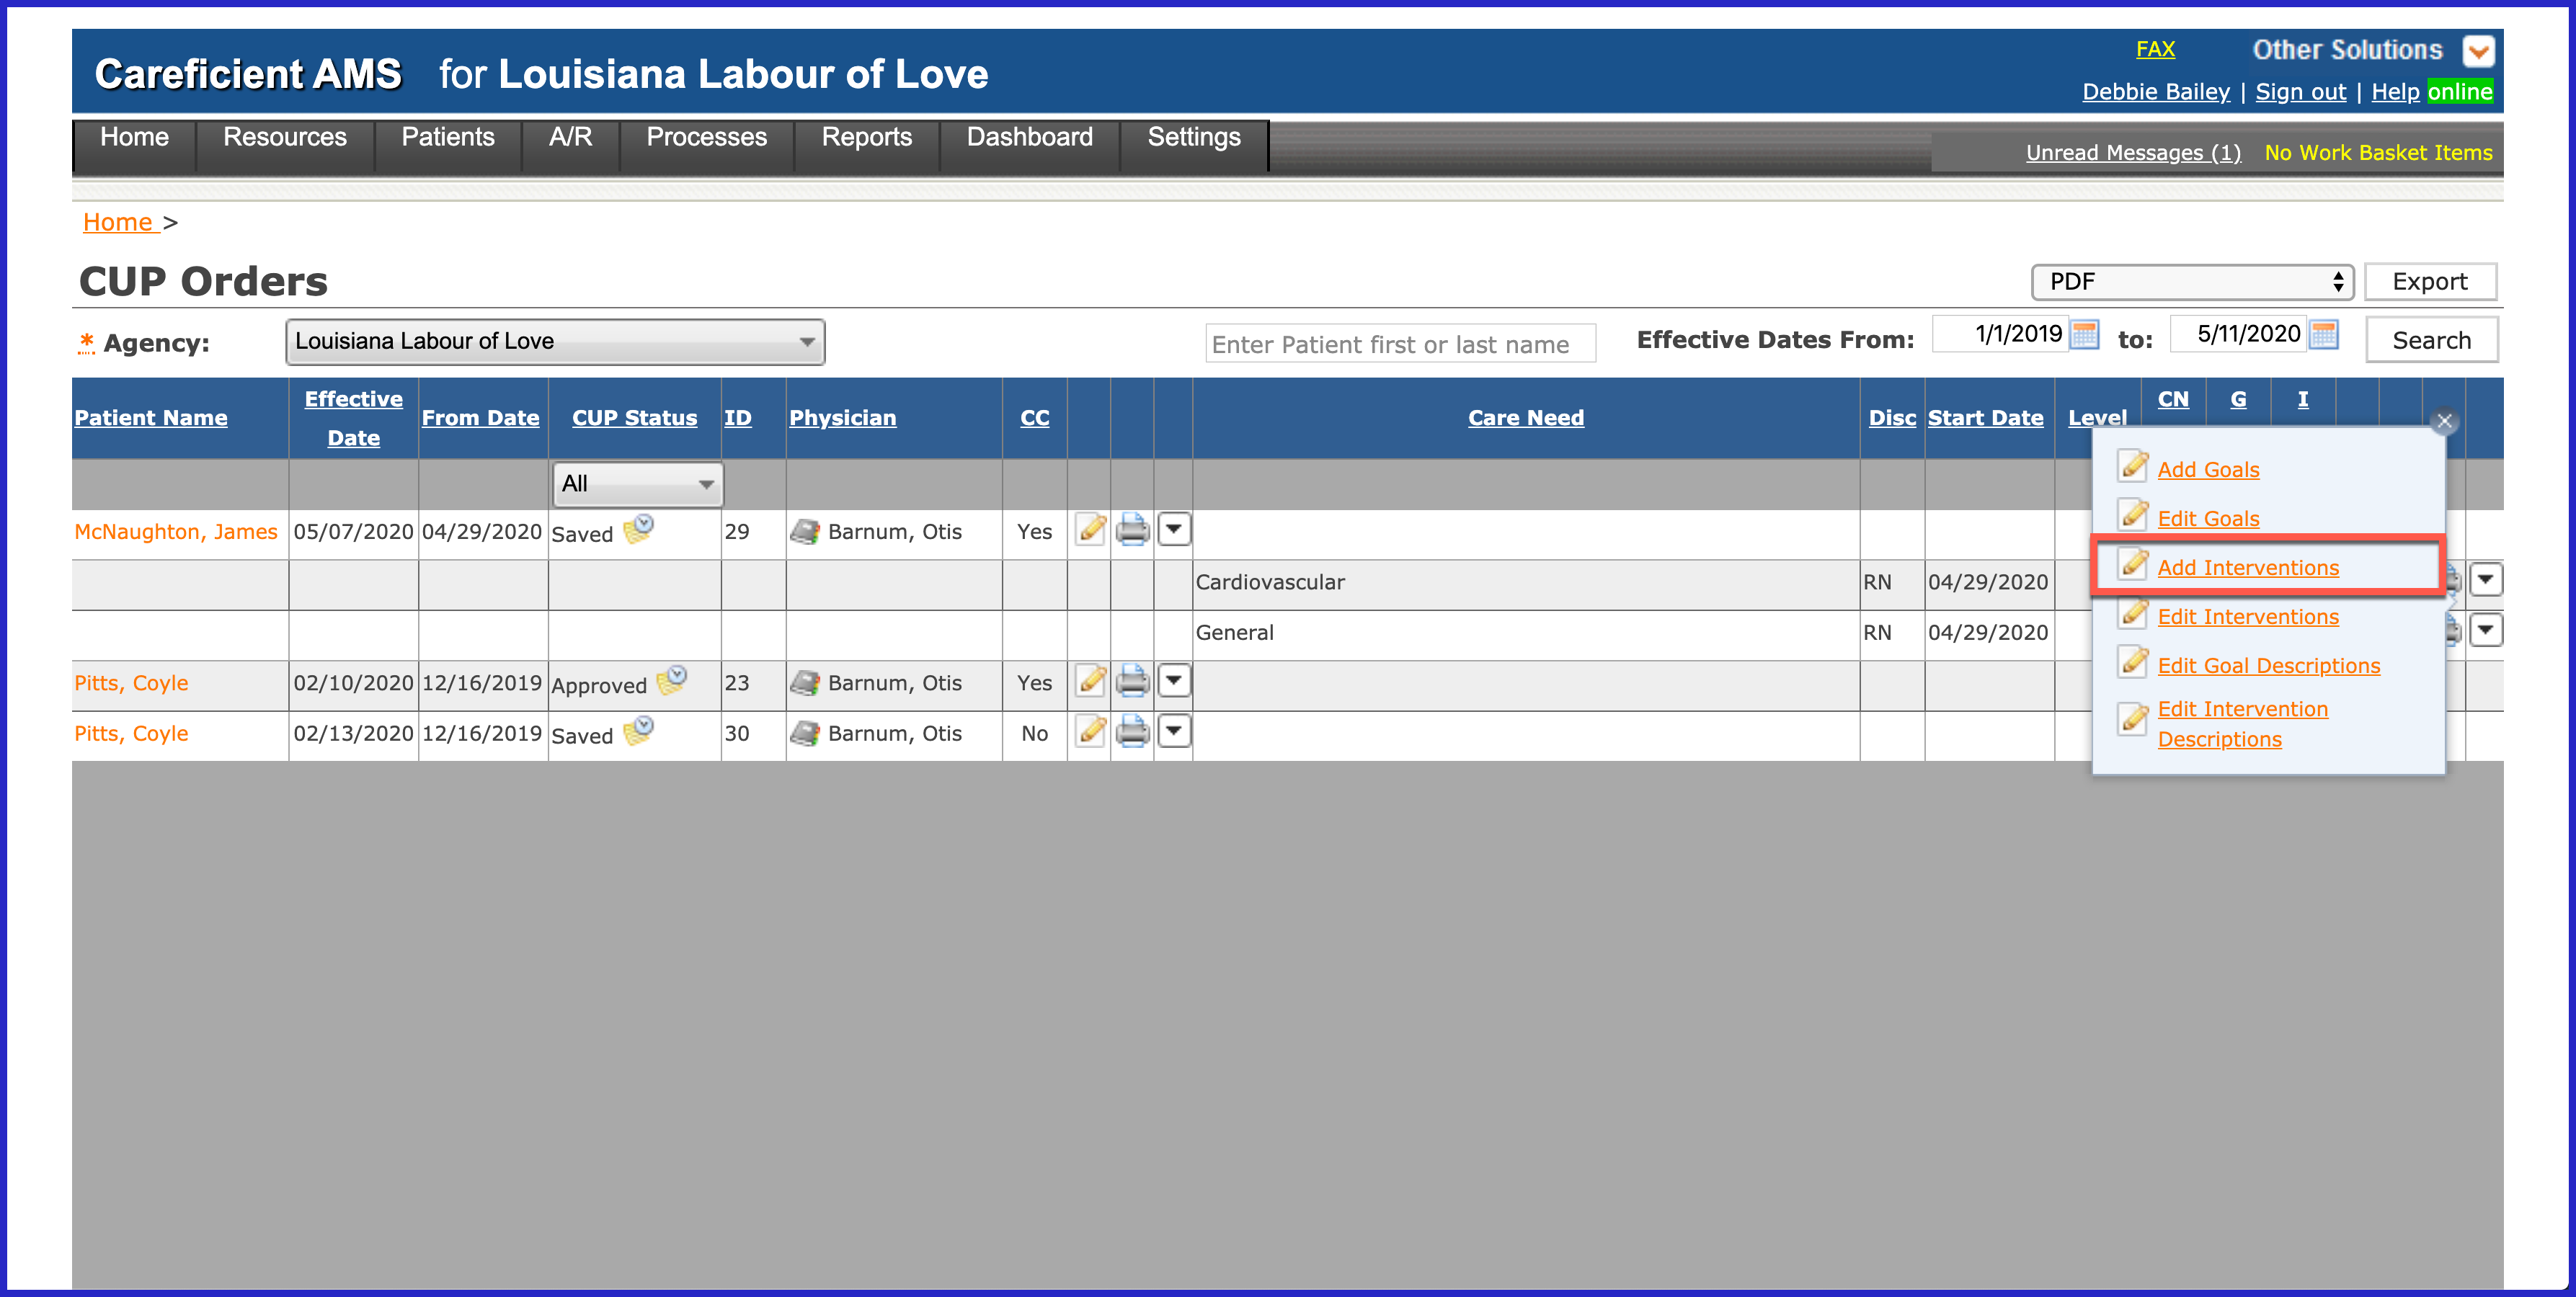
To add interventions, click on the drop down to the right of the Care Need that you want to add interventions to and click "Add Interventions".
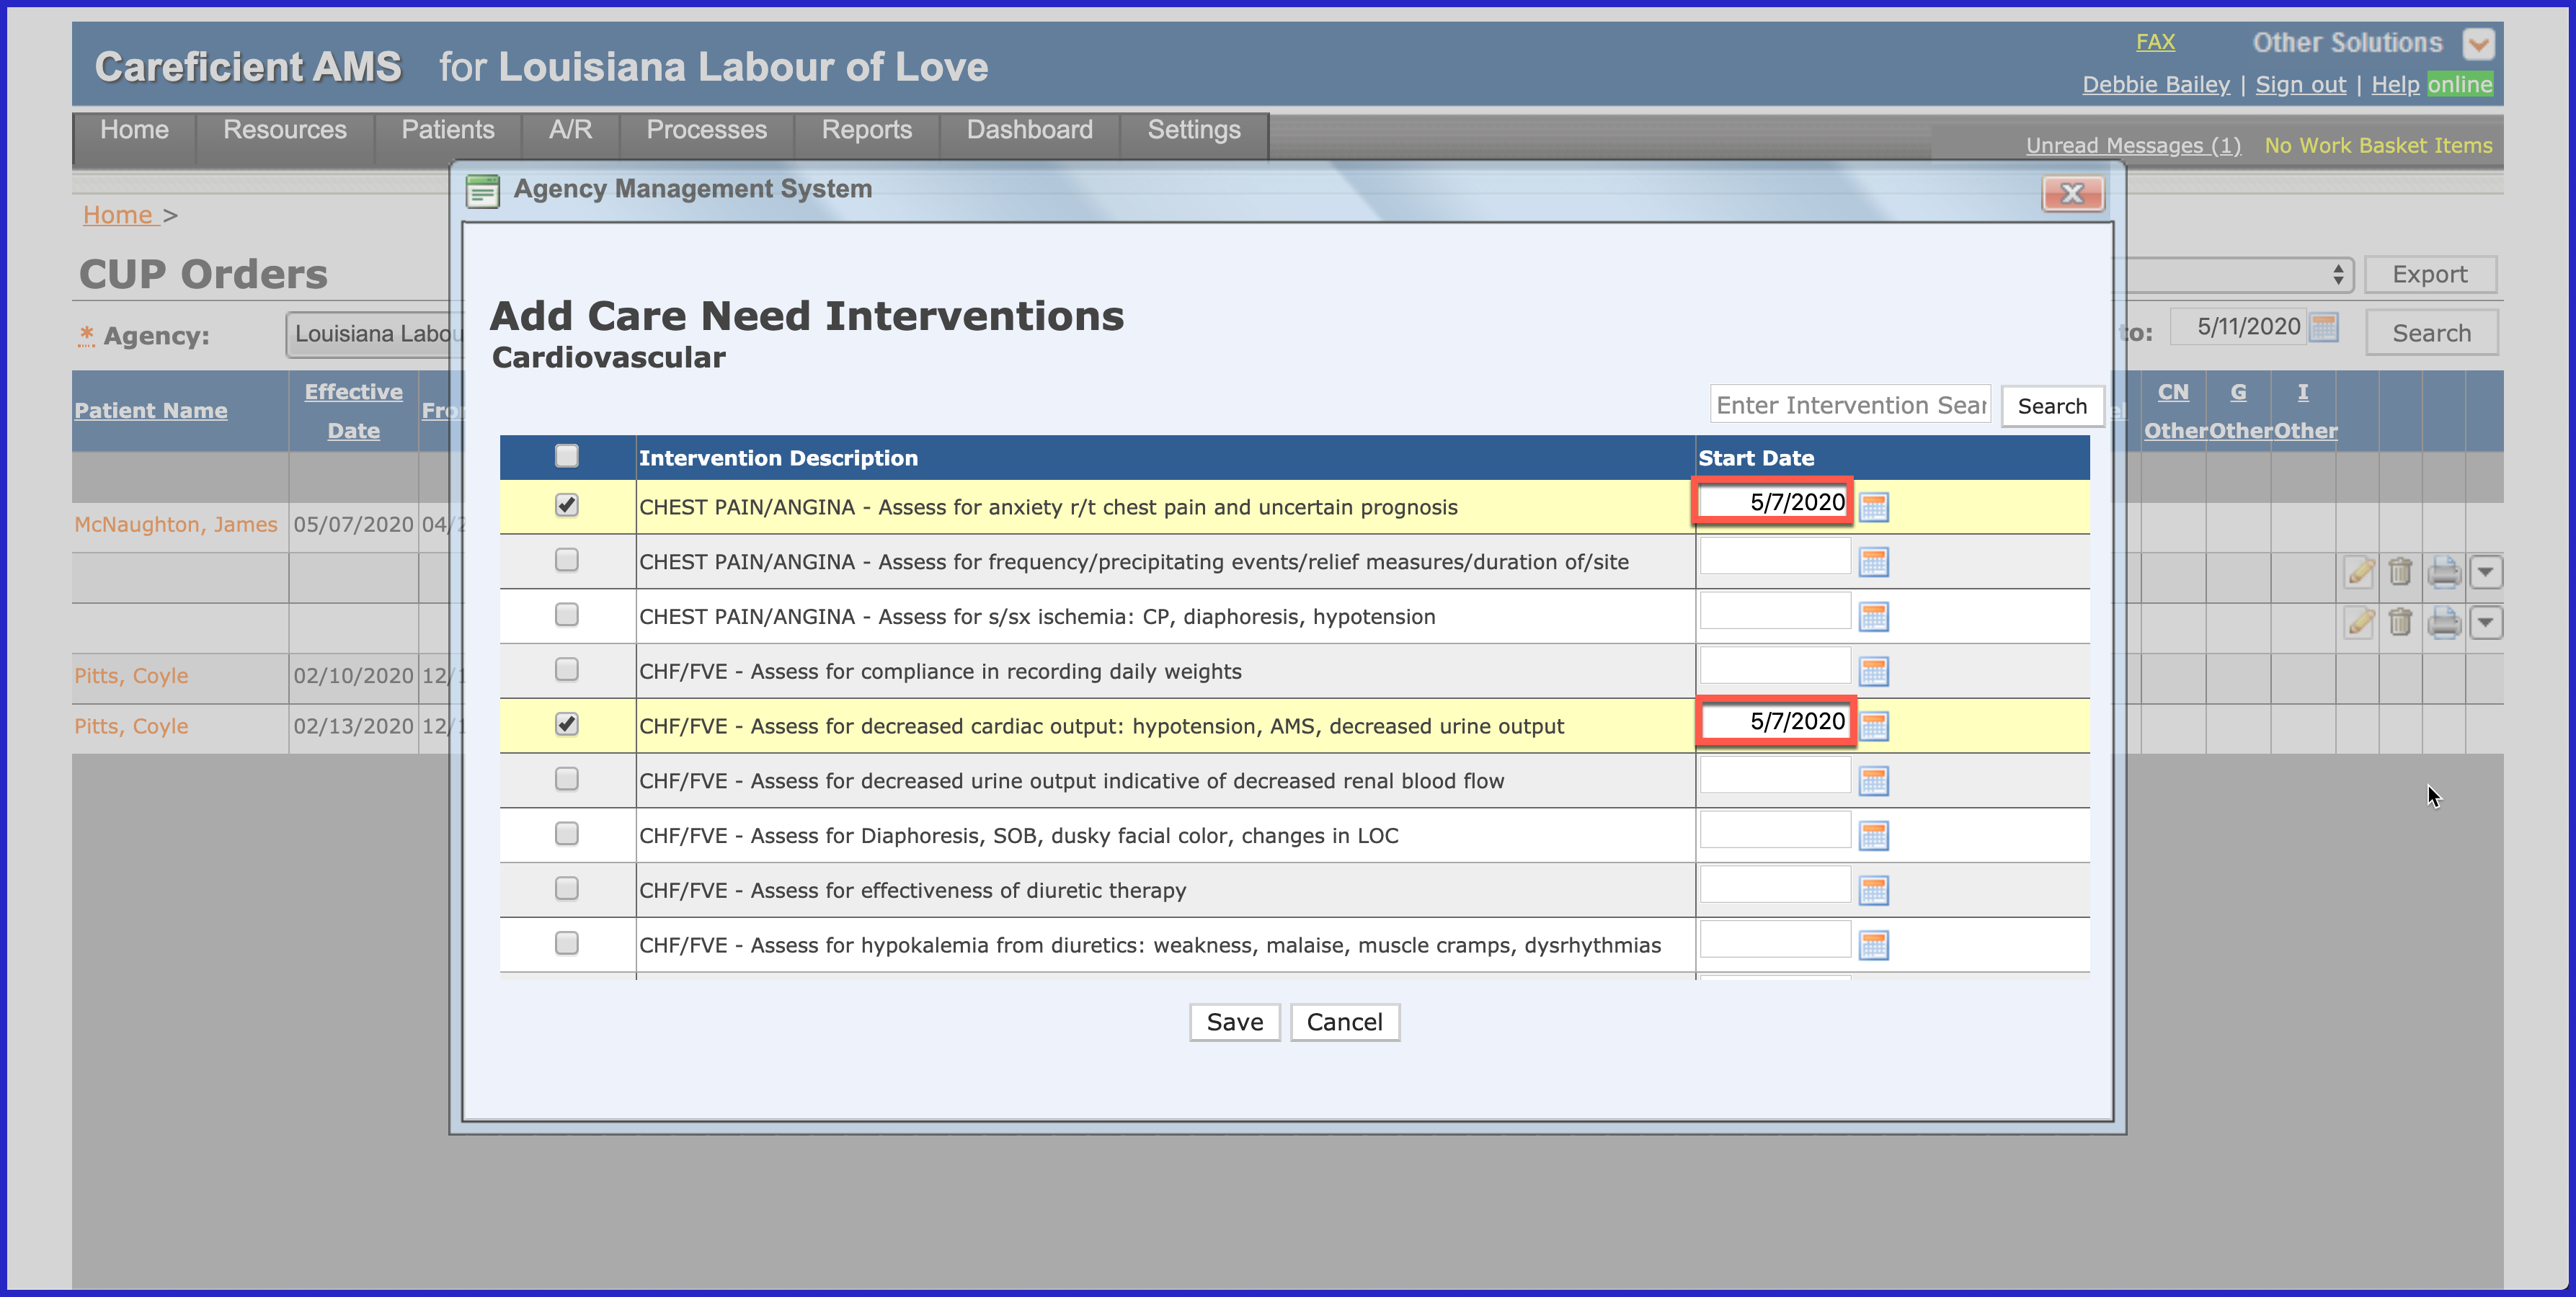
Check the interventions that you want to add. When adding new interventions during the cert period, make sure to add the start date for the interventions so that they don't show up in prior service notes. Click "Save" when you are finished.
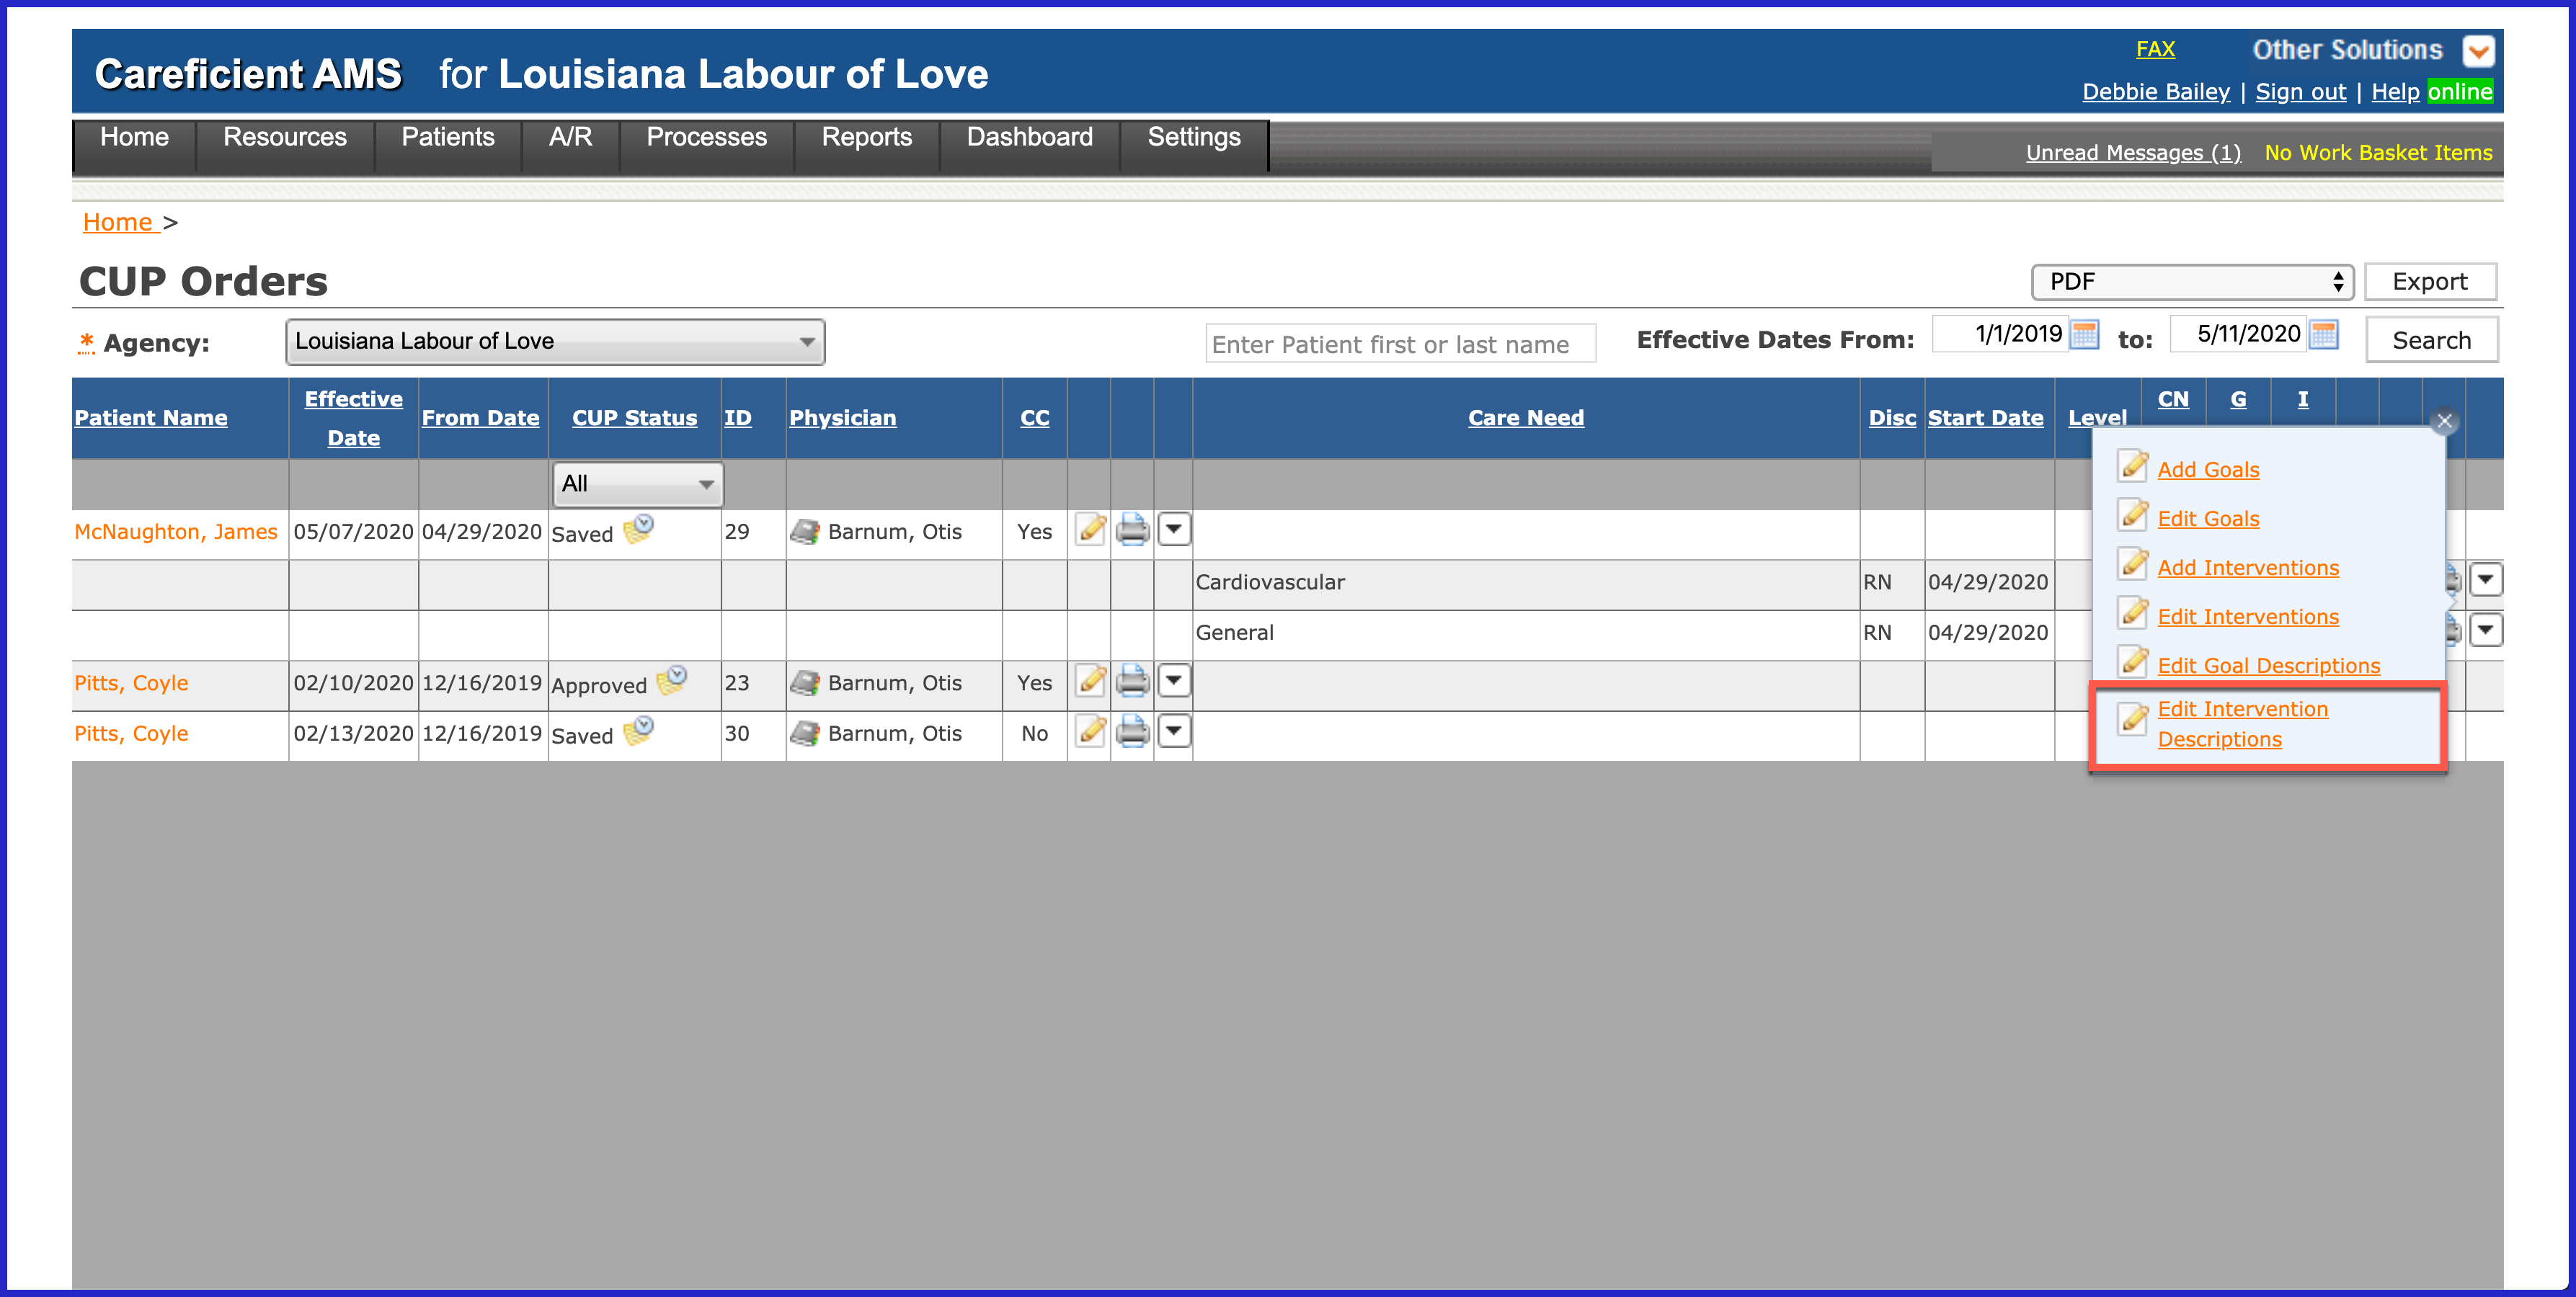
To make the interventions more specific to your patient, click on the drop down to the right of the Care Need that you want to edit descriptions for and choose "Edit Intervention Descriptions".
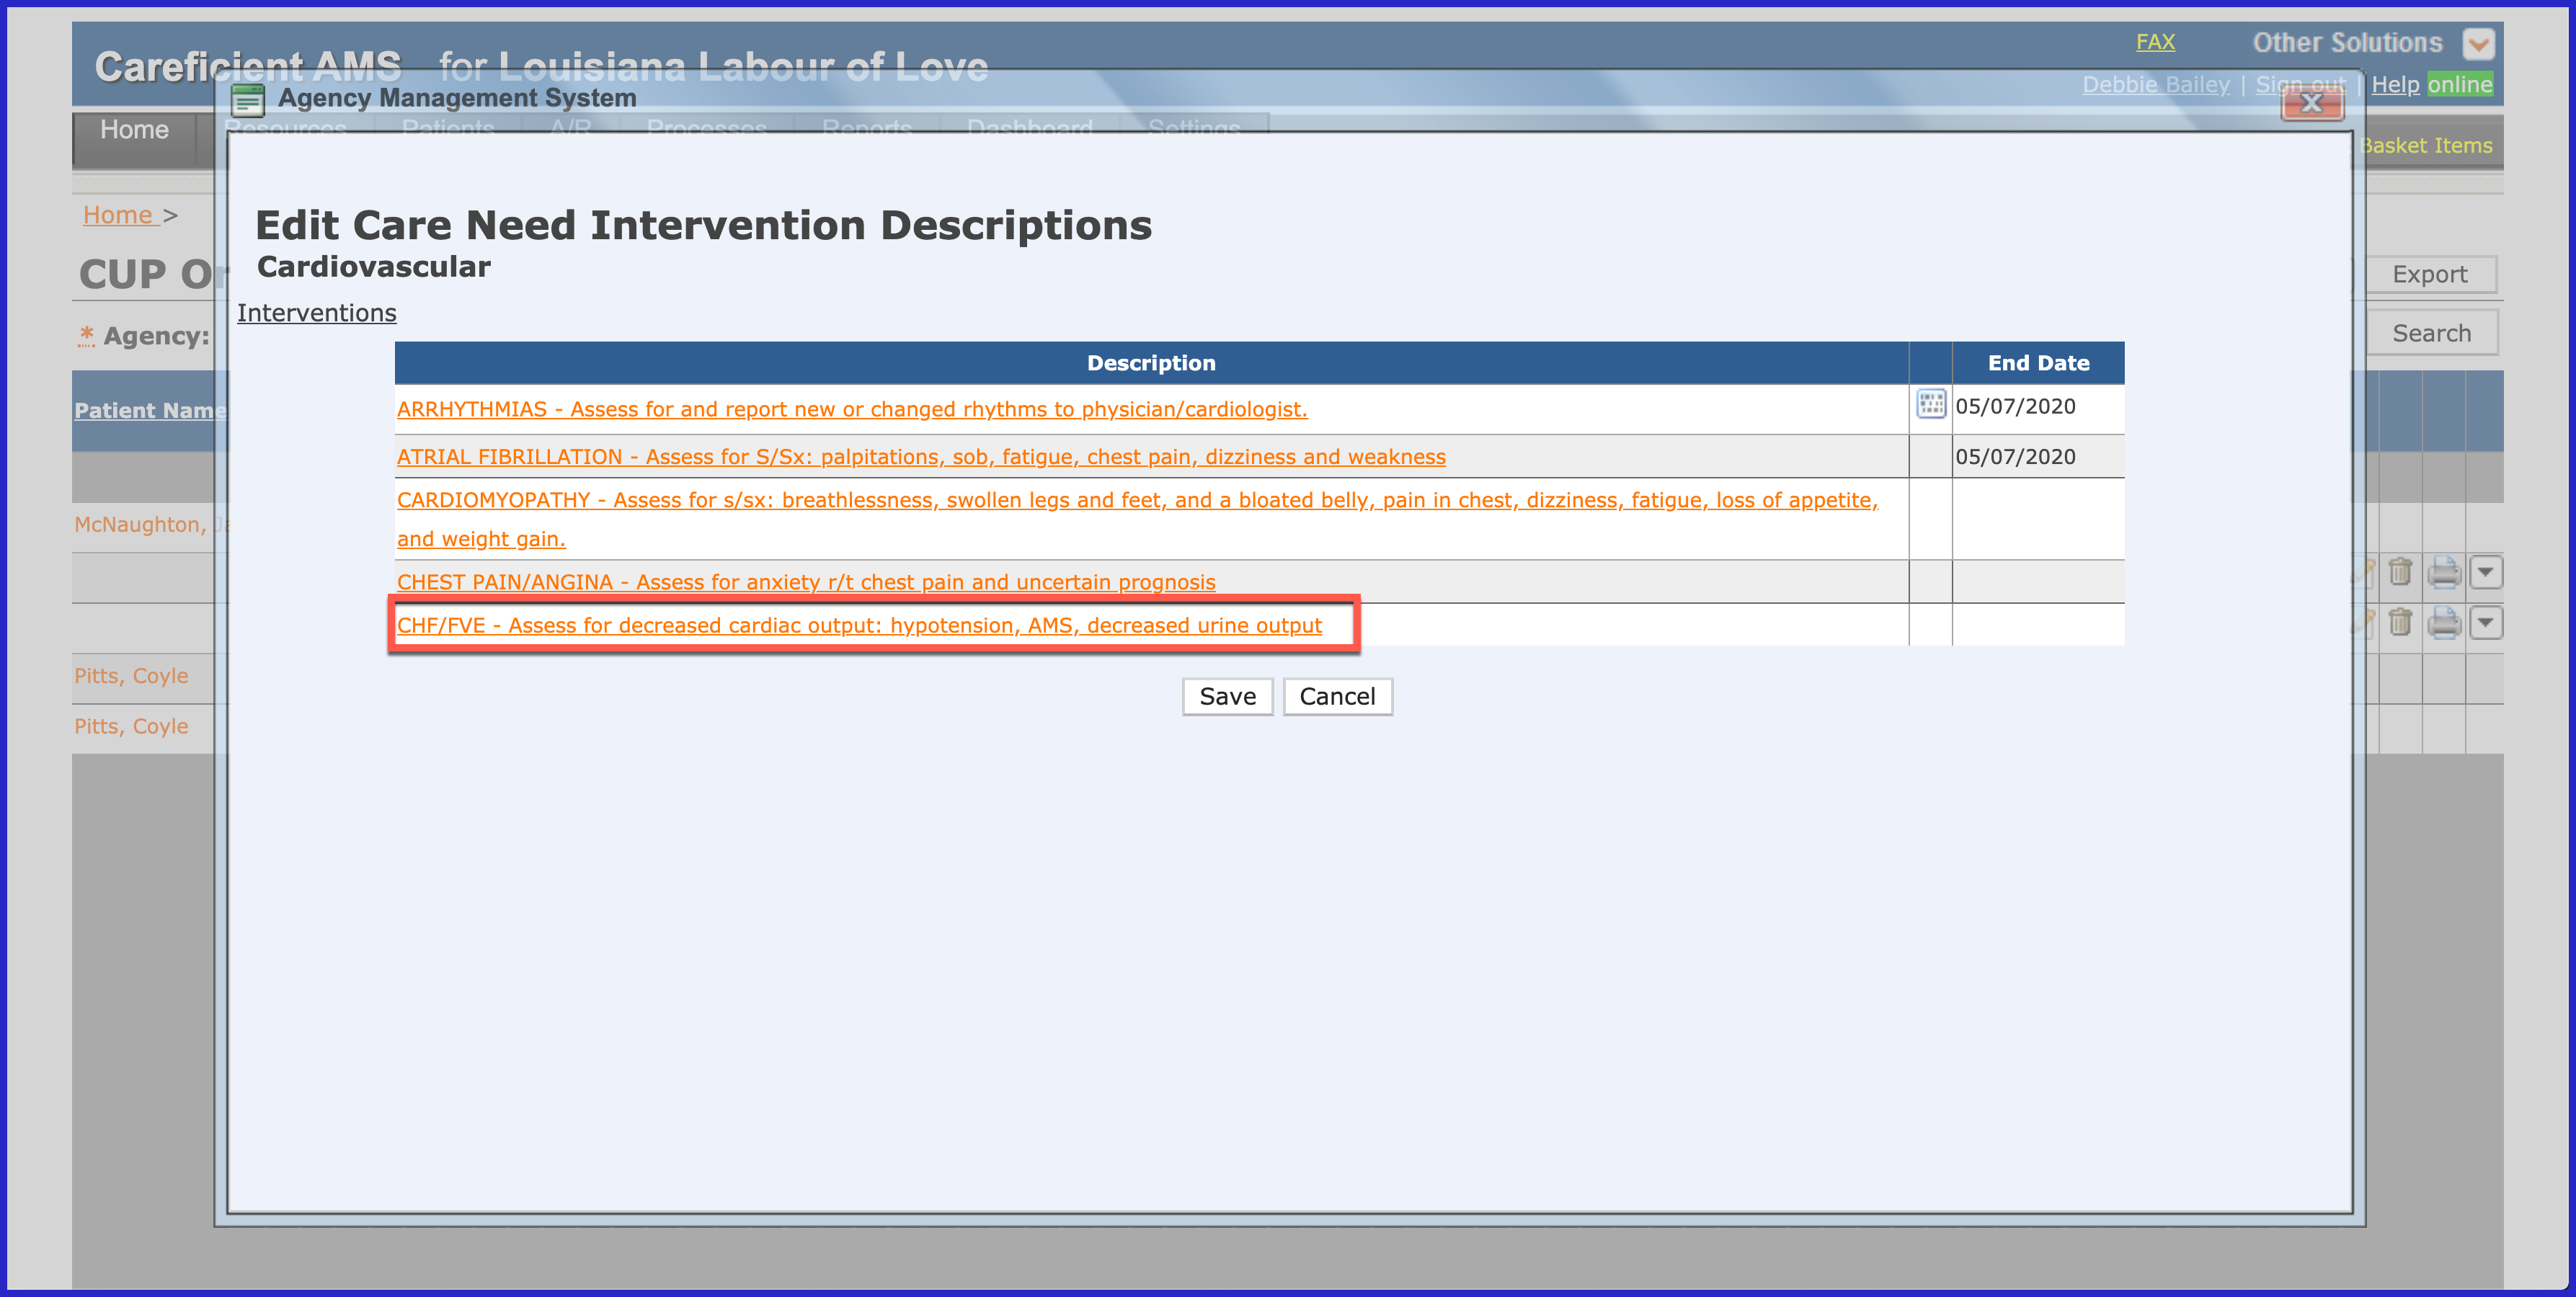
Click on the intervention that you want to edit.
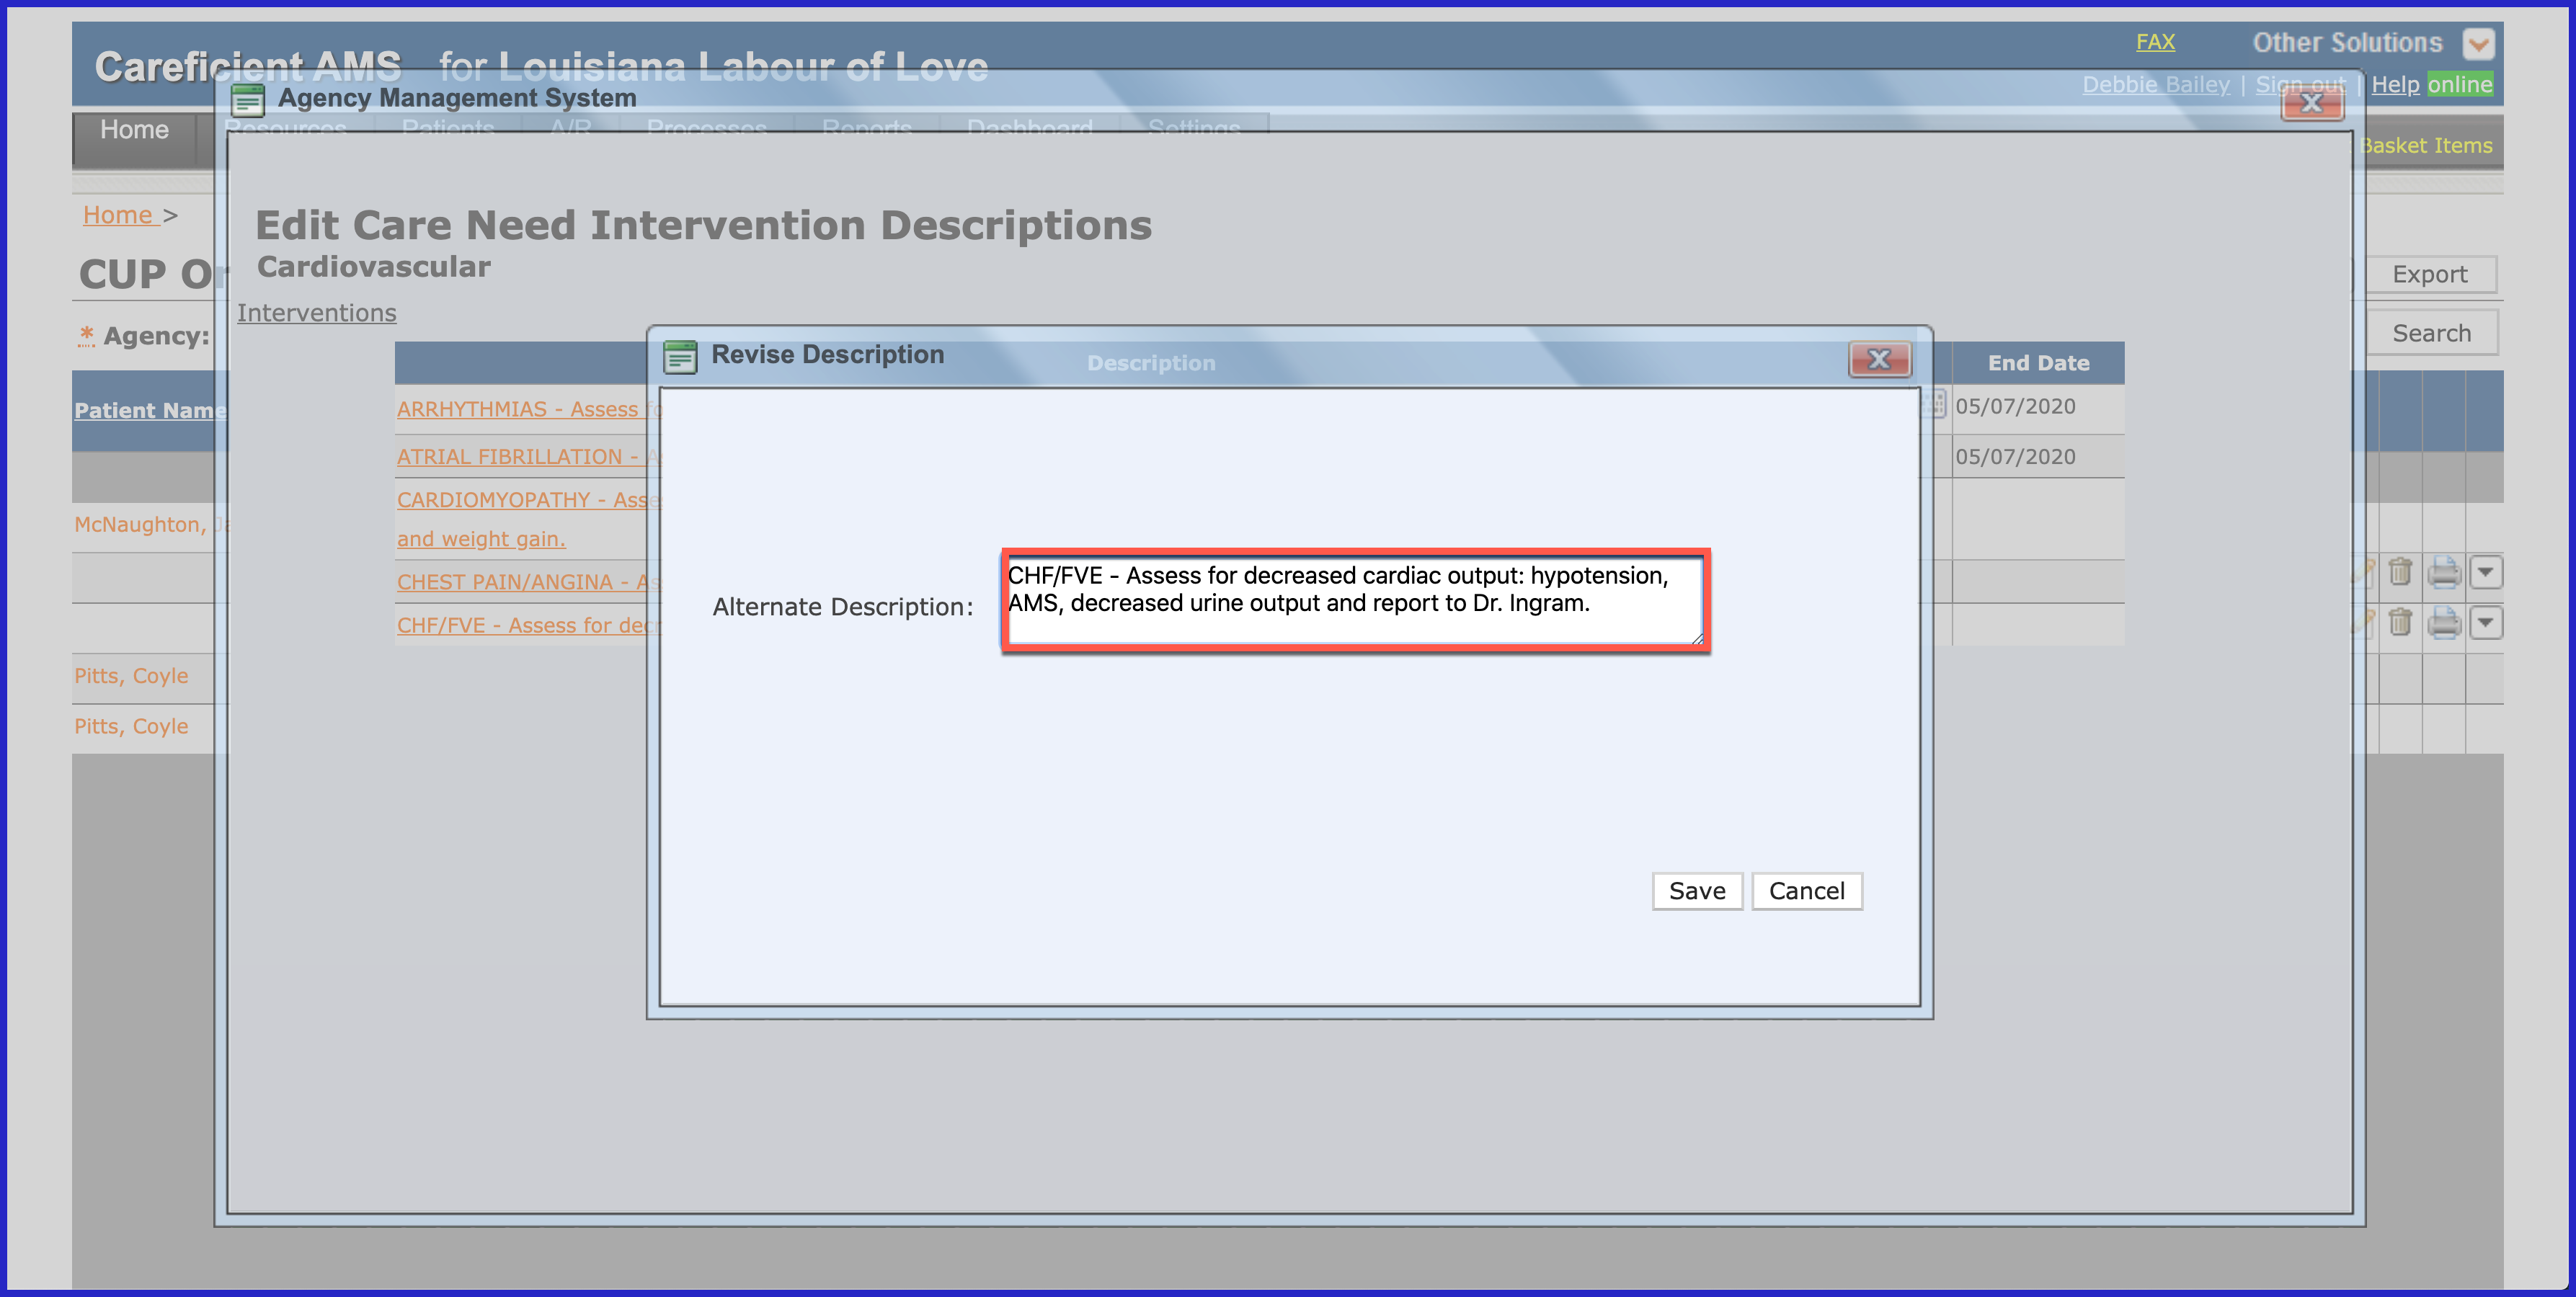
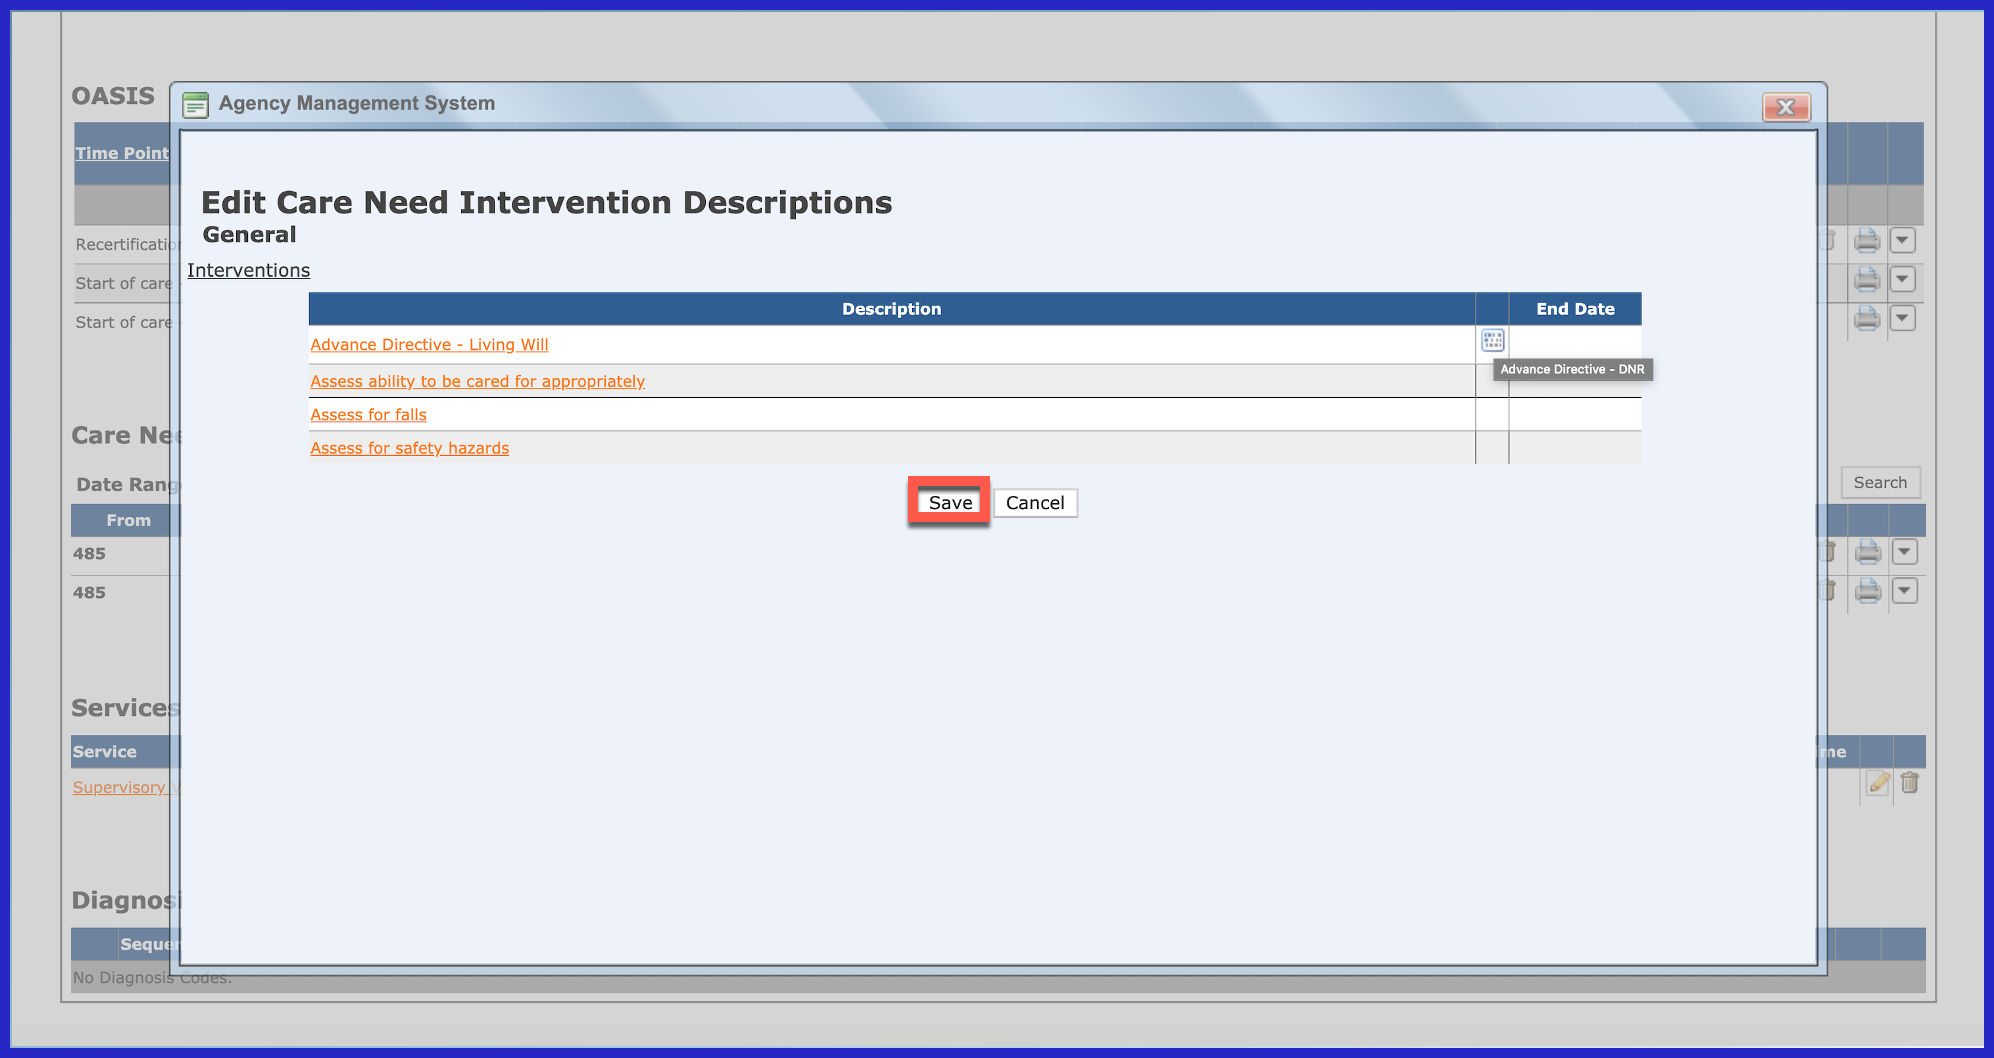
Make the necessary changes and click "Save".
You will now see the following icon. Hover over this icon to see what the intervention was prior to your changes.
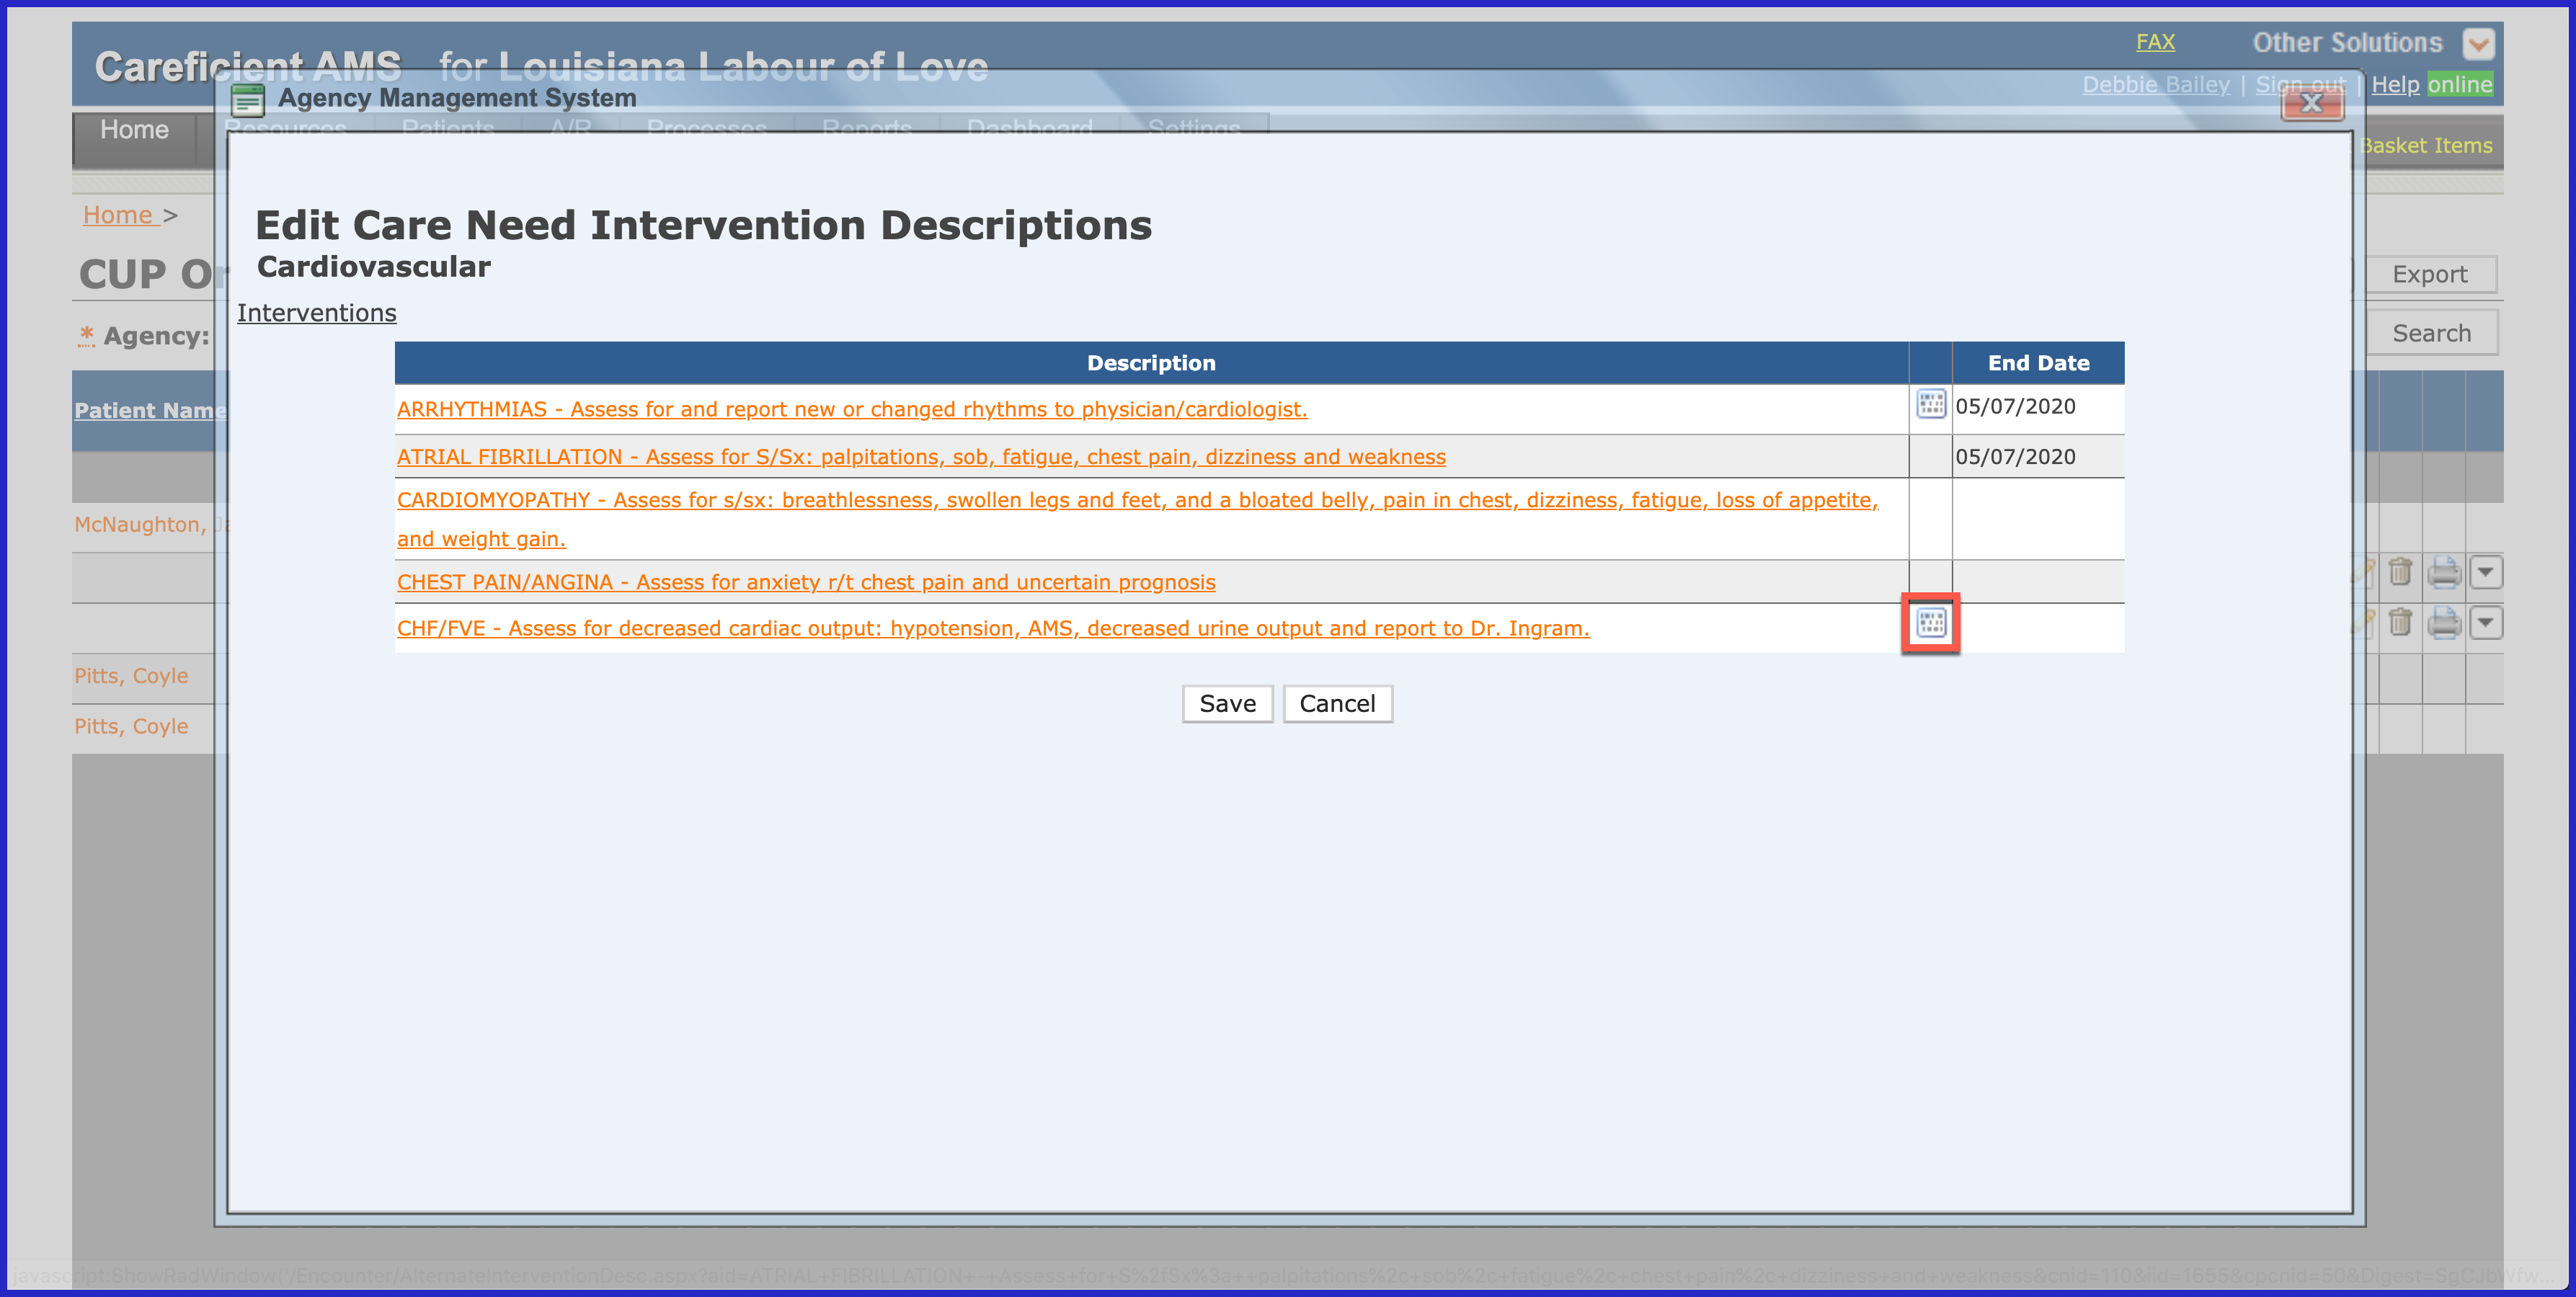
A pop-up displays showing the the intervention prior to editing. Click "Save" to continue.
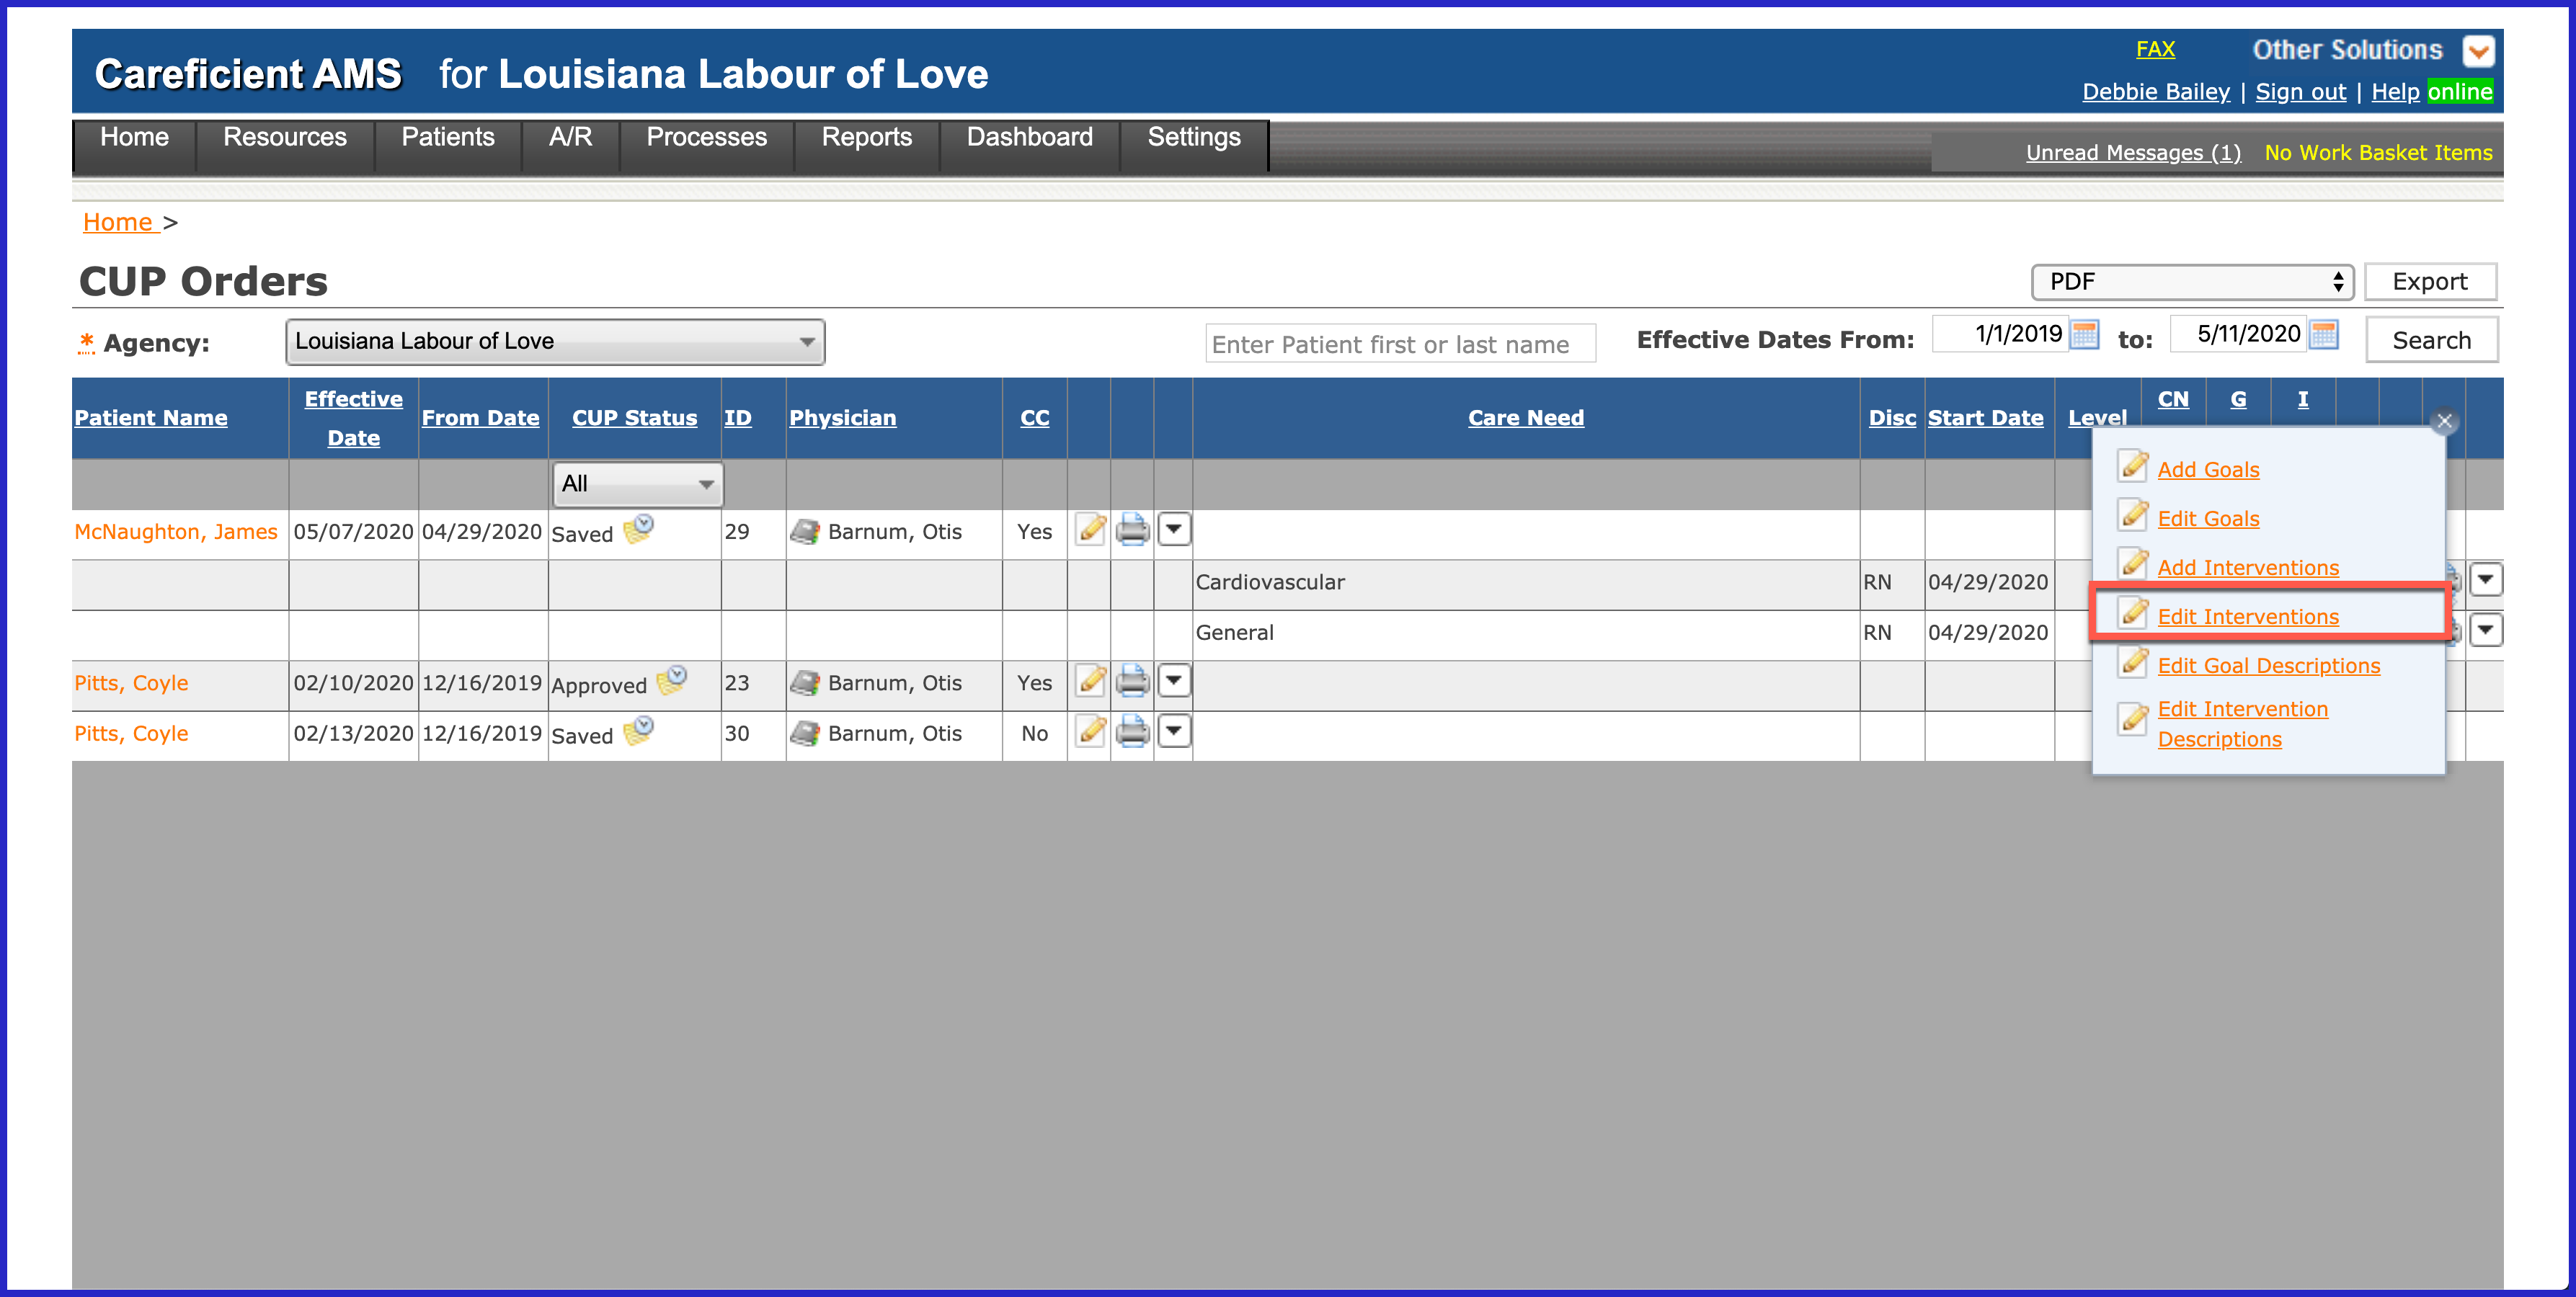
To edit current interventions, click on the "Edit Interventions" link.
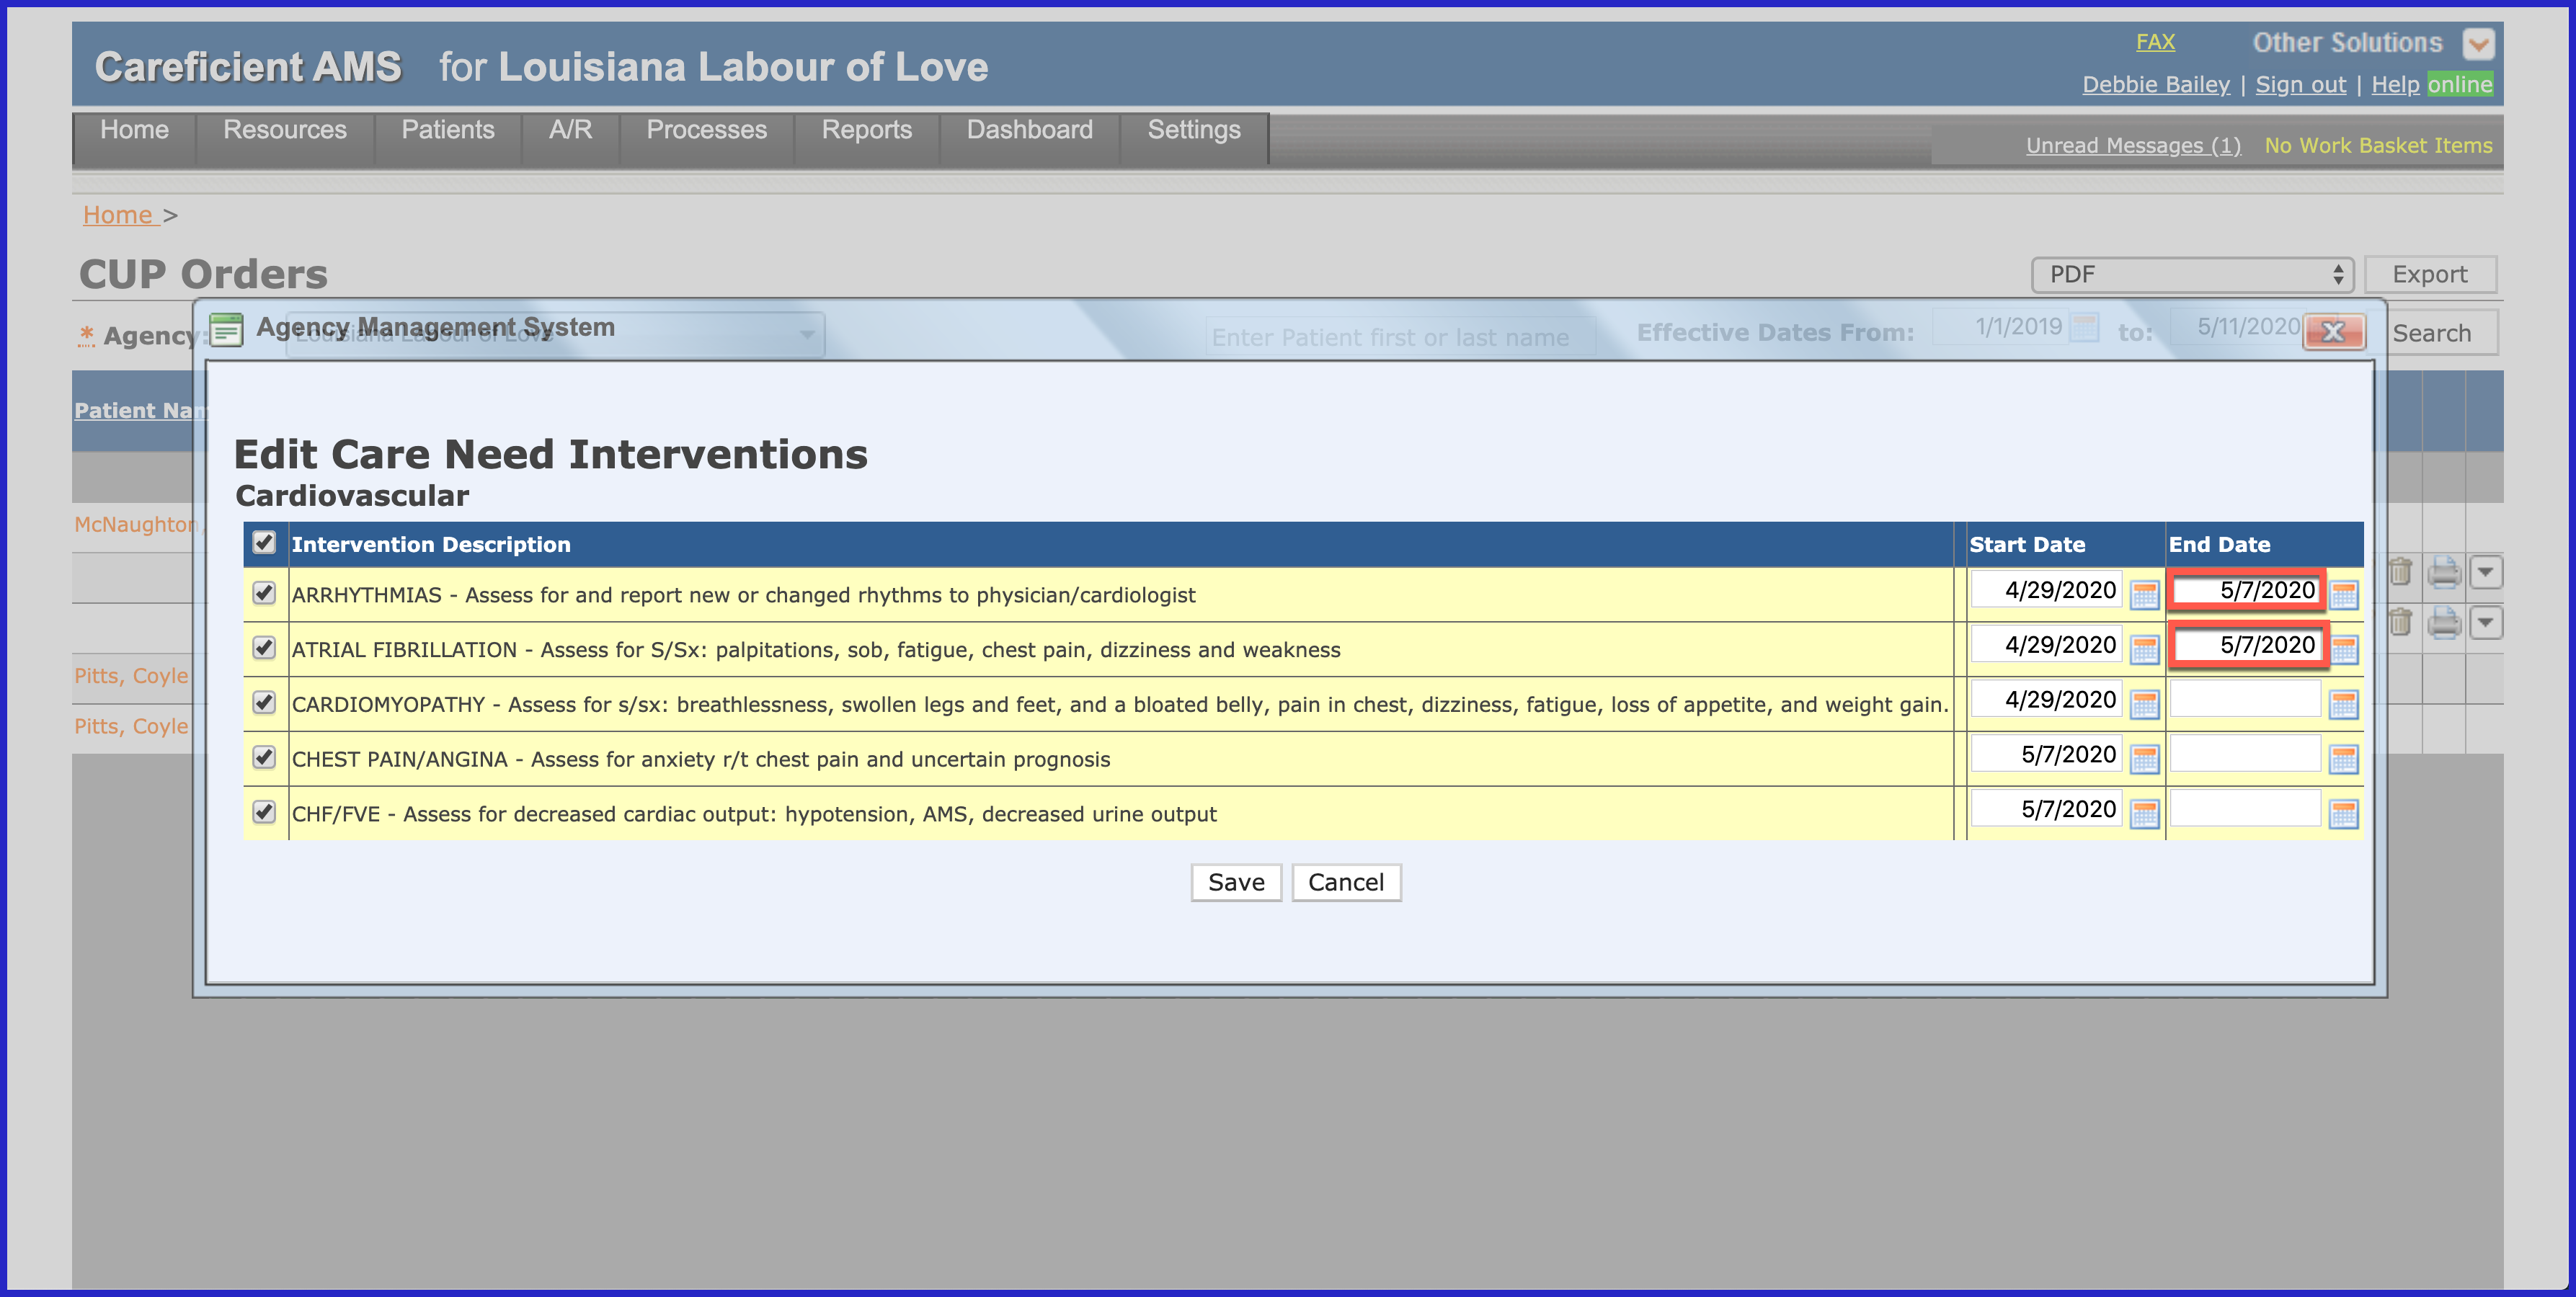
Keep in mind that the only editing you can do once they have been added from a prior order, is to end them. Only newly added interventions can be edited to read something different. Add the end date for the interventions you want to end and click "Save" when finished.
You will do this for each patient that you need to conference on. Once you have completed Case Conference, you will click on the "Edit" pencil to the right of the CUP (Clinical Update) Order.

Make any necessary changes, sign and approve the order.
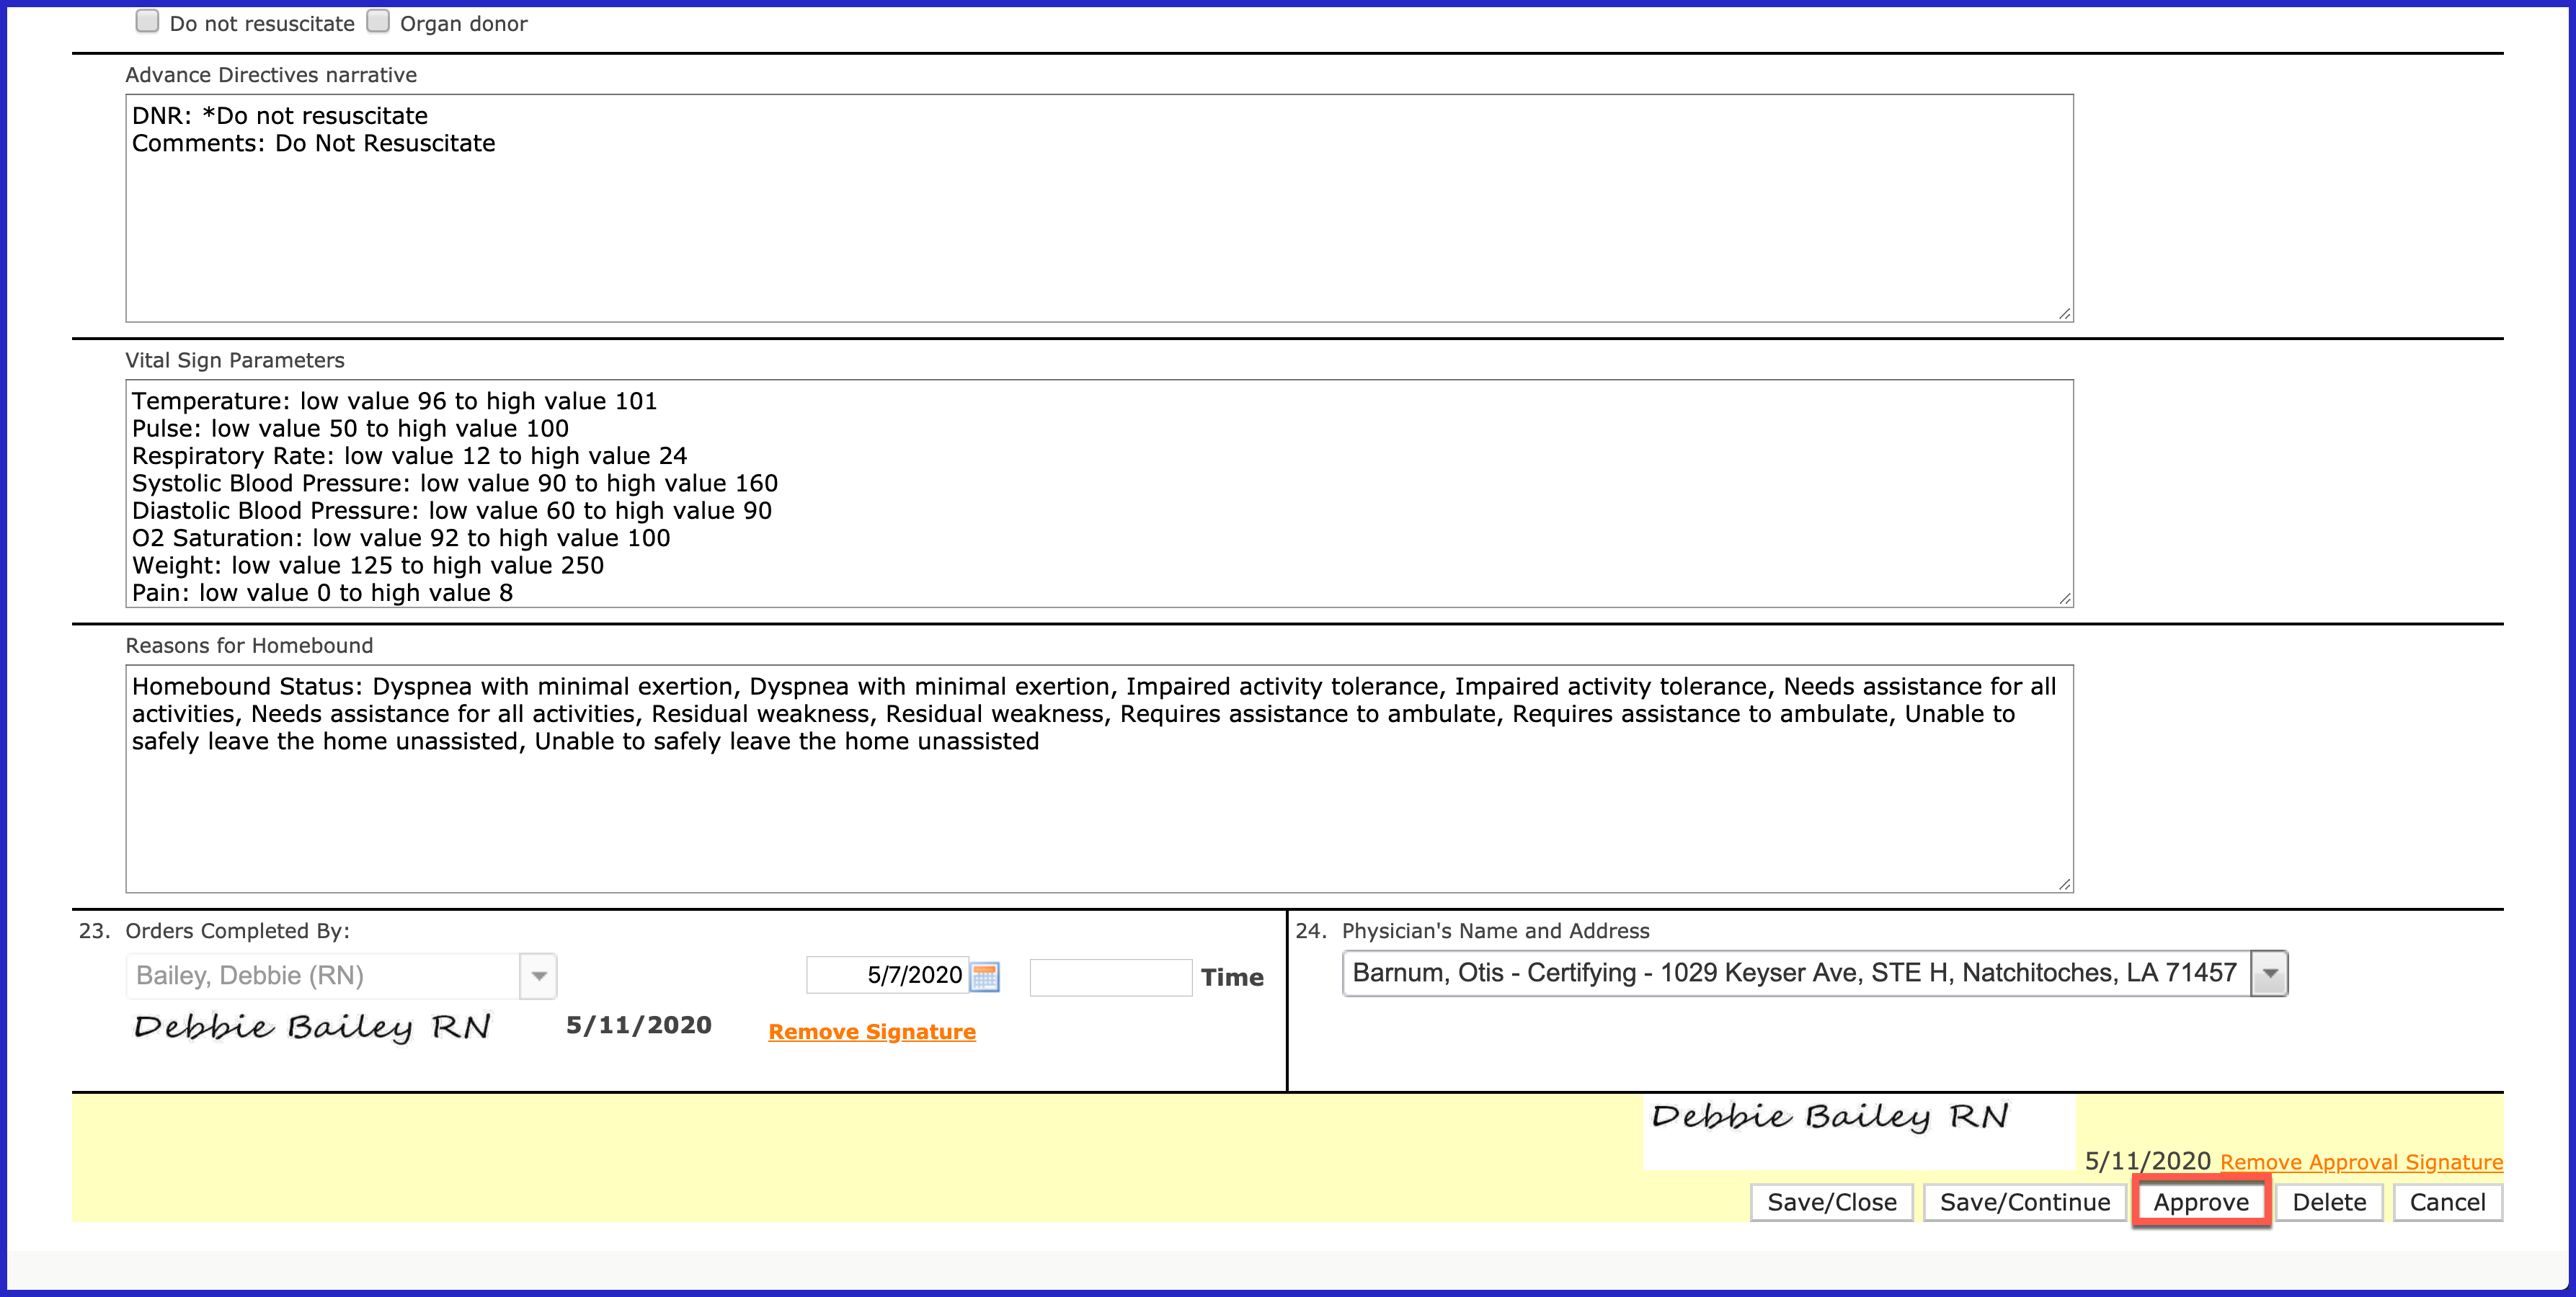
The change you made to the Care Need/Interventions/Goals, will now print with the CUP (Clinical Update) Order. You will need to make sure and add the next CUP (Clinical Update) Order for your next Case Conference Meeting. To do so, click on the name of your patient.

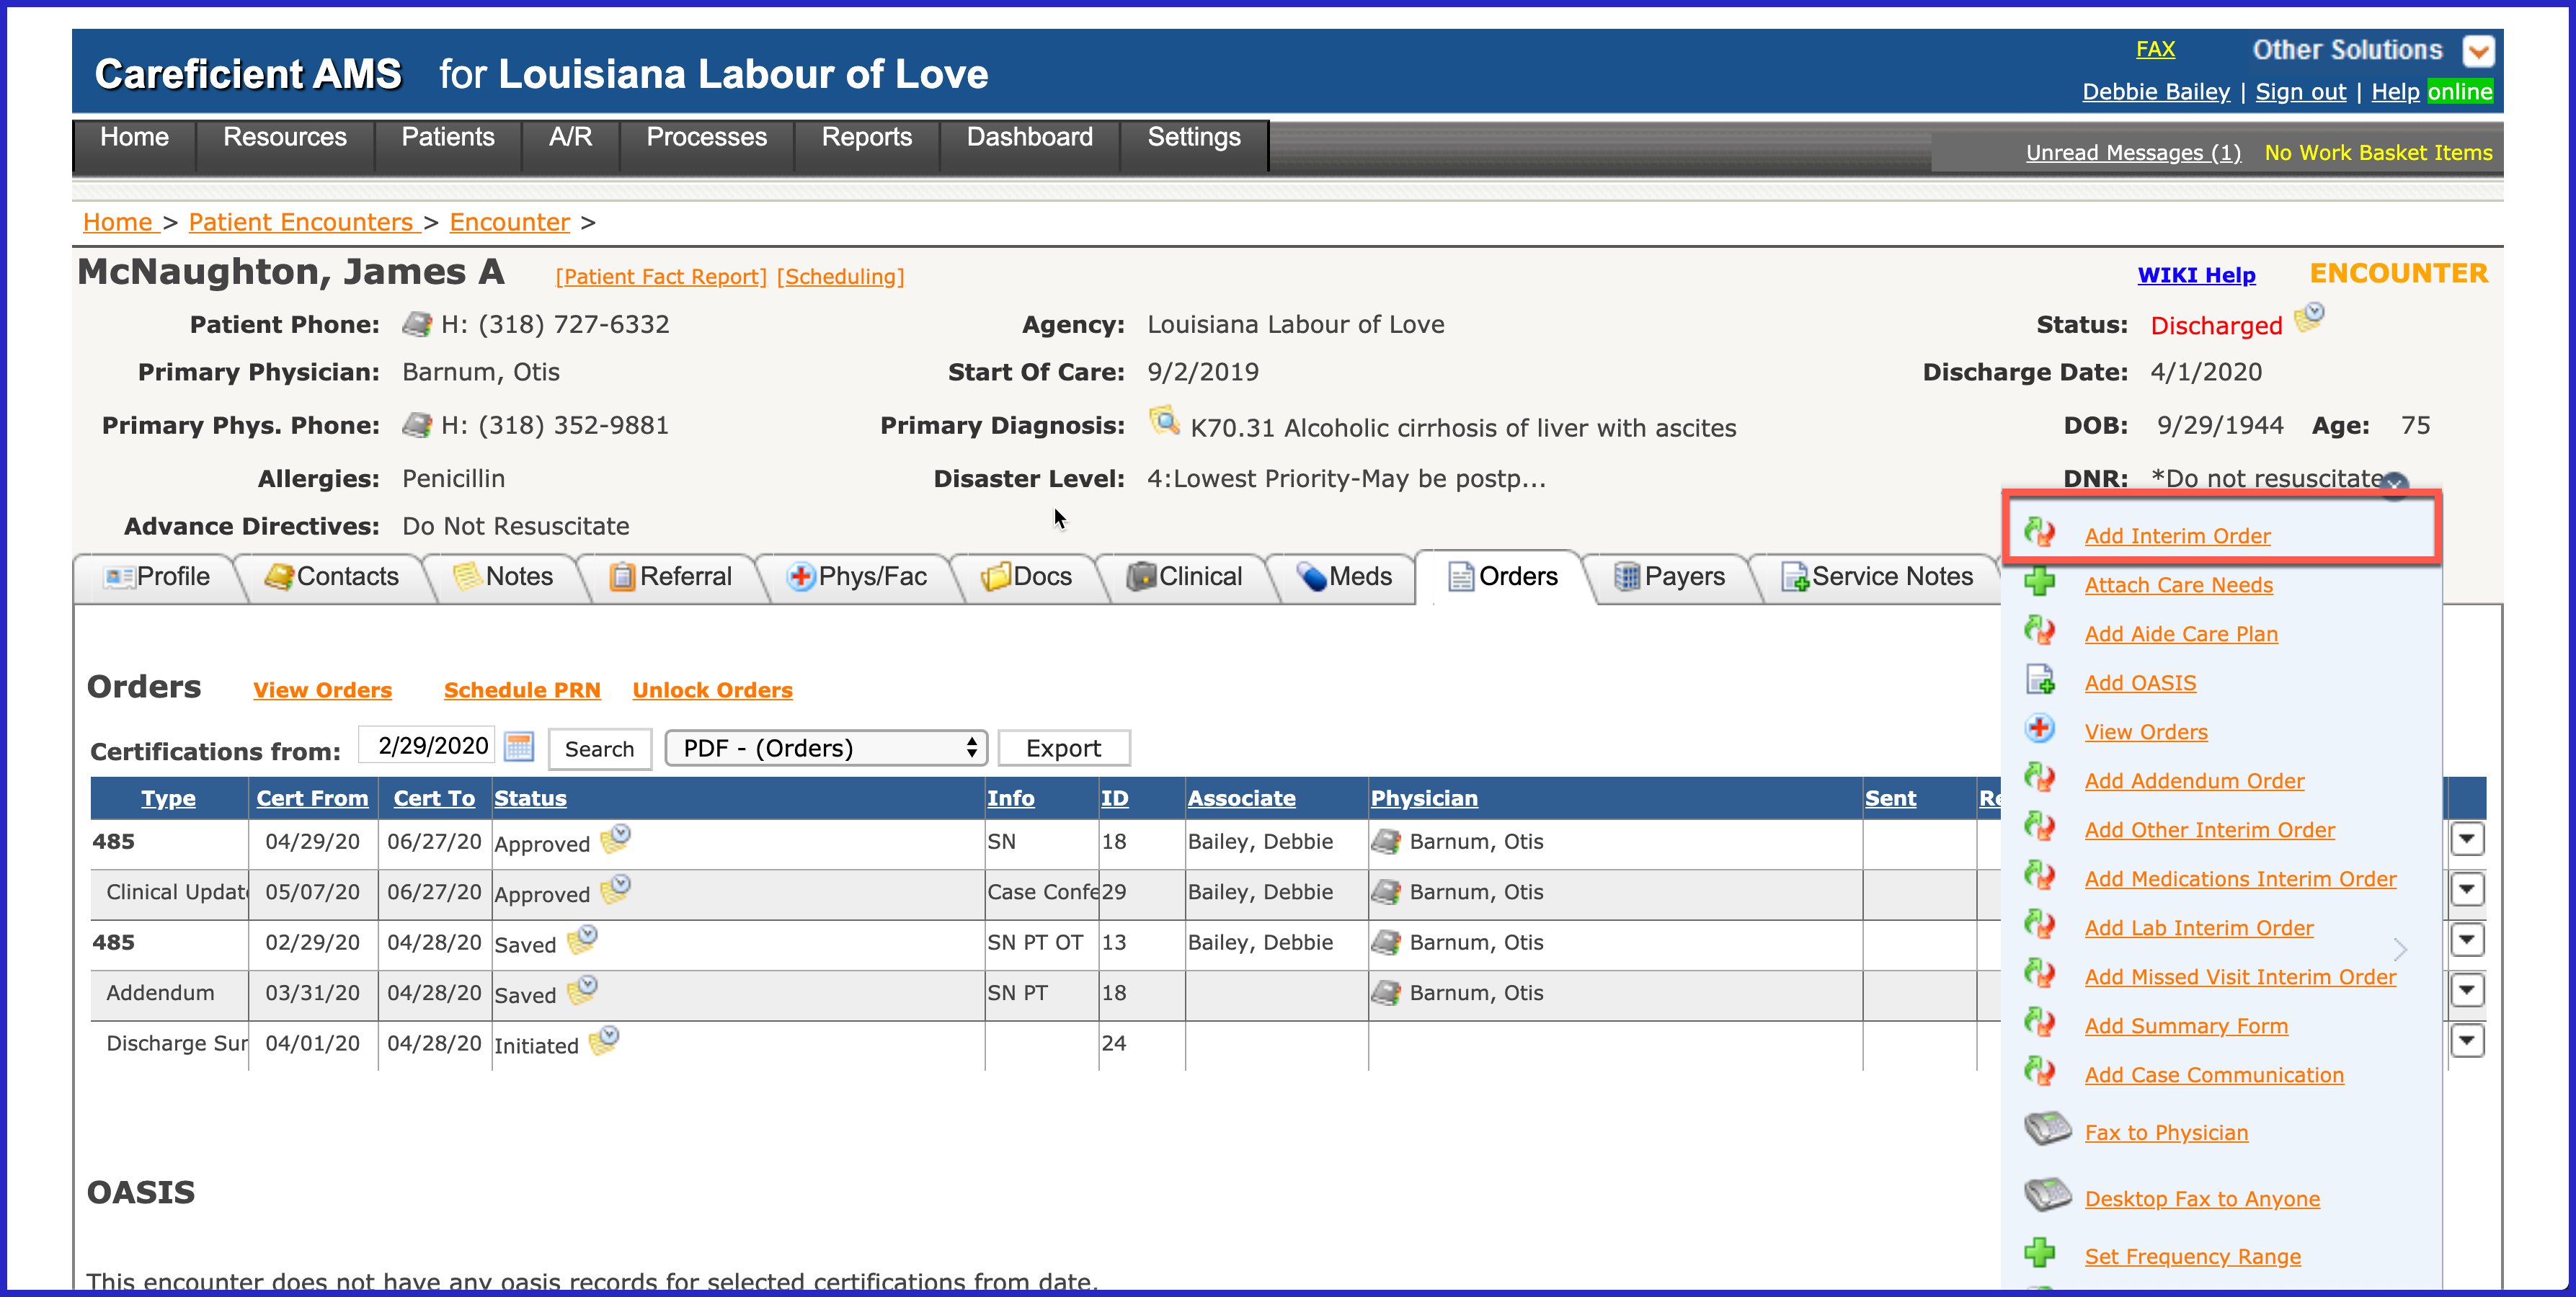
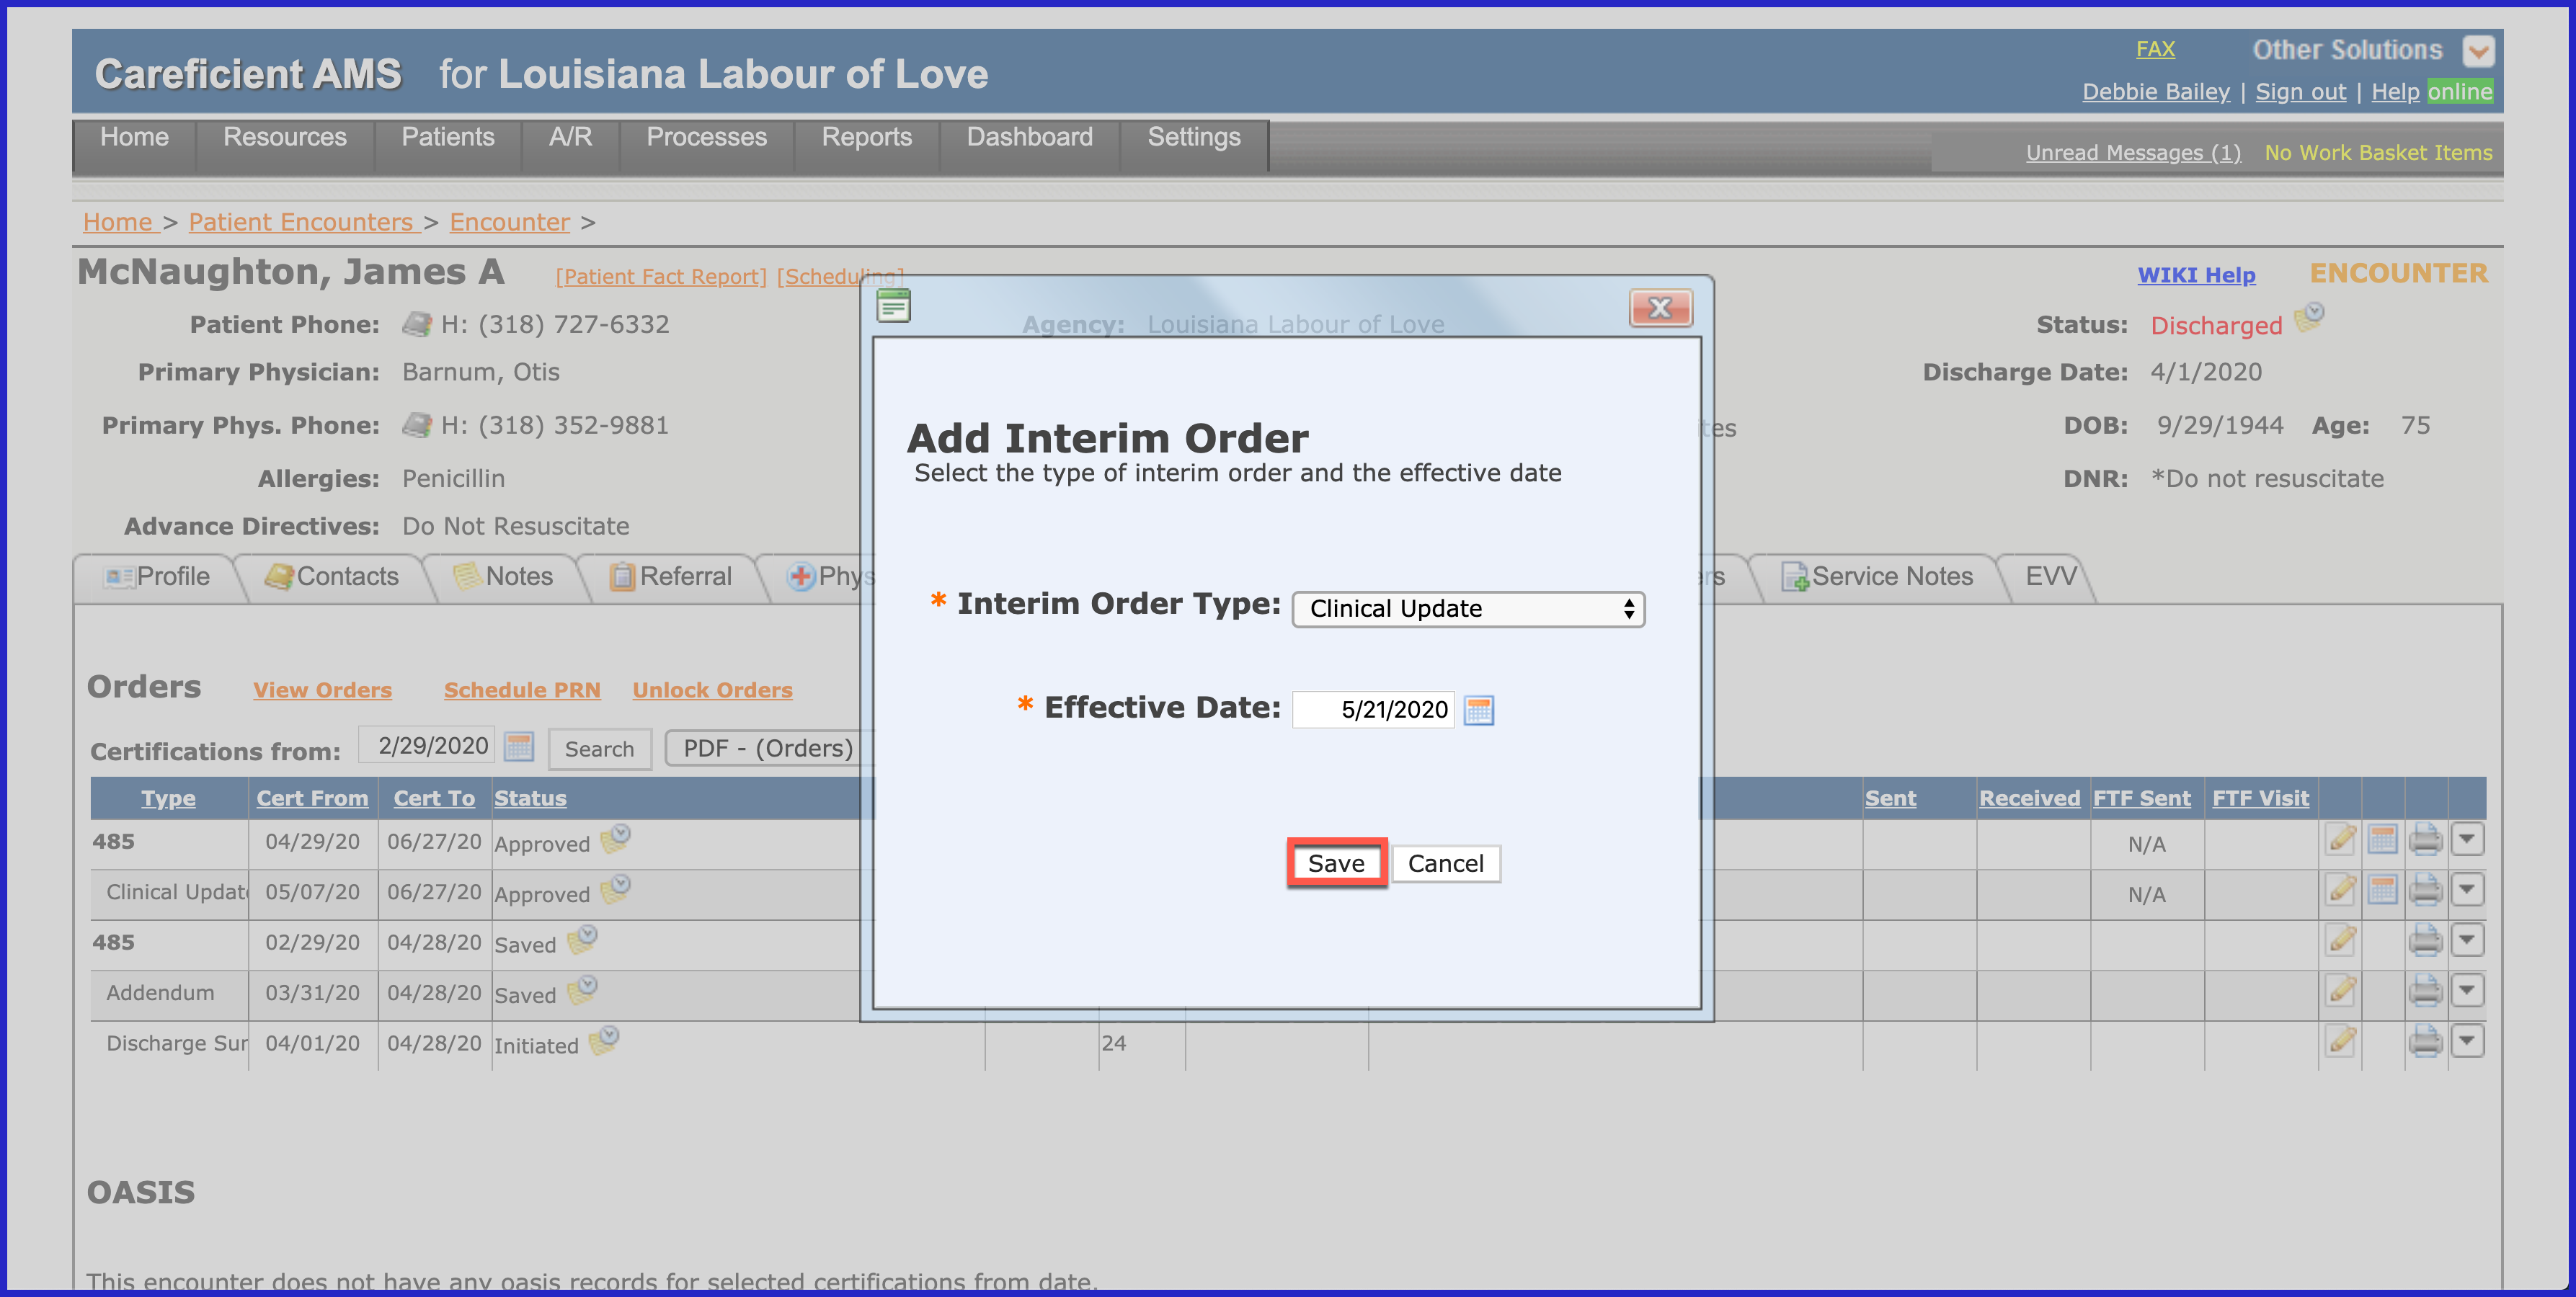
Click on the drop down to the right of the 485 and choose "Add Interim Order". Remember if you have an interim order that is not saved, you will not have the option to Add Interim Order.
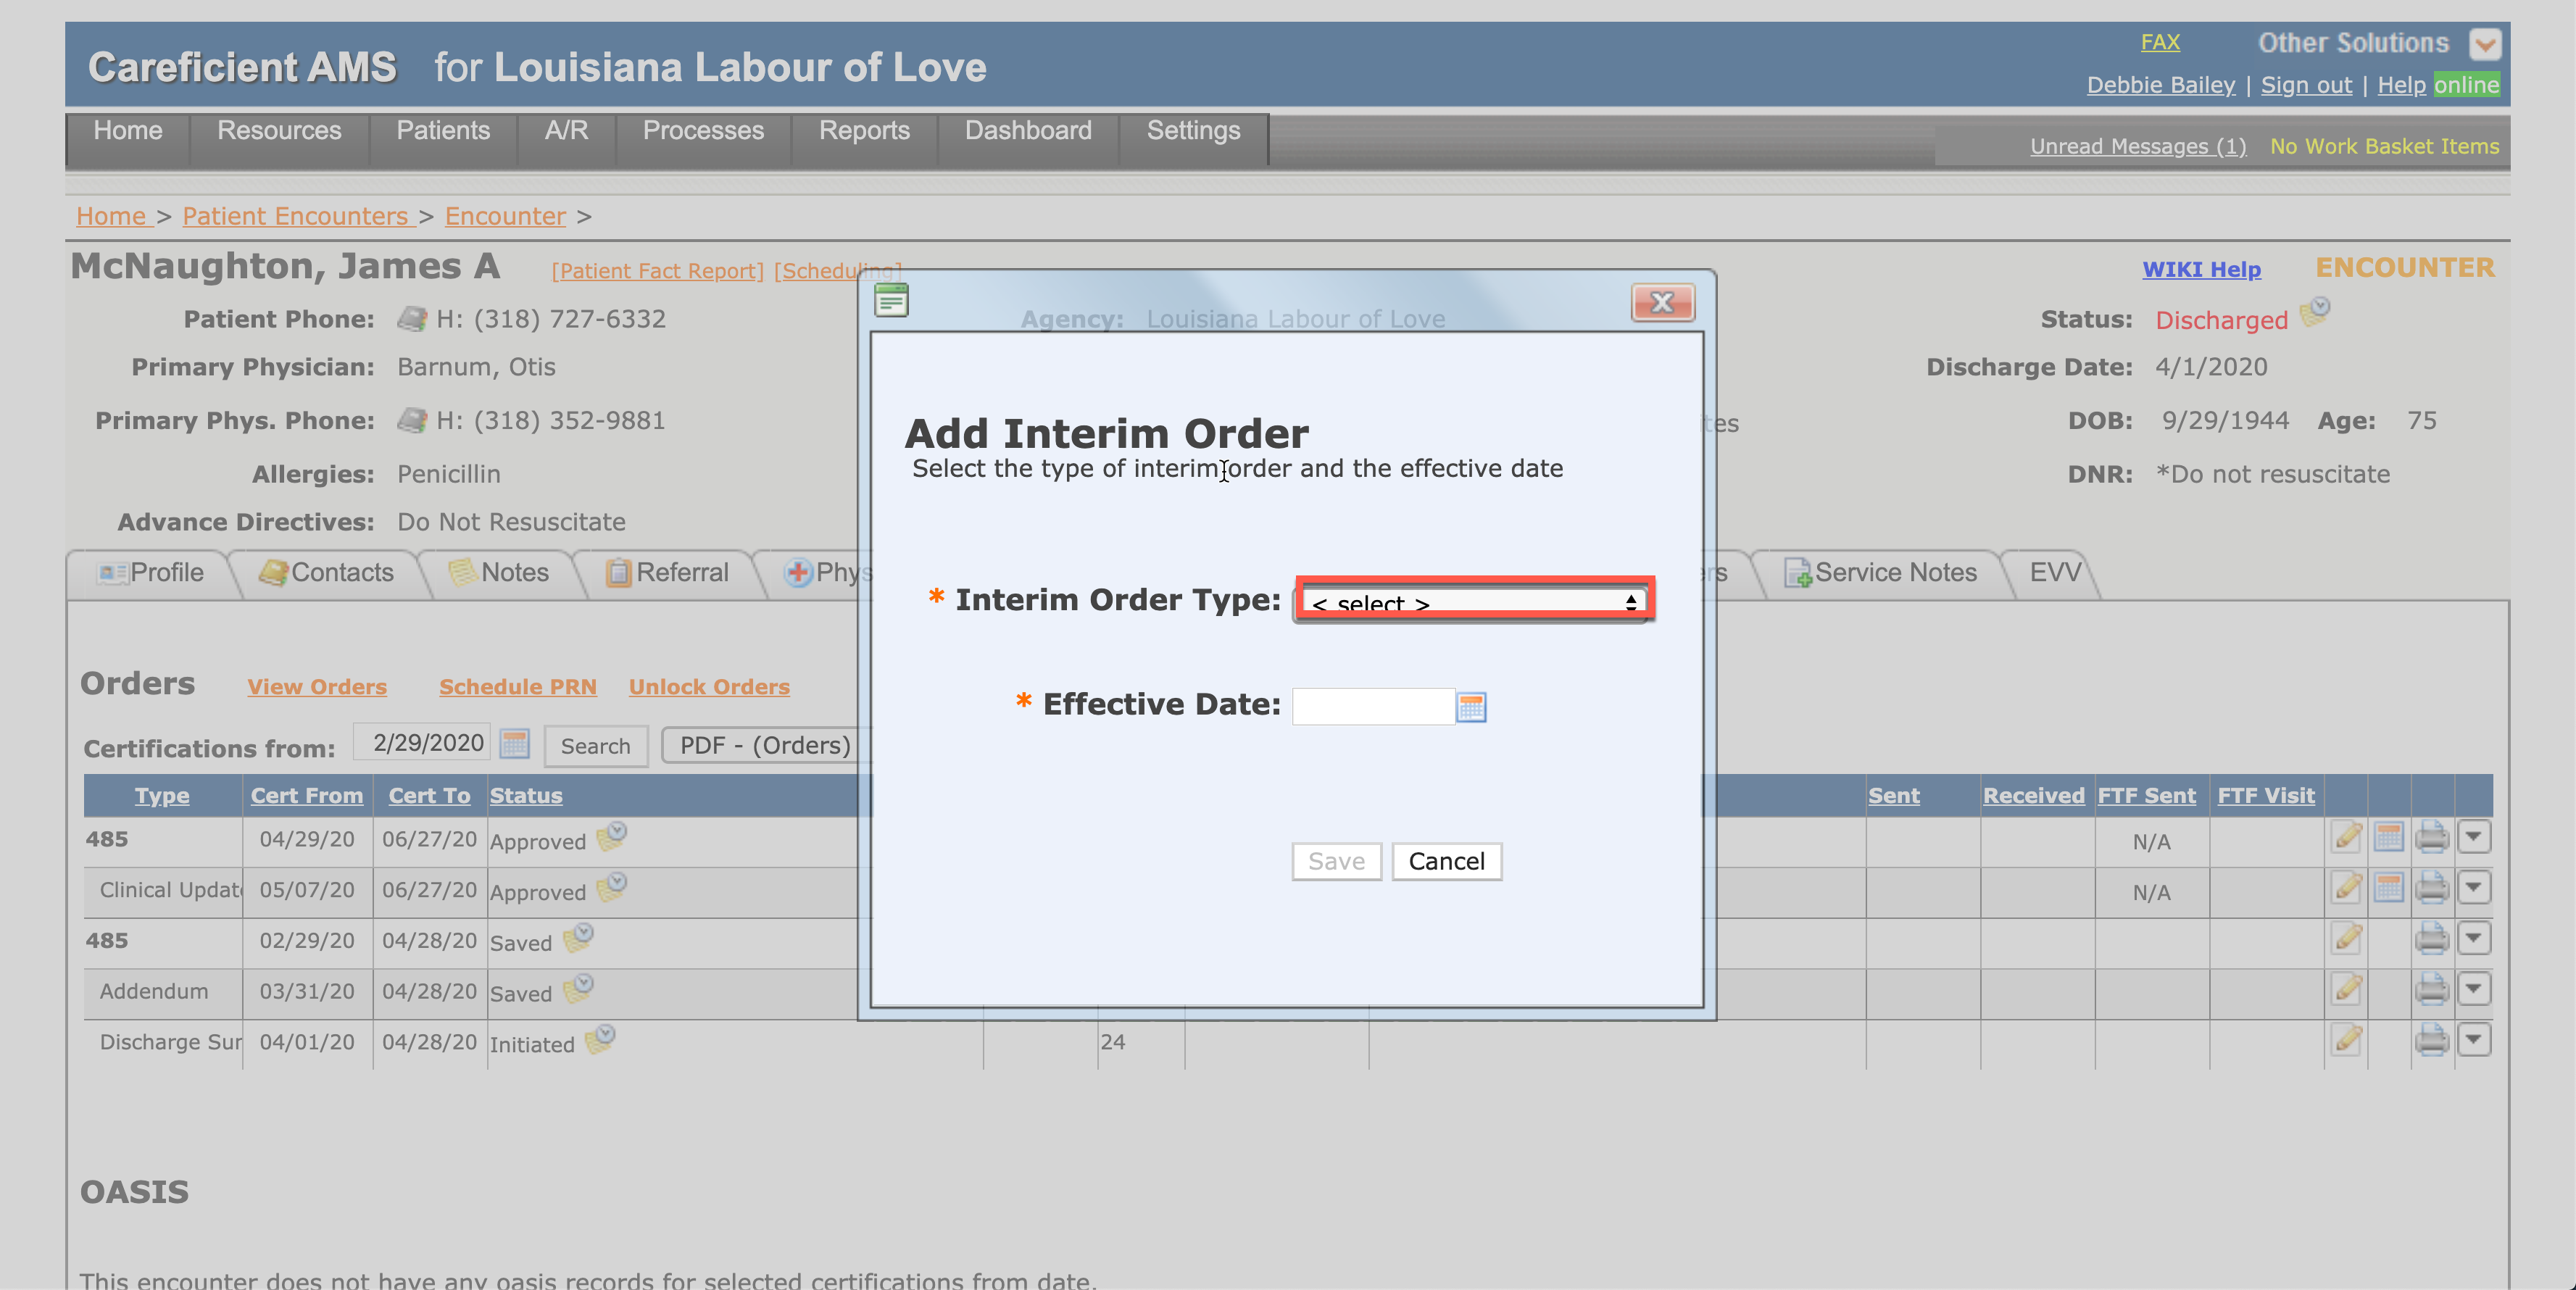
Click on the drop down to the right of Interim Order Type.
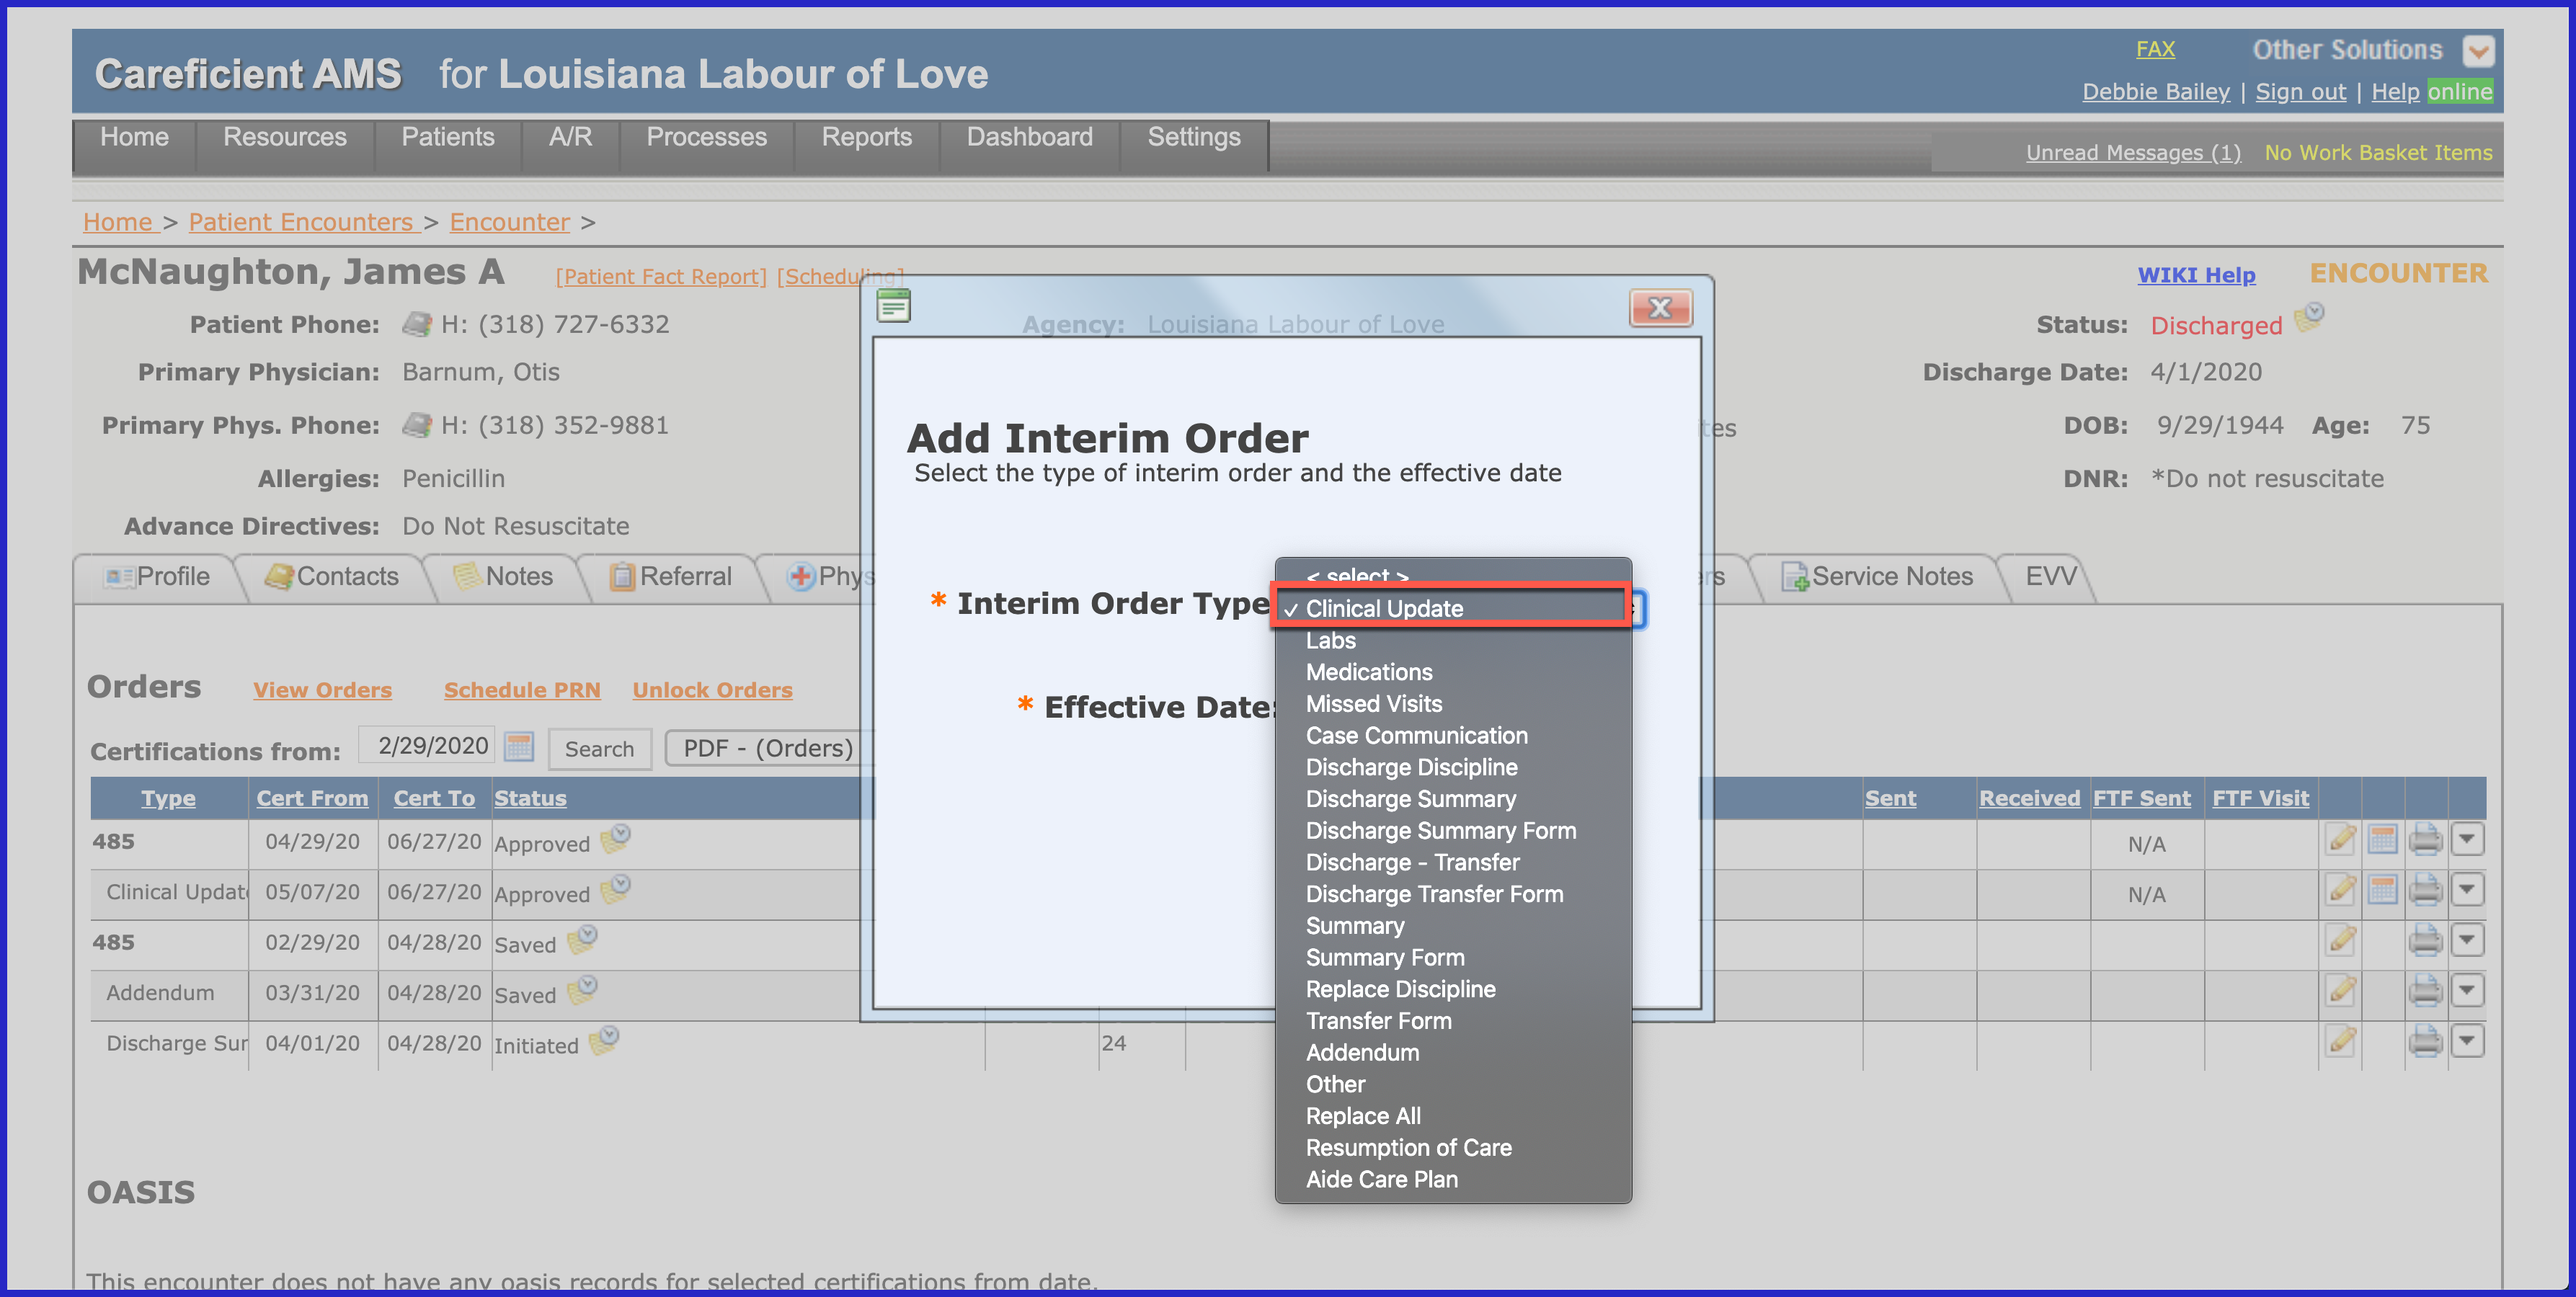
Choose "Clinical Update".
Enter the date of your next Case Conference and "Save".
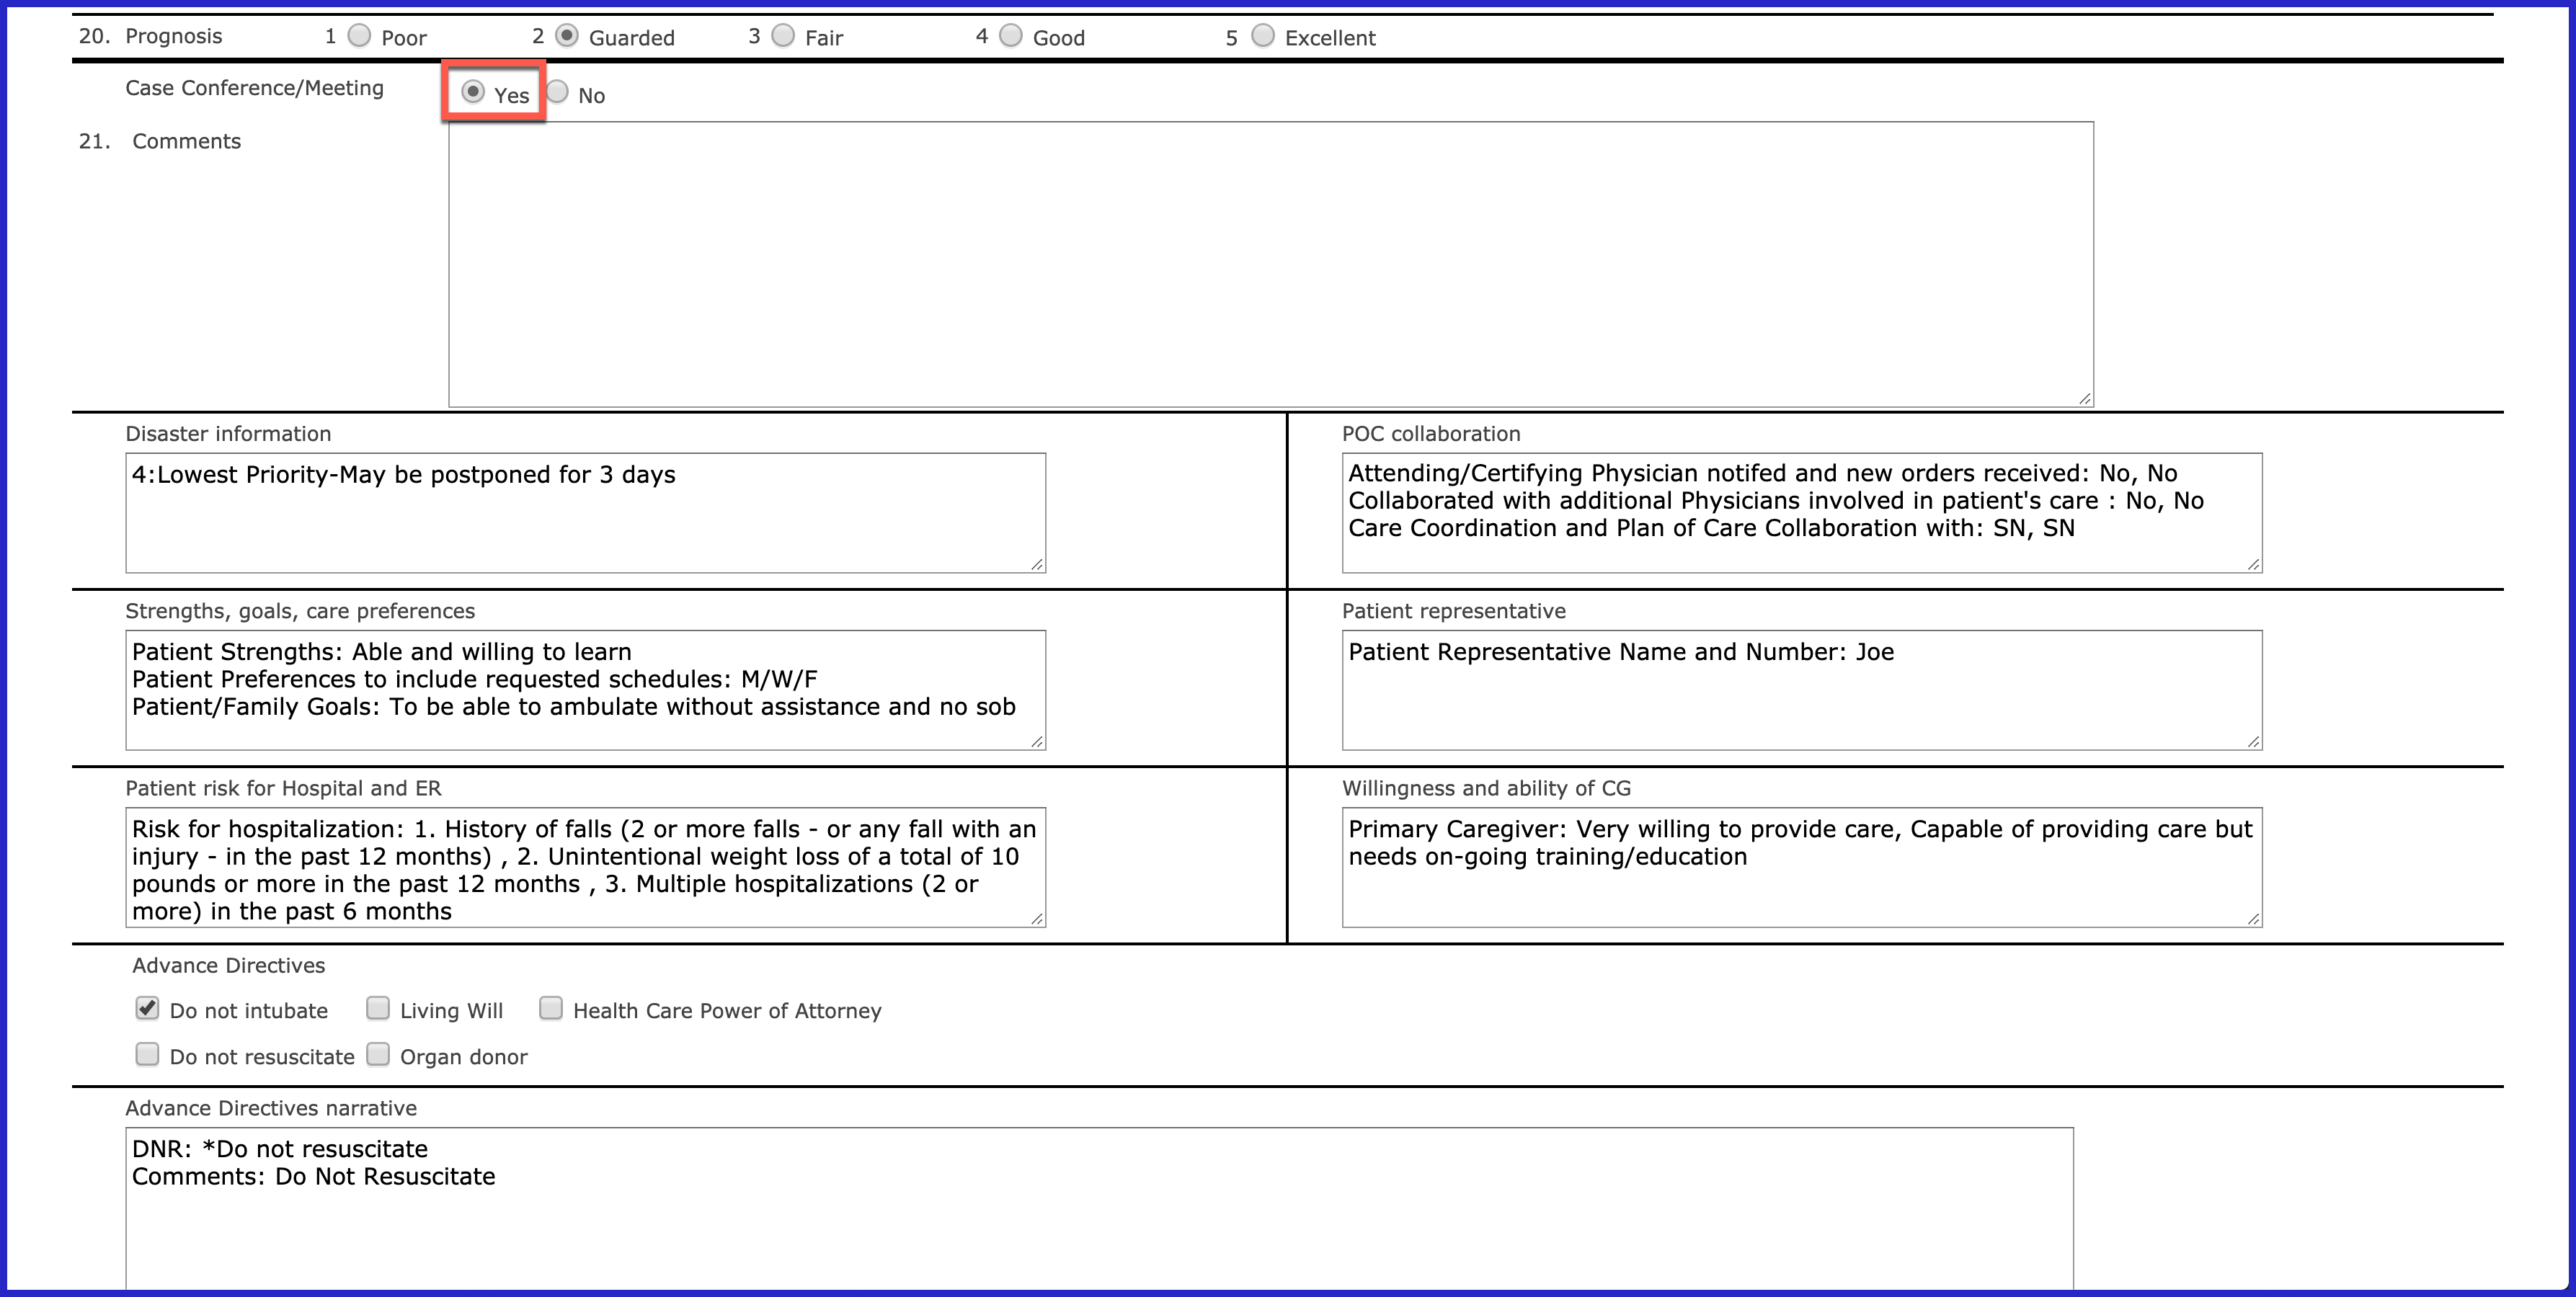
Make sure to check "Yes" to Case Conference/Meeting.
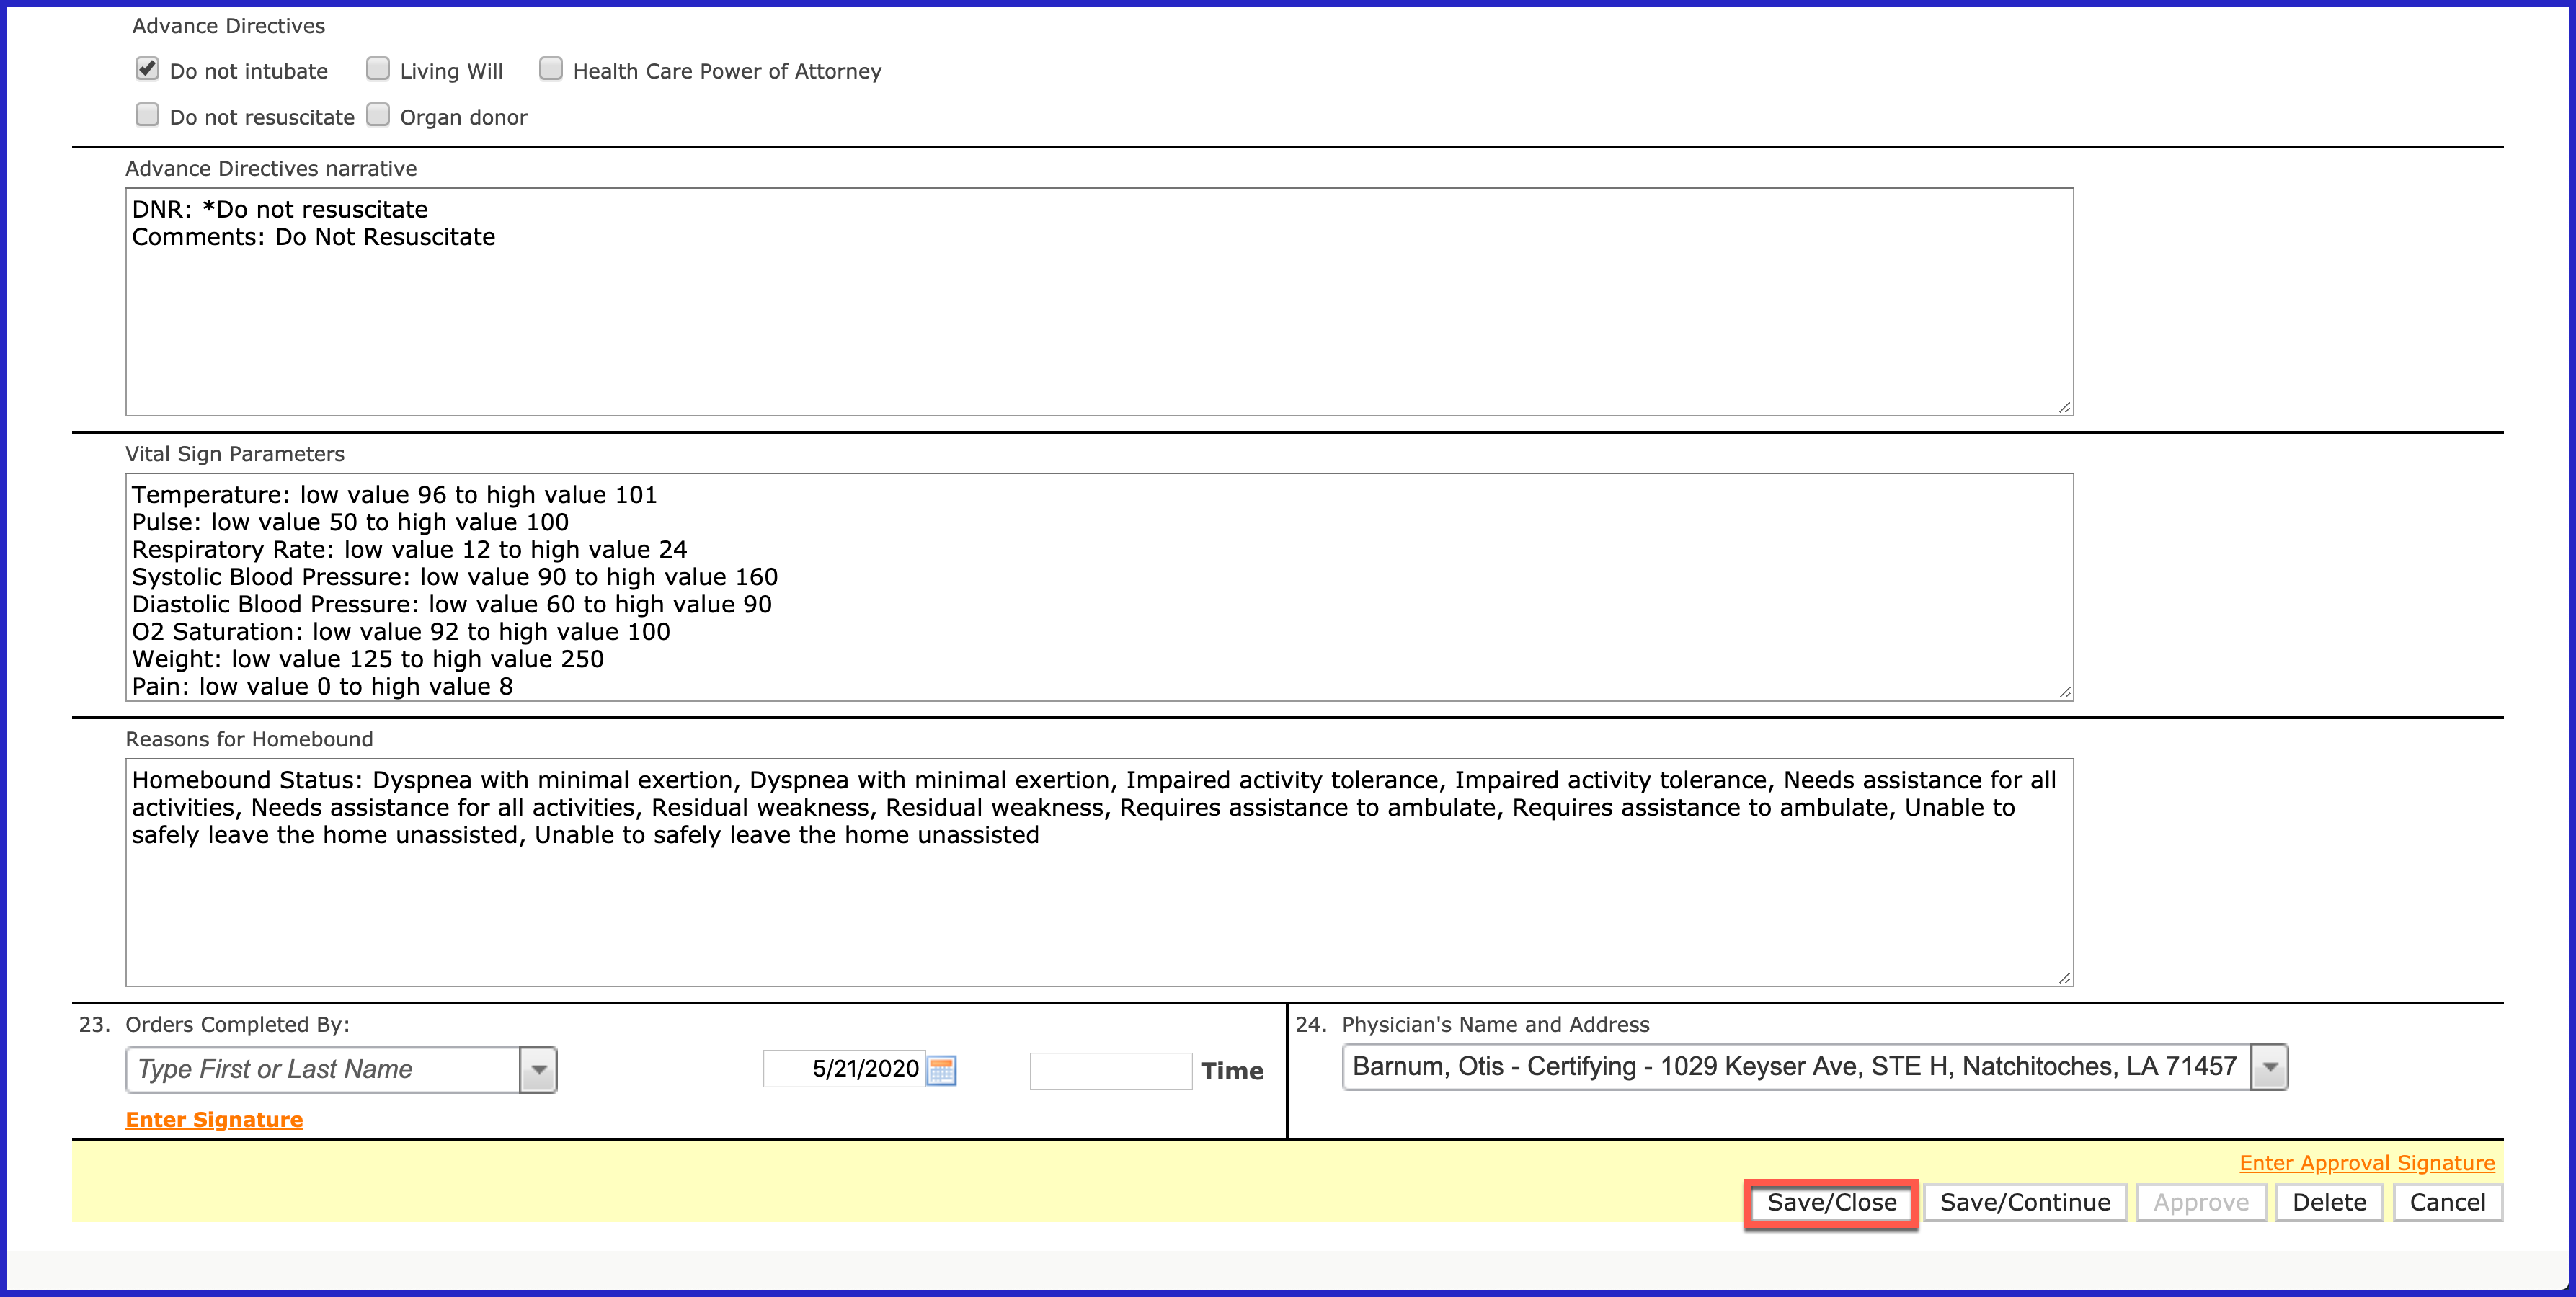
Then Save/Close the order. It will need to stay open until the next case conference meeting.
You can print a PDF of the CUP orders by clicking on the Export button. The PDF version includes:
- Patient
- Effective Date
- From Date
- To Date
- Status
- Physician
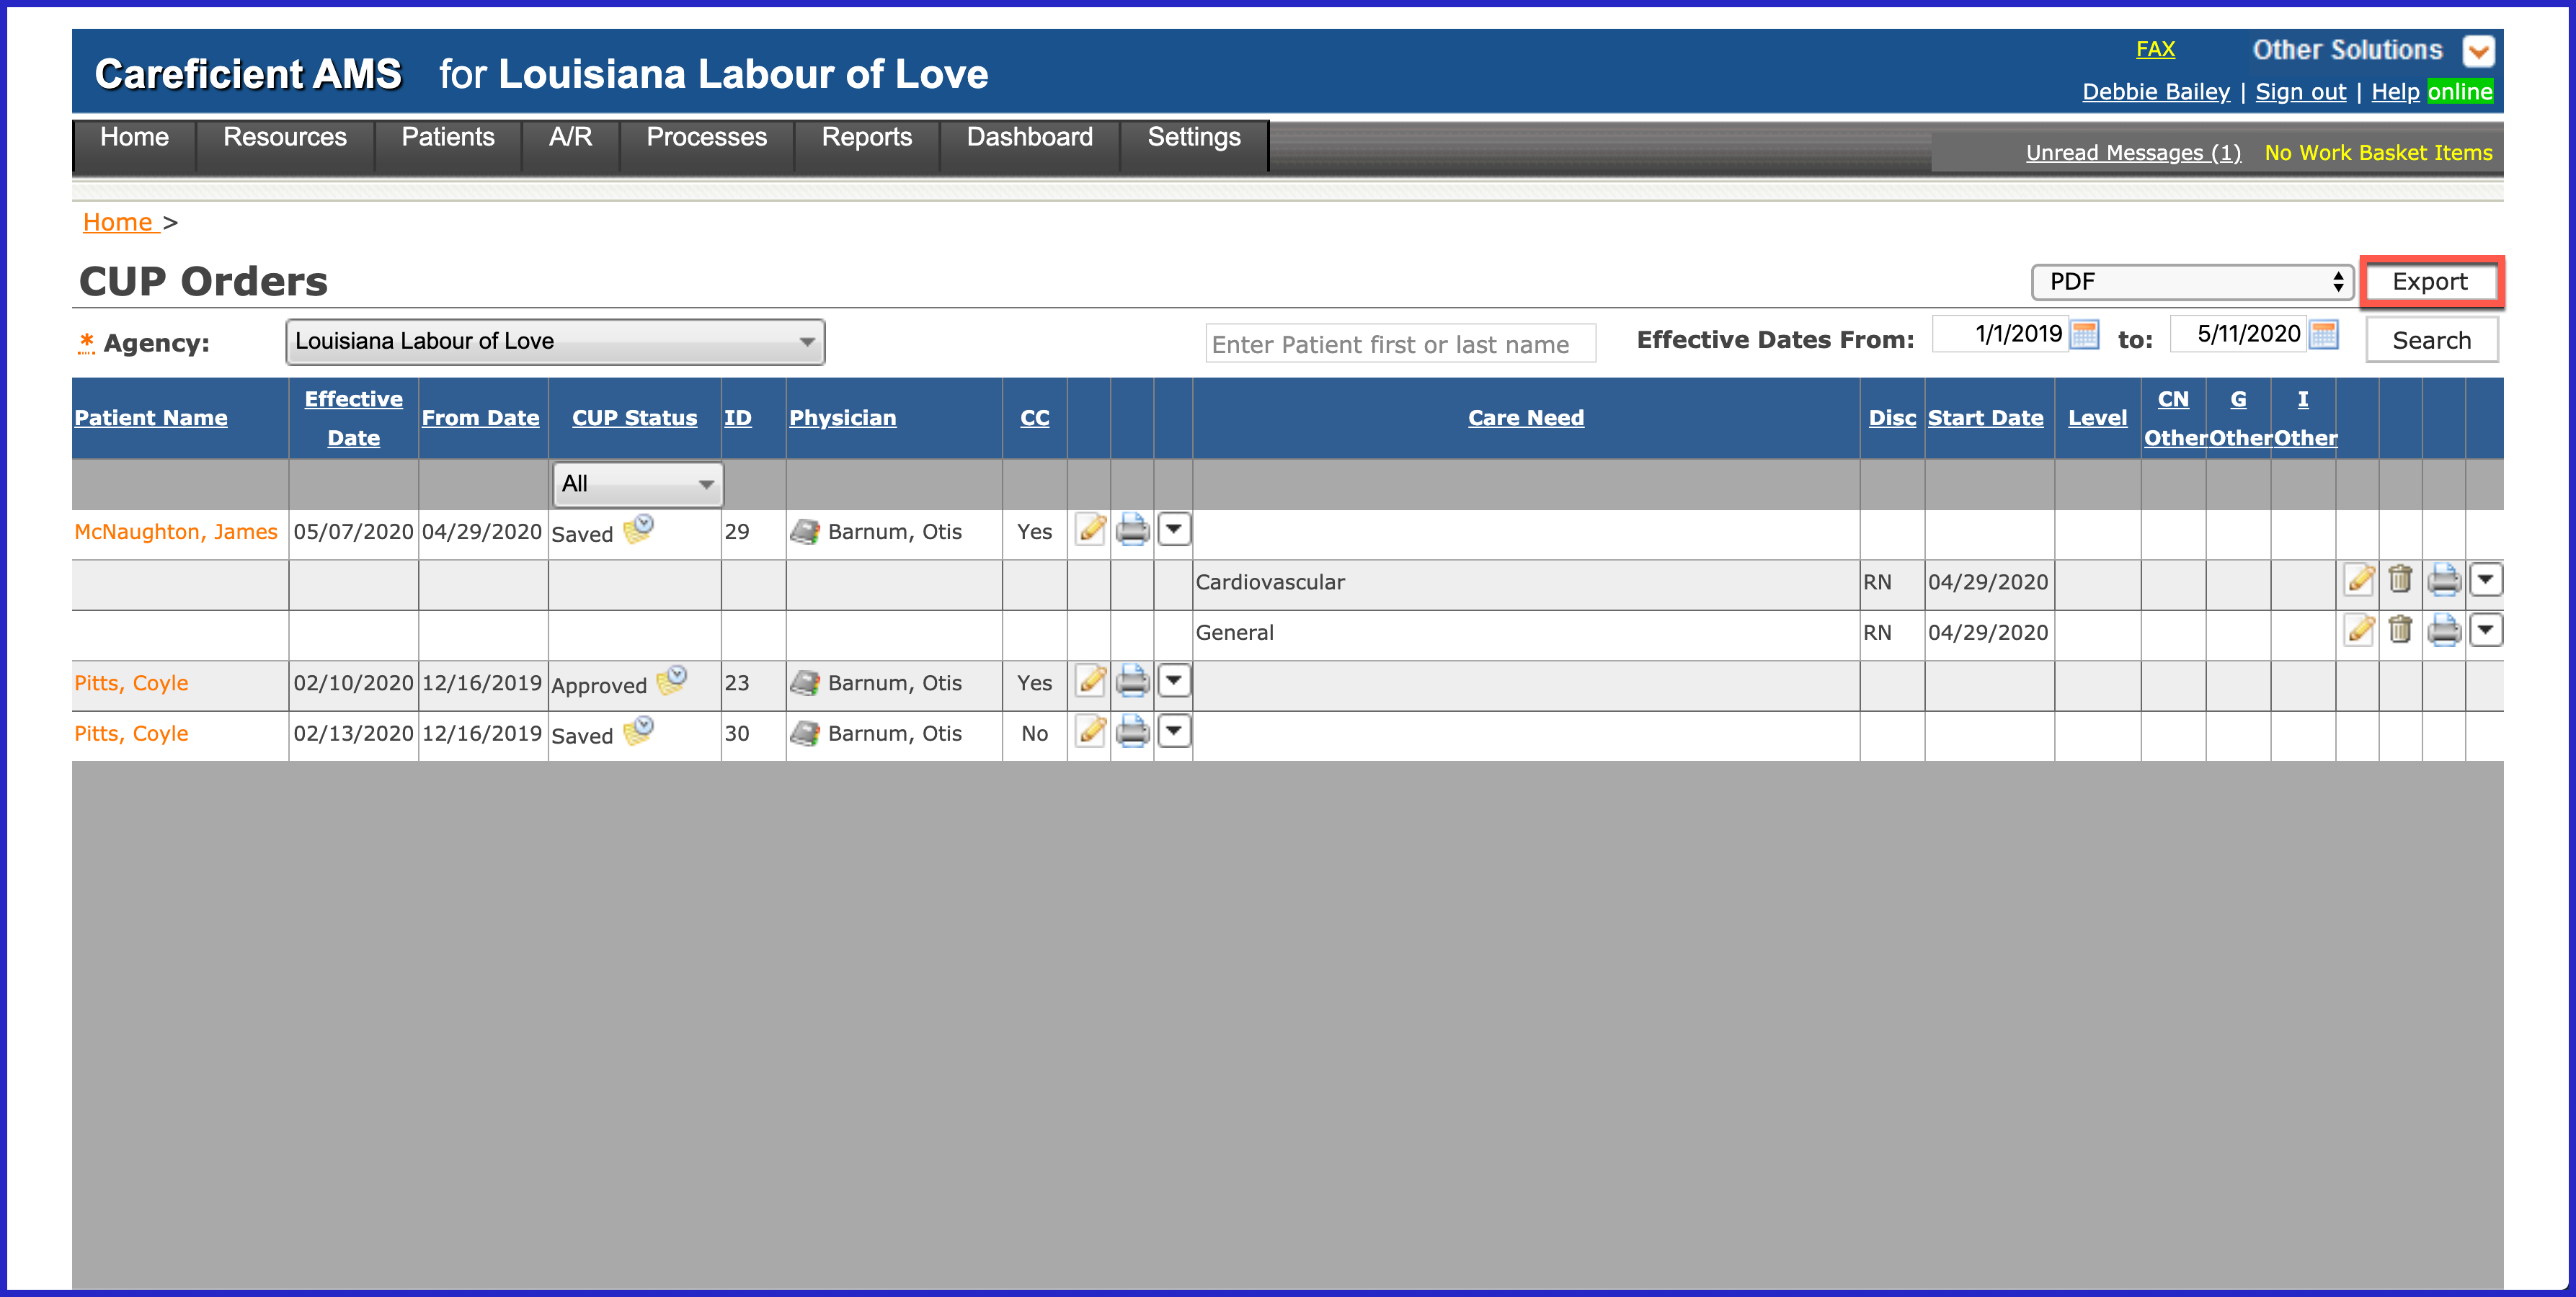
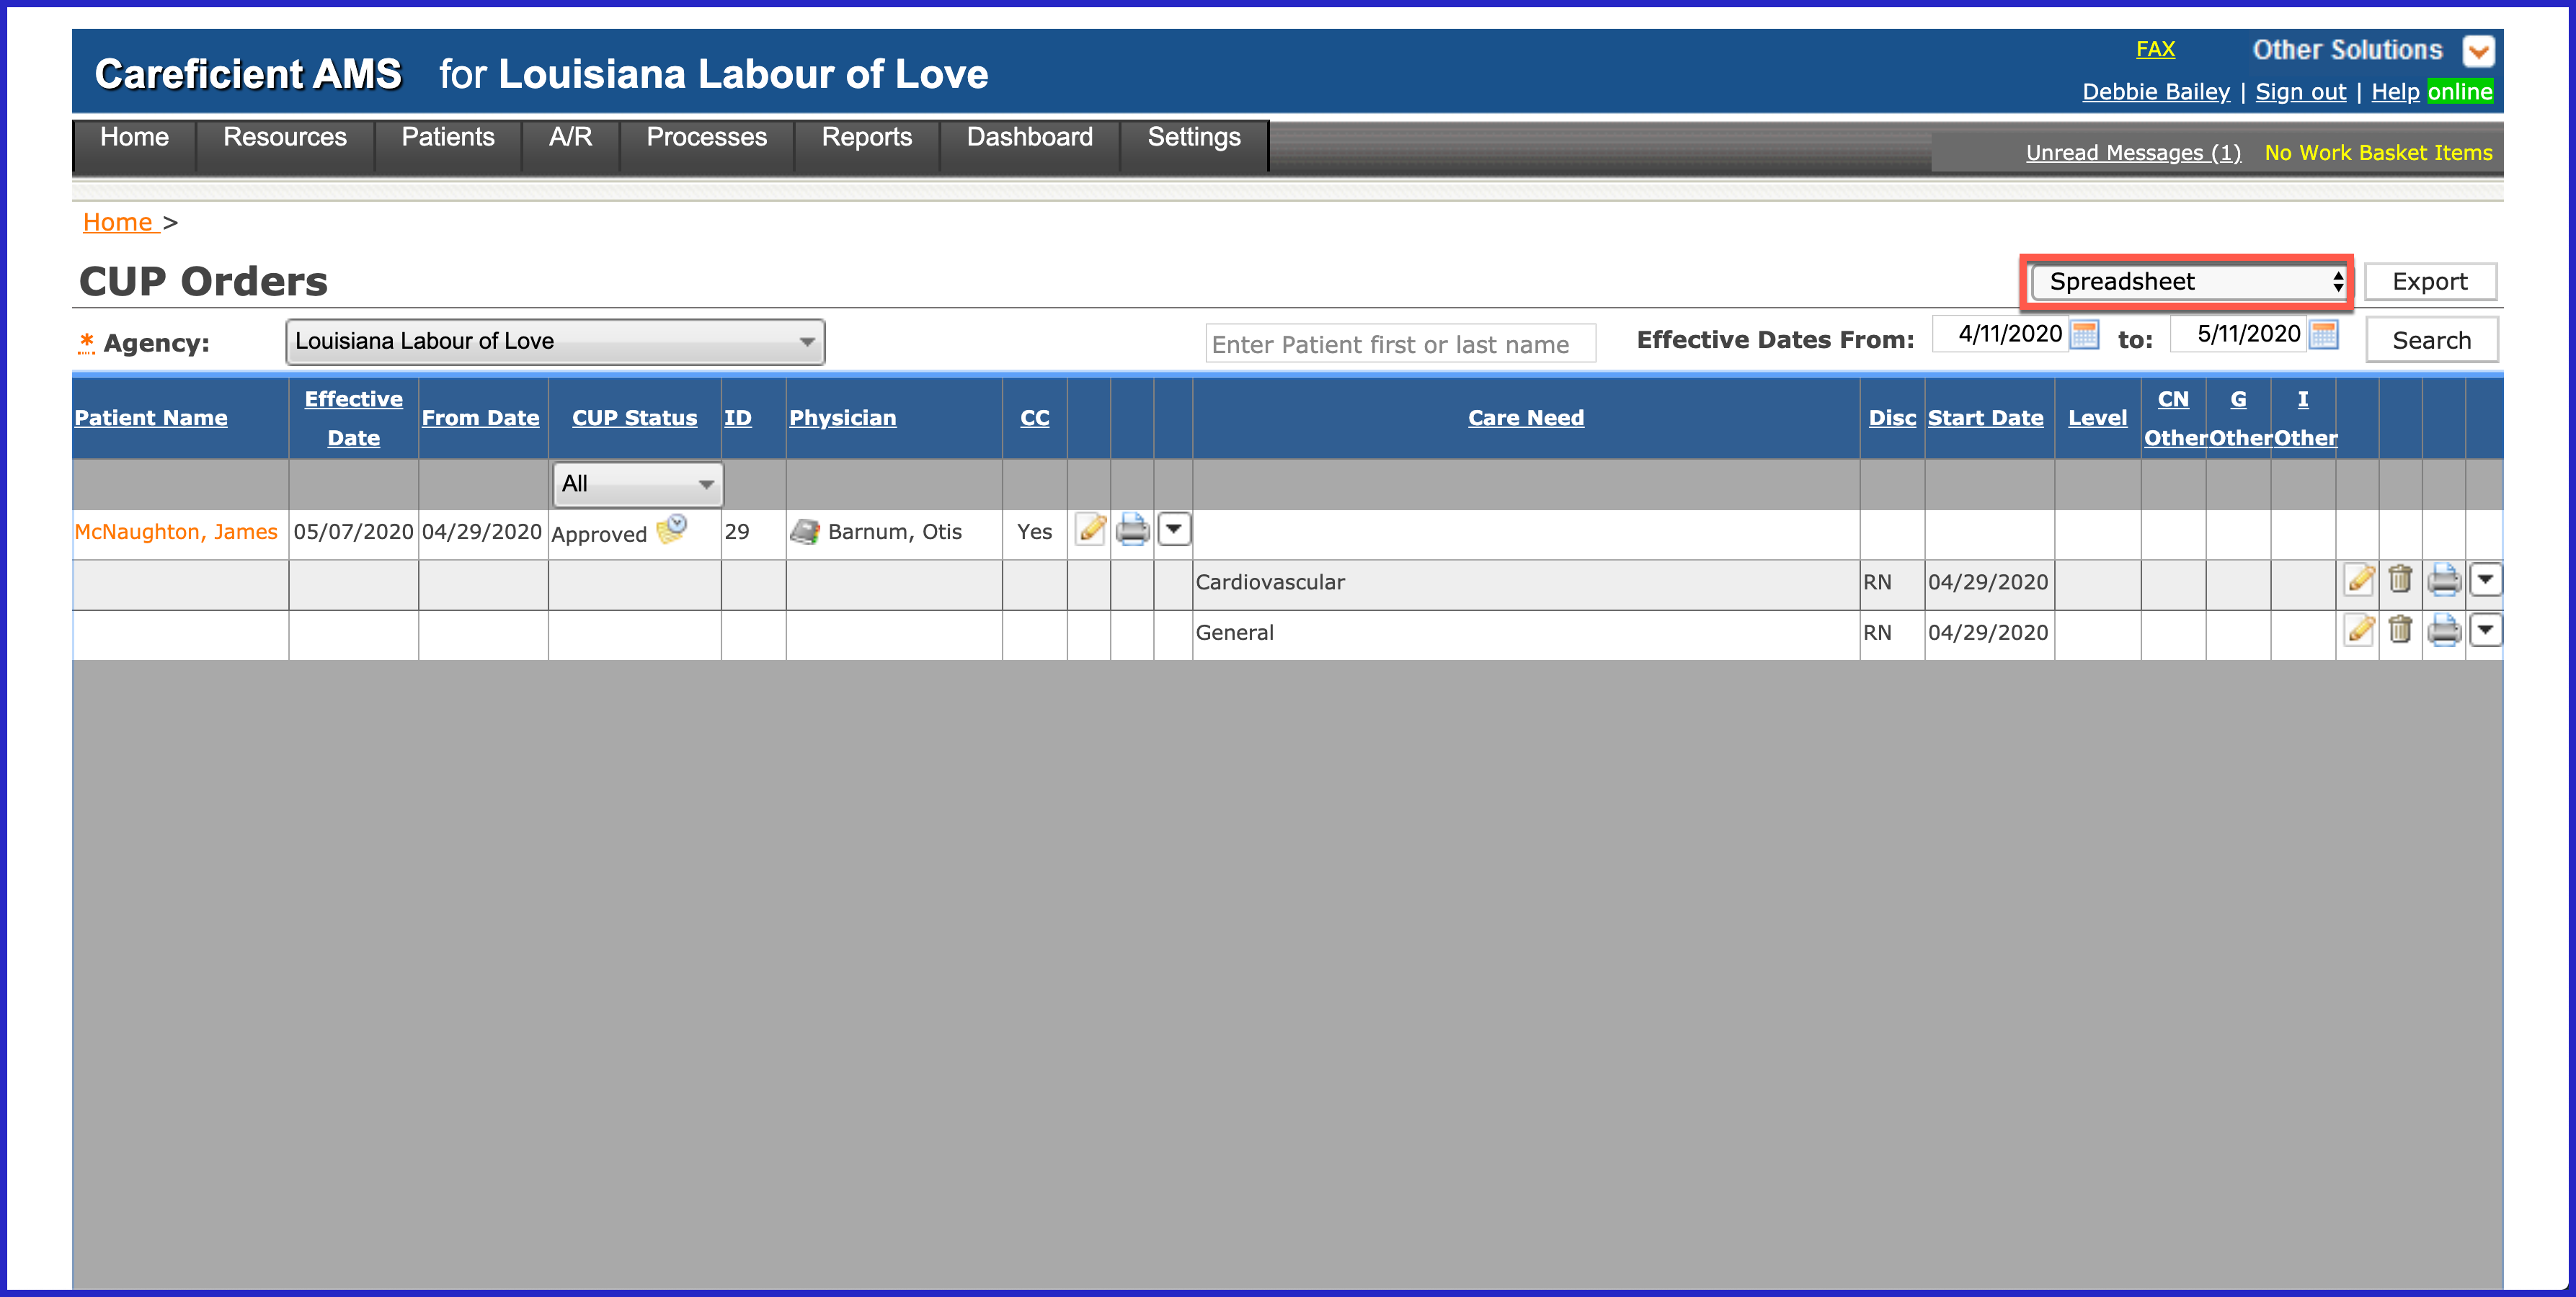
You can also export to a spreadsheet format by clicking on the drop down to the right of PDF
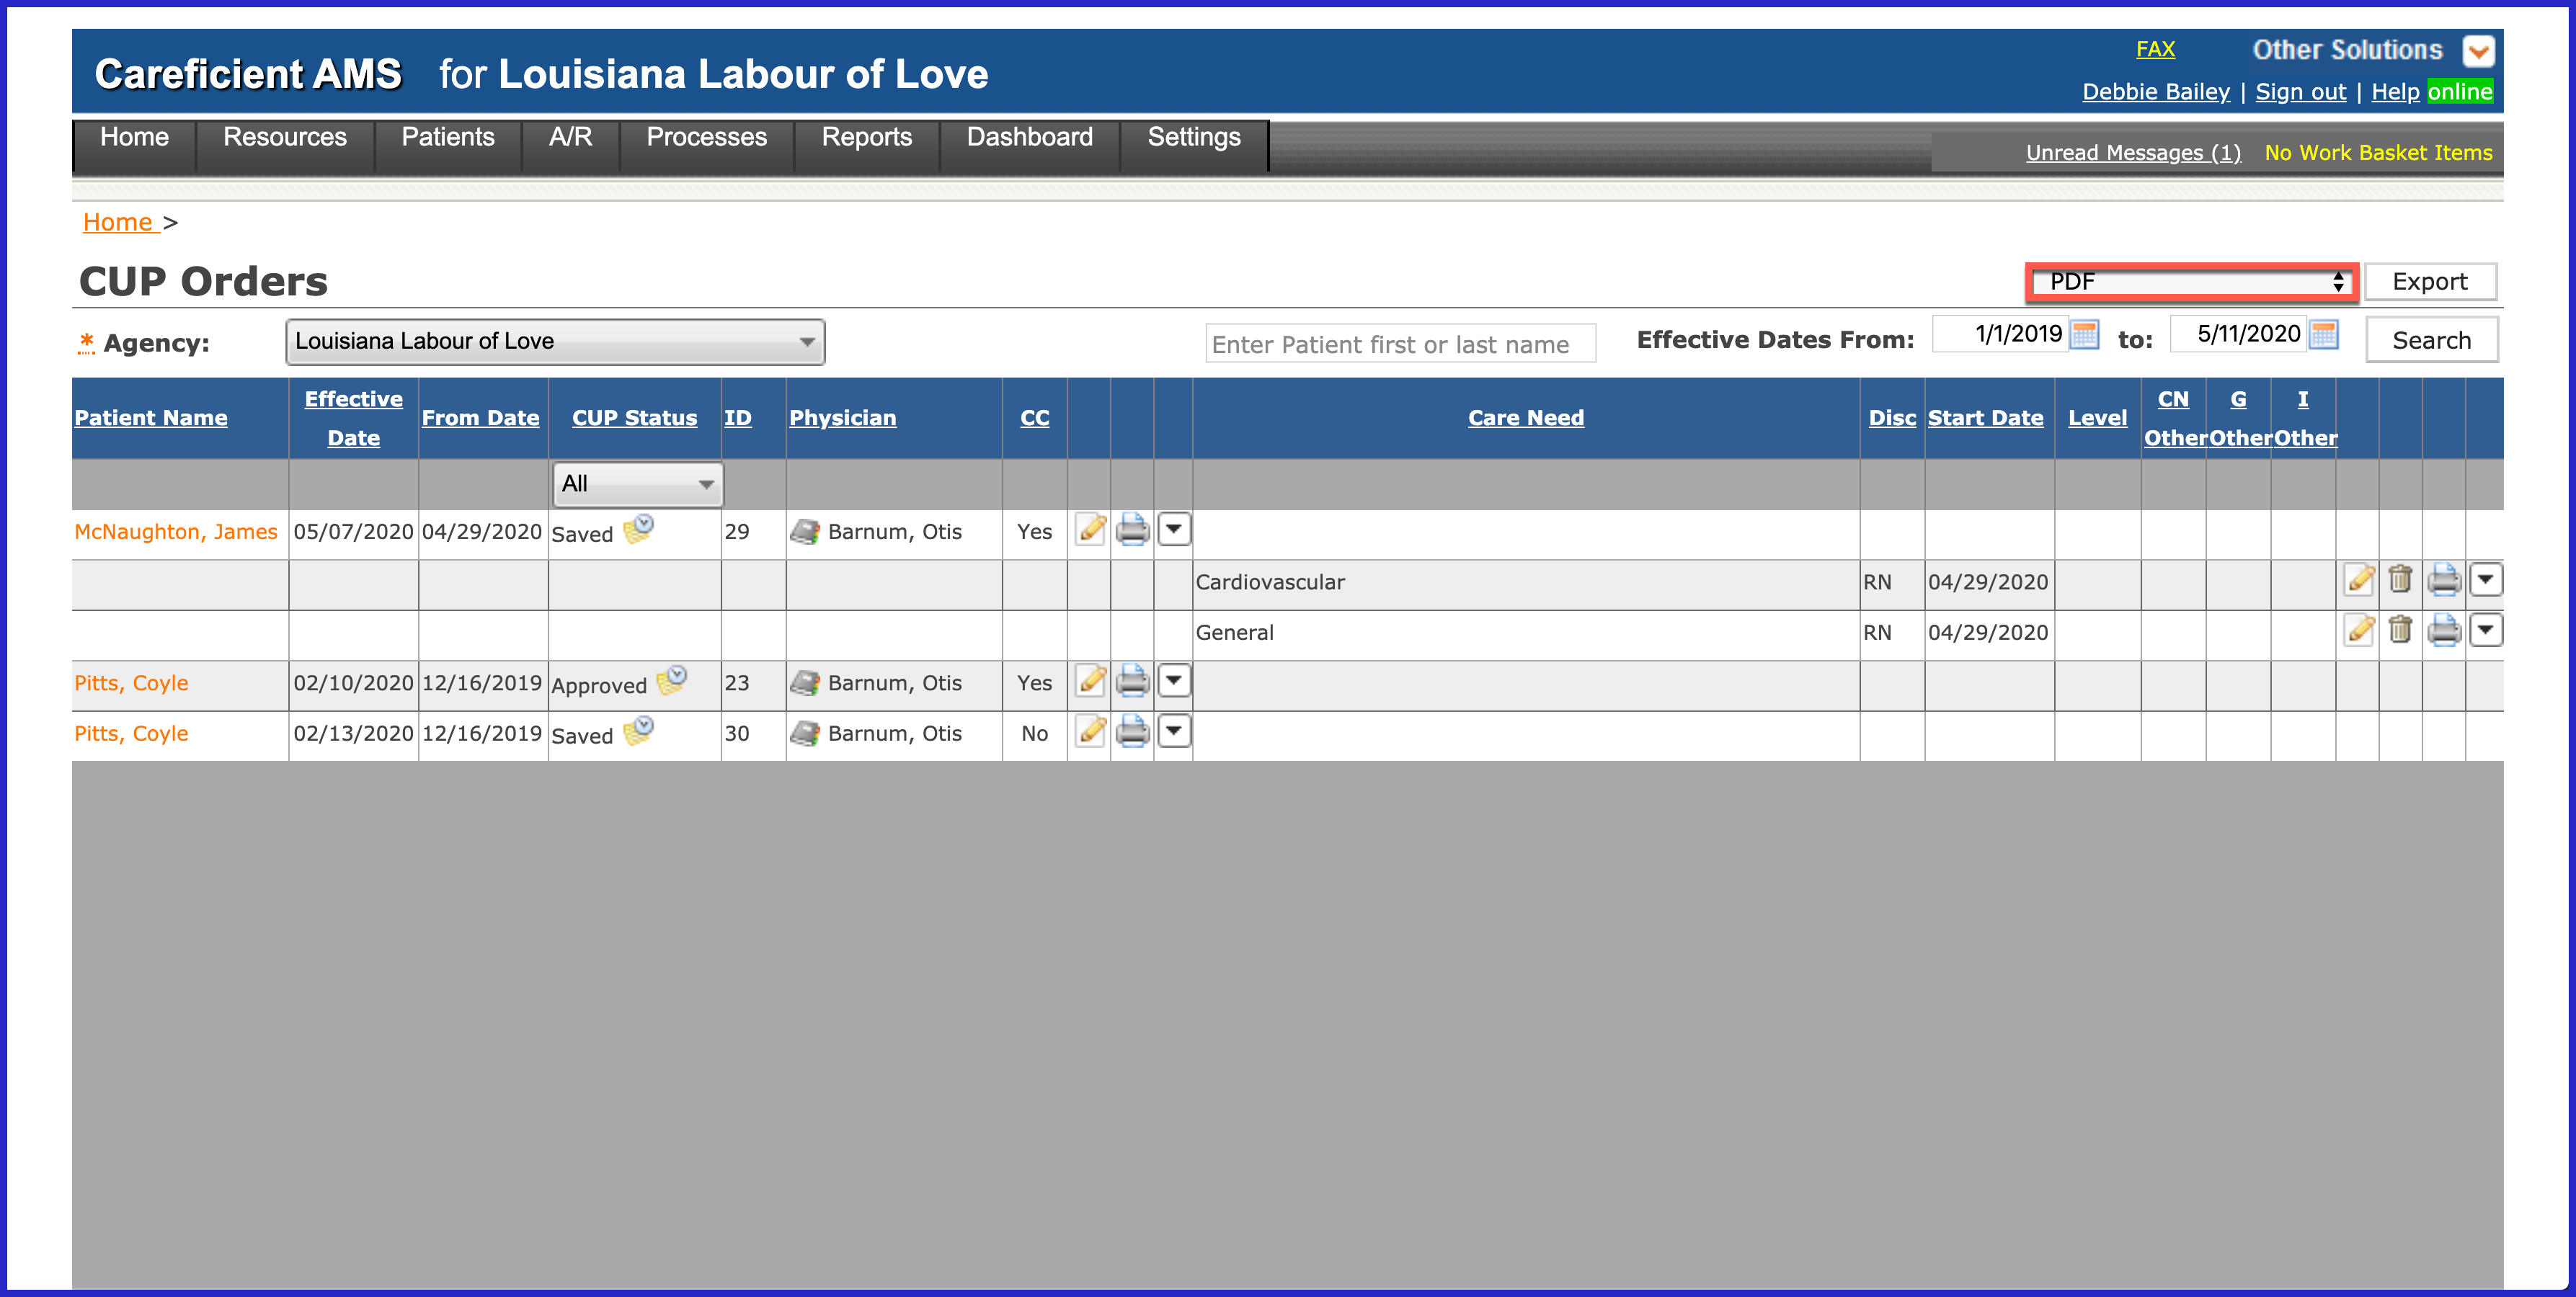
and choosing "Spreadsheet". Then export. The Spreadsheet option includes:
- Patient
- Effective Date
- From Date
- To Date
- Status
- Physician
- CC
